![]()
![]()
![]() Try before you buy. Download any Adobe product for a free 30 day trial.
Try before you buy. Download any Adobe product for a free 30 day trial.
![]() See our Photoshop CS4 Tutorials Page for free Photoshop 11 video clips.
See our Photoshop CS4 Tutorials Page for free Photoshop 11 video clips.
![]()
![]()
Free Photoshop CS5 High Definition Video Tutorials
 Here is our collection of free video tutorials from Deke. The latest are on top. If you like them, sign up to lynda.com. You can get a free 7-day trial to the lynda.com Online Training Library. The trial membership entitles you to 7 days of access to all 986 courses in the lynda.com Online Training Library for free.
After signing up for the free 7-day trial to the lynda.com Online Training Library you'll gain access to over 59,000 video tutorials instantly. Subscriptions to the lynda.com Online Training Library provide anytime access to tens of thousands of video tutorials covering Photoshop, Illustrator, Dreamweaver, web design, digital imaging, 3D, digital video, animation, and many other topics. View free video clips.
How To Create Stereoscopic 3D Text And Shapes In Photoshop - HD Video Tutorial
If you tuned in to Deke’s Techniques last week, you probably still have your red/cyan cardboard sunglasses at hand. Good thing, because this week, Deke shows you how to take your stereoscopic image and move solid objects (in this case text) behind and in front of the perceived screen plane. Words and pictures coming at you courtesy of Deke and lynda.com! And despite its intricate effect, this technique primarily consists of systemtatically turning channels on and off and moving layers right and left. In fact, Deke gives you a cool, non-3D (take those silly glasses off for a second) graphic that shows you how to move your anaglyphic objects to and fro for the desired effect:
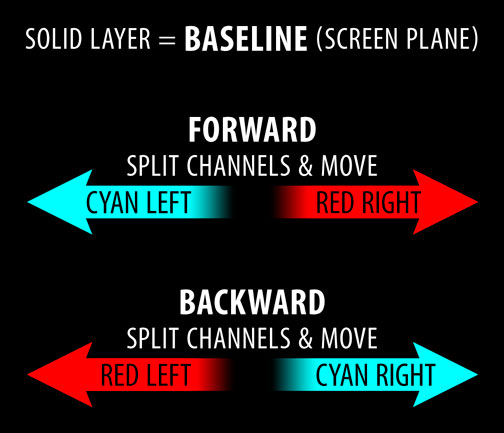
By the end of this free video, you’ll have your text dancing in and out of the screen. And in this week’s lynda.com member-exclusive video, Deke shows you how to apply a tilt effect to that text for an amazingly sophisticated effect that you’ll be hard pressed to find documented anywhere else. Put your silly glasses back on for this one, kids.
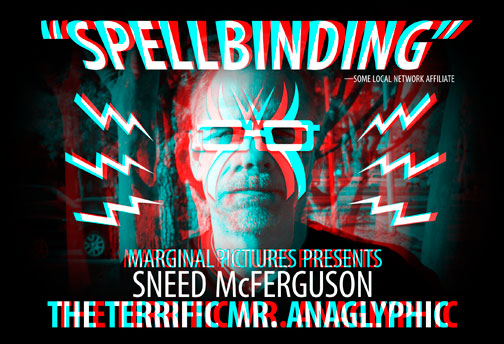
How To Create A Classic Anaglyphic Stereoscopic 3D Image
In this week’s free Deke’s Technique, you’ll see how to create a classic anaglyphic stereoscopic 3D image in Photoshop. Anaglyph images are created by superimposing two slightly different perspectives of the same scene, with each version seen by only one eye or the other, resulting in a sense of depth when your brain fuses the two images into one. In this case, Deke shows you how to create an image intended to be viewed through the old-school red (left) and cyan (right) glasses.
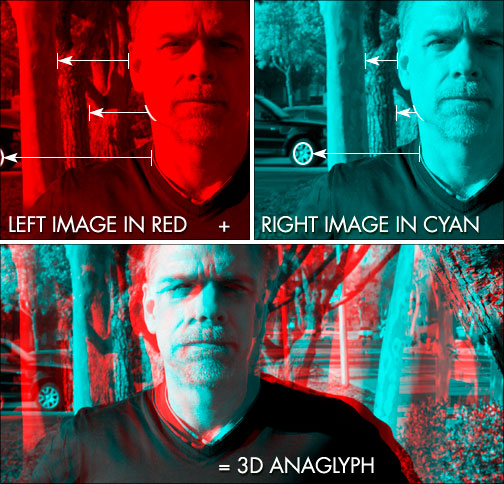
In order to achieve this classic effect, you have to first correctly shoot a pair of images with a slightly shifted perspective, like the ones shown below shot by lynda.com’s own Jacob Cunningham. You can see in the top two images (each with a simulated filter applied), slightly means slightly—as in the distance between your two eyes. Then the two images are placed on separate layers in the same file, and the color channels are turned off so that each of your eyes (with the requisite glasses on) sees a slightly different image. Then, your brain does the rest.
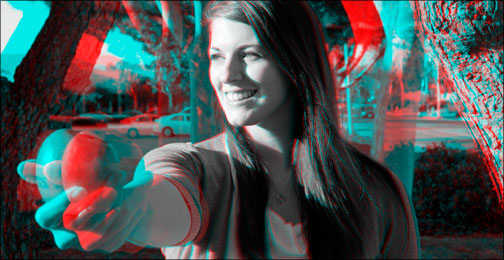
If that’s not enough depth for you, lynda.com members can see an exclusive video in the Online Training Library, in which Deke (again with the help of Jacob) demonstrates how to create a stereoscopic image with an object projecting out beyond the screen plane.
Fixing Badly Kerned Composite Character
If you, like Deke, recoil at the sight of badly kerned text, then this week’s type-geek technique is just for you. Sure, adjusting the spacing between full-fledged characters is fairly straightforward in Photoshop: Click in between two characters with the type tool and use the Alt (or Option) key in combination with the right and left arrow keys as needed. Simple, intuitive, effective. But what about the percentage symbol, for instance?
It’s actually made up of three sub-characters (a small superscript zero, a fraction-slash, and a small baseline zero). Figuring how to kern between those three components is just the kind of challenge Deke likes to take apart. And taking apart the percent character is the key to this technique.
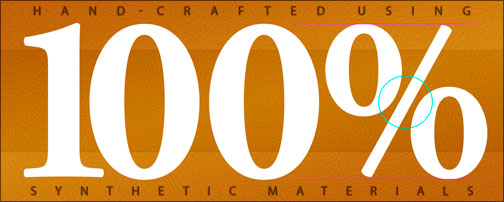
So imagine that you have this ’100%’ text (against a background of 100% wood-free wood Deke created in last week’s free episode). It’s easy enough to kern the number characters closer together, but when you do, the percent symbol looks oddly loose, as you can see indicated by the cyan circle below. The percentage symbol uses about twice the space as the other characters. Also, the fraction character (the slash) is extending beyond the top and bottom of the respective small zeros, as indicated by the magenta lines below.
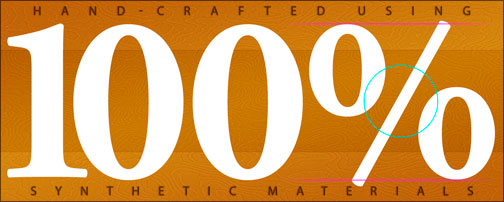
By changing the text to outlines, separating out the paths of the component pieces of the symbol, and adjusting them, Deke was able to create this much more aesthetically pleasing version:
How To Create Synthetic Wood Grain In Photoshop
After watching this week’s video, I know if I were stranded on a desert island (with Photoshop and a power supply for my laptop, of course) I would be able to create 100% synthetic, natural-looking wood purely from Photoshop. The fake woodgrain is created from a combination of the clouds, emboss, high pass, and noise filters, plus an adjustment layer or two, and a color overlay effect. After watching this week’s free movie, you will be able to create something like this:
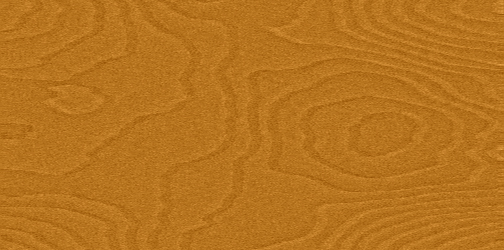
Without a single pixel harmed or tree destroyed!
Removing People From Photos With Image Stacks
Have you ever wanted to capture a pristine photo of a famous location that was unmarred by the presence of other people or random objects? Imagine the Golden Gate Bridge with no cars or the Piazza San Marco with no tourists. This week’s Deke’s Techniques shows you how to simulate that kind of exclusive access using the image stacking capabilities of Photoshop CS5 Extended. In this free video, Deke McClelland shows you how he removed a pesky tourist from his shots of a famous theater by aligning multiple shots, turning all those layers into a single smart object, and then applying a median calculation to remove his fellow traveler (not to mention an inexplicable floating orangutan head) from the scene.
In Deke’s case, this pesky woman was walking across the railing at the Theatro Olympico in Vincenza, Italy while Deke was trying to capture Palladio’s amazing forced-perspective set. (Here he actually used a variation technique to show you all four of her positions at once!)

And without having to rely on a single mask, he managed to remove her by simply asking Photoshop to do the math, and ended up with this result:

During the course of the video, you’ll also learn some of the other calcuations that Photoshop Extended offers up (download a 30-day free trial). You’ll also see how to troubleshoot remnant artifacts if your calculations don’t do the job satisfactorily. (And as a bonus, you’ll get a beautiful view of this gorgeous, 16th-century forced-perspective theatre designed by the famous architect, Palladio.)
Creating A Flawless Panorama In Photoshop - HD Video Tutorial
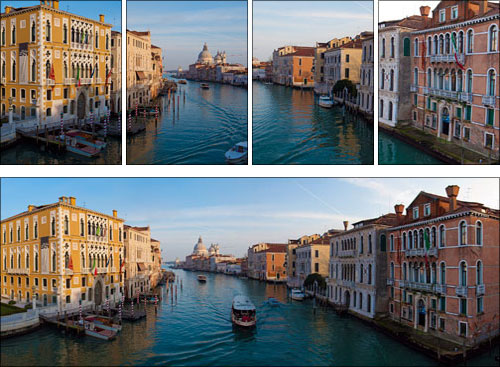
This week, Deke broadens your horizons with his helpful tips for creating a seamless panorama. Although the Photomerge process in Photoshop is not particularly difficult to use, shooting good images to go into the merged panorama takes some thought. Working carefully will give you the best results, despite the automatic nature of the processing. For instance, worry less about locking down your settings or using a tripod, and more about your feet and framing the shot all the way through. Deke also has some tips for using Photomerge as well. Ultimately, Deke shows you how to seamlessly stitch together photos shot from the Accademia Bridge in Venice that will make you feel like you’re gliding down the Grand Canal.
And what do you think of Deke’s observation about the current trend against photo stitching— lining up the individual photos that would normally go into a panorama, but leaving them in separate frames? For instance, do you prefer modern tetraptych (yes, I had to look that word up) in the upper image below, or the classic panorama in the lower image? I may be a helpless romantic when it comes to Venezia, but for me, it’s the image below that evokes my nostalgia for standing on the Ponte dell’Accademia in one of the most magical cities in the world. And isn’t that what a panorama is supposed to inspire?
Click here to watch Creating A Flawless Panorama In Photoshop
Create A 3D Pie Chart In Photoshop Extended - HD Video Tutorial
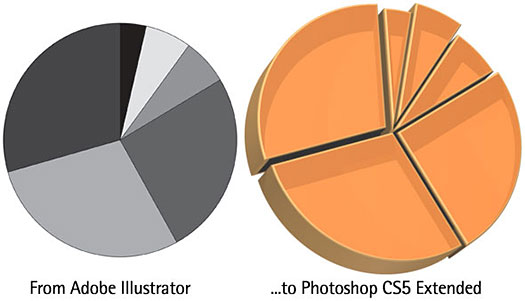
This week’s free Deke’s Technique acknowledges something you may already know: pie can be tastier in 3D. Author Deke McClelland starts with a classic ingredient, the ability to make pie charts relatively easily in Adobe Illustrator, then kicks it up a notch with the new Repoussé feature in Photoshop CS5 Extended. As you can see below, he starts with a simple black and white segmented circle in Illustrator, imports it into Photoshop Extended (download a 30-day free trial), then gives it depth and color with a little transparent effect and some repoussé adjustments. Click here to watch How To Create A 3D Pie Chart In Photoshop Extended.
Turning A Photo Into An Ink Drawing In Photoshop
For this week’s free Photoshop technique, lynda.com author Deke McClelland takes an ordinary photo, applies several filters (two of which he claims to never use under any other circumstances), and transforms the photo into an ink drawing. Click here to watch the free video tutorial, Turning A Photo Into An Ink Drawing In Photoshop, in a new window (this is a Hi-Def video which makes it super easy to follow along!). With the application of Gaussian Blur, Smart Blur, High Pass, Notepaper, and yet more Gaussian blur, you’ll learn how to start with a photo like the one on the left below and apply a pen-and-paper drawing effect like that on the right.
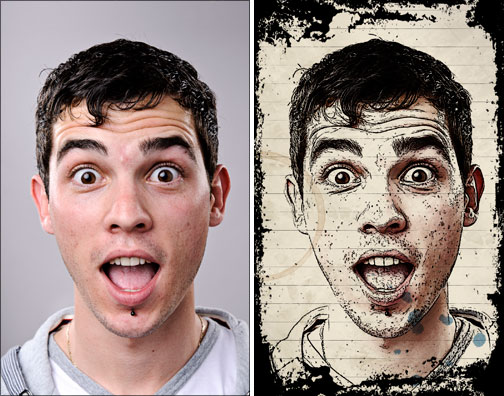
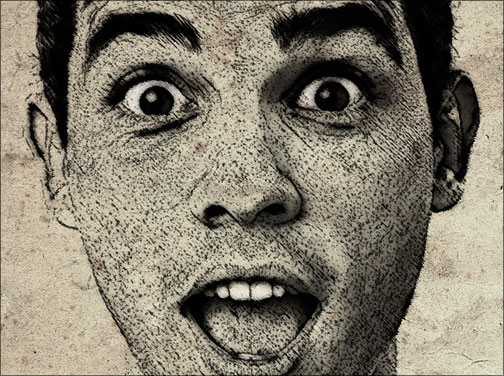
I have to admit, I find these creative transformations to be my favorite flavor of Technique of Deke. I start wanting to apply these treatments to random photos of my friends and family. And for more fun and creative possiblity, this week lynda.com members have an exclusive video awaiting them in the Online Training Libary in which Deke takes the very same photo and applies a pencil drawing effect. Here’s a preview of what you’ll see:
How To Fix Red Eyes Like A Pro In Photoshop
Wait, fixing red-eye like a pro? True, professional photographers, with their fancy equipment, probably don’t end up with glowing-eyed subjects very often. But the fact is if you’re using the camera at hand, and it happens to be a compact device with the flash and sensor in close angles to one another, anyone might end up with red-eye in their portraits. And what Deke demonstrates in this week’s technique is how to fix red-eye like a pro. That is, a professional Photoshop retoucher.
Click here to watch the free video tutorial, How To Fix Red Eyes Like A Pro In Photoshop, in a new window (this is a Hi-Def video which makes it super easy to follow along!).
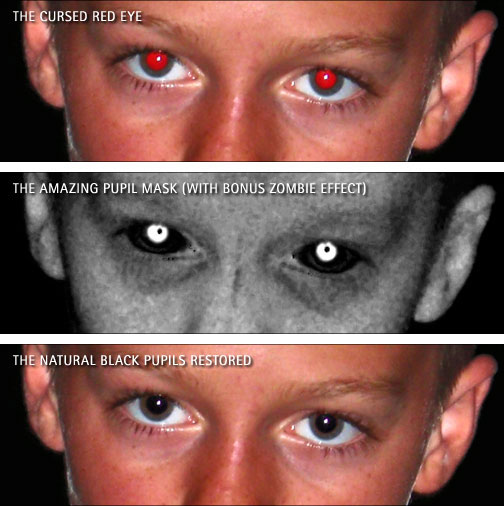
And yes, this involves avoiding Photoshop’s red-eye tool altogether. Deke starts by showing you how to create a nuanced mask using the Calculations command and painting with an overlay brush to select the subtle outlines of a blown-out pupil. Then he employs the Channel Mixer to rid the eyes of their redness. The result, as you can see below, allows for nice dark pupils with nothing but the spark of a natural spectral highlight. (And along the way, you get a cool zombie-like effect during the mask creation process.)
Fixing Chromatic Aberrations In Photoshop
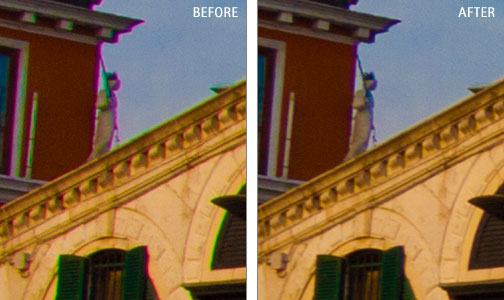
This week’s technique from Deke is about using Photoshop to fix a common problem that occurs in photographs: transverse chromatic aberration, otherwise known by its far less daunting name, color fringing. This phenomenon— caused by light breaking up into its primary components— leaves outlines of aberrant color around the edges in your photograph. Have no fear, however, because despite its daunting name, transverse CA is easily fixed in Photoshop. Deke not only illustrates how the phenomenon occurs, but also shows you how to fix it, armed with the Lens Correction filter and a modicum of analytical ability (or simple trial-and-error). Click here to watch the free video tutorial, Fixing chromatic aberrations in Photoshop - Free Photoshop Video Tutorial, in a new window (this is a Hi-Def video which makes it super easy to follow along!).
Check out the before and after results on this photo of Venice’s Rialto Bridge, and notice how the stripes of color around the statue and windows have disappeared in the image on the right.
How To Create Seamlessly Repeating Tile Ptterns In Photoshop
In this week’s free video technique, Deke McClelland shows you how to use Photoshop’s Offset filter to create a repeating, or tessellating, pattern for your homemade giftwrap project, in which an image (or two in this case) is wrapped around so that it can be tiled into a seamlessly repeating pattern. By offsetting and duplicating the images in Photoshop, you’ll end up with a convenient, delightfully intertwined pattern, as you can see below.

Building A Synthetic Starfield From Scratch
This week, intrepid Photoshop explorer and lynda.com author Deke McClelland gives you no less than the infinite universe. Actually, this installment of Deke’s Techniques shows you how to create your own galaxy view, complete with stars, lens flare, and space gas, all created completely from scratch in Photoshop. Starting with a layer of nothing but black pixels, Deke uses smart objects and classic Photoshop filters to create an infinitely customizable space-scape that you can use in your own design voyages. The universe is at your command.
Click here to watch the free video tutorial, Building a synthetic starfield from scratch, in a new window (this is a Hi-Def video which makes it super easy to follow along!).
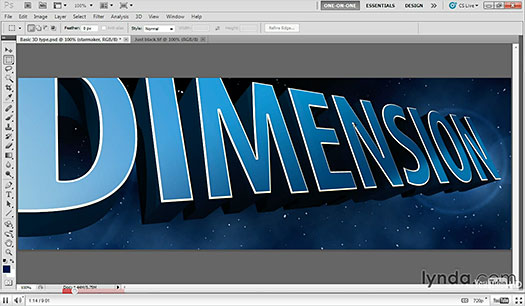
Simulating Subpixel Rendering - Free Photoshop Video Tutorial
What, you ask, is subpixel rendering? This week's Deke's Technique will either make your head spin or make you feel on top of the geek heap. The idea is this: Regardless of the which rendering intent you use for your text— Sharp, Crisp, Strong, or Smooth— Photoshop has a habit of rendering very small type looking very bad, whereas that same very small type looks nice and legible when rendered by your operating system or as editable type by a browser. What's the difference? The reason is subpixel rendering, which permits an application to rasterize text and other vector objects, on-the-fly, to each of the three color channels (RGB) independently.
Of course, if you’re working with HTML type, all is well. But as soon as you render that text to pixels, subpixel is not an option. It’s not Photoshop’s fault; JPEG, GIF, PNG, and other web image formats don’t support subpixel rendering. In this week’s free technique, Deke shares not only how subpixel rendering works, but also how to simulate it in Photoshop by creating a faux color antil-alias effect. For those of you who make small type for your screen images—whether web, kiosk, or presentation—or who just like to know the geekiest trick of the week, it’ll make all the tiny difference in the world. Click here to watch the free video tutorial, Simulating subpixel rendering, in a new window (this is a Hi-Def video which makes it super easy to follow along!).
![]()
Making 3D Type With Repoussé - Free Photoshop Video Tutorial
Nothing gives your words more weight than adding a third dimension to your text. This week, Deke shows you how to create 3D text using the Repoussé feature in Photoshop CS5 Extended. With this tool, you can take ordinary text, give it heft, add color to each of its newly created sides, and twirl it around to show off its new facets. Deke also shows you how to smooth out the edges and polish up your object by applying ray tracing. It may take a while to render, but, hey, it’s adding a whole new dimension to your Photoshop repertoire.
Click here to watch the free video tutorial, Making 3D type with Repoussé, in a new window (this is a Hi-Def video which makes it super easy to follow along!).

Deke's Techniques is taught by computer graphics guru Deke McClelland, and presented in his signature step-by-step style. The intent is to reveal how various Photoshop and Illustrator features can be combined and leveraged in real-world examples so that they can be applied to creative projects right away. Click here to see all the free clips from this series at lynda.com.
Masking Highlights and Shadows Independently
This week’s free technique gives you one of Deke McClelland’s many Photoshop tips for using an image to select itself, specifically isolating the highlights and shadows of a photograph to select the light and dark areas using the underrated Color Range command. By using the image’s own details to create the mask, you don’t have to rely on the unreliable Quick Selection or Magic Wand Tool. And you can fine-tune your mask to add areas to it. Another hidden benefit of using Color Range is that you can either generate a selection (working blind, as Deke likes to call it) or you can directly create a layer mask, and thus see what you’re doing as you do it. Click here to watch the free video tutorial, Masking Highlights and Shadows Independently - Free Photoshop Video Tutorial, in a new window (this is a Hi-Def video which makes it super easy to follow along!).
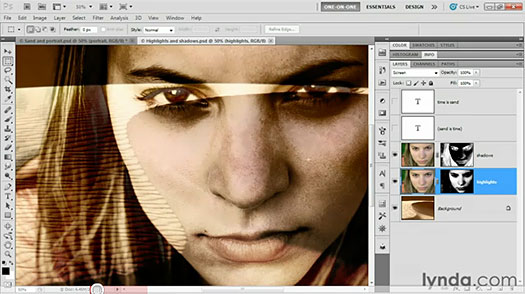
Creating A High Key, High Contrast Effect
In this week’s free video technique, Deke shares his recipe for taking an ordinary portrait and turning it into something visually striking by adding a high key, high contrast effect. The tools are reasonably simple: a color adjustment layer, a few passes with the dodge and burn tools, a convenient roughly drawn layer mask, and a gradient to finish the effect off. But the result is sophisticated and compelling. Click here to watch the free video tutorial, Creating a high key, high contrast effect, in a new window (this is a Hi-Def video which makes it super easy to follow along!).

Deke's Techniques - Blending Textures Onto A Face
This week's free Photoshop technique from lynda.com instructor Deke McClelland takes an ordinary portrait shot and maps two different textures onto the subject create an exotic effect. The process doesn't require any masks, but rather relies solely on advanced blending techniques. Click here to watch the free video tutorial, Blending Textures Onto A Face, in a new window (this is a Hi-Def video which makes it super easy to follow along!).
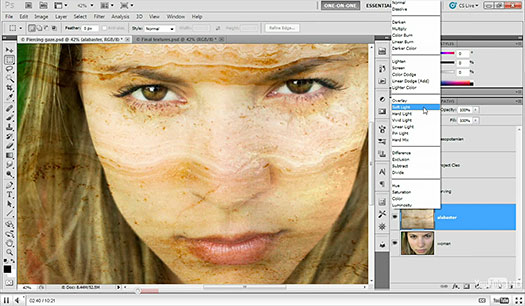
Using blend modes and layers means your effect can be adjusted to suit your taste with no fear of underlying pixel destruction. And no fear of missing dinner either, since Deke explains it all in just over ten minutes. If you can’t get enough of blending with faces, lynda.com members should be sure to check out this week’s exclusive members-only video, Rendering a face as a cave painting, in Deke’s Techniques in the Online Training Library.
Deke's Techniques - Creating A Molten Letter Effect
Deke's Techniques is a collection of short Photoshop and Illustrator projects and creative effects that can be completed in ten minutes or less. Click here to watch the free video tutorial, Creating A Molten Letter Effect, in a new window (this is a Hi-Def video which makes it super easy to follow along!).
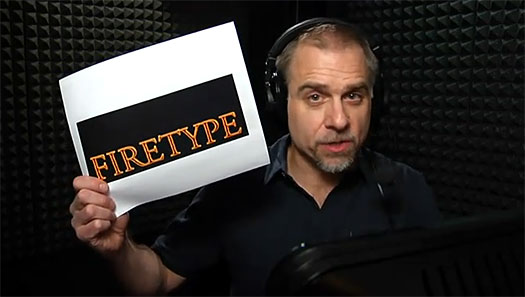
 This week’s episode of Deke’s Techniques features the creation of glowing embers of type. In under eight minutes, Deke shows you how to employ a combination of layer effects to create the burning glow, and then apply filters to create the ripples of heat coming off the incendiary text. Although the letters appear to be on the brink of destruction, they nonetheless remain completely editable underneath, so you can alter your burning message to suit you (or your client’s) whim. Deke's Techniques is taught by computer graphics guru Deke McClelland, and presented in his signature step-by-step style. The intent is to reveal how various Photoshop and Illustrator features can be combined and leveraged in real-world examples so that they can be applied to creative projects right away. Click here to see all the free clips from this series at lynda.com.
Deke's Techniques - Creating A Reflection In Shattered Glass
Welcome to this week's lynda.com video blog entry from Photoshop master Deke McClelland. Today's episode features creating the reflection of a woman, whose scream may or may not have broken the glass in question, into a shattered mirror. Click here to watch the free video tutorial, Creating a reflection in shattered glass, in a new window (this is a Hi-Def video which makes it super easy to follow along!).
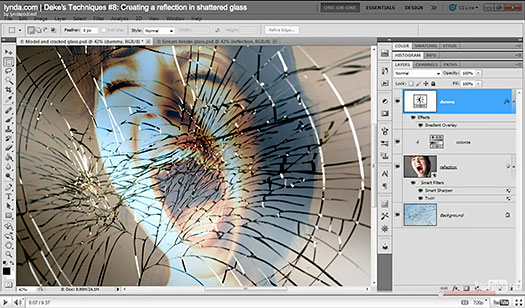
 And while the model’s angst clearly possesses destructive properties, the modifications Deke demonstrates in this video decidedly do not. Through the intelligent use of Smart Filters, each of the filter effects remains editable so you can ratchet up or tone down the effect depending on your particular appetite for destruction.
Members of the lynda.com Online Training Library can learn more about the advanced blending options Deke uses to fine-tune the effect in this week’s video by checking out Chapter 28: Blend Modes Revealed in Deke’s comprehensive Photoshop CS5 One-on-One: Mastery course. Members will also have access to this week’s exclusive Deke’s Techniques video, in which Deke explores the classic fantasy motif of the talking forest by mapping the visage of Deke’s evil twin into the rough-hewn bark of tree.
Deke's Techniques - Control Smoothing With An Anti-edge Mask
This week, Deke demonstrates how to retouch a stressed image in order to smooth out detail, while controlling the effect with specially crafted mask. If using the High Pass filter and edge masks are old hat for you, watch as Deke turns the whole concept inside-out by using a reverse high-pass effect combined with an anti-edge mask.
The result is that you get controlled “un-sharpening” right where you need it—a useful effect you can apply to your own overly sharp photographs. And as usual, Deke shows you the whole process in under ten minutes. Click here to watch the free video tutorial, Control smoothing with an anti-edge mask, in a new window (this is a Hi-Def video which makes it super easy to follow along!).
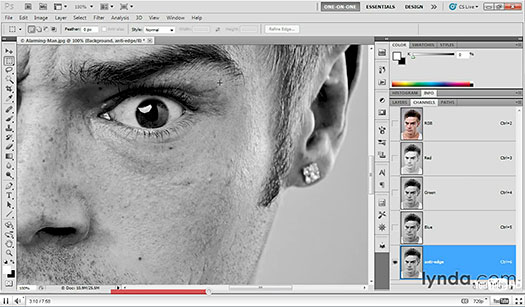
Of course, the bite-sized nature of Deke’s Techniques means that Deke’s got to work quickly on this one. So you’ll probably need a to be reasonably comfortable with the concepts of both sharpening and masking in order to follow along with this particular video (as in understanding both concepts to the point where applying them in reverse doesn’t make you want to turn your brain inside-out.)
Deke's Techniques - Rendering Type In Gold
Deke's Techniques is a collection of short Photoshop and Illustrator projects and creative effects that can be completed in ten minutes or less. Click here to watch the free video tutorial, Rendering Type In Gold, in a new window (this is a Hi-Def video which makes it super easy to follow along!).

In this video lynda.com author Deke McClelland shows you how to create gleaming gold from ordinary type. And being the noted Photoshop trainer that he is, Deke manages this alchemical feat in under ten minutes. This is no garish fool's gold, but a lovely soft, volumetric effect that will lend luster to your own creations. And because it's created with Photoshop's Layer Effects, your treasured text can be edited at any moment if you change your mind about your gilded message.
Deke's Techniques - Creating Ice Text
Deke's Techniques is a collection of short Photoshop and Illustrator projects and creative effects that can be completed in ten minutes or less. Click here to watch the free video tutorial, Creating Ice Text, in a new window (this is a Hi-Def video which makes it super easy to follow along!).
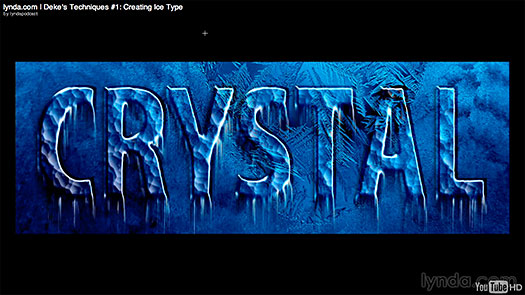
In this video Deke shares his method for creating an icy cool type effect. Deke combines the Wind filter and some quickly applied layer effects in Photoshop to create this chilly effect, including fully formed icicles. But thanks to a careful use of smart objects, the text remains decidedly unfrozen and completely editable underneath.
Deke's Techniques - Branding Type On A Texture
Deke's Techniques is a collection of short Photoshop and Illustrator projects and creative effects that can be completed in ten minutes or less. Click here to watch the free video tutorial, Branding Type On A Texture, in a new window. (This is a Hi-Def video which makes it super easy to follow along!)
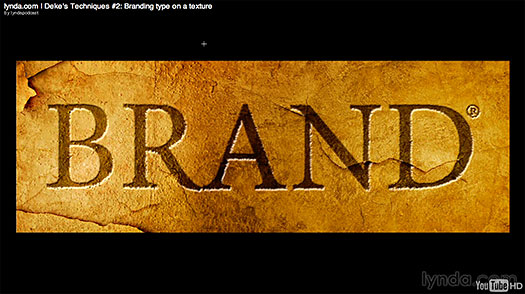
 This video features Deke showing you how to virtually brand your chosen type into any surface imaginable in Photoshop. The specific background (leather, cowhide, parchment, corrugated paper) doesn’t matter. The key to this technique is turning your background into a displacement map, then applying some Burn tool action and a little Bevel and Emboss.
Deke's Techniques is taught by computer graphics guru Deke McClelland, and presented in his signature step-by-step style. The intent is to reveal how various Photoshop and Illustrator features can be combined and leveraged in real-world examples so that they can be applied to creative projects right away. Click here to see all the free clips from this series at lynda.com.
Deke's Techniques - Creating A Hammered Metal Background- Free Photoshop CS5 Hi-Def Video Tutorial
Deke's Techniques is a collection of short Photoshop and Illustrator projects and creative effects that can be completed in ten minutes or less. Click here to watch the free video tutorial, Creating A Hammered Metal Background, in a new window (this is a Hi-Def video which makes it super easy to follow along!).
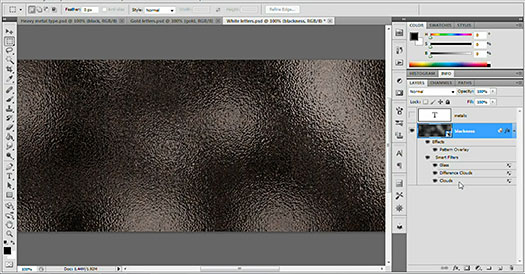
 In this episode, Deke shows you how to create something heartily substantial from something virtually nonexistent. Specifically, Deke creates a hammered metal background (featured behind last week’s type of gold project) from insubstantial clouds and glass. Start with a field of black pixels, apply some smart filters, and top it off with a little rusty metal pattern, and you have a wall of textured metal that will support any creation you want to build on top of it. And because you’re using the Clouds and Difference Clouds filters, which are based on random fractal noise, your wall of steel won’t look exactly like anyone else’s when you put it to use in your own projects.
![]()
Adobe Coupons & Offers
 Visit the Adobe Coupon Codes & Special Offers Page to see the latest specials and upgrade & bundle deals from Adobe — including 80% Off on Photoshop, Lightroom, Dreamweaver & Flash for students.
Find upgrade options and deals at the Adobe Store. Get up to 80% off at the Adobe Education Store.
Creative Suite 5.5 Subscriptions Available Worldwide
Subscription editions of Creative Suite software are just like regular Creative Suite products — they are installed on your computer and provide all the same features and functionality. Find out more about monthly or annual subscriptions.
You can also download a free 30 day trial of any Adobe CSS product.
![]()
Exclusive onOne Photoshop & Lightroom Plugins 15% Coupon
 Enter our exclusive discount coupon code - PSSPPT06 - during the checkout process at onOne Software for an instant 15% discount on any onOne product. This includes Genuine Fractals and their amazing Photoshop Plug-In Suite.
OnOne’s new Plug-In Suite solves six of the most frequent problems photographers will encounter in Photoshop. This suite has been granted American Photos Magazine’s Editor’s Choice award for Top Image Editing Software. The Plugin Suite includes:
Perfect Resize (formerly known as Genuine Fractals) is renowned by both photographers and printers for its finesse at increasing images to more than ten times their original size while maintaining the sharpness and detail you started with. Think of this as the industry standard for image resizing.
Perfect Layers brings a layered workflow to Photoshop Lightroom. With Perfect Layers you can create and edit multi-layered Photoshop files directly within Photoshop Lightroom or Apple Aperture. Use it to change skies, composite images and even create layouts.
 Mask Pro is used to remove the tough stuff — such as hair, smoke and glass — while retaining the fine detail. You choose what colors to keep, then paint away what you don’t need.
PhotoTools Pro packs hundreds of high-calibre photographic effects into one user-friendly plug-in. It’s fast and easy to use. Gives your photos that pro quality look.
PhotoFrame Pro lets you enhance your pictures with hundreds of such design effects, or simply drop your image into a pre-fab layout in Photoshop, Lightroom or Aperture.
FocalPoint helps to control focus and minimize visual noise. Draw the eye to specific points in your images by using selective focus, depth-of-field and vignette effects.
PhotoTune lets you can compare images side-by-side and easily color correct and enhance them. PhotoTune optimizes the dynamic range, color and sharpness of your image without the need to know all the complicated controls in Photoshop like levels and curves.
![]()
Exclusive 15% Discount On Topaz Plugins, Bundles And Upgrades
 Enter our exclusive discount coupon code PHOTOSHOPSUPPORT during the checkout process at Topaz Labs for an instant 15% discount on any Topaz product, including bundles and upgrades.
Topaz Labs Photoshop plug-ins are specifically designed to expand a photographer's creative toolbox by harnessing powerful image technology developments. Photographers everywhere are now taking advantage of the creative exposure effects, artistic simplification, unique edge manipulation, and top-of-the-line noise reduction offered in Topaz products. The Topaz Photoshop Plugins Bundle is a super powerful Photoshop plugins package that includes the following Topaz products:
Topaz Adjust
Deliver stunning and dynamic images with this uniquely powerful plug-in that features HDR-like abilities and enhances exposure, color and detail.
Topaz InFocus
 Topaz InFocus uses the latest advancements in image deconvolution technology to restore, refine and sharpen image detail.
Topaz Detail
A three-level detail adjustment plug-in that specializes in micro-contrast enhancements and sharpening with no artifacts.
Topaz ReMask
The fastest and most effective masking and extraction program with one-click mask refining.
Topaz DeNoise
Highest-quality noise reduction plug-in that removes the most noise and color noise while preserving the most image detail.
Topaz Simplify
Provides creative simplification, art effects, and line accentuation for easy one-of-a-kind art.
Topaz Clean
Take control of the detail depth of your images with extensive smoothing, texture control and edge enhancement tools.
Topaz DeJPEG
Drastically improves the quality of web images and other compressed photos.
Learn more about the Topaz Photoshop Plugins Bundle. Download a free trial version.
![]()
Photoshop Masking Plugin Fluid Mask - Exclusive Instant Discount
 The 4 1/2 out of 5 star review of Fluid Mask at MacWorld begins by saying that this "Photoshop plug-in takes the pain out of extracting backgrounds," and goes on to recommend the latest version, stating that "Fluid Mask is a very effective tool for separating objects from their backgrounds. It offers a variety of useful features for tackling almost any difficult image, from wispy hair to complex foliage. Online video tutorials and live training sessions help ease the learning curve."
Our friends at Vertus, the makers of Fluid Mask Photoshop Plugin, have set up a special exclusive discount for PhotoshopSupport.com. Go to our Fluid Mask page for a special, exclusive discount link.
Fluid Mask is designed for photographers, image editors, graphic designers and all those who take digital image editing seriously. In a streamlined interface and workflow, Fluid Mask instantly shows key edges in the image and provides comprehensive easy to use tools that work with difficult-to-see edges and tricky areas like trees & lattices. Fluid Mask will also preserve all-important edge information for a professional quality cut out. Go to our Fluid Mask page for more info.
![]()
Auto FX 15% Off Special Discount Code For Photoshop Plugins - Coupon Code S94525
 Our friends at Auto FX have given us an exclusive special offer discount coupon code S94525 that will give you an instant 15% discount on any and all of their amazing Photoshop plugins and even their special Photoshop Plugin Bundles.
All you have to do is apply coupon code S94525 during the checkout process and you'll have your amount recalculated to include the discount. Below is an overview of their Photoshop Bundle Deal, which the S94525 coupon code will add another 15% discount to. Enjoy!
The Auto FX Plug-in Suite provides a comprehensive selection of visual effects from the world's premier developer of Adobe Photoshop Plug-ins. This suite of products works with Photoshop CS, CS2, CS3, CS4 and CS5. Auto FX Plug-in Suite includes 165 effect filters and thousands of instant effects to improve your images. Purchased separately, the products in this suite are worth over $1,400. By purchasing the Plug-in Suite for $499 you'll save $900.
Auto FX Plugins - Discount Coupons - Mystical Suite & DreamSuite
Find out more about ![]()
Special Deals On Nik Software Photoshop Plugins - Viveza, Complete Collection - 15% DISCOUNT COUPONS
Follow the links below and the 15% discount will be AUTOMATICALLY APPLIED to any purchase you make, or use our exclusive discount coupon code - NIKPSS - during the checkout process at Nik Software for the instant 15% discount. This exclusive discount coupon code can be applied to all the latest Nik Software Photoshop plugins, including Silver Efex Pro, Color Efex Pro, Viveza, HDR Efex Pro, and The Complete Collection (big savings).
Nik Software The Complete Collection (Plugins Bundle)
 The Complete Collection includes all of Nik Software's latest award-winning plug-in software titles for Photoshop, Lightroom and Aperture including: Dfine, Viveza, HDR Efex Pro, Color Efex Pro, Silver Efex Pro, and Sharpener Pro.
The Complete Collection features products with Nik Software's patented U Point® technology, giving photographers the most powerful tools for precise and natural photographic enhancements and corrections without the need for complicated selections or layer masks.
The Complete Collection is offered in two editions: (1) the Complete Collection Ultimate Edition includes support for every plug-in to work in Photoshop, Lightroom, and Aperture, and offers Color Efex Pro 3.0 to work in Capture NX 2 as well. (2) the Complete Collection for Lightroom and Aperture includes support for each plug-in to only work in Lightroom and Aperture. Click here to compare both editions
Color Efex Pro 3.0
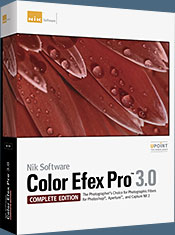 52 photographic filters with over 250 effects for professional quality images.
Completely Original. Completely Indispensable.
Nik Software Color Efex Pro 3.0 filters are the leading photographic filters for digital photography. The award-winning Color Efex Pro 3.0 filters are widely used by many of today's professional photographers around the world to save time and get professional level results. Whether you choose the Complete Edition, Select Edition, or Standard Edition, you’ll get traditional and stylizing filters that offer virtually endless possibilities to enhance and transform images quickly and easily.
Patented U Point technology provides the ultimate control to selectively apply enhancements without the need for any complicated masks, layers or selections. Control color, light and tonality in your images and create unique enhancements with professional results. With 52 filters and over 250 effects found in Color Efex Pro 3.0, you can perform high quality retouching, color correction, and endless creative enhancements to your photographs. Download a free Trial version.
Viveza
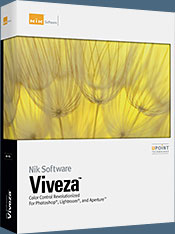 The most powerful tool to selectively control color and light in photographic images without the need for complicated selections or layer masks.
Two of the most important factors in creating great photography are color and light. Mastering the art of selectively correcting or enhancing each of these is now possible for every photographer without the need for complicated masks or selections, or expert-level knowledge of Photoshop. Integrating award-winning U Point technology, Viveza is the most powerful and precise tool available to control light and color in photographic images.
U Point powered Color Control Points, placed directly on colors or objects in an image (such as sky, skin, grass, etc.), reveal easy-to-use controls that photographers can use to quickly adjust brightness, contrast or color in a fraction of the time needed by other tools. With Viveza you’ll spend more time shooting photographs and save hours of image editing. Download a free Trial version.
Silver Efex Pro
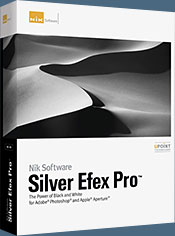 Complete power and control to create professional quality black and white images in one convenient tool.
Silver Efex Pro from Nik Software is the most powerful tool for creating professional quality black and white images from your photographs. For the first time, all the advanced power and control required for professional results have been brought together in one convenient tool.
Featuring Nik Software’s patented U Point technology to selectively control the tonality and contrast of the image, Silver Efex Pro includes advanced imaging algorithms to protect against unwanted artifacts, a comprehensive collection of emulated black and white film types, a variable toning selector for adding traditional toning techniques, over 20 one-click preset styles, and a state-of-the-art grain reproduction engine that help produce the highest quality black and white images possible from your color images while providing more freedom to experiment. Download a free Trial version to use Silver Efex Pro.
HDR Efex Pro
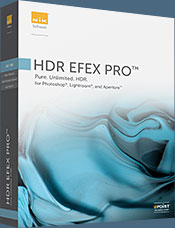 Experience the power, control, and creative expression of HDR. This all in one toolkit lets you achieve your best HDR images ever, ranging from the realistic to artistic.
HDR Efex Pro is the essential new standard for creating amazingly high quality realistic to artistic HDR images with a revolutionary new all-in-one workflow. HDR Efex Pro includes a vast selection of one-click visual presets for incredibly fast results, advanced tone mapping algorithms, powerful and detailed HDR controls, and patented U Point® technology
Follow our discount coupon links, or enter our exclusive discount coupon code - NIKPSS - during the checkout process at Nik Software for the instant 15% discount. This exclusive discount coupon code can be applied to all the latest Nik Software Photoshop plugins, including Silver Efex Pro, Color Efex Pro, Viveza, HDR Efex Pro, and The Complete Collection (big savings).
![]()


