![]()
![]() Buy. Download. Create. Get Photoshop now at the Adobe Store.
Buy. Download. Create. Get Photoshop now at the Adobe Store.
![]() Get Flash, Dreamweaver, Photoshop Extended with Adobe Web Premium.
Get Flash, Dreamweaver, Photoshop Extended with Adobe Web Premium.
![]()
![]() The Photoshop Blog offers the latest Photoshop news and software updates, Photoshop tips and tutorials, and random thoughts from graphic artist and Photoshop expert Jennifer Apple.
The Photoshop Blog offers the latest Photoshop news and software updates, Photoshop tips and tutorials, and random thoughts from graphic artist and Photoshop expert Jennifer Apple.
![]()
![]()
JUNE 30 2005
• Where's My Stuff? - Free PDF
 This is a great free PDF from Ben Willmore. The "Where's My Stuff?" PDF is designed to help you make the transition from CS to CS2 by indicating what’s happened to many of the features that were available in the previous version of Photoshop.
The PDF (580K) is adapted from Ben's Photoshop CS2: Up To Speed book, which covers every change made in Photoshop CS2 and nothing else.
![]() Get the "Where's My Stuff?" PDF at Ben Willmore's Digital Mastery
Get the "Where's My Stuff?" PDF at Ben Willmore's Digital Mastery
![]() posted by Jennifer Apple at 12:22 AM EDT | permalink
posted by Jennifer Apple at 12:22 AM EDT | permalink
• Maintaining Aspect Ratios
![]() From The PhotoshopHelp Blog: Here's how to resize a bunch of photos so that they are all the same, 640 x 480 at 72 ppi.
From The PhotoshopHelp Blog: Here's how to resize a bunch of photos so that they are all the same, 640 x 480 at 72 ppi.
- Start by selecting the Rectangular Marquee tool.
Choose Fixed Aspect Ratio from the Styles: dropdown in the tools Option bar.
Enter 480 for the Height and 640 for the Width.
Use the Marquee tool as if you were cropping.
Click and drag to select the appropriate image area.
With the selection active, choose Image > Crop
The image is cropped to the correct aspect ratio.
Now you need to resize the image and change the resolution.
Choose Image > Image Size
The Image Size dialog box appears.
Deselect the Resample Image option.
Enter 72 in the Resolution section.
Reselect the Resample Image and Constrain Proportions options.
Enter 640 in the Width.
480 is automatically entered in the Height because you cropped the image to the Aspect Ratio previously.
Click OK.
I created an Action for the second step, however I suggest doing the Crop manually. Some things just shouldn't be automated.
![]() reprinted by permission, courtesy of Jim Barthman at The PhotoshopHelp Blog
reprinted by permission, courtesy of Jim Barthman at The PhotoshopHelp Blog
![]() posted by Jennifer Apple at 12:01 AM EDT | permalink
posted by Jennifer Apple at 12:01 AM EDT | permalink
![]()
JUNE 29 2005
• Discount: Creative Suite Conference
From Ben Willmore's 'Where Is Ben?' blog: "I'll be presenting a full day session on the Essentials of Photoshop at the upcoming Creative Suite Conference in Las Vegas on July 19th.
"If you use CSC05LVWIL as your coupon code when signing up, then you'll get into my class for less then 50% of the usual cost. That means you'll end up paying just $99 for a class that everyone else gets charged $200 to attend. You can also use the coupon code to save $145 on a 2 or 3 day conference pass."
![]() Get the details at Ben Willmore's blog.
Get the details at Ben Willmore's blog.
![]() posted by Jennifer Apple at 12:22 AM EDT | permalink
posted by Jennifer Apple at 12:22 AM EDT | permalink
• Photoshop Tip: Getting A Fresh Histogram In One Click
![]() When you have the histogram palette open to monitor your tonal adjustments to an image, you may see a tiny warning symbol in the right corner of your histogram. That's its way of letting you know that you're looking at a Histogram reading from the Histogram's memory cache - not a fresh reading. If you want to refresh the Histogram and get a new reading (and you should), you can click directly on the tiny warning symbol and it will refresh immediately for you.
When you have the histogram palette open to monitor your tonal adjustments to an image, you may see a tiny warning symbol in the right corner of your histogram. That's its way of letting you know that you're looking at a Histogram reading from the Histogram's memory cache - not a fresh reading. If you want to refresh the Histogram and get a new reading (and you should), you can click directly on the tiny warning symbol and it will refresh immediately for you.
![]() reprinted by permission and sponsored by the NAPP
reprinted by permission and sponsored by the NAPP
![]() posted by Jennifer Apple at 12:22 AM EDT | permalink
posted by Jennifer Apple at 12:22 AM EDT | permalink
![]()
JUNE 28 2005
• Shortcuts? We Don't Need No Stinkin' Shortcuts!
![]() Actually, we do. And learning them has never been easier, as I've put together a quick walk-through as well as a resource list where you can download all kinds of great free Photoshop shortcut sets that you can print.
Actually, we do. And learning them has never been easier, as I've put together a quick walk-through as well as a resource list where you can download all kinds of great free Photoshop shortcut sets that you can print.
Read the Photoshop Keyboard Shortcuts tutorial.
![]() posted by Jennifer Apple at 12:22 AM EDT | permalink
posted by Jennifer Apple at 12:22 AM EDT | permalink
• Layer Mask Accuracy
![]() From The PhotoshopHelp Blog: It's hard to tell what you're painting on a Layer Mask simply by looking at the thumbnail.
From The PhotoshopHelp Blog: It's hard to tell what you're painting on a Layer Mask simply by looking at the thumbnail.
Try this instead — Alt + click on a Layer Mask thumbnail and the Layer Mask occupies the current workspace as an 8-bit Grayscale image. Perfect for analyzing and filling in areas of your mask you may have missed.
![]() reprinted by permission, courtesy of Jim Barthman at The PhotoshopHelp Blog
reprinted by permission, courtesy of Jim Barthman at The PhotoshopHelp Blog
![]() posted by Jennifer Apple at 12:02 AM EDT | permalink
posted by Jennifer Apple at 12:02 AM EDT | permalink
![]()
JUNE 27 2005
• New Photoshop CS2 Book - The Photoshop CS2 Help Desk Book
 After years of fielding questions at seminars from Photoshop users, Dave Cross realized there was a lot of common ground: there were many questions that were indeed "frequently asked." In addition, most questions seemed start with “How come I can't...," "How do I...," or "Why won't the (fill in the blank) tool work?"
The Photoshop CS2 Help Desk Book addresses the most common problems and questions in Photoshop by both providing answers to the most frequently asked questions, and outlining strategies that can help you avoid problems in the first place.
![]() Read more about this book.
Read more about this book.
![]() posted by Jennifer Apple at 12:03 AM EDT | permalink
posted by Jennifer Apple at 12:03 AM EDT | permalink
• Photoshop Tip: Focusing Attention By Adding Depth
![]() Here's a trick for defining depth to the view of your artwork: Make the objects that are farther away appear out of focus or blurry, and the objects that are near, sharp and crisp. You can use this technique for drawing attention to objects in the foreground of your Photoshop image by slightly blurring the background. This adds depth and dimension to your artwork, as well as focusing attention. To do this, put a selection around the area you want the focus, add a 10-pixel Feather (Option-Command-D/Alt-Control-D), Inverse the selection (from the Select menu or Shift-Command-I/Shift-Control-I), then apply your Blur (Filter>Blur>Gaussian).
Here's a trick for defining depth to the view of your artwork: Make the objects that are farther away appear out of focus or blurry, and the objects that are near, sharp and crisp. You can use this technique for drawing attention to objects in the foreground of your Photoshop image by slightly blurring the background. This adds depth and dimension to your artwork, as well as focusing attention. To do this, put a selection around the area you want the focus, add a 10-pixel Feather (Option-Command-D/Alt-Control-D), Inverse the selection (from the Select menu or Shift-Command-I/Shift-Control-I), then apply your Blur (Filter>Blur>Gaussian).
![]() reprinted by permission and sponsored by the NAPP
reprinted by permission and sponsored by the NAPP
![]() posted by Jennifer Apple at 12:05 AM EDT | permalink
posted by Jennifer Apple at 12:05 AM EDT | permalink
![]()
JUNE 24 2005
• I Cover The Waterfront... (more link love)
Here's my latest collection of assorted Photoshop tips, tutorials, news and tidbits...
Evaluating Images And Adjusting Photographic Tonal Values
From Graphics.com: Knowing how to evaluate photographs and adjust their tonal values is an essential part of any imaging workflow. Tim Grey shows how.
Photoshop Roadmap June Newsletter - Discounts & Free Stuff
![]() Thanks to the Photoshop Roadmap for the kind words about our site in their June Newsletter. You can read the Newsletter online, which includes some software discounts and some free downlaods.
Thanks to the Photoshop Roadmap for the kind words about our site in their June Newsletter. You can read the Newsletter online, which includes some software discounts and some free downlaods.
Sharpening Image Edges In Photoshop
From Graphics.com: Denny Tang shows how to maintain control by sharpening image edges with layers in Photoshop.
Text Wrapping in Photoshop CS and CS2
![]() From Heathrowe.com: Here is a great way to simulate text wrapping to your Paragraph type with full formatting just like a Page Layout editing program.
From Heathrowe.com: Here is a great way to simulate text wrapping to your Paragraph type with full formatting just like a Page Layout editing program.
Create A Studio Background in Photoshop
From Pixel Perfect Digital: This tutorial illustrates how to create a studio background effect from a 2D background using the Transform/Distort tool.
Framed and Exposed: It's a Frame-Up
From Creativepro.com: Have you wanted to dress up your photo images with a fancy digital edge? Ben Long investigates three programs, from $40 to $200, that create photo frames.
![]() posted by Jennifer Apple at 12:22 AM EDT | permalink
posted by Jennifer Apple at 12:22 AM EDT | permalink
• Photoshop Tip: Get Back You Background Layer
![]() Lost your Background layer? It happens. It's heartbreaking, but it happens. If you suddenly find yourself staring at a layers palette and there's no Background layer (chances are you accidentally converted your Background layer into a regular layer), here's how to get a Background layer again: Create a new blank layer. Then, go under the Layer menu, under New, and choose Background from Layer, and Photoshop will take your new blank layer and create a solid white Background layer at the bottom of your layer stack.
Lost your Background layer? It happens. It's heartbreaking, but it happens. If you suddenly find yourself staring at a layers palette and there's no Background layer (chances are you accidentally converted your Background layer into a regular layer), here's how to get a Background layer again: Create a new blank layer. Then, go under the Layer menu, under New, and choose Background from Layer, and Photoshop will take your new blank layer and create a solid white Background layer at the bottom of your layer stack.
![]() reprinted by permission and sponsored by the NAPP
reprinted by permission and sponsored by the NAPP
![]() posted by Jennifer Apple at 12:22 AM EDT | permalink
posted by Jennifer Apple at 12:22 AM EDT | permalink
![]()
JUNE 23 2005
• Photoshop Tip: Quick Switch Visibility And Linking
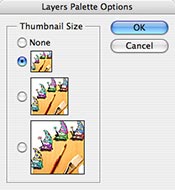 If you have to switch visibility or linking in Photoshop you would click the eye or the chain icon left to the layer. But what if you have to do this to 30 different items? Are you gonna click them one by one? You guessed right - no.
Open the layers palette to full size so it stretches from the top to the bottom of the screen. Press the little arrow on the top right corner and select palette options and choose a small icon size so that you can fit as many layers on the palette as possible. Now you can fit 30 layers and have them all visible at the same time on a 20" monitor.
To switch visibility or linking on all of them at once - click and hold the icon and drag through all the layers.
![]() reprinted by permission, courtesy of Ivan Raszl at CreativeBits
reprinted by permission, courtesy of Ivan Raszl at CreativeBits
![]() posted by Jennifer Apple at 12:25 AM EDT | permalink
posted by Jennifer Apple at 12:25 AM EDT | permalink
• Download $500 Of Free Stock Photos Now
New subscribers to Turbo Photo's new 'Free Stock Photos' newsletter are welcomed with instant download access to 50 hi-res royalty-free stock photos. Subscribe by visiting the Turbo Photo website, then clicking on the 'Free Photos' button.
![]() Go to the Turbo Photo website
Go to the Turbo Photo website
![]() posted by Jennifer Apple at 12:25 AM EDT | permalink
posted by Jennifer Apple at 12:25 AM EDT | permalink
![]()
JUNE 22 2005
• New Photoshop CS2 Book - Photoshop CS2: Up To Speed
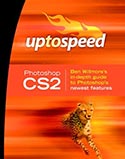 The first and only book to focus exclusively on the new features of Photoshop CS2, Photoshop CS2: Up To Speed by Ben Willmore is designed for anyone who has a working knowledge of CS and wants to get 'up to speed' with CS2 in the most efficient way possible. The book covers every change made in CS2 and features full chapters devoted to Bridge, Variables, Smart Objects, the new Layers Palette, Camera Raw and HDR Imaging.
It's also designed to let you quickly learn what's been moved, renamed or eliminated from the previous version, making your transition to CS2 as painless as possible.
![]() Read through a collection of rave reviews for this book.
Read through a collection of rave reviews for this book.
![]() posted by Jennifer Apple at 12:22 AM EDT | permalink
posted by Jennifer Apple at 12:22 AM EDT | permalink
• Free Brushes From Photoshop Roadmap
![]() The Photoshop Roadmap is offering a set of 21 free brushes made by Stephanie Shimerdla from Obsidandawn. All you need to do is become a member of The Photoshop Roadmap (registration is simple and free) to download these exclusive brushes.
The Photoshop Roadmap is offering a set of 21 free brushes made by Stephanie Shimerdla from Obsidandawn. All you need to do is become a member of The Photoshop Roadmap (registration is simple and free) to download these exclusive brushes.
![]() Get more details at The Photoshop Roadmap site.
Get more details at The Photoshop Roadmap site.
![]() posted by Jennifer Apple at 12:22 AM EDT | permalink
posted by Jennifer Apple at 12:22 AM EDT | permalink
• Photoshop Tip: Don't Have Italic Or Bold? Don't Sweat It
![]() If you have a typeface that doesn't have a bold or italic version available, don't sweat it-Photoshop can make a fake bold or italic version for you. They're called faux bold and faux italic. It's pronounced "fo," as in "Fe, Fi, Fo, Fum"). To apply a faux style to the type, highlight your type and choose Faux Bold of Faux Italic from the Character palette's pop-down menu. Here's another tip: Don't forget to turn off these faux styles when you're done, because they don't automatically turn themselves off.
If you have a typeface that doesn't have a bold or italic version available, don't sweat it-Photoshop can make a fake bold or italic version for you. They're called faux bold and faux italic. It's pronounced "fo," as in "Fe, Fi, Fo, Fum"). To apply a faux style to the type, highlight your type and choose Faux Bold of Faux Italic from the Character palette's pop-down menu. Here's another tip: Don't forget to turn off these faux styles when you're done, because they don't automatically turn themselves off.
![]() reprinted by permission and sponsored by the NAPP
reprinted by permission and sponsored by the NAPP
![]() posted by Jennifer Apple at 12:22 AM EDT | permalink
posted by Jennifer Apple at 12:22 AM EDT | permalink
![]()
JUNE 21 2005
• Photoshop And The 5 Second Test
 In a recent edition of the User Interface Engineering newsletter, Jared Spool published an article describing a design-testing concept called the 5-Second Test. "Several years back we conceived the idea of the 5-Second Test. What would happen if we just got a user's first reaction to the design? Could they tell us anything useful? The technique turned out to be extremely valuable. Not only did we gain fascinating insights about the design, it turned out to be a quick, flexible testing method."
Using the 5-Second Test on Photoshop mockups can save you plenty of time and money by revealing what is wrong with a design at the development stage instead of at the launching stage.
Read 5-Second Tests: Measuring Your Site's Content Pages by Christine Perfetti.
![]() posted by Jennifer Apple at 12:22 AM EDT | permalink
posted by Jennifer Apple at 12:22 AM EDT | permalink
• Photoshop Tip: Full Screen Mode Bonus
![]() From PhotoshopHelp Blog: Here's a way (for PC users only) to be in full screen mode and have access to the menus:
From PhotoshopHelp Blog: Here's a way (for PC users only) to be in full screen mode and have access to the menus:
- Press the F key twice to enter Full Screen mode.
The image is centered on a black background with no menus.
A small arrow appears at the top of the tool bar.
Click the arrow to access all the menu commands.
You can have your black background and your menus too.
In response to this post, Marc writes "When entering the first full-screen state, [Press the F key once] you may adjust the background color by selecting the Paint Bucket tool, and SHIFT+click anywhere on the grey background. The current foreground color will be used."
Thanks Marc, that's a great tip! Finally I have a reason to use the Paint Bucket.
![]() reprinted by permission, courtesy of Jim Barthman at The PhotoshopHelp Blog
reprinted by permission, courtesy of Jim Barthman at The PhotoshopHelp Blog
![]()
JUNE 20 2005
• Using Photoshop To Create A Photorealistic Image
From Graphics.com: Vinny Chirayil shows how to use Photoshop as a previsualization tool to fast-forward the creation process.
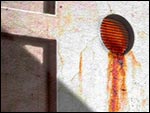 In the intro to the tutorial he says, "I am always amazed by artists who can texture a scene in Photoshop and give it a 3D, photo-realistic look. A practical example can be found in the making of the CG animated movie Final Fantasy. Due to time constraints a huge set that was built in 3D wound up being textured and lit by a matte artist, not fully rendered in the 3D application as would normally have been done. Instead, a large grayscale rendering was generated that served as the template for the matte artist to paint the final background graphics.
"You don't have to be making a CG movie to also benefit from the time you can save using this approach. Instead of experimenting with textures in a 3D applicaiton, do this in Photoshop. Once you are clear about the final look, only then do the texture renderig in 3D. Using Photoshop like this as a previz tool can really fast-forward the creation process."
![]() Read the Using Photoshop To Create A Photorealistic Image tutorial.
Read the Using Photoshop To Create A Photorealistic Image tutorial.
![]() posted by Jennifer Apple at 12:15 AM EDT | permalink
posted by Jennifer Apple at 12:15 AM EDT | permalink
• Photoshop Tip: View Your Layer Mask As A Rubylith
![]() If you want to view your Layer Mask by itself (rather than how the Layer Mask affects your overall image), hold the Option key (PC: Alt key) and click directly on the Layer Mask thumbnail in the Layers palette. This will display just the Mask itself. You can also view the Layer Mask like a Rubylith (a red overlay used in traditional masking) by pressing the Backslash key (\) on your keyboard.
If you want to view your Layer Mask by itself (rather than how the Layer Mask affects your overall image), hold the Option key (PC: Alt key) and click directly on the Layer Mask thumbnail in the Layers palette. This will display just the Mask itself. You can also view the Layer Mask like a Rubylith (a red overlay used in traditional masking) by pressing the Backslash key (\) on your keyboard.
![]() reprinted by permission and sponsored by the NAPP
reprinted by permission and sponsored by the NAPP
![]() posted by Jennifer Apple at 12:22 AM EDT | permalink
posted by Jennifer Apple at 12:22 AM EDT | permalink
![]()
JUNE 17 2005
• I Cover The Waterfront... (more link love)
Here's my latest collection of assorted Photoshop tips, news and tidbits...
Photoshop CS2 Custom Menus and More
From PhotoshopLAB.com: Photoshop CS2 allows you to customize your menus, and this tutorial walks you through all of the steps.
 Design How-to: Brochures That Get Noticed
From Creativepro.com: You don't need metallic inks or tricky die-cuts to create a brochure everyone wants to pick up. Just offset the folds and work a little design magic. It's easy - you even get you templates! Get the free Before & After Magazine PDF article.
Use Adobe Dialog
From Heathrowe.com: In Photoshop CS2 and Creative Suite 2, the 'Use Adobe Dialog' is now the route to access & create Version Cue projects. And you'll discover other great reasons to use this feature in this tutorial from Darrell Heath.
Transparent 3D Objects
From Lunacore.com: Learn how to create transparent 3D objects, then use the technique for different projects in the future.
Create Photoshop Halftones
From PhotoshopHelp Blog: Find out how to halftone screen a scanned photo so it is suitable for offset printing.
 Nice Pretty Brushes
From Fragile Decay: 50 sets of free brushes. I liked the moons in sets 30-40. Browse the pretty brushes from Fragile Decay.
Find Free Photos... Fast!
Yotophoto is a search engine for free-use stock photographs. Some of the images are public domain and others have generous Creative Commons (or similar) licensing. Nearly all these photographs are free for personal and commercial use with minimal restrictions.
Have a look at Yotophoto Free Stock Photos Search Engine.
![]() posted by Jennifer Apple at 12:25 AM EDT | permalink
posted by Jennifer Apple at 12:25 AM EDT | permalink
• Photoshop - Recent Support Documents - 1:45 AM
Here are the most recent Photoshop documents from the Adobe Support Knowledgebase.
![]() Show Options Display The Wrong Images (Bridge 1.0.x On Windows)
Show Options Display The Wrong Images (Bridge 1.0.x On Windows)
Issue: When you choose a Show command from the View menu in Adobe Bridge, the wrong images, or groups of images, appear.
![]() View document at the Adobe Support Knowledgebase.
View document at the Adobe Support Knowledgebase.
Keyboard Shortcut For Zoom In Displays Spotlight Menu (Photoshop CS-CS2, Photoshop Elements 3.0 On Mac OS X v10.4)
Issue: When you hold Command and Space Bar to change the cursor to the Zoom In tool (magnifying glass) in Adobe Photoshop CS-CS2 or Adobe Photoshop Elements 3.0 on Mac OS X v10.4, the Spotlight menu appears.
![]() View document at the Adobe Support Knowledgebase.
View document at the Adobe Support Knowledgebase.
Brush Preset Picker Does Not Close When You Double-click It (Photoshop CS2)
Issue: The Brush Preset Picker menu in the Adobe Photoshop CS2 Options bar does not close when you double-click a brush preset.
![]() View document at the Adobe Support Knowledgebase.
View document at the Adobe Support Knowledgebase.
Keyboard Shortcut For Selecting Highlights Doesn't Work (Photoshop CS, CS2 On Mac OS X v10.4)
Issue: Nothing happens when you press Command+Option+` to select highlights in an image in Adobe Photoshop on Mac OS X v10.4.
![]() View document at the Adobe Support Knowledgebase.
View document at the Adobe Support Knowledgebase.
![]() posted by Jennifer Apple at 2:21 AM EDT | permalink
posted by Jennifer Apple at 2:21 AM EDT | permalink
![]()
JUNE 16 2005
• Alien Skin Software Announces Eye Candy 5: Impact
 Alien Skin Software have announced Eye Candy 5: Impact. A set of 10 plug-in filters for Adobe Photoshop and other compatible host programs, Impact creates chrome, bevels, glass buttons, perspective shadows, and more.
The third of three upgrades to Eye Candy 4000, Impact features three all-new filters and seven rewritten Eye Candy classics. Embossing effects now include additional preset bevel shapes and all-new surface texture controls. Gel, glass, chrome and liquid metal effects now showcase a wide variety of vibrant reflections. Impact creates an array of drop and perspective shadows, as well as reflections.
In addition, Impact showcases three all-new filters. The Backlight filter projects dramatic light beam and spotlight effects. Brushed Metal simulates textured metal surfaces such as brushed aluminum and polished brass. Extrude gives 2D objects a classic 3-D look, adding thickness and perspective.
Impact will be the third Eye Candy 5 plug-in collection. The first, Eye Candy 5: Textures, was released in 2004 and produces a variety of seamless textures such as snake and lizard skin, fur, brick, stone and wood. Eye Candy 5: Nature followed in 2004 and creates fire, smoke, rust, ice, snow and more.
Impact is expected to ship in July at an estimated street price of $99. Registered users of other Alien Skin Software products will receive discount pricing when ordering direct. Online delivery will be available at the Alien Skin Web site.
![]() posted by Jennifer Apple at 12:25 AM EDT | permalink
posted by Jennifer Apple at 12:25 AM EDT | permalink
• Adobe Issues Security Update for Windows Creative Suite Products
![]() Adobe is advising users of Photoshop CS and Creative Suite to download and install a security update. The update addresses a potential vulnerability in the Adobe License Management Service, which is installed with various Adobe products that require product activation.
Adobe is advising users of Photoshop CS and Creative Suite to download and install a security update. The update addresses a potential vulnerability in the Adobe License Management Service, which is installed with various Adobe products that require product activation.
Note that Adobe is not aware of any report of malicious code that exploits this vulnerability, but Adobe wants to be proactive by providing users with a simple mechanism to protect their systems.
![]() View document at the Adobe Support Knowledgebase.
View document at the Adobe Support Knowledgebase.
![]() posted by Jennifer Apple at 12:25 AM EDT | permalink
posted by Jennifer Apple at 12:25 AM EDT | permalink
![]()
JUNE 15 2005
• Extensis Offers 50% Discount On Imaging Suite And Creative Tools
 Extensis is offering their Photo Imaging Suite or any of their Creative Tools for 50% off its regular price. Save $250 on the Photo Imaging Suite, and save $100 on Mask Pro, pxl SmartScale, PhotoFrame, and Intellihance Pro.
Offer ends midnight, June 24, 2005. Offer applies only to English, full product purchases of the Extensis Photo Imaging Suite and Extensis Creative Tools.
![]() For more details visit the Extensis site.
For more details visit the Extensis site.
![]() posted by Jennifer Apple at 12:25 AM EDT | permalink
posted by Jennifer Apple at 12:25 AM EDT | permalink
• Veer Introduces New Shuttleboard Interactive Lightbox
 Veer today announced the addition of Shuttleboard (patent applied for) to the company's web site at veer.com. Shuttleboard is a new interactive web-based lightbox mode that significantly improves creative professionals' ability to view, sort, and manipulate images and type before purchasing. The new lightbox mode, with its large workspace and sophisticated functionality - such as scale, crop, and layer - offers creatives a flexible alternative to typical lightboxes. Registered users on the Veer web site can now choose from standard mode or Shuttleboard mode on every lightbox. An overview of Shuttleboard features is available via the online tutorial.
Using Shuttleboard mode, users can resize, move, crop, and interact with images and type around a spacious work area. Typeface samples are editable, allowing users to enter text, compare fonts side by side, or get a feel for how images and type work together before they purchase. Shuttleboard facilitates collaboration - lightboxes can be e-mailed, edited, annotated, and shared by team members or clients who are registered on the Veer web site.
"Shuttleboard dares to tread where other ordinary lightboxes have yet to set foot," comments Cameron Moll, well-known designer, speaker, and creator of the popular design blog Authentic Boredom. "To combine the utility of a lightbox with a highly intuitive, online comping application is sheer genius. Veer's Shuttleboard is a better way to picture combinations of photography and type in a proposed layout. Shuttleboard shortens the process between search, comp, and buy."
![]() For more info and to follow the Shuttleboard tutorial, visit veer.com/shuttleboard
For more info and to follow the Shuttleboard tutorial, visit veer.com/shuttleboard
![]() posted by Jennifer Apple at 12:25 AM EDT | permalink
posted by Jennifer Apple at 12:25 AM EDT | permalink
• Photoshop Tip: Turn Off Font Preview
![]() Is the WYSIWYG font preview really annoying you? It's just one of those things-some people love it and some hate it. Well, if you're part of the latter group you can turn it off. However, doing so isn't very intuitive since there's no "Turn off Font Preview" setting. Press Command-K (PC: Control-K) to display the Preferences dialog box. Choose Type and uncheck Font Preview Size. This turns the font preview off altogether.
Is the WYSIWYG font preview really annoying you? It's just one of those things-some people love it and some hate it. Well, if you're part of the latter group you can turn it off. However, doing so isn't very intuitive since there's no "Turn off Font Preview" setting. Press Command-K (PC: Control-K) to display the Preferences dialog box. Choose Type and uncheck Font Preview Size. This turns the font preview off altogether.
![]() reprinted by permission and sponsored by the NAPP
reprinted by permission and sponsored by the NAPP
![]()
JUNE 14 2005
• X-Rite's Pulse ColorElite System Wins Award from Photoshop User Magazine
 X-Rite today announced that its new Pulse ColorElite System has won Photoshop User Magazine's Five Star Award. The product review will be featured on page 84 of the upcoming July/August issue of the publication, which hits stands today. This is one of several favorable reviews Pulse has received since it began shipping in late 2004.
"X-Rite is thrilled and honored to receive the Five Star Award from an industry leading publication like Photoshop User Magazine," said Scott Bowman, Director of X-Rite's Graphic Arts Business. "The reception to Pulse has been outstanding since we first previewed the product at Drupa last year. Photography and design professionals worldwide have truly embraced Pulse as the new standard for performance and ease-of-use."
![]() Visit the X-Rite site.
Visit the X-Rite site.
![]() posted by Jennifer Apple at 2:25 AM EDT | permalink
posted by Jennifer Apple at 2:25 AM EDT | permalink
• Image Editing With Photoshop CS2's Spot Healing Brush
From Graphics.com: The Spot Healing Brush in Photoshop CS2 replaces foreground elements with interpolated background data, with just a few swipes of the brush.
![]() Read Image Editing with Photoshop CS2's Spot Healing Brush.
Read Image Editing with Photoshop CS2's Spot Healing Brush.
![]() posted by Jennifer Apple at 2:25 AM EDT | permalink
posted by Jennifer Apple at 2:25 AM EDT | permalink
• 10,000 Brushes For Photoshop & Create Your Own Engravings
Here are two entries from a plug-ins article at Creativepro.com: Abneil Software's $30 Graphicxtras Brushes Collection packs in 10,000 brushes for Photoshop. The 35 folders each hold multiple brush sets. Blurred, Dots, Lines, Noise, Pencil Sketch, Scatter, Stars, and Wispy are just a few of the many brushes in this collection. You can use some as shapes, while others are realistic. Many contain shape dynamics that twist and turn as you use them. Try making frames around images with the large brushes.
Andromeda Software's Cutline Filter ($69) is a plug-in for Photoshop 5.5 through CS that converts a grayscale image to a black-and-white engraving similar to the portraits on American currency. It provides interactive control over the spacing of the lines as well as the angle of the curves, giving you complete freedom to create the engraving of your dreams.
![]() posted by Jennifer Apple at 2:25 AM EDT | permalink
posted by Jennifer Apple at 2:25 AM EDT | permalink
![]()
JUNE 13 2005
• Photoshop Tip: Delete Swatch From Color Palette
 From CreativeBits.com: You surely know that in Photoshop you can drop the foreground color to the swatches palette for later reference just by clicking on an empty area of the swatches palette.
But, did you know that it's as easy to delete one too? Unfortunately just dragging the swatch out won't work. However, you can drag it to the tiny trash icon. Even simpler is to press the Alt (Option) key and the cursor turns into a scissor that will allow you to delete a swatch instantly just by clicking on it.
Keep your color palette tidy and if you spent lot of time setting it up, make sure to save it for later use together with the project you worked on.
![]() reprinted by permission, courtesy of Ivan Raszl at CreativeBits
reprinted by permission, courtesy of Ivan Raszl at CreativeBits
![]() posted by Jennifer Apple at 12:25 AM EDT | permalink
posted by Jennifer Apple at 12:25 AM EDT | permalink
• Kirsty (brushes.500ml.org) Has A New Brush Set
 Kirsty sends this in: "It's time again for a new brush set: Forensic Tools. Yup, it contains almost everything to do with forensics: gloves, fingerprint powder, cotton swabs, evidence bags, etc. In short, the whole works! Go take a look for yourself."
![]() posted by Jennifer Apple at 12:25 AM EDT | permalink
posted by Jennifer Apple at 12:25 AM EDT | permalink
• Photoshop Tip: Stop the "Click-And-Jump-To-That-Layer" Blues
![]() Problem: All of a sudden, every time you click on a layer with the Move tool, it jumps to that layer. Solution: Somehow you turned on a feature called Auto Select Layer, which lets you make a layer active by just clicking on it with the Move tool. To turn this feature off, click on the Move tool, and up in the Options Bar, turn off the checkbox for Auto Select Layer. Besides, you never really need to turn this feature on, because you can just hold the Command key (PC: Control key) and click on any layer.
Problem: All of a sudden, every time you click on a layer with the Move tool, it jumps to that layer. Solution: Somehow you turned on a feature called Auto Select Layer, which lets you make a layer active by just clicking on it with the Move tool. To turn this feature off, click on the Move tool, and up in the Options Bar, turn off the checkbox for Auto Select Layer. Besides, you never really need to turn this feature on, because you can just hold the Command key (PC: Control key) and click on any layer.
![]() reprinted by permission and sponsored by the NAPP
reprinted by permission and sponsored by the NAPP
![]() posted by Jennifer Apple at 12:25 AM EDT | permalink
posted by Jennifer Apple at 12:25 AM EDT | permalink
![]()
JUNE 10 2005
• I Cover The Waterfront... (link love)
Here's my latest collection of assorted Photoshop tutorials, tips, news and tidbits...
Adobe Bridge Overview & Tips
From Heathrowe.com: In Photoshop CS2 and Creative Suite 2, the Bridge has proved a remarkable improvement from the previous File Browser. Here's a brief overview and some helpful tips.
CS2 Layers Tip From Jan Kabili
From The Unofficial Photoshop Weblog: In Linking Layers In CS2, Jan explains some changes that have been implemented in CS2 for linking layers.
Making Image Color Balance Adjustments in Photoshop
From Graphics.com: After you've optimized the overall tonality of your image, the next step is typically color adjustments. Tim Grey shows you some tips in this tutorial adapted from Photoshop CS2 Workflow: The Digital Photographer's Guide.
Removing A Blue Haze
From Lunacore.com: This tutorial shows a technique to remove the blue haze that you will quite often encounter in pictures of mountains and valleys.
Looking Inside a Raw File
From Where Is Ben: David Cardinal has an interesting article about what's contained in a Raw format image.
Adobe Bridge Update (WIN) & A Bridge Problem Workaround
From PhotoshopNews.com: See Adobe Bridge 1.0.1 Update Available for Windows Download, and Folders With an Apostrophe Breaks Bridge & Camera Raw.
![]() posted by Jennifer Apple at 12:02 AM EDT | permalink
posted by Jennifer Apple at 12:02 AM EDT | permalink
Photoshop Top Issues
![]() "Error 2: photoshop is undefined..." when you browse to Bridge from Photoshop (CS2)
"Error 2: photoshop is undefined..." when you browse to Bridge from Photoshop (CS2)
Issue: Adobe Photoshop returns the error, "Error 2: photoshop is undefined. Line 1 - photoshop.invokeBridge (false, false, ");" when you attempt to start Adobe Bridge by choosing File Browse or by clicking Go To Bridge in the Options bar.
![]() View this document at the Adobe Support Knowledgebase.
View this document at the Adobe Support Knowledgebase.
Functions, names, and locations of preferences files (Photoshop CS2, ImageReady CS2)
Use this document to find or re-create preferences files for Adobe Photoshop CS2 and Adobe ImageReady CS2. Preferences files vary by name and location for each version, with each version storing its own preference settings in a different set of files.
![]() View this document at the Adobe Support Knowledgebase.
View this document at the Adobe Support Knowledgebase.
Ctrl-click or Command-click on layer doesn't load layer boundaries as selection (Photoshop CS2)
Issue: When you Ctrl-click (Windows) or Command-click (Mac OS) the name of a layer in the Layers palette in Adobe Photoshop, the layer boundaries don't load as a selection.
![]() View this document at the Adobe Support Knowledgebase.
View this document at the Adobe Support Knowledgebase.
![]() posted by Jennifer Apple at 1:02 AM EDT | permalink
posted by Jennifer Apple at 1:02 AM EDT | permalink
Photoshop Recent Support Documents
![]() Troubleshoot problems detecting a digital camera (Photoshop CS-CS2, Photoshop Elements 2.0-3.0, Photoshop Album 2.0, Bridge 1.0)
Troubleshoot problems detecting a digital camera (Photoshop CS-CS2, Photoshop Elements 2.0-3.0, Photoshop Album 2.0, Bridge 1.0)
This document can help you to resolve problems that occur when you connect a digital camera to your computer to import images using Adobe Photoshop, Adobe Photoshop Elements, Adobe Photoshop Album, or Adobe Bridge.
![]() View this document at the Adobe Support Knowledgebase.
View this document at the Adobe Support Knowledgebase.
Slow performance and screen redraw problems in Photoshop (CS2 on Windows)
You may encounter performance or redraw issues in Adobe Photoshop CS2 if you run it on a computer that has an older video card installed or that uses an older video card driver because of the increased demand in Photoshop for system resources. Older video cards use slower processors and less RAM than is optimal for processing screen redraws in Photoshop.
![]() View this document at the Adobe Support Knowledgebase.
View this document at the Adobe Support Knowledgebase.
Error: "...problem with the database and '[file name]' was not updated..." and folders display as white boxes (Bridge 1.0 for Mac OS)
Issue: When you open a folder in Adobe Bridge for the first time, you see the error "There was a problem with the database and "[file name]" was not updated correctly. This may effect searches..." Images in the folder, including the one referenced in the error message, display correctly, but you are unable to browse into other folders, which appear as white boxes in Adobe Bridge.
![]() View this document at the Adobe Support Knowledgebase.
View this document at the Adobe Support Knowledgebase.
![]() posted by Jennifer Apple at 1:02 AM EDT | permalink
posted by Jennifer Apple at 1:02 AM EDT | permalink
• Total Training Offers A "15% Off" Special Discount Coupon
Total Training is offering a limited time 15% off Discount Coupon Code. To apply this to a purchase, follow this link, and at checkout enter the following code: save15aff.
To review some of the available training, see our Total Training Sample Clips Page where you'll find a selection of free sample video clips, including clips from Adobe Photoshop CS2 with Deke McClelland.
NOTE: This offer excludes bundles and closeouts.
![]() posted by Jennifer Apple at 12:02 AM EDT | permalink
posted by Jennifer Apple at 12:02 AM EDT | permalink
• One More PDF From The Adobe Evangelists Site - Power Shortcuts
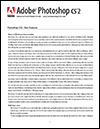 From the Power Shortcuts PDF: "In Photoshop CS2, many of the shortcuts for the application menus, palette menus and tools can be customized using the Keyboard Shortcuts editor. Although this document mentions some of the more common editable shortcuts, it also provides additional functionality only accessible through using keyboard modifiers which can't be changed through the Keyboard Shortcut editor." To help organize the document, it is subdivided into the following 6 categories:
- Part 01 The Tool Palette
- Part 02 Navigating the Work Area
- Part 03 Palette Shortcuts
- Part 04 Adobe Bridge
- Part 05 Camera Raw
- Part 06 Grab Bag (everything else)
[20 pages - 136 KB]
![]() Go to the Adobe Evangelists Site.
Go to the Adobe Evangelists Site.
![]() posted by Jennifer Apple at 12:29 AM EDT | permalink
posted by Jennifer Apple at 12:29 AM EDT | permalink
• Color Composer Pro Version - Free Demo
 Master Colors, LLC has announced a free downloadable demo version of its award winning, dynamic palette generating software, the HVC Color Composer Pro Version, a plug-in for Adobe Photoshop. Along with the demo version of the software, you can also download a practice template and take free online color lessons.
"This is an absolute must have plug-in for professional artists, photographers, and designers," says Neil Murphy, Vice President of Sales & Marketing for Master Colors, LLC. "Finally, the Master Colors HVC Color composer gives every Photoshop user complete power over color in an intuitive and easy way. Just wait until you create a color composition using the Master Colors HVC Color Composer – you won't believe how easy it is!"
A very favorable review of the HVC Color Composer can be found in the May/June premiere edition of Layers Magazine (formerly MacDesign Magazine).
![]() Download the Layers Magazine review (PDF).
Download the Layers Magazine review (PDF).
![]() Download the HVC Color Composer demo.
Download the HVC Color Composer demo.
![]() Download the practice template and take a free color lesson.
Download the practice template and take a free color lesson.
![]() posted by Jennifer Apple at 12:02 AM EDT | permalink
posted by Jennifer Apple at 12:02 AM EDT | permalink
![]()
JUNE 09 2005
• Jan Kabili Is Posting At The Unofficial Photoshop Weblog
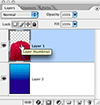 It looks like Jan Kabili is now an official blogger at the Unofficial Photoshop Weblog. This is great news, as Jan is an excellent Photoshop author and trainer, and the Photoshop community is lucky to have her sharing her expertise. She's already posted a couple of great tips.
In "Selecting The Contents Of A Layer" Jan shows you the new way to create a selection around the non-transparent contents of a layer in CS2, and in "The New CS2 Layers Palette" she shows you the new and improved way to select multiple layers in CS2.
![]() posted by Jennifer Apple at 12:15 AM EDT | permalink
posted by Jennifer Apple at 12:15 AM EDT | permalink
• CS2 PDFs From The Adobe Evangelists Site
There are 5 PDFs by Julieanne Kost and Daniel Brown that you can download from the Adobe Evangelists site that contain an enormous amount of info about Photoshop CS2. Here's a breakdown of what's covered:
What's New in CS2 - In-depth Information About All The Big New Features
This document lists some of the new features in Photoshop CS2, and offers some background and tips.
But Wait! There's More! - All Of The Other Cool Stuff In Photoshop CS2
From the PDF: "This document is intended to point out some of the more subtle changes between Photoshop CS and Photoshop CS2 so that the more seasoned users can quickly get up to speed."
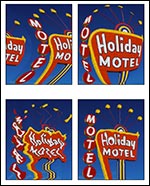 Filters in Adobe Photoshop CS2
Wow, talk about comprehensive! This is a long chart that shows variations of a single image that has been transformed by applying one of the artistic filters.
Adobe Bridge - The Next-generation File Browser
From the PDF: "This document is by no means a "step-through" of the features in the Adobe Bridge, rather its a jump-start for more seasons users to quickly get up to speed by focusing on only the differences and added functionality between the Bridge and it's predecessor, the File Browser."
Camera Raw - Everything You Need To Know About Camera Raw
This document gives you a good overview of Camera Raw for Photoshop CS2 and includes benefits of shooting in raw files, explains Multi-file Camera Raw editing and conversion, and has an explanation of the various tools you'll encounter.
Image Size - Common Questions - Answered!
Questions include:
- What is the relationship between mega pixels, file size, image size, and print size?
- How do I figure out how at what size to scan? What resolution (ppi) should I send to my ink jet printer?
- What resolution do I need to send my images to the printing press?
- How large should I save an image when creating a slide show on my computer?
- What resolution should I use to post my images on my web site?
- Printing using an online service.
Where Things Are - Where does Photoshop CS2 keep _______?
This is a list of the location of the most commonly requested files.
HDR (Hi-Dynamic Range) - Supported Features in HDR
Topics include: Available features for Editing in HDR, and Tips for taking HDR Merge Exposures.
![]() Go to the Adobe Evangelists Site.
Go to the Adobe Evangelists Site.
![]() posted by Jennifer Apple at 12:15 AM EDT | permalink
posted by Jennifer Apple at 12:15 AM EDT | permalink
• Photoshop Tip: Save Room in Your Layers Palette
![]() This is a quick little tip for keeping your layers palette shorter and more manageable. When you apply a layers style to your layers, each effect is listed separately in the layers palette by default. If you apply five or six effects to one layer, it takes up a ton of room in your palette, and before you know it, you're scrolling farther and farther down the palette. To have it take up dramatically less space, collapse the effects in the palette by clicking on the down-facing triangle next to the little "f" icon to the right of the layers name in the Layers palette. You can expand this list of effects anytime by clicking in the same spot.
This is a quick little tip for keeping your layers palette shorter and more manageable. When you apply a layers style to your layers, each effect is listed separately in the layers palette by default. If you apply five or six effects to one layer, it takes up a ton of room in your palette, and before you know it, you're scrolling farther and farther down the palette. To have it take up dramatically less space, collapse the effects in the palette by clicking on the down-facing triangle next to the little "f" icon to the right of the layers name in the Layers palette. You can expand this list of effects anytime by clicking in the same spot.
![]() reprinted by permission and sponsored by the NAPP
reprinted by permission and sponsored by the NAPP
![]() posted by Jennifer Apple at 12:22 AM EDT | permalink
posted by Jennifer Apple at 12:22 AM EDT | permalink
![]()
JUNE 08 2005
• Looking For Photoshop Answers
![]() Heathrowe.com has updated their Photoshop FAQ section, which now features over 90 entries spread over 5 pages.
Heathrowe.com has updated their Photoshop FAQ section, which now features over 90 entries spread over 5 pages.
![]() Go to the Photoshop FAQ section at Heathrowe.
Go to the Photoshop FAQ section at Heathrowe.
![]() posted by Jennifer Apple at 12:25 AM EDT | permalink
posted by Jennifer Apple at 12:25 AM EDT | permalink
• Should You Buy A Canon Rebel XT Or 20D?
Ben Long has always been our go-to guy for digital photography, and in this article he compares the Rebel and the EOS 20D.
From the intro: "What's $500 worth these days? There are many measures of the worth of a dollar, of course. To use a currency standard that is generally accepted here in San Francisco, $500 will get you roughly 83 burritos. For the digital photographer, $500 is the difference between a Canon Digital Rebel XT and a Canon EOS 20D."
![]() Go to article at Complete Digital Photography.
Go to article at Complete Digital Photography.
![]() posted by Jennifer Apple at 12:25 AM EDT | permalink
posted by Jennifer Apple at 12:25 AM EDT | permalink
• How Many Free Fonts?
EKNP Free Fonts features a huge collection of over 1,500 fonts. You have the choice of either downloading them individually for free, or else all at once for $4.95.
![]() Go to the EKNP Free Fonts site.
Go to the EKNP Free Fonts site.
![]() posted by Jennifer Apple at 12:25 AM EDT | permalink
posted by Jennifer Apple at 12:25 AM EDT | permalink
• Photoshop Tip: When A Little Is Too Much
![]() From CreativeGuy.com: When you apply a filter in Photoshop, sometimes you wish you could just lessen the result of the filter a little bit, without having to wait for the entire filter to run on the image again. It's almost like the filter applied too much effect for your taste.
From CreativeGuy.com: When you apply a filter in Photoshop, sometimes you wish you could just lessen the result of the filter a little bit, without having to wait for the entire filter to run on the image again. It's almost like the filter applied too much effect for your taste.
It's easy to adjust the result of a filter after it has already been applied. You simply go to Filter> Fade or Edit> Fade right after you apply the filter, which will lessen the effect of the filter.
![]() reprinted by permission, courtesy of Jim Dempsey at CreativeGuy
reprinted by permission, courtesy of Jim Dempsey at CreativeGuy
![]() posted by Jennifer Apple at 12:25 AM EDT | permalink
posted by Jennifer Apple at 12:25 AM EDT | permalink
![]()
JUNE 07 2005
• Link Love
Some Photoshop tutorials, tips and tidbits...
Plugin People: Interview With Nils Kokemohr From nik Multimedia
From Graphics.com: Photoshop plugin developer Harald Heim talks with Nils Kokemohr, the founder of nik multimedia, in the second installment of this ongoing series.

Color Management For Your Digital Workflow
From Apple.com: A free online seminar from Apple that helps demystify color management.
Synchronizing Color Across Adobe CS2 Applications with Bridge
From Graphics.com: Chris Murphy demonstrates how to choose the right color settings and synchronize across Adobe Creative Suite 2 applications.
Faking Long Exposures in Photoshop
From ArtWorld.com: This free 15-minute video tutorial will teach you how to fake long exposures in your photos using Photoshop. You will also learn how to use the same technique in regular photography.
10 Tips For Great Flower Photography
From Pixel Perfect Digital: Some helpful tips for taking photos of flowers.
Creating Stubble And Beards In Photoshop
From Graphics.com: What if the client loves the layout but wants the male model to have a trendy touch of stubble? See how to do it.
![]() posted by Jennifer Apple at 12:13 AM EDT | permalink
posted by Jennifer Apple at 12:13 AM EDT | permalink
• Canon Announces The New EOS 20Da Digital SLR
 The new EOS 20Da digital SLR (based on the popular EOS 20D camera) helps address the specific requirements of astrophotography with features such as a live preview LCD and a modified low-pass filter optimized to help photograph the clear night sky in brilliant detail.
![]() Read the press release.
Read the press release.
![]() posted by Jennifer Apple at 12:12 AM EDT | permalink
posted by Jennifer Apple at 12:12 AM EDT | permalink
• User Interface Control
![]() Long hours in front of a computer monitor can wreak havoc on your eyes. Give them a break by increasing the font size of the Photoshop User Interface. In Photoshop CS2 you can do so in the General Preferences.
Long hours in front of a computer monitor can wreak havoc on your eyes. Give them a break by increasing the font size of the Photoshop User Interface. In Photoshop CS2 you can do so in the General Preferences.
- Choose Edit > Preferences > General.
The General Prefs dialog box opens.
Select Large from the UI Font Size dropdown menu and restart Photoshop.
The font size for the options bar, palettes, and tool tips are all increased. My optic nerves feel better already.
![]() reprinted by permission, courtesy of Jim Barthman at The PhotoshopHelp Blog
reprinted by permission, courtesy of Jim Barthman at The PhotoshopHelp Blog
![]() posted by Jennifer Apple at 12:11 AM EDT | permalink
posted by Jennifer Apple at 12:11 AM EDT | permalink
![]()
JUNE 06 2005
• Explore The Adobe Stock Photos Workflow
![]() From Creativepro.com: A service new in Creative Suite 2 lets you download comps free of watermarks, and it invisibly links the comps to high-res originals. This PDF article walks you through the process of downloading comps, editing them in Photoshop; placing them in Illustrator, InDesign, or GoLive; and buying the high-res version.
From Creativepro.com: A service new in Creative Suite 2 lets you download comps free of watermarks, and it invisibly links the comps to high-res originals. This PDF article walks you through the process of downloading comps, editing them in Photoshop; placing them in Illustrator, InDesign, or GoLive; and buying the high-res version.
![]() Read the article at Creativepro.com.
Read the article at Creativepro.com.
![]() posted by Jennifer Apple at 12:55 AM EDT | permalink
posted by Jennifer Apple at 12:55 AM EDT | permalink
• New Canon CanoScan LiDE 25 And CanoScan LiDE 60 Scanners
The streamlined Canon CanoScan LiDE 25, which sells for $49.99, uses one simple cable to provide both power and a USB connection, and the CanoScan LiDE 60, which sells for $79.99, uses a USB 2.0 High-Speed interface for lightning fast image transfers.
Are these things going to get any cheaper? And they both come with bundled OCR scanning software. Wow.
![]() Read the Press Release.
Read the Press Release.
![]() posted by Jennifer Apple at 12:54 AM EDT | permalink
posted by Jennifer Apple at 12:54 AM EDT | permalink
• Color Jeopardy From Pantone
 Think you know your colors? Try this color Jeopardy game from Pantone (hosted by Alex Tricolor) and see how good you are. You're given multiple choices to help you if you don't have a clue. Here's a sample...
- Answer - Babies see this color first
A: yellow
B: red
C: blue
D: don't know
No, I'm not giving away the answer!
![]() Play the Color Jeopardy Game from Pantone.
Play the Color Jeopardy Game from Pantone.
![]() posted by Jennifer Apple at 12:53 AM EDT | permalink
posted by Jennifer Apple at 12:53 AM EDT | permalink
• Photoshop Tip: Surface Blur
![]() On its own, the new Surface Blur filter can be very useful in blurring surfaces in photographs while preserving edge detail. Couple this with layer masks and you've got yourself a great way to retouch an image. Try this: Press Command-J (PC: Ctrl-J) to create a duplicate layer of the photograph you're working on. On the top copy, choose Filter>Blur>Surface Blur, choose settings that blur your photograph just enough (I chose a Radius of 5 and a Threshold of 15 pixels but you can adjust these settings to accommodate your image), then click OK. You'll notice that even through Surface Blur preserves some of the edge detail, you'll often lose a bit of detail in the process. To fix this, add a layer mask by selecting the Add vector Mask icon in the Layers palette. Press X to set your foreground to black and then press B to select the Brush tool. Now, paint over your blurred image to bring back some of the original detail.
On its own, the new Surface Blur filter can be very useful in blurring surfaces in photographs while preserving edge detail. Couple this with layer masks and you've got yourself a great way to retouch an image. Try this: Press Command-J (PC: Ctrl-J) to create a duplicate layer of the photograph you're working on. On the top copy, choose Filter>Blur>Surface Blur, choose settings that blur your photograph just enough (I chose a Radius of 5 and a Threshold of 15 pixels but you can adjust these settings to accommodate your image), then click OK. You'll notice that even through Surface Blur preserves some of the edge detail, you'll often lose a bit of detail in the process. To fix this, add a layer mask by selecting the Add vector Mask icon in the Layers palette. Press X to set your foreground to black and then press B to select the Brush tool. Now, paint over your blurred image to bring back some of the original detail.
![]() reprinted by permission and sponsored by the NAPP
reprinted by permission and sponsored by the NAPP
![]() posted by Jennifer Apple at 12:52 AM EDT | permalink
posted by Jennifer Apple at 12:52 AM EDT | permalink
![]()
JUNE 03 2005
• Newly Supported Cameras And Options Unavailable After Installing Camera Raw 3.1 Update (Adobe Bridge 1.0)
From the Adobe Support Knowledgebase
Issue: You do not see the newly supported cameras and options in Adobe Bridge 1.0 after you install the Camera Raw 3.1 update.
![]() View document at the Adobe Support Knowledgebase.
View document at the Adobe Support Knowledgebase.
![]() posted by Jennifer Apple at 2:43 PM EDT | permalink
posted by Jennifer Apple at 2:43 PM EDT | permalink
• Holding Control Or Command And Clicking A Layer Name Does Not Load Layer Boundaries As Selection (Photoshop CS2)
Issue: When you hold Control (Windows) or Command (Mac OS) and click on the name of a layer in the Layers palette in Adobe Photoshop CS2, the layer boundaries are not loaded as a selection.
Solution: Click on the layer thumbnail.
(From the Adobe Support Knowledgebase)
![]() posted by Jennifer Apple at 2:45 PM EDT | permalink
posted by Jennifer Apple at 2:45 PM EDT | permalink
• Photoshop Tip: Layer Extent At A Glance
Let's say your object is larger than your canvas and some of its parts are not visible. If you want to quickly have an understanding of how big the object is you can press Command+T (PC: Control+T) to access the Free Transform tool, which shows you the boundaries of your object even outside of the canvas area.
Then just hit ESC to abort the operation.
This is much quicker than moving the object back and forth.
![]() reprinted by permission, courtesy of Ivan Raszl at CreativeBits
reprinted by permission, courtesy of Ivan Raszl at CreativeBits
![]() posted by Jennifer Apple at 12:14 AM EDT | permalink
posted by Jennifer Apple at 12:14 AM EDT | permalink
• Photoshop Tutorial: Blend Items Into Textures
![]() From Heathrowe: An effective and seamless way to blend items into textured surfaces.
From Heathrowe: An effective and seamless way to blend items into textured surfaces.
Read the Blend Images Into Textures tutorial.
![]() posted by Jennifer Apple at 12:13 AM EDT | permalink
posted by Jennifer Apple at 12:13 AM EDT | permalink
Photoshop Tip: Mark Your Image As Copyrighted
![]() From CreativeGuy: To mark your image as copyrighted, choose File> File Info and in the Copyright Status drop-down menu, select the Copyrighted option and enter any relevant information in the fields provided. Press the OK button and note the copyright symbol ( © ) that appears in front of the image title in the document title bar.
From CreativeGuy: To mark your image as copyrighted, choose File> File Info and in the Copyright Status drop-down menu, select the Copyrighted option and enter any relevant information in the fields provided. Press the OK button and note the copyright symbol ( © ) that appears in front of the image title in the document title bar.
Tip: You can even save this information and load (or append) it later for inclusion in another image.
Tip: Right-click on a document titlebar to quickly access the File Info command.
![]() reprinted by permission, courtesy of Jim Dempsey at CreativeGuy
reprinted by permission, courtesy of Jim Dempsey at CreativeGuy
![]() posted by Jennifer Apple at 12:12 AM EDT | permalink
posted by Jennifer Apple at 12:12 AM EDT | permalink
• Framed And Exposed: Eine Kleine Nachtphoto
From Creativepro.com: Night photography opens up a whole new world, where the most mundane scenes turn magical. This is your passport to the new world. Although, as photographers, we can be snobbish and poetic about light, it's important to remember that just because it's dark outside doesn't mean there's no light. The light at night has a particular quality that can be extremely enjoyable to work with. The most obvious difference, of course, is that there's far less of it. The light that is there is almost always artificial, so night photography is akin to indoor, low-light photography. Fortunately, a good digital image sensor is much more light-sensitive than even the speediest film. Granted, there's a broad range of low-light quality to be had from a digital camera, but in general, they're well-suited to shots in the dark.
![]() Read the article by Ben Long at Creativepro.com.
Read the article by Ben Long at Creativepro.com.
![]() posted by Jennifer Apple at 12:11 AM EDT | permalink
posted by Jennifer Apple at 12:11 AM EDT | permalink
![]()
JUNE 02 2005
• Photoshop Tip: Checkered Background Customization
From CreativeBits: When working with white or light grey objects the default checkered pattern that stands for the transparent background makes it quite difficult to see the edges of your elements. It's especially difficult to judge semitransparent areas.
I've seen designers adding another locked layer below the working layers filled with a dark color. This is a good solution, except that it adds to the file size and needs to be switched on and off when saving your work with the transparent background as a gif or png.
There is a simple way to replace the light checkered background to a darker pattern or any flat color - preferably one that is not used in your artwork. Just open Preferences/ Transparency and Gamut and play around with the different settings. It only takes a few seconds and will help your work tremendously.
![]() reprinted by permission, courtesy of Ivan Raszl at CreativeBits
reprinted by permission, courtesy of Ivan Raszl at CreativeBits
![]() posted by Jennifer Apple at 12:11 AM EDT | permalink
posted by Jennifer Apple at 12:11 AM EDT | permalink
• Special Andromeda Software Deal At Photoshop Roadmap
![]() The Photoshop Roadmap has an exclusive special where you can receive an extra 10% discount on purchases of Andromeda's three plugins bundles - the Photographic Tools & Lens Effects Collection, the Artistic Screening Tools Collection, and the Graphic Design Resources Collection. This is on top of the 20% discount from Andromeda, which gives you a total of 30% off the suggested retail price. The three bundles combine the full collection of Andromeda's plugins for digital photography, web design, graphic design, and artistic work.
The Photoshop Roadmap has an exclusive special where you can receive an extra 10% discount on purchases of Andromeda's three plugins bundles - the Photographic Tools & Lens Effects Collection, the Artistic Screening Tools Collection, and the Graphic Design Resources Collection. This is on top of the 20% discount from Andromeda, which gives you a total of 30% off the suggested retail price. The three bundles combine the full collection of Andromeda's plugins for digital photography, web design, graphic design, and artistic work.
![]() Get more info at the Photoshop Roadmap Andromeda Specials page.
Get more info at the Photoshop Roadmap Andromeda Specials page.
![]() posted by Jennifer Apple at 12:11 AM EDT | permalink
posted by Jennifer Apple at 12:11 AM EDT | permalink
• Photoshop Tip: Change The Font Preview Size
![]() Font preview is a great new feature. However, the preview size may be too small or too large for your needs. To change this setting, go into Photoshop's Preferences and choose Type. Adjust the Font Preview Size setting to your liking (Small, Medium or Large).
Font preview is a great new feature. However, the preview size may be too small or too large for your needs. To change this setting, go into Photoshop's Preferences and choose Type. Adjust the Font Preview Size setting to your liking (Small, Medium or Large).
![]() reprinted by permission and sponsored by the NAPP
reprinted by permission and sponsored by the NAPP
![]() posted by Jennifer Apple at 12:02 AM EDT | permalink
posted by Jennifer Apple at 12:02 AM EDT | permalink
![]()
JUNE 01 2005
 • 32 New Grunge Textures From PixelPerfectDigital
Look through 32 new grunge textures that were all created using Picasa 2's "Picture Collage" tool, which merges several images together.
![]() Go to PixelPerfectDigital to view the grunge textures.
Go to PixelPerfectDigital to view the grunge textures.
![]() posted by Jennifer Apple at 12:22 AM EDT | permalink
posted by Jennifer Apple at 12:22 AM EDT | permalink
![]() • Bridge For Macintosh Upgraded To Version 1.0.1
• Bridge For Macintosh Upgraded To Version 1.0.1
There's an upgrade for the Mac version of Bridge available at the Adobe site. This brings the Mac version of Bridge to 1.0.1.
![]() posted by Jennifer Apple at 12:22 AM EDT | permalink
posted by Jennifer Apple at 12:22 AM EDT | permalink
• The Art of RAW Conversion 2005 - PDF Book
Digital Outback Photo has announced that its latest E-book, The Art of RAW Conversion, is now available to download for $39.95. The 290-page book authored by Uwe Steinmueller and Jürgen Gulbins explains how to get the best quality from Photoshop CS2 and a number of different RAW converters as well as understanding DNG, basic color management and how to remove noise, chromatic aberration and lens distortions.
![]() Get more info at the Digital Outback Photo site.
Get more info at the Digital Outback Photo site.
![]() posted by Jennifer Apple at 12:22 AM EDT | permalink
posted by Jennifer Apple at 12:22 AM EDT | permalink
• Image Warp in Photoshop CS2
![]() With the release of Photoshop CS2 you can take advantage of the new image Warp command to correct images that are distorted.
With the release of Photoshop CS2 you can take advantage of the new image Warp command to correct images that are distorted.
- 1- Start by duplicating the Background layer by dragging it over the New Layer icon located at the bottom of layers palette.
2- A layer named "Background copy" is created.
3- Single-click the new layer to select it, if it isn't selected already.
4- Choose Image > Transform > Warp
5- A grid with control points and handles appear over the image layer.
6- Click and drag the points or handles to manipulate the grid and transform the layer to eliminate the distortion. To correct a fish eye problem, you'll probably want to click and drag each of the four corner points outside of the image area.
7- To commit your warp, click the Commit button in the option bar or press Enter (PC) or Return (Mac)
Protect your pixels: Multiple warps will reduce the quality of bitmapped images. Keep transformations to a minimum to reduce pixel loss.
![]() reprinted by permission, courtesy of Jim Barthman at The PhotoshopHelp Blog
reprinted by permission, courtesy of Jim Barthman at The PhotoshopHelp Blog
![]() posted by Jennifer Apple at 12:31 AM EDT | permalink
posted by Jennifer Apple at 12:31 AM EDT | permalink
![]()
Photoshop CS5 & Photoshop CS5 Extended - Best Deals From Adobe
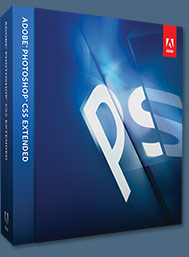 Adobe Photoshop CS5 delivers breakthrough capabilities to help you create images with impact. Refine your
images with reengineered photography tools for removing noise, adding grain, and creating high dynamic
range (HDR) images. Get precise results when making complex selections. Remove any image element and
see the space fill in almost magically. Paint with naturally textured brushstrokes and realistic color blends. Learn more about Photoshop CS5.
Adobe Photoshop CS5 Extended software helps you create the ultimate images
for print, the web, and video. Enjoy all the state-of-the-art editing, compositing,
and painting capabilities in industry-standard Photoshop CS5, and experience
fast performance thanks to cross-platform 64-bit support. Also create 3D extrusions
for logos, artwork, and motion graphics; edit 3D objects with advanced tools; and create and enhance motion-based content. Learn more about Photoshop CS5 Extended.
Find CS5 upgrade options and Creative Suite 5 deals at the Adobe Store. See CS5 pricing in UK currency at the Adobe UK Store. Visit the Adobe Special Offers page to find the latest deals. Save 80% on Adobe Student Editions. Try before you buy — download a free Photoshop CS5 trial.
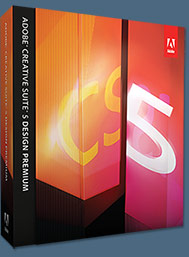 Adobe Creative Suite 5 Design Premium
Adobe Creative Suite 5 Design Premium software gives you fresh new creative tools, along
with the ability to deliver ideas faster in print and create interactive content without writing
code. Plus Design Premium integrates with Adobe CS Live online services to maximize
your design time by streamlining critical nondesign tasks.
Adobe Creative Suite 5 Design Premium combines Adobe InDesign CS5, Photoshop CS5 Extended, Illustrator CS5, Flash CS5 Professional, Dreamweaver CS5, Fireworks CS5, and Acrobat Pro with additional tools and services. Download a free CS5 Design Premium 30 day trial.
Photoshop CS5 Tutorials & CS5 Resources
See our Photoshop CS5 Resource Center for Free Photoshop CS5 Tutorials, and the Free Photoshop CS5 Trial Download. See our Photoshop CS4 Resource Center for Free Photoshop CS4 Tutorials.
![]()
Exclusive onOne Software 15% Instant Discount Coupon
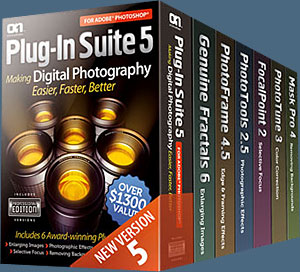 Enter our exclusive discount coupon code - PSSPPT06 - during the checkout process at onOne Software for an instant 15% discount on any onOne product. This includes Genuine Fractals and their amazing Photoshop Plug-In Suite.
OnOne’s new Plug-In Suite solves six of the most frequent problems photographers will encounter in Photoshop. This suite has been granted American Photos Magazine’s Editor’s Choice award for Top Image Editing Software. The Plugin Suite includes:
Genuine Fractals Pro is renowned by both photographers and printers for its finesse at increasing images to more than ten times their original size while maintaining the sharpness and detail you started with. Think of this as the industry standard for image resizing.
Mask Pro is used to remove the tough stuff — such as hair, smoke and glass — while retaining the fine detail. You choose what colors to keep, then paint away what you don’t need.
 PhotoTools Pro packs hundreds of high-calibre photographic effects into one user-friendly plug-in. It’s fast and easy to use. Gives your photos that pro quality look.
PhotoFrame Pro lets you enhance your pictures with hundreds of such design effects, or simply drop your image into a pre-fab layout in Photoshop, Lightroom or Aperture.
FocalPoint helps to control focus and minimize visual noise. Draw the eye to specific points in your images by using selective focus, depth-of-field and vignette effects.
PhotoTune lets you can compare images side-by-side and easily color correct and enhance them. PhotoTune optimizes the dynamic range, color and sharpness of your image without the need to know all the complicated controls in Photoshop like levels and curves.
Simply enter our exclusive discount coupon code - PSSPPT06 - during the checkout process at onOne Software for an instant 15% discount on any onOne product.
![]()
Nik Software 15% Instant Discount - Exclusive 15% Coupon
Enter our exclusive discount coupon code - NIKPSS - during the checkout process at Nik Software for an instant 15% discount on any Nik Software product. This exclusive discount coupon code can be applied to all the latest Nik Software Photoshop plugins, including Silver Efex Pro, Color Efex Pro, Viveza, Sharpener Pro, and Dfine.
Color Efex Pro
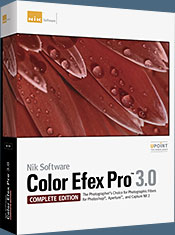 52 photographic filters with over 250 effects for professional quality images.
Completely Original. Completely Indispensable.
Nik Software Color Efex Pro filters are the leading photographic filters for digital photography. The award-winning Color Efex Pro filters are widely used by many of today's professional photographers around the world to save time and get professional level results. Whether you choose the Complete Edition, Select Edition, or Standard Edition, you’ll get traditional and stylizing filters that offer virtually endless possibilities to enhance and transform images quickly and easily.
Patented U Point technology provides the ultimate control to selectively apply enhancements without the need for any complicated masks, layers or selections. Control color, light and tonality in your images and create unique enhancements with professional results. With 52 filters and over 250 effects found in Color Efex Pro, you can perform high quality retouching, color correction, and endless creative enhancements to your photographs. Download a free Trial version.
Viveza
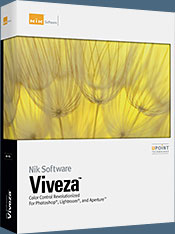 The most powerful tool to selectively control color and light in photographic images without the need for complicated selections or layer masks.
Two of the most important factors in creating great photography are color and light. Mastering the art of selectively correcting or enhancing each of these is now possible for every photographer without the need for complicated masks or selections, or expert-level knowledge of Photoshop. Integrating award-winning U Point technology, Viveza is the most powerful and precise tool available to control light and color in photographic images.
U Point powered Color Control Points, placed directly on colors or objects in an image (such as sky, skin, grass, etc.), reveal easy-to-use controls that photographers can use to quickly adjust brightness, contrast or color in a fraction of the time needed by other tools. With Viveza you’ll spend more time shooting photographs and save hours of image editing. Download a free Trial version.
Silver Efex Pro
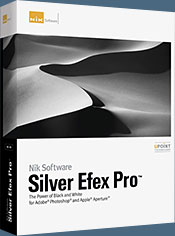 Complete power and control to create professional quality black and white images in one convenient tool.
Silver Efex Pro from Nik Software is the most powerful tool for creating professional quality black and white images from your photographs. For the first time, all the advanced power and control required for professional results have been brought together in one convenient tool.
Featuring Nik Software’s patented U Point technology to selectively control the tonality and contrast of the image, Silver Efex Pro includes advanced imaging algorithms to protect against unwanted artifacts, a comprehensive collection of emulated black and white film types, a variable toning selector for adding traditional toning techniques, over 20 one-click preset styles, and a state-of-the-art grain reproduction engine that help produce the highest quality black and white images possible from your color images while providing more freedom to experiment. Download a free Trial version to use Silver Efex Pro.
Enter our exclusive discount coupon code - NIKPSS - during the checkout process at Nik Software for an instant 15% discount. This exclusive discount coupon code can be applied to all the latest Nik Software Photoshop plugins, including Silver Efex Pro, Color Efex Pro, Viveza, Sharpener Pro, and Dfine.
![]()
Exclusive 15% Discount On All Topaz Plugins - Use Coupon Code PHOTOSHOPSUPPORT - Includes Bundles And Upgrades
 Enter our exclusive discount coupon code PHOTOSHOPSUPPORT during the checkout process at Topaz Labs for an instant 15% discount on any Topaz product, including bundles and upgrades.
Topaz Labs Photoshop plug-ins are specifically designed to expand a photographer's creative toolbox by harnessing powerful image technology developments. Photographers everywhere are now taking advantage of the creative exposure effects, artistic simplification, unique edge manipulation, and top-of-the-line noise reduction offered in Topaz products. The Topaz Photoshop Plugins Bundle is a super powerful Photoshop plugins package that includes the following Topaz products:
Topaz Adjust
Deliver stunning and dynamic images with this uniquely powerful plug-in that features HDR-like abilities and enhances exposure, color and detail.
 Topaz Detail
A three-level detail adjustment plug-in that specializes in micro-contrast enhancements and sharpening with no artifacts.
Topaz ReMask
The fastest and most effective masking and extraction program with one-click mask refining.
Topaz DeNoise
Highest-quality noise reduction plug-in that removes the most noise and color noise while preserving the most image detail.
Topaz Simplify
Provides creative simplification, art effects, and line accentuation for easy one-of-a-kind art.
Topaz Clean
Take control of the detail depth of your images with extensive smoothing, texture control and edge enhancement tools.
Topaz DeJPEG
Drastically improves the quality of web images and other compressed photos.
Learn more about the Topaz Photoshop Plugins Bundle. Download a free trial version.
![]()
Photoshop Masking Plugin Fluid Mask - Exclusive Instant Discount
 The 4 1/2 out of 5 star review of Fluid Mask at MacWorld begins by saying that this "Photoshop plug-in takes the pain out of extracting backgrounds," and goes on to recommend the latest version, stating that "Fluid Mask is a very effective tool for separating objects from their backgrounds. It offers a variety of useful features for tackling almost any difficult image, from wispy hair to complex foliage. Online video tutorials and live training sessions help ease the learning curve."
Our friends at Vertus, the makers of Fluid Mask Photoshop Plugin, have set up a special exclusive discount for PhotoshopSupport.com. Go to our Fluid Mask page for a special, exclusive discount link.
Fluid Mask is designed for photographers, image editors, graphic designers and all those who take digital image editing seriously. In a streamlined interface and workflow, Fluid Mask instantly shows key edges in the image and provides comprehensive easy to use tools that work with difficult-to-see edges and tricky areas like trees & lattices. Fluid Mask will also preserve all-important edge information for a professional quality cut out. Go to our Fluid Mask page for more info.
![]()
lynda.com Online Training Library - View Free Video Clips
 Subscriptions to the lynda.com Online Training Library provide anytime access to tens of thousands of video tutorials covering Photoshop, Illustrator, Dreamweaver, web design, digital imaging, 3D, digital video, animation, and many other topics. View free video clips.
For less than a dollar a day, members have the opportunity to stay current and keep skills sharp, learn innovative and productive techniques, and gain confidence and marketability - all at their own pace. Premium subscriptions include instructors’ exercise files so that members can follow along with the exact examples onscreen. Customers learn at their own pace and may stop, rewind, and replay segments as often as necessary. View some free video clips (high resolution).
![]()
Did You Know You Could Create An Entire Website In Photoshop?
SiteGrinder Photoshop Plugin - Create Websites Instantly
 There often seems to be a strict division of labor within the world of web design and development. Creative professionals tend to stick to the Photoshop domain, while those well-versed in scripting are left to the task of implementing their work. Indeed, the two realms are quite different from each other, to which any of us even vaguely familiar with either can easily attest.
Essentially, Photoshop is a no-holds-barred design studio, offering the artist a seemingly endless array of creative options. On the other hand, HTML, CSS, Java and the like follow strict rules of engagement, requiring the developer to take any number of esoteric concerns into consideration in order to ensure that designs are properly displayed on the web.
Turn Photoshop Into A Complete Web Design Tool
SiteGrinder seeks to bridge this gap between design and development. Basically, SiteGrinder turns Photoshop into an easy-to-use and fully functional web design tool. With SiteGrinder, designers will now have the freedom to totally let their creativity loose and then, without skipping a beat, transfer their designs to the web. Bringing esthetic concerns together with more practical considerations, SiteGrinder is an amazingly powerful tool that would make a fantastic addition to any web designer's bag of tricks. Mac OS X and Windows versions of the SiteGrinder unlockable demo are available now via download.
![]()
Photoshop CS4 Essential Skills - By Mark Galer And Philip Andrews
 Brimming with beautiful pictures, Photoshop CS4 Essential Skills guides you through a project-based, progressive curriculum so that you can build all the essential skills to enhance photographs creatively and professionally with Photoshop CS4. If you are an aspiring professional or a student learning photography, digital imaging, or design graphics, you'll be amazed at the stunning results you can achieve. A DVD is included free.
The Essential Skills Photography Series from Focal Press uniquely offers a structured learning experience for photographers of all ages, with both the underlying theory and loads of invaluable 'how to' and real-life practice projects - all from the most talented photography practitioners/educators in the world.
Read 2 free sample chapters:
Skin Retouching Tips In Photoshop CS4
Transforming Smart Objects In Photoshop CS4
Find more Photoshop CS4 tutorials on our Photoshop CS4 Tutorials Page.
Read 2 free sample chapters from the Adobe Photoshop CS3 version:
![]() Adjusting Exposure in Adobe Camera Raw CS3
Adjusting Exposure in Adobe Camera Raw CS3
![]() Photoshop CS3 Tutorial High Dynamic Range
Photoshop CS3 Tutorial High Dynamic Range
Find More Adobe Photoshop Books at Amazon.com
Find all the latest bestselling Photoshop books at discount prices at Amazon.com.
![]()


