![]()
![]()
![]() Try a 30-day free trial of Photoshop or any Adobe Creative Suite product.
Try a 30-day free trial of Photoshop or any Adobe Creative Suite product.
![]()
Create A Web Badge Using Vector Shapes Photoshop CS6
NOVEMBER 20, 2012
In this tutorial from Photoshop Daily, Adam Smith shows you how to use the new vector shapes in Photoshop CS6 (free trial) to create web assets.
Set your document
Select File>New and choose Mobile & Devices from the Preset drop options. From these options set size 1536 x 2048, retina display resolution. You can either leave Resolution at 72 ppi, hitting OK, or swap this out for 300ppi by selecting Image>Image Size, activate Resample Image and altering Resolution value. We’ve set ours at 300 ppi, as we need to present the print example to you in the magazine after all. Now it’s time to establish colour.

Colour consistency
Tones that repeatedly clash on your pages can simply look ugly or have more serious consequences like impairing text legibility, for example red type on black background, or greying on blue. What you should do is make sure that your colours contrasts enough with the background to achieve clear readability. Also stick to several colours rather than loads, for a slick look. We’ve supplied you with a coordinated swatch. Load the Web badge colour swatch.aco by choosing Window>Swatches, selecting Load Swatches from the panel fly out options.

Header backdrop
Set some rough guides to establish your header areas, and draw out your header backdrop using the Rectangle shape tool in a white colour. Add a Drop Shadow from the Layer Stye (fx) options, setting colour to black, Opacity between 20% and 30%, Blend Mode to Multiply, Angle at 90 degrees, Distance between 25px and 35px, Size at around 20px. Also add a White Stationary Pattern Overlay, from the Color paper presets in the Pattern fly out options. Set scale at around 540%, Blend Mode to Linear Burn, Opacity at 100%.

Sub menu
Similarly create your menu bar below your header layer, using the Rectangle shape tool in a ‘button green’ colour. Apply a Gradient Overlay from the Layer Style (fx) options to this menu layer, setting a black to transparent gradient style. Also set Opacity at 15%, Angle at 90 degrees and Scale at 20%. You can position the gradient in real time, placing it at the foot of your shape to mimic a drop shadow, creating a 3D effect when the two layer effects fall into place.

Base badge shape
Select the Polygon shape tool and in the overhead options set Sides value to 20, activating Smooth Corners, Star and Smooth Indents. Also Set the Indents Sides By option to 10%. Now draw out a shape that’s size fits inside the borders of your header backdrop layer, using a ‘button charcoal’ colour. Duplicate this shape and rescale holding Shift, increasing size by 7%. Centralise this copy shape and select the Shape tool, activating options. Set your Fill shape options to No Color.

Add badge stroke
Duplicate your copy badge layer and increase size once more, centralising. Deactivate the attached Inner Shadow layer style, active the Shape tool and set a ‘button green’ colour Stroke. In the Stroke Options set a dotted style, Setting Align to Outside, Gap at 3 and a 2pt size. Activate your original badge shape and rotate by 8.5 degrees creating a more diverse pattern as all badge shape layers combine. Activate the Ellipse shape tool and draw out a ‘button green’ colour circle, holding Shift in the centre of your badge.

Badge centre
Activate the Shape tool options, applying a solid style 8pt ‘button grey’ colour Stroke. Apply a Drop Shadow from the Layer Styles, setting Blend Mode to Multiply, Opacity at 30%, Angle at 90 degrees, Distance at 10px, Size at 40px. Select the Rectangle shape tool and draw your shape so the edges fall into your Ellipse shape stroked edges. Rotate this shape layer -15 degrees, counter clockwise. If any of the edges should fall outside of the stroked edge, activate the Move tool, hold Cmd and manually transform corners.

Badge centre part II
Select the Ellipse tool and draw a smaller ‘button grey’ colour circle, between 7cm and 8cm in size, in the middle of your badge. Place this new layer beneath your Rectangle shape. Duplicate this circle shape and decrease size by around 10%. Activate the Shape tool options. Apply a ‘button green’ solid style Stroke at a 1.5pt size. Hold Shift and activate all badge-related layers and select New Group from Layers from the Layers panel fly out menu.

Create texture
You can use your own textures but we’re going to create ours using one of Photoshop’s presets. Open another 1536 x 2048, 300 ppi document and select Pattern Overlay from the Layer Style (fx) options. Select the Patterns preset from the Pattern fly out option, applying the Waffle pattern, setting Scale at 100%. Rasterize this layer (Ctrl-click layer) and desaturate (Cmd/Ctrl-U>saturation -100). Select Edit>Define Pattern and call this new pattern ‘web badge texture’. You can now add this from your Layer Style>Pattern Overlay presets.

Quick Tip: As you’re working with vectors in CS6 you can change resolution size without the fear of pixelation, even creating a new document, simply dragging, dropping and resizing elements to match the right output.
Apply texture
Back in your web header project, activate your ‘button green’ badge layer. Select Style>Pattern Overlay and add the ‘web badge texture’. Set Blend Mode to Luminosity, Opacity at 55%, and Scale at 190%. Activate your ‘button green’ menu layer and apply the same Pattern Overlay style and settings, accept for Scale, which we’ve set to 150% instead. This is simply an aesthetic choice and we felt effects looked better at that setting.

Option dividers
Still working with the menu layer, we know want to create dividers to create separate menu buttons. Drag and place guidelines at 9cm, 18cm and 27cm in your image, effectively mapping 3 button spaces from left to right. Zoom in at 50%, activate the Rectangle shape tool and choose a ‘button green’ colour. Draw out a thin rectangle shape the height of your menu shape. Duplicate this layer, activate the original and change its blending mode to Luminosity, setting Opacity at 50%. Select the Move tool and click the right arrow key twice.

Make a button
Activate both divider layers (Shift-click) and duplicate, subsequently placing these over our previously placed guidelines. Place these all into a separate group folder titled ‘Dividers’. Select the rounded Rectangle tool and set a Radius of 30 px from the overhead options. Set your foreground colour to ‘button orange, background colour to ‘button yellow’ (Tool Bar>Color Picker). Set your Shape Fill options to Gradient and draw out your box, fitting this within your menu layer, to the right. Also apply a ‘button orange’ 1px solid style Stroke. Set Stroke Options>Align to inside.

Type hierarchy
When working with white space like in our badge, varying type size, weight and colour fonts can create visual interest. More importantly this can highlight the most important content. In this case your brand name, which should be largest and central. We’ve applied a mock name and applied this with a Georgia font at a 65 pt size. This is reinforced with more decorative type styles, using Arial and Times New Roman fonts. We’ve also applied other shapes to create visual interest.

Add noise
We’ve also applied Arial font type to create button links in our menu bar, applying subtle Drop Shadow effects from the Layer Style options. Now you have your layout essentials. But we want to add a more tangible sense to our elements. Just duplicate the menu and ‘button green’ colour badge layers, deleting any attached layer styles and Stroke settings. Select Filter>Noise>Add Noise, apply an Amount up to 6%. Drop Fill to 50%.

Sharpen elements
As we are working with vectors we can rescale at any time, but now we have raster noise layers its safer to group elements into Smart Objects when de-scaling. Applying Smart Objects is also great at allowing you to apply non-destructive sharpening. Photoshop CS6 can add this externally to a Smart Object without having to rasterize, much like a Layer Style. All visual details inside the Smart Object layer stays as before. As we’re also working with vectors you can also easily change out colour values if you wish, using the Shape tool>Fill options.

Download A 30-day Free Trial Of Any Adobe Creative Suite
 Photoshop Extended integrates the state-of-the-art editing, compositing, and graphic design capabilities of Adobe Photoshop, and features advanced tools for 3D design, image and video editing.
Photoshop and Photoshop Extended can be purchased as stand-alone applications, as components of the Adobe Creative Suite family, or as part of Adobe's new Creative Cloud offering. Upgrade pricing is also available to eligible customers.
Download
the 30-day Photoshop free trial, or a trial of any Adobe product, including the Master Collection. See our Photoshop CS6 Tutorials Page for a collection of free tutorials and videos. Visit the Adobe Coupons & Special Offers Page to see the latest deals from Adobe. Get up to 80% off at the Adobe Education Store.
posted by Jennifer Apple | facebook | RSS feed | bookmark | comment | twitter
![]()
onOne Software For Digital Photographers – Exclusive 15% Discount
onOne Software is the fastest and easiest way to make your images extraordinary. They work everywhere – with Photoshop, Lightroom, Aperture, and as standalone applications. Use discount code PSSPPT06 to get 15% off any onOne product.

Perfect Photo Suite
- Everything You Need to Realize Your Photographic Vision
- Seven integrated products for your photography workflow
- Perfect Effects: Create images with impact
- Perfect Portrait: Simply powerful retouching
- Perfect Resize (Genuine Fractals): Enlarge images for print
- Perfect Layers: The power of layers without Photoshop
- Perfect Mask: The essential cut-out tool
- FocalPoint: Put the focus where you want
- PhotoFrame: Borders, backgrounds, textures and adornments
Perfect Effects
- Add popular HDR and retro looks
- Recreate the look of film and darkroom techniques
- Finish images with vignettes, textures and borders
Perfect Portrait
- Simply powerful portrait retouching
- Automatic skin smoothing and blemish removal
- Instant enhancement of eyes and teeth
Perfect Mask
- Remove backgrounds with a single click
- Easily cut around the tough stuff like hair, glass, and tree branches
- All of the best masking tools without Photoshop
Perfect Resize
- Get the highest quality image enlargement, powered by Genuine Fractals
- Enlarge mobile phone to DSLR images up to 1000%
- Maintain all the sharpness and detail of your original photo
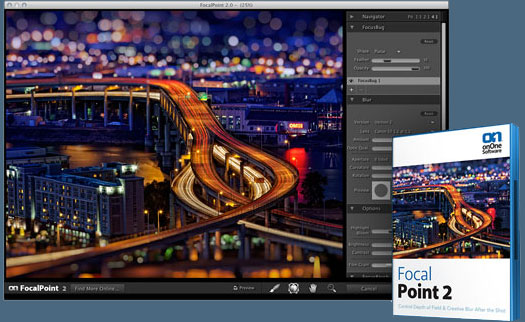
 FocalPoint
- Create the look of fast, expensive lenses instantly
- Control depth of field after the shot
- Simulate the creative look of tilt-shift lenses
PhotoFrame
- Enhance images with borders, textures and adornments
- Add authentic film and darkroom edge effects
- Complete library of more than 1000 professional design elements
Perfect Layers
- Extend the image editing power of Lightroom & Aperture
- Combine the best parts of multiple photos
- Retouch portraits and landscapes
![]()
Exclusive 15% Discount On Topaz Plugins, Bundles And Upgrades
 Enter our exclusive discount coupon code PHOTOSHOPSUPPORT during the checkout process at Topaz Labs for an instant 15% discount on any Topaz product, including bundles and upgrades.
Topaz Labs Photoshop plug-ins are specifically designed to expand a photographer's creative toolbox by harnessing powerful image technology developments. Photographers everywhere are now taking advantage of the creative exposure effects, artistic simplification, unique edge manipulation, and top-of-the-line noise reduction offered in Topaz products. The Topaz Photoshop Plugins Bundle is a super powerful Photoshop plugins package that includes the following Topaz products:
Topaz Adjust
Deliver stunning and dynamic images with this uniquely powerful plug-in that features HDR-like abilities and enhances exposure, color and detail.
Topaz InFocus
 Topaz InFocus uses the latest advancements in image deconvolution technology to restore, refine and sharpen image detail.
Topaz Detail
A three-level detail adjustment plug-in that specializes in micro-contrast enhancements and sharpening with no artifacts.
Topaz ReMask
The fastest and most effective masking and extraction program with one-click mask refining.
Topaz DeNoise
Highest-quality noise reduction plug-in that removes the most noise and color noise while preserving the most image detail.
Topaz Simplify
Provides creative simplification, art effects, and line accentuation for easy one-of-a-kind art.
Topaz Clean
Take control of the detail depth of your images with extensive smoothing, texture control and edge enhancement tools.
Topaz DeJPEG
Drastically improves the quality of web images and other compressed photos.
Learn more about the Topaz Photoshop Plugins Bundle. Download a free trial version.
![]()
Site Grinder Web Design Tool
 There often seems to be a strict division of labor within the world of web design and development. Creative professionals tend to stick to the Photoshop domain, while those well-versed in scripting are left to the task of implementing their work. Indeed, the two realms are quite different from each other, to which any of us even vaguely familiar with either can easily attest.
Essentially, Photoshop is a no-holds-barred design studio, offering the artist a seemingly endless array of creative options. On the other hand, HTML, CSS, Java and the like follow strict rules of engagement, requiring the developer to take any number of esoteric concerns into consideration in order to ensure that designs are properly displayed on the web.
Turn Photoshop Into A Complete Web Design Tool
SiteGrinder seeks to bridge this gap between design and development. Basically, SiteGrinder turns Photoshop into an easy-to-use and fully functional web design tool. With SiteGrinder, designers will now have the freedom to totally let their creativity loose and then, without skipping a beat, transfer their designs to the web. Bringing esthetic concerns together with more practical considerations, SiteGrinder is an amazingly powerful tool that would make a fantastic addition to any web designer's bag of tricks. Mac OS X and Windows versions of the SiteGrinder unlockable demo are available now via download.
![]()
lynda.com Online Training Library - View Free Video Clips
 Subscriptions to the lynda.com Online Training Library provide anytime access to tens of thousands of video tutorials covering Photoshop, Illustrator, Dreamweaver, web design, digital imaging, 3D, digital video, animation, and many other topics. View free video clips.
For less than a dollar a day, members have the opportunity to stay current and keep skills sharp, learn innovative and productive techniques, and gain confidence and marketability - all at their own pace. Premium subscriptions include instructors’ exercise files so that members can follow along with the exact examples onscreen. Customers learn at their own pace and may stop, rewind, and replay segments as often as necessary. View some free video clips (high resolution).
![]()
|
|


