![]()
![]()
![]() Buy. Download. Create. Get Photoshop Lightroom 3 at the Adobe Store.
Buy. Download. Create. Get Photoshop Lightroom 3 at the Adobe Store.
![]() Try before you buy - download a free 30 day Photoshop Lightroom 3 trial.
Try before you buy - download a free 30 day Photoshop Lightroom 3 trial.
![]()
![]()
Adobe Photoshop Lightroom 4 - $79 Upgrade, $149 Full
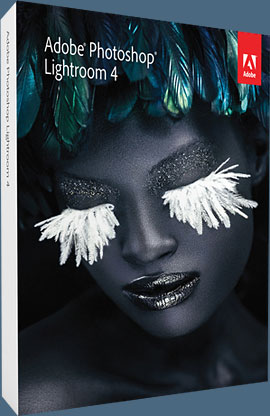 Adobe has announced the availability of Adobe Photoshop Lightroom 4 software for Mac OS and Windows. Lightroom is the essential digital photography workflow solution helping amateur and professional photographers quickly import, manage, enhance and showcase their images.
Lightroom 4 is now available for US$149 for the full version and US$79 for the upgrade, providing an incredible value for photographers. Lightroom 4 introduces refined technology for superior shadow and highlight processing, ability to create photo books, additional local adjustment controls, and enhanced video support.
Lightroom 4 is a major release, adding significant new capabilities and innovations. New adjustment controls maximize dynamic range from cameras, recovering exceptional shadow details and highlights. The software features new and improved auto adjustments to dynamically set values for exposure and contrast, and additional local adjustment controls including Noise Reduction, Moire and White Balance.
Visit the official Photoshop Lightroom 4 Center for full details and free tutorials.
Drag And Drop Online Publish Services In Lightroom 3 — Photoshop Lightroom 3 Tutorial
go back to the Photoshop Lightroom 3 main tutorials page
 In this tutorial we’ll explore a new feature of the Library that lets you share and manage images outside of Lightroom 3, as easily as you can with those within it.
Lightroom 3 recognizes and supports the popularity of external image sharing and social networking websites, as well as mobile devices, with the introduction of Publish Services. Using the same process as you would to create new Collections in the Library, you can now set up direct access to websites and facilitate mobile device syncing from directly within the Library module.
The included plugin integrates your Flickr account with Lightroom 3, letting you easily manage uploads, and check comments and Favorites counts. Developers will be able to create this same kind of direct access for other websites and services using the extensibility of Lightroom publish plug-ins. You can also use Publish Services to integrate mobile devices like your iPhone with Lightroom 3, making device synchronization as simple as drag and drop.
Try it: Set up a Flickr account for use within Lightroom 3
Step 1 — Switch to the Library module, and under Publish Services, click the Set Up link next to the Flickr plugin title. The Lightroom Publishing Manager opens.
Step 2 — Enter a Description under Publish Service (for example, Family), and then under Flickr account, click Log In. Lightroom 3 asks permission to link to this account—click Authorize to proceed.
Step 3 — Your web browser will now open to Flickr. Depending on your settings, you may have to create a Flickr account or log into your existing account.
Step 4 — Once you log into your account, you will see a page with text that reads “Adobe Photoshop Lightroom wants to link to your Flickr account.” There are two blue boxes on the page, letting you confirm or decline the link. Locate the confirmation box (on the right) and click NEXT. Then, in the next page, click OK, I’LL AUTHORIZE IT.
Step 5 — Close your web browser and return to Lightroom 3. You should find a dialog box in front of the Lightroom Publishing Manager window. Click Done to tell Lightroom 3 you’ve completed the Flickr account setup and authorization.
Step 6 — In the Lightroom Publishing Manager window, adjust any options you would like for your Flickr service. Note that here again you can choose to use your custom watermarks. In particular, please be sure to set Privacy to Private, Safety to Restricted, and select Hide From Public Site Areas. Once you’re done with the options, click Save.
Step 7 — Under Flickr in the Publish Services panel, you’ll now see an entry for your Photostream, with a 0 next to it, indicating you have not added any photos yet. Select a few images in the Library and drag them to the Photostream entry. The number now updates to show the photos added.
Step 8 — Click Photostream to change the display. Note the photos you dragged now appear under New Photos to Publish. Click the Publish button at the bottom of the left panel. You should see a progress bar appear at the top left showing you the process of uploading images to Flickr, and each photo on completion moves from the New Photos to Publish area into a new area marked Published Photos.
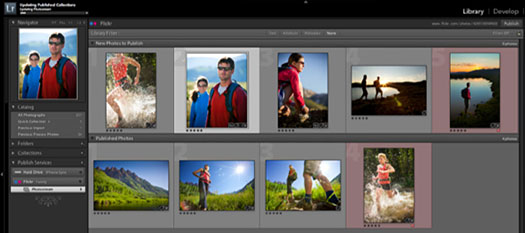
When you select a Publish Collection, you can easily see the photos you’ve already published from Lightroom 3, as well as those currently in the queue to be published.
Step 9 — Right-click Photostream in the Publish Services panel and select Show in Flickr. Sign into Flickr, if necessary, and browse to your Photostream to see the new uploaded images. Click one of the images, add a comment in the box below the display, and click POST COMMENT.
Step 10 — Switch back to Lightroom 3, select the Photostream, if necessary, and select the photo for which you added a comment on the Flickr website. Then, at the top left of the Comments panel in the right column, press the Refresh Comments button. The header for the panel changes to One Comment, and your comment is displayed below. Note you can also add comments to images in the Lightroom 3 Comments panel which will then appear on Flickr, and you can also collect Favorites counts from Flickr for images available for viewing by others.
In addition to creating links to websites, you can use the Publish Services feature to link to folders on your own hard drives. This allows you to set up sync folders for mobile devices, such as iPhones or iPods.
Try it: Set up a Publish Service to sync to your iPhone or other compatible mobile device
Step 11 — Under Publish Services, click the Set Up link next to the Hard Drive title. The Lightroom Publishing Manager opens.
Step 12 — Enter a Description under Publish Service (for example, iPhone Sync), and then under Export Location, select the Export To menu and choose Specific Folder. Click the Choose button below and to the right, and select the folder on your hard drive to which you want to publish. Adjust any other settings you like, and then click Save.
Step 13 — Switch to the synchronization software you use for your mobile device, and set up the device to sync with the same folder you just designated in Lightroom 3. For example, for iPhones or iPods, you would use iTunes.
Step 14 — Under Hard Drive in the Publish Services panel, you’ll now see an entry for your device sync folder, with a 0 next to it, indicating you added any photos yet. Select three or four images in the Library and drag them to the entry. The number now updates to show the photos added.
Step 15 — Click the device sync entry to change the display. Note the photos you dragged now appear under New Photos to Publish. Click the Publish button at the bottom of the left panel. You should see a progress bar appear at the top left showing you the process of exporting images to the sync folder, and each photo on completion moves from the New Photos to Publish area into the new Published Photos area. Whenever you next sync your mobile device, the images will be available on it.
Read other Lightroom 3 tutorials in this series:
Tethered Capture In Lightroom 3
Creating Exportable Video Slideshows In Lightroom 3
Import A Recent Shoot With A New Custom Preset
Control The Processing Of Your Exisiting Images In Lightroom 3
How To Create And Control Natural Grain In Lightroom 3
More Flexible Watermarks In Lightroom 3
Lens Correction In Lightroom 3
How To Achieve Lower Noise and Apply Better Sharpening In Lightroom 3
How To Create Natural Vignetting In A Cropped Image In Lightroom 3
Perspective Correction In Lightroom 3
Import And Organize Video Files In Lightroom 3
Multi-image Print Layouts In Lightroom 3.
Adobe Debuts Photoshop Lightroom 4 Public Beta on Adobe Labs
Adobe has announced Adobe Photoshop Lightroom 4 beta for Windows and Mac. Available as a free public download from Adobe Labs, Lightroom is the essential digital photography workflow solution helping amateur and professional photographers quickly import, manage, enhance and showcase their images. Read the full press release.

Perfect Layers For Lightroom - Create Layers In Lightroom
 onOne Software today introduced the Perfect Layers Public Preview. Perfect Layers gives photographers the ability to easily create and work with layered files in their workflow application of choice. Perfect Layers supports the creation of layered files that can be opened and edited by Adobe Photoshop software and can be used directly from within Adobe Photoshop Lightroom software, Adobe Bridge and, with the shipping version, Apple Aperture.
“The impact Perfect Layers is going to have on photographers using Lightroom makes it a game changer!” said Scott Kelby, Editor-in-Chief of Photoshop User magazine. "This is the must-have plug-in for Lightroom."
The ability to have multiple layers in a single file is a great benefit and provides unlimited creative options when enhancing an image. With the Perfect Layers Public Preview, from directly within Lightroom, photographers can create or open layered files. This means photographers can combine multiple images from Lightroom into a single image. They can also open existing Photoshop documents from within Lightroom.
27 Free Lightroom Presets - Compatible With Lightroom 1, Lightroom 2, And Lightroom 3
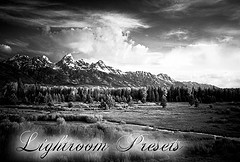 From the Adobe Free Plugins site comes 27 Free Lightroom Presets from Bryan Wheeler. These Presets provide you with a range of different photo processing opportunities and possibilities, from dramatic black and whites, creating a frozen appearance in your shots, to giving your images an autumn look. They were all hand-created with the Lightroom user in mind.
All of these Presets are usable in both LR 1, LR 2 and LR 3 programs.
Go to our Photoshop Lightroom 3 Tutorials Page for more free tips and videos.
Photoshop Lightroom 3 - Best Deals From The Adobe Store
 Adobe Photoshop Lightroom 3 helps you bring out the best in your
photography, whether you’re perfecting one image, searching for ten, processing
hundreds, or organizing thousands. Experiment fearlessly with state-of-the-art nondestructive editing tools, easily manage
all your images, and showcase your work in elegant print layouts, slide shows, web
galleries, and on popular photo-sharing sites. Learn more about Adobe Photoshop Lightroom 3, or try a free Lightroom 3 trial download. See our Photoshop Lightroom 3 Tutorials Page for free tips, tricks and videos.
Photoshop Lightroom 3 includes a range of nondestructive editing features — everything from advanced exposure and color controls to superior noise reduction and sharpening. Experiment fearlessly with as many different adjustments and looks as you like. Your original images are never altered, and it’s easy to reverse your steps or save multiple versions of any photograph. Make your images as great as you imagined they could be using the leading-edge image processing tools in Adobe Photoshop Lightroom 3.
![]()
Lightroom 3 Deals - Save By Upgrading From Lightroom 1 Or 2 - Save 30% By Bundling With Photoshop CS5 - Students Get Lightroom For $99
 You can save 30% on Lightroom 3 if you buy a new or upgrade version of Photoshop CS5. Upgrading from Lightroom version 1 or 2 will save you about 1/3 of the full price. Students in about a dozen countries can buy a full version of LR3 for only $99 vs. $299.
Get 30% off Lightroom 3 when purchased with a Creative Suite 5 edition, Photoshop CS5, or Photoshop CS5 Extended. Purchase a full or upgrade version of Adobe Photoshop Lightroom 3, along with a full or upgrade version of Photoshop CS5, Photoshop CS5 Extended, or a Creative Suite edition containing Photoshop CS5 or Photoshop CS5 Extended.
Manage, edit, and showcase all your images faster than ever before with Adobe Photoshop Lightroom 3 software. Accelerated performance makes key tasks quicker, and the newly designed import interface is exceptionally intuitive and transparent. New support for video files from most digital SLR cameras lets you easily manage and organize video clips alongside still photos. Create even more amazing images with new nondestructive editing tools, including world-class noise reduction. Share dynamic slideshows by exporting them as videos, even in high definition. Showcase your work with style and impact using more flexible print layouts, streamlined publishing to online photo-sharing sites, and more.
![]()
Exclusive 15% Discount On All Topaz Plugins - Use Coupon Code PHOTOSHOPSUPPORT - Includes Bundles And Upgrades
 Topaz Labs Photoshop plug-ins are specifically designed to expand a photographer's creative toolbox by harnessing powerful image technology developments.
Enter our exclusive discount coupon code PHOTOSHOPSUPPORT during the checkout process at Topaz Labs for an instant 15% discount on any Topaz product, including bundles and upgrades.
Photographers everywhere are now taking advantage of the creative exposure effects, artistic simplification, unique edge manipulation, and top-of-the-line noise reduction offered in Topaz products. The Topaz Photoshop Bundle includes the following Topaz plugins:
Topaz Adjust
Deliver stunning and dynamic images with this uniquely powerful plug-in that features HDR-like abilities and enhances exposure, color and detail.
 Topaz Detail
A three-level detail adjustment plug-in that specializes in micro-contrast enhancements and sharpening with no artifacts.
Topaz ReMask
The fastest and most effective masking and extraction program with one-click mask refining.
Topaz DeNoise
Highest-quality noise reduction plug-in that removes the most noise and color noise while preserving the most image detail.
Topaz Simplify
Provides creative simplification, art effects, and line accentuation for easy one-of-a-kind art.
Topaz Clean
Take control of the detail depth of your images with extensive smoothing, texture control and edge enhancement tools.
Topaz DeJPEG
Drastically improves the quality of web images and other compressed photos.
Learn more about the Topaz Photoshop Plugins Bundle. Download a free trial version.
![]()
Photoshop CS5 & Photoshop CS5 Extended - Best Deals From Adobe
 Adobe Photoshop CS5 delivers breakthrough capabilities to help you create images with impact. Refine your
images with reengineered photography tools for removing noise, adding grain, and creating high dynamic
range (HDR) images. Get precise results when making complex selections. Remove any image element and
see the space fill in almost magically. Paint with naturally textured brushstrokes and realistic color blends. Learn more about Photoshop CS5.
Adobe Photoshop CS5 Extended software helps you create the ultimate images
for print, the web, and video. Enjoy all the state-of-the-art editing, compositing,
and painting capabilities in industry-standard Photoshop CS5, and experience
fast performance thanks to cross-platform 64-bit support. Also create 3D extrusions
for logos, artwork, and motion graphics; edit 3D objects with advanced tools; and create and enhance motion-based content. Learn more about Photoshop CS5 Extended.
Visit the Adobe Special Offers page to find the latest deals. Save 80% on Adobe Student Editions. See our Photoshop CS5 Resource Center for Free Photoshop CS5 Tutorials, and the Free Photoshop CS5 Trial Download.
![]()
Exclusive onOne Software 15% Instant Discount Coupon
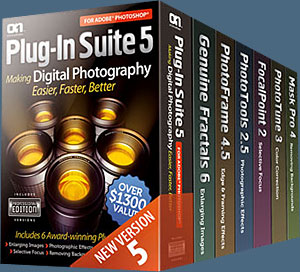 Enter our exclusive discount coupon code - PSSPPT06 - during the checkout process at onOne Software for an instant 15% discount on any onOne product. This includes Genuine Fractals and their amazing Photoshop Plug-In Suite.
OnOne’s new Plug-In Suite solves six of the most frequent problems photographers will encounter in Photoshop. This suite has been granted American Photos Magazine’s Editor’s Choice award for Top Image Editing Software. The Plugin Suite includes:
Genuine Fractals Pro is renowned by both photographers and printers for its finesse at increasing images to more than ten times their original size while maintaining the sharpness and detail you started with. Think of this as the industry standard for image resizing.
Mask Pro is used to remove the tough stuff — such as hair, smoke and glass — while retaining the fine detail. You choose what colors to keep, then paint away what you don’t need.
 PhotoTools Pro packs hundreds of high-calibre photographic effects into one user-friendly plug-in. It’s fast and easy to use. Gives your photos that pro quality look.
PhotoFrame Pro lets you enhance your pictures with hundreds of such design effects, or simply drop your image into a pre-fab layout in Photoshop, Lightroom or Aperture.
FocalPoint helps to control focus and minimize visual noise. Draw the eye to specific points in your images by using selective focus, depth-of-field and vignette effects.
PhotoTune lets you can compare images side-by-side and easily color correct and enhance them. PhotoTune optimizes the dynamic range, color and sharpness of your image without the need to know all the complicated controls in Photoshop like levels and curves.
Simply enter our exclusive discount coupon code - PSSPPT06 - during the checkout process at onOne Software for an instant 15% discount on any onOne product.
![]()
Nik Software 15% Instant Discount - Exclusive 15% Coupon
Enter our exclusive discount coupon code - NIKPSS - during the checkout process at Nik Software for an instant 15% discount on any Nik Software product. This exclusive discount coupon code can be applied to all the latest Nik Software Photoshop plugins, including Silver Efex Pro, Color Efex Pro, Viveza, Sharpener Pro, and Dfine.
Color Efex Pro
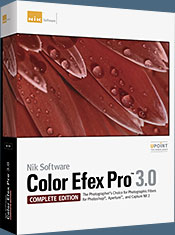 52 photographic filters with over 250 effects for professional quality images.
Completely Original. Completely Indispensable.
Nik Software Color Efex Pro filters are the leading photographic filters for digital photography. The award-winning Color Efex Pro filters are widely used by many of today's professional photographers around the world to save time and get professional level results. Whether you choose the Complete Edition, Select Edition, or Standard Edition, you’ll get traditional and stylizing filters that offer virtually endless possibilities to enhance and transform images quickly and easily.
Patented U Point technology provides the ultimate control to selectively apply enhancements without the need for any complicated masks, layers or selections. Control color, light and tonality in your images and create unique enhancements with professional results. With 52 filters and over 250 effects found in Color Efex Pro, you can perform high quality retouching, color correction, and endless creative enhancements to your photographs. Download a free Trial version.
Viveza
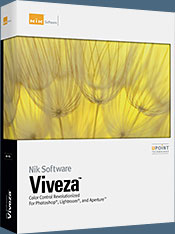 The most powerful tool to selectively control color and light in photographic images without the need for complicated selections or layer masks.
Two of the most important factors in creating great photography are color and light. Mastering the art of selectively correcting or enhancing each of these is now possible for every photographer without the need for complicated masks or selections, or expert-level knowledge of Photoshop. Integrating award-winning U Point technology, Viveza is the most powerful and precise tool available to control light and color in photographic images.
U Point powered Color Control Points, placed directly on colors or objects in an image (such as sky, skin, grass, etc.), reveal easy-to-use controls that photographers can use to quickly adjust brightness, contrast or color in a fraction of the time needed by other tools. With Viveza you’ll spend more time shooting photographs and save hours of image editing. Download a free Trial version.
Silver Efex Pro
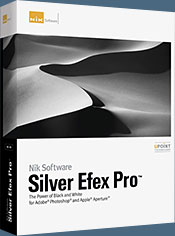 Complete power and control to create professional quality black and white images in one convenient tool.
Silver Efex Pro from Nik Software is the most powerful tool for creating professional quality black and white images from your photographs. For the first time, all the advanced power and control required for professional results have been brought together in one convenient tool.
Featuring Nik Software’s patented U Point technology to selectively control the tonality and contrast of the image, Silver Efex Pro includes advanced imaging algorithms to protect against unwanted artifacts, a comprehensive collection of emulated black and white film types, a variable toning selector for adding traditional toning techniques, over 20 one-click preset styles, and a state-of-the-art grain reproduction engine that help produce the highest quality black and white images possible from your color images while providing more freedom to experiment. Download a free Trial version to use Silver Efex Pro.
Enter our exclusive discount coupon code - NIKPSS - during the checkout process at Nik Software for an instant 15% discount. This exclusive discount coupon code can be applied to all the latest Nik Software Photoshop plugins, including Silver Efex Pro, Color Efex Pro, Viveza, Sharpener Pro, and Dfine.
![]()
Photoshop Masking Plugin Fluid Mask - Exclusive Instant Discount
 The 4 1/2 out of 5 star review of Fluid Mask at MacWorld begins by saying that this "Photoshop plug-in takes the pain out of extracting backgrounds," and goes on to recommend the latest version, stating that "Fluid Mask is a very effective tool for separating objects from their backgrounds. It offers a variety of useful features for tackling almost any difficult image, from wispy hair to complex foliage. Online video tutorials and live training sessions help ease the learning curve."
Our friends at Vertus, the makers of Fluid Mask Photoshop Plugin, have set up a special exclusive discount for PhotoshopSupport.com. Go to our Fluid Mask page for a special, exclusive discount link.
Fluid Mask is designed for photographers, image editors, graphic designers and all those who take digital image editing seriously. In a streamlined interface and workflow, Fluid Mask instantly shows key edges in the image and provides comprehensive easy to use tools that work with difficult-to-see edges and tricky areas like trees & lattices. Fluid Mask will also preserve all-important edge information for a professional quality cut out. Go to our Fluid Mask page for more info.
![]()
Adobe Photoshop Lightroom 3 Book, The: The Complete Guide for Photographers - Sample Chapters And Free Videos - Lens Correction And Noise Reduction Tutorials
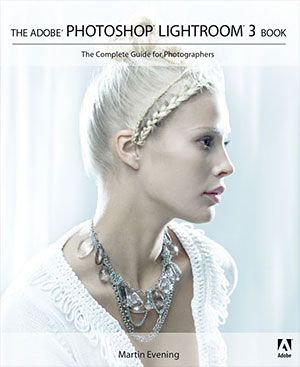 Martin Evening is a London-based advertising and fashion photographer and noted expert in both photography and digital imaging. In addition to being a bestselling author, Martin is sought after for speaking and lecturing. He also works with the Photoshop and Lightroom 3 engineering teams, consulting on new feature development and alpha and beta testing.
In Adobe Photoshop Lightroom 3 Book, The: The Complete Guide for Photographers, Martin shows you how to:
• Work efficiently with images shot in the raw or JPEG format
• Import photographs with ease and sort them according to your workflow
• Create and manage a personal image library
• Apply tonal adjustments to multiple images quickly
• Integrate Lightroom with Adobe Photoshop
• Export images for print or Web as digital contact sheets or personal portfolios
• Work with automatic lens correction and improved noise reduction.
2 Free Photoshop Lightroom Videos From Martin Evening
Here are two free Adobe Photoshop Lightroom 3 video tutorials from Martin Evening.
The Adobe Photoshop Lightroom 3 Book: Noise Reduction Video
This tutorial shows some of the key benefits of working with the new improved noise reduction sliders in Lightroom 3 that are available when using Process Version 2010.
The Adobe Photoshop Lightroom 3 Book: Auto Lens Correction Video
See how Lightroom 3 allows you to apply auto lens profile corrections directly to raw and non-raw images in Lightroom.
At the Peachpit Press site you can find a sample chapter, The Lens Corrections Panel. In it Martin discusses how to use the Lens Corrections panel in Adobe Photoshop Lightroom 3, including how to correct lens vignetting and chromatic aberration. From the intro:
"Lens vignetting is a problem that’s commonly encountered with wide-angle lenses and is particularly noticeable if the subject you are photographing contains what should be an even shade of tone or color. For example, you’ll become more aware of such lens vignetting problems when you are photographing a landscape with a large expanse of clear blue sky, or you are photographing a subject against a plain, light colored backdrop. It is in these types of situations that you are more likely to notice a darkening of the image toward the corners" Read the full article, The Lens Corrections Panel.
![]()
Photoshop Lightroom 3 Visual QuickStart Guide: Organizing and Reviewing Images
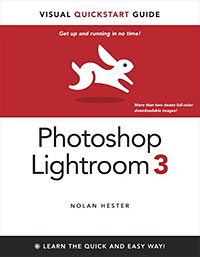 Adobe Photoshop Lightroom 3: Visual QuickStart Guide uses simple step-by-step instructions, loads of screen shots, and an array of time-saving tips and tricks, serving both as the quickest route to Adobe Photoshop Lightroom 3 mastery for new users, and a handy reference for more experienced digital photographers.
Adobe Photoshop Lightroom 3 was designed from the ground up with digital photographers in mind, offering powerful editing features in a streamlined interface that lets photographers import, sort, and organize images.
Adobe Photoshop Lightroom 3: Visual QuickStart Guide is the definitive task-based tutorial for digital photographers needing a jump-start on the complete range of features available in Adobe Photoshop Lightroom 3. Master this workflow application quickly and completely by working from beginning to end or just skip to the task you need right now. It's all covered, everything from importing, organizing and processing images, to managing and showcasing your images - whether it's one shot or an entire shoot.
At the Peachpit Press site you can read a sample chapter, Organizing and Reviewing Images. From the intro: While it’s tempting to immediately start fixing and tweaking the exposures of your photos, time spent in Adobe Photoshop Lightroom's Library module organizing and reviewing photos will be worth it. Nolan Hester explains how and why to use the Library module.
This chapter covers — Dimming the Lights, Stacking Photos, Flagging Photos, Using Ratings and Labels, Using the Compare and Survey Views, Removing or Deleting Photos, Putting It All Together.
It’s tempting to jump ahead to the Develop module and immediately start fixing and tweaking the exposures of your photos. But the time spent offers a hidden bonus: Deleting poor images (explained on page 88) will leave you with far fewer— and much better — images once you finally turn to adjusting their exposures. Read the full sample chapter, Organizing and Reviewing Images.
![]()
Adobe Photoshop Lightroom 3 Classroom in a Book - Free Chapters - Integrated Tethered Shooting and Manual Correction for Lens Distortion
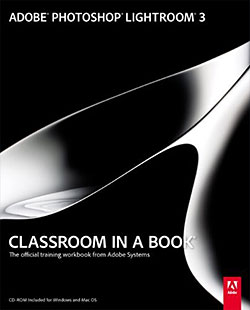 Serious digital photographers, amateur or pro, who seek the fastest, easiest, most comprehensive way to learn Adobe Photoshop Lightroom 3 choose Adobe Photoshop Lightroom 3 Classroom in a Book from the Adobe Creative Team at Adobe Press. The 10 project-based lessons in this book show readers step-by-step the key techniques for working in Photoshop Lightroom 3.
Photoshop Lightroom 3 delivers a complete workflow solution for the digital photographer. Readers learn how to manage large volumes of digital photographs, work in a non-destructive environment to allow for fearless experimentation, and perform sophisticated image processing tasks to easily produce good-looking pictures and polished presentations for both web and print. The newly expanded version of this software offers accelerated speed with refined, powerful performance.
This completely revised Photoshop Lightroom 3 cross-platform edition covers how to work in the new import interface, add audio to your slideshows, shoot tethered, use the new crop overlay tool, customize a watermark, simulate film grain in your images, utilize more options for publishing your work online, and further customize your print packages.
Two Free Excerpts — Integrated Tethered Shooting & Manual Correction for Lens Distortion
For a range of DSLR cameras including many models from Canon and Nikon, you can capture photographs directly into Lightroom 3 without the need for any third-party software. This excerpt from Adobe Photoshop Lightroom 3 Classroom in a Book, Integrated Tethered Shooting, explains how to use tethered shooting with a supported camera.
In this excerpt from Adobe Photoshop Lightroom 3 Classroom in a Book, Manual Correction for Lens Distortion, you'll see how to manually correct lens distortions such as keystone distortion and barrel distortion.
![]()
![]()
![]() The Photoshop Blog offers the latest Photoshop and Digital Photography news and software updates, tips and tutorials, and random thoughts from graphic artist, digital photographer and Photoshop expert Jennifer Apple. Also includes Lightroom news!
The Photoshop Blog offers the latest Photoshop and Digital Photography news and software updates, tips and tutorials, and random thoughts from graphic artist, digital photographer and Photoshop expert Jennifer Apple. Also includes Lightroom news!
![]()


