![]()
![]() Buy. Download. Create. Order Photoshop CS4 now at the Adobe Store.
Buy. Download. Create. Order Photoshop CS4 now at the Adobe Store.
![]() Try before you buy. Download any Adobe product for a free 30 day trial.
Try before you buy. Download any Adobe product for a free 30 day trial.
![]()
![]()
Welcome To The June 2009 Photoshop Newsletter
More special deals and new tips and tricks and free Photoshop brushes! Have fun!
![]()
Adobe Summer Special Deals - Save $100 On Upgrades To Creative Suite 4 - Plus Save Up To 80% On Education Versions
 Adobe has a Summer Suite Deal. For a limited-time you can save $100 when you upgrade to Creative Suite 4 from an earlier version of Adobe Creative Suite, Production Studio, or Macromedia Studio. Ends August 31, 2009.
Plus, Adobe is offering up to 80% off to all students and faculty in the Adobe Education Store with valid identification.
Adobe Student Editions are full versions of the latest CS4 software from Adobe,including Adobe Creative Suite 4 Design Premium, Creative Suite 4 Design Standard, Creative Suite 4 Web Premium, and Photoshop CS4, priced at a huge discount for higher education students.
 Adobe CS4 Student Discount Prices
• Photoshop CS4 Student Edition ($199)
• Web Premium CS4 Student Edition ($349)
• Design Standard CS4 Student Edition ($299)
• Design Premium CS4 Student Edition ($399)
Eligibility For Student Editions
Student Edition products are for purchase by higher education students only. A higher education student is defined as a full- or part-time student enrolled at a higher education institution defined as an accredited public or private university or college (including community, junior, or vocational college) that grants degrees requiring not less than the equivalent of two years of full-time study.
![]()
Auto FX Photo/Graphic Edges Review
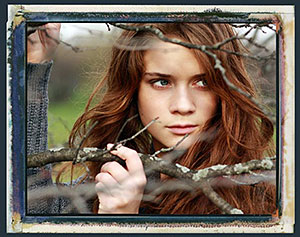 Here's our review of the recently released Photo/Graphic Edges 7.0 Platinum Edition Photoshop Plugin package.
Auto FX Photo/Graphic Edges 7.0 Platinum Edition (PGE) adds multiple framing styles to any type of image, the main focus being the modification of photograph borders to give them flare and definitive style. PGE can work either as a stand-alone application or as a plug-in for various image-editing programs (Adobe Photoshop being the predominant choice).
The program is relatively easy to use and has an intuitive learning curve. Each style palette is similar in its functionality so that once you have mastered how to make adjustments on one, you can apply the same techniques to the others. When encountering a command/button/icon you aren't familiar with, simply hover your mouse over it and a short description with instructions is displayed.
Effects and borders are added as Effect Layers over the original image. You can adjust the layers as you want: turn them on or off, or use multiple layers together. All the while, your original artwork remains unaffected.
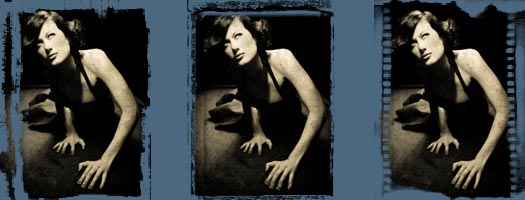
When an Effect Layer is added or selected, the option palette appears, giving you numerous adjustment options. These include mood, lighting, background colour, feathering and width among others. You can choose from a variety of border styles with descriptive tags like "Acid Edge," "Montage" and "Grunge." Within each of these styles there are numerous preset variations on the same themes.
For an amateur, this program will give lots of options, ease of use and generally fast results. The built-in presets do the time-consuming work of design and illustration for you. PGE can create impressive final results that can be used in digital or print format. On the other hand, a user with substantial image-editing and illustration skills could eventually find this software limiting since all of these styles could potentially be recreated using conventional applications but with a much more unique and original look.
Photo/Graphic Edges 7.0 Platinum Edition includes both a Photoshop plug-in and stand-alone application version for Macintosh OS X (all versions) and Windows 2000 / XP / Vista. Visit the AUto FX site to download a free demo version and to watch free training videos on this product.
![]()
Creating Faux Bokeh Backgrounds In Photoshop - Photoshop Tutorial From Obsidian Dawn
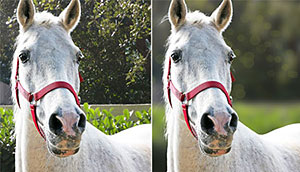 This tutorial will walk you through how to create a faux bokeh background in Photoshop. For those of you that are unsure about what bokeh is, it is a Japanese term used in photography. It is used to describe the qualities of the area of a photo that is out of focus, and is used to help draw your eye to the subject of the photograph. Some pretty cool things happen with bokeh, too. Especially where lights or heavily lighted areas are concerned. Have you ever looked at a photograph or been watching a movie, perhaps where it was dark out, and the lights in the background are all blurry, but instead of just being blurry they appear as these odd gatherings of circles and/or polygons? I didn’t notice it all that often until I started looking, and now I see it everywhere!
![]()
onOne Software Announces Free Version of PhotoTools 2 - Photoshop Plugins With 14 Effects
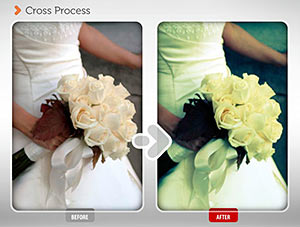 onOne Software today announced a free Lite version of PhotoTools 2 Standard Edition. PhotoTools 2 Standard Edition is a flexible, yet powerful, plug-in for Adobe Photoshop CS2, CS3 and CS4 that utilizes the power of Photoshop Actions to provide a range of imaging tools, including effects, corrections and production automation, in a full-featured interface.
Based on the exact same feature set as PhotoTools 2 Standard Edition, PhotoTools 2 Lite includes 14 of the most popular effects found in both PhotoTools 2 Standard Edition and PhotoTools 2 Professional Edition. The 14 effects available in PhotoTools 2 Lite range from reproducing classic photographic effects like Bleach Bypass and Cross Process, to reproducing film stock such as Kodachrome and Velvia, to modern effects, including automatic skin smoothing.
“We are excited to offer this free version of PhotoTools 2 as a way for new users to experience the product’s elegant workflow and effects,” said Craig Keudell, president of onOne Software. “PhotoTools 2 Lite is a way for onOne to give back to the photographic community and allow everyone to easily add a professional look to their photographs.”
PhotoTools 2 Lite is offered at no cost and is only available as an electronic download direct from onOne Software. For users who wish to access the full database of effects that come with the Standard or Professional Editions of PhotoTools 2, they will need to purchase a copy of the Standard or Professional Edition. PhotoTools 2 Professional and Standard editions are available for $259.95 and $159.95, respectively, and may be ordered immediately from onOne Software. Enter our exclusive discount coupon code - PSSPPT06 - during the checkout process at onOne Software for an instant 15% discount on any onOne product. This includes Genuine Fractals and their amazing Photoshop Plug-In Suite.
![]()
Adobe Camera Raw 5.4 Includes Support For 24 New Cameras
Adobe has released a new candidate of Adobe's Camera Raw plug-in for CS4, Version 5.4 is now available for download from Adobe Labs. This version supports 24 new cameras, including:
![]()
Free Grunge Sheet Music Textures From BittBox
Bittbox is offering some free grunge music sheet textures. From the intro: I’ve seen textures similar to these on deviantArt in the past and always wanted to give it a try, so here are the fruits of my labor. By the way, the song in the textures is Claude Debussy’s “La Mer” in case you were wondering. I have to give a shout out to Andreas Mischke who helped me find the public domain sheet music I used. Enjoy!

![]()
Free Grungy Swirl Photoshop Brushes From BrushPortfolio
BrushPortfolio.com has released a free set of Grungy Swirl Photoshop brushes. There is a variety of grungy swirl images contained within this brush set including individual images so you can create your own brushes. There are 28 brushes total ranging in size from 1580 to 2500 pixels. Happy Creating!

![]()
New Lightroom Preset Actions From Gavin Phillips
I'm talking with Gavin Phillips, owner of ‘Photographers Photoshop, about his new Lightroom Presets.
 What’s the 'must have' feature in your 'Dramatic BW & Color' set of ‘Presets’?
Look at the diversity of images you can create by clicking a button. In a sense we are collaborating with you to give you more creative ideas.
What is the advantage of Lightroom Presets?
Saves you time & increases your profits. They are also editable, so you can tweak the settings if you want to.
But I can create Presets myself, why pay for them?
The same reason you purchase plugins, custom textures or brushes. Our designers invest many hours going through hundreds of Lightroom settings to find stylish effects that you will like. How much is your time worth?
Do presets work the same on RAW and JPG files?
A preset developed for a RAW image will not give the same effect when applied to a JPG file. We give you two identical sets of 45 presets. One for RAW workflow and one for JPG workflow.
How many presets are in this set and what is the price?
You get 45 presets, nearly twice the amount we offered in our first set or presets. With our introductory sale, pay less than a $1.00 per preset. The sale ends soon.

![]()
Lightroom Top 10 Gotcha’s From The Lightroom Queen
Victoria Bampton (the Lightroom Queen)
is the author of Adobe Lightroom 2 - The Missing FAQ eBook. Here's a new article from her on Lightroom, and below that you'll find links to her free Lightroom Shortcuts PDFs.
 If you’re just starting out with Lightroom, there are a few CRUCIAL bits of information which will save you hours of headaches and untangling. They’re the kind of thing that just make you say “I’d wish I’d known that before...” These are my top ten gotchas, direct from the forums.
- Lightroom is all about non-destructive editing - so don’t try to save over your originals.
- Lightroom doesn’t ‘contain’ files, it just holds data about them - so don’t go deleting your originals thinking that they’re safely stored in Lightroom.
- Lightroom’s backups don’t back up your originals - you still need to do that.
- Lightroom’s catalog is just a database, and databases can become corrupted - backup regularly, and keep older backups for a while.
- Lightroom needs to know where the files are - don’t move or rename files outside of Lightroom, i.e. in Explorer or Finder, otherwise you’ll have a long job fixing all of the links.
- Lightroom will not match your cameras rendering when working with raw files as it’s just raw data, but you can use the new profiles to emulate the manufacturer’s look for some cameras, or you can build your own profile to match.
- Lightroom offers a choice of different colour spaces when you output, and AdobeRGB/ProPhotoRGB will look odd in programs that aren’t colour managed (like web browsers). Use sRGB for screen output like emailing or uploading to the web.
- Lightroom’s Grid view behaves differently to other views - anything you do in Grid view applies to all selected images, whereas other views only apply to the most selected image.
- Lightroom has 3 different levels of selection, not 2. Notice the difference, otherwise you could accidently apply a setting to multiple different images.
- Lightroom’s Flags are local to the folder or collection, whereas star ratings and labels are global. This means that a photo can be flagged in one collection but not flagged in the folder.
Adobe Lightroom Keyboard Shortcuts - Free Download
Photoshop Lightroom Version 2
Lightroom Keyboard Shortcuts - Windows Release Version 2.0
Lightroom Keyboard Shortcuts - Mac Release Version 2.0
Photoshop Lightroom Version 1
Lightroom Keyboard Shortcuts - Windows 1.4.1
Lightroom Keyboard Shortcuts - Mac 1.4.1
![]()
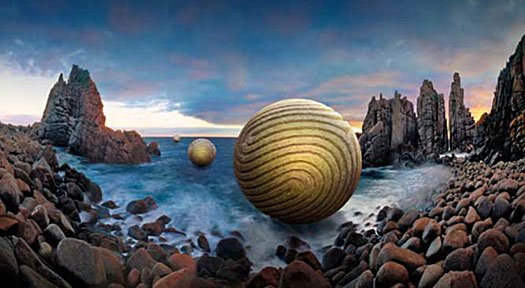
Photoshop CS4: Essential Skills Cover
Mark Galer tracks the development of the concept and
image that appears on the cover for the Photoshop CS4 book, the fourth version of the best selling ‘how-to’ book published by Focal Press. Download the PDF (432 KB).
![]()
Nik Dfine 2.0 Updated For Lightroom 2 - Exclusive 15% Discount
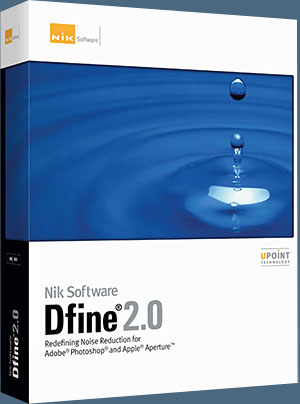 Nik Software announced today that Dfine 2.0, its popular award-winning digital photographic plug-in offering photographers advanced and powerful noise reduction for their digital images, is now available for Adobe Photoshop Lightroom 2.3 and higher. Dfine 2.0 provides superior noise reduction while maintaining detail and sharpness throughout an image and providing unprecedented selective control over noise reduction by employing Nik Software’s U Point technology. The update is available now as a free download to current Dfine 2.0 owners.
Nik Software 15% Instant Discount
Enter our exclusive discount coupon code - NIKPSS - during the checkout process at Nik Software for an instant 15% discount on any Nik Software product. This exclusive discount coupon code can be applied to all the latest Nik Software Photoshop plugins, including Silver Efex Pro, Color Efex Pro, Viveza, Sharpener Pro, and Dfine.
“Dfine 2.0 now joins Sharpener Pro 3.0, Viveza, Color Efex Pro 3.0 and Silver Efex Pro and completes the Lightroom update for our entire line of software plug-ins for photographers,” said Michael J. Slater president and CEO of Nik Software. “We are pleased to announce that Dfine 2.0 is now available and this update, like previous Lightroom compatibility releases, is offered to Dfine 2.0 users at no additional cost.”
![]()
Nik Sharpener Pro 3.0 Updated For Adobe Photoshop Lightroom 2 - 15% Exclusive Discount
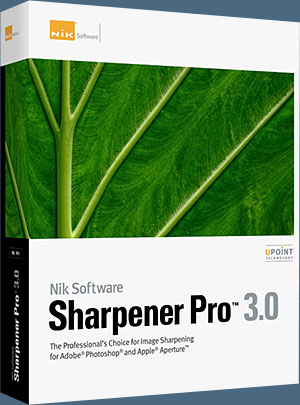 Nik Software announced today that Sharpener Pro 3.0, its popular digital photographic plug-in offering the most advanced and powerful sharpening solution for photographers, is now available for Adobe Photoshop Lightroom 2.3 and higher. Sharpener Pro 3.0 eliminates the guesswork typically required for achieving superior and consistent selective sharpening results. The update is available now as a free download to current owners.
Sharpener Pro 3.0 installs as a plug-in for Lightroom 2.3. Once installed, Sharpener Pro 3.0 is accessible via the Lightroom Photo>Edit In… menu. Edits made using the plug-in within Lightroom are non-destructive in nature, with edits applied automatically to a newly generated TIFF file and not the original. Sharpener Pro 3.0 also takes advantage of Lightroom’s efficiencies for everyday tasks, including the ability to edit multiple images in one session, increasing productivity for photographers.
Featuring Nik Software's patented U Point technology, Sharpener Pro 3.0 enables photographers to selectively sharpen objects within their images. U Point-powered Control Points are easy to use and offer precise control over sharpening intensity without the need to create complicated selections and layer masks.
The suggested retail price of Sharpener Pro 3.0 is $199.95. Upgrades from any previous version are available for $99.95. Enter our exclusive discount coupon code - NIKPSS - during the checkout process at Nik Software for an instant 15% discount on any Nik Software product. Sharpener Pro 3.0 installs as a plug-in for either Adobe Photoshop, Apple Aperture 2.1, or Lightroom and is available for Windows and Macintosh operating systems, including Vista and Leopard.
![]()
Photoshop Daily - Free Resources For The Photoshop Community
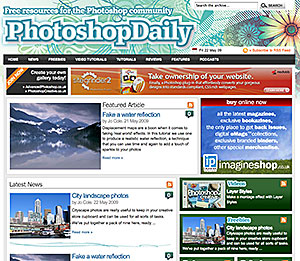 Jo Cole of Photoshop Creative and Advanced Photoshop magazines asked us to pass along some info about a free Photoshop resource site he's involved with called Photoshop Daily. Well, sure! So here it is:
Good news for Photoshop users – a new site has launched that offers amazing free creative resources. Photoshop Daily brings together everything that a Photoshop user could ever want. From the latest rumours and activities from Adobe, right through to showcasing cool gadgets or resource websites to expand Photoshop’s creativity. If there is something happening that is of interest to Photoshop fans they will find it at the new Photoshop Daily website.
![]()
Photoshop Tips And Tricks From Jay Nelson
Here's another batch of Photoshop tips and tricks by Jay Nelson, the editor-in-chief of Design Tools Monthly.
 Preview Sharpening in Camera Raw
When sharpening an image in Camera Raw 4.1 and above, you can hold down the Option key as you adjust the sliders. This will show you a grayscale preview of of the effect that change will make!
Better Grayscale Photos in CMYK
When printed in a CMYK publication, grayscale photos can look much better if you create the gray from all four CMYK inks. The result can have a much wider tonal range than a simple grayscale image, because it can use all four inks to make halftone dots. But some curves to be applied to the separate inks to bring out the details in the image, and optionally to impart a warm or cool effect.
The easiest way to convert a grayscale image into a successful quadtone is to use Adobe's presets. In Photoshop, choose Mode> Duotone. Then choose Quadtone and click the Load button. Navigate to the Photoshop application folder, and within it go to this folder: Presets/Duotone/Quadtone/Process Quadtones. Then choose among the presets: CMYK cool, very cool, neutral, wm, very wm, or ext wm.
Option-Transform
Here's the quickest way to use the Free Transform tool on a copy of a selection in Photoshop: just add the Option key when you press the Free Transform tool keyboard shortcut -- Option-Command-T instead of Command-T.
Magic Setting for Dodge & Burn Tools in CS4
The Dodge and Burn tools in Photoshop CS4 are far more effective now. Rather than dulling the colors and whitening or darkening the tones, it protects them. The key is to enable the checkbox in the Options bar labeled Protect Tones.
 Illustrator Smart Objects in Photoshop
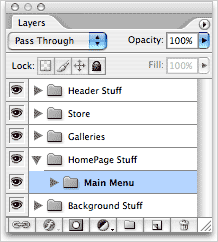
When you place artwork from Illustrator into Photoshop, you have the option of bringing it in as a Smart Object. Doing this will maintain the Illustrator artwork's infinite resolution, which means that if you resize it in Photoshop, or resize the entire Photoshop file, the Illustrator Smart Object will output at the full resolution of the Photoshop file. An additional benefit is that the Illustrator artwork becomes embedded in the Photoshop file.
You can edit the embedded file by selecting its layer in the Layers panel and either double-clicking the layer thumbnail or Control-clicking on the layer and choosing Edit Contents. The embedded Illustrator artwork will open in Illustrator, but you won't be changing the original Illustrator file on your hard drive.
Photoshop CS4 Quick Tips
Photoshop CS4 has lots of little improvements -- here are a few:
• You can delete a layer by selecting it and pressing the Delete key on your keyboard.
• If you have a MacBook Pro or MacBook Air with a gesture-equipped trackpad, you can use the two-finger pinch to zoom in and out, and the two-finger twist to rotate its canvas.
• The new Vibrance adjustment layer is more subtle and effective than Hue/Saturation. It can add punch and presence to objects in a scene, without creating color artifacts in uniform backgrounds.
Optimize Multiple Exposures in Photoshop
Photoshop CS4 has a feature that can combine multiple exposures into one optimized image. For example, you could take several shots of the same scene, each optimized for a different light level or area of focus, and Photoshop will take the best of each. To use it, place each image on its own layer in one Photoshop document. Then, select all the layers and choose Edit> Auto-Align Layers… Leave the defaults as-is, and click OK. Then, choose Edit> Auto-Blend Layers… Again, leave the defaults and click OK. That's it! (Note: while this works best when you use a tripod, the Auto-Align step does a good job of aligning hand-held shots.)
Public Domain Images from the U.S. Government
Hey, you paid for them already! Get excellent images at:
www.archives.gov
www.digitalvaults.org
www.nsf.gov/news/mmg
www.state.gov/r/pa/ei/pix
www.nasa.gov/multimedia
www.loc.gov/rr/print/catalog.html
www.defenselink.mil/multimedia/multimedia.aspx
www.usmint.gov/pressroom
www.nps.gov/pub_aff/imagebase.html
www.photolibrary.fema.gov/photolibrary
www.photolib.noaa.gov
www.nih.gov/about/nihphotos.htm
(We saw this list in FPO Magazine, a remarkable new publication for magazine designers and publishers: www.fpomagazine.com)
New Grid View in Bridge
Unlike other view modes in Bridge, the new Grid view in Bridge CS4 shows all images without cutting any off at the bottom of the preview window.
Helpful Adjustment Presets in Photoshop
In Photoshop CS4, if you create an Adjustment Layer, look in the Adjustment Layer panel. There, you can choose among several very helpful presets for each kind of adjustment. If one gets you almost to where you need, you can tweak it from there. Browse through the presets for Levels, Curves, Exposure, Hue/Saturation, Black & White, Channel Mixer and Selective Colors. Click one to apply it, then press Command-Z to undo it. It's an incredibly fast way to make instant adjustments.
Lightroom's Area Histogram
In the Develop module in Photoshop Lightroom, you can limit the histogram to displaying only the data in a selected area: Click the Crop Overlay button and drag the crop outline to surround the area of interest.
Skip the Confirmation Prompts
If you get tired of seeing a confirmation prompt in Photoshop (the dialogs that say "Apply effects before changing this?" or "Are you sure you want to do this?"), you can force it not to appear by holding down the Option key when performing the action. For example, hold down the Option key when dragging a Layer Mask to the trash icon, and it won't warn you about applying that Layer Mask to its layer.
Photoshop User
Measure Objects in Real World Units
When viewing a photo in Photoshop CS3/CS4 Extended, you can measure the real-world sizes of items, as long as you know the real-world size of any item in the photo. Choose Analysis> Set Measurement Scale. Click and drag on your known object to measure its length in pixels. That value will appear in the Pixel Length field. Then in the Logical Length field, enter the real-world measurement of that object -- say, three feet. Finally, in the Logical Units field, type in "feet" or whatever unit you used in Logical Length. Now you can use the Ruler tool under the Analysis menu (or in the Tools panel) to measure items in real-world units!
Tip #2: Photoshop Extended can also generate a Scale Marker for your image, just like on a map. Choose Analysis> Place Scale Marker… and give it a length. A bar will appear on a new layer, with its length labeled.
Add Several Layer Styles
Here's a trick to add more than one Layer Style to a layer: add a Layer Style and the convert the layer to a Smart Object. Then you can apply an additional Layer Style - even the same Layer Style again. You can use this trick to add two different strokes to a selection, for example.
Zooming Tip
Recent versions of many applications will zoom in when you press Command-+ (plus). Bonus: if you select an object or objects and then press Command-+, those objects will be centered in your window and zoomed in. So, the next time you have an item selected, try pressing Command-+ to zoom into it, or Command-- (minus) to zoom out.
![]()
Real World Adobe Photoshop CS4 For Photographers Sample Chapters
 Here are some free sample chapters from the new book Real World Adobe Photoshop CS4 for Photographers. You'll learn about blending modes, dodging and burning by hand, using history to make adjustments, and soft-proofing an image for print.
Adjusting Images Using Blending Modes
Applying Levels, Curves, Hue/Saturation, and the other adjustments as adjustment layers offers tremendous flexibility and power, but they aren’t always the quickest or easiest ways to fix your images. In some cases, you may find it easier and faster to do the heavy lifting with blending modes, and save Curves for fine-tuning.
Dodging and Burning by Hand
The powerful one-two punch of adjustment layers and blending modes also comes in handy for those times when specific areas of your image aren’t successfully addressed by overall changes to curves or blending modes. You already saw forms of local corrections back when we masked adjustment layers for edits based on Curves and the Multiply and Screen blending modes. For more free-form control, you can set up a single layer that gives you reversible dodging and burning without having to draw a curve, and it’s possible because of the Overlay blending mode...
Using History to Mix Adjustments
A more free-flowing, seat-of-the-pants alternative to layers is the History panel. History does a lot more than give you as many as 1000 levels of Undo. When you use the History Brush together with edits such as filters or blending modes, you can apply effects that are very similar to those you can achieve with layers and masks. It helps to be familiar with how the History panel works. For that, see “History Panel Tips” in Chapter 6, “Essential Photoshop Tips and Tricks.”
Soft-Proofing an Image for Print
Thanks to the wonders of color management, the digital darkroom offers a key advantage over the traditional, analog darkroom: You can see what will happen in the print before you actually produce it.
The naïve view of color management is that it makes your prints match your monitor. If you’ve read this far, you’ve probably realized that this is an impossible goal—printers can’t print the range of color that a good monitor can display. Instead, color management tries to reproduce the image as faithfully as the limitations of the output process will allow. In other words, you can’t really make the print match your monitor, but you can use your monitor to tune the print for the specific printer you’re using. What makes this possible is the output profile, which describes the printer, ink, and paper.
But color management knows nothing about images, only about each image’s color space. No output profile, however good, does equal justice to all images. When you convert an image from a working space to the gamut and dynamic range of a composite printer, the profile treats all images identically, using the same gamut and dynamic range compression for all.
Fortunately, the soft-proofing features in Photoshop let you preview exactly how the profile will render your images, so that you can make the necessary corrections. If you want great rather than good, optimize images for different output processes, because each image requires its own compromises.
![]()
15% Discount On All onOne Software Plugins
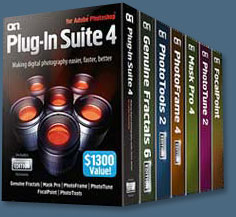 Enter discount coupon code PSSPPT06 during the checkout process at onOne Software for an instant 15% discount on any onOne Software product. This is a special offer exclusively for PhotoshopSupport.com visitors.
Genuine Fractals 6 adds several new features designed to help photographers get the best enlargements possible. These new features include texture presets, a new gallery wrap function, batch processing, tiling for smaller printers and support for Adobe Photoshop CS4, Adobe Photoshop CS4 Extended and Adobe Photoshop Lightroom 2.
Genuine Fractals 6 represents onOne Software's continuing commitment to provide photographers with the industry standard for resizing images with no loss in image quality and sharpness. Plug-In Suite 4.5 includes full versions of the following onOne Software products:
Genuine Fractals 6 Professional Edition can resize digital images over 1000% with no loss of detail or sharpness. Version 6 now includes texture presets, a gallery wrap feature, batch processing, tiling for small format printers, and support for Lightroom 2 and Aperture 2.1.
PhotoTools 2 Professional Edition is a flexible yet powerful Photoshop plug-in that utilizes the power of Photoshop Actions to provide a complete library of effects created by Kevin Kubota and Jack Davis. These effects may be previewed, stacked and blended together just like filters over a camera lens and its built-in batch processing engine helps improve productivity. Version 2 now includes a new effects library, over 120 new effects, masking capabilities and support for Lightroom 2 and Aperture 2.1.
PhotoFrame 4 Professional Edition can be used to create stunning border and edge effects that look like they came out of the darkroom. Users can select from over a thousand edges, including authentic film and artistic mediums. Version 4 now includes a new frame library, improved library management options, new content, output options, and integration with Lightroom 2 and Aperture 2.1.
Mask Pro 4.1 easily creates high-quality masks and selections even from tough subjects like hair and glass, making it easy to place a subject in a new background.
PhotoTune 2.2 provides professional quality color correction in an easy-to-use interface. PhotoTune 2.2 includes ColorTune for general color correction and SkinTune for color correcting skin tones accurately.
FocalPoint 1.0 simulates selective focus or tilt-shift lenses, helping photographers blur and/or vignette an image to focus a viewer's attention.
Enter our exclusive discount coupon code - PSSPPT06 - during the checkout process at onOne Software for an instant 15% discount on any onOne product.

![]()
Did You Know You Could Create An Entire Website In Photoshop?
SiteGrinder Photoshop Plugin - Create Websites Instantly
 There often seems to be a strict division of labor within the world of web design and development. Creative professionals tend to stick to the Photoshop domain, while those well-versed in scripting are left to the task of implementing their work. Indeed, the two realms are quite different from each other, to which any of us even vaguely familiar with either can easily attest.
Essentially, Photoshop is a no-holds-barred design studio, offering the artist a seemingly endless array of creative options. On the other hand, HTML, CSS, Java and the like follow strict rules of engagement, requiring the developer to take any number of esoteric concerns into consideration in order to ensure that designs are properly displayed on the web.
Turn Photoshop Into A Complete Web Design Tool
SiteGrinder seeks to bridge this gap between design and development. Basically, this program turns Photoshop into an easy-to-use and fully functional web design tool. With SiteGrinder, designers will now have the freedom to totally let their creativity loose and then, without skipping a beat, transfer their designs to the web. Bringing esthetic concerns together with more practical considerations, this program is an amazingly powerful tool that would make a fantastic addition to any web designer's bag of tricks.
 Generate Your Web Pages Directly From Photoshop
By generating web pages directly from Photoshop, you'll be able to spend much more time on the creative end of the spectrum, since you'll know right off the bat how well particular designs will translate to the web. No more going back to the Photoshop drawing board after getting a phone call from your development team, telling you that what you had envisioned doesn't have a chance of being displayed on the web. You can immediately visually and interactively test your designs, which permits you to then make changes to either esthetics or functions while it's still relatively early on in the design process.
Pricing and Availability
Mac OS X and Windows versions of the SiteGrinder unlockable demo are available now via download. SiteGrinder can be ordered from Media Lab's online store.
![]()
Photoshop Masking Plugin Fluid Mask 3 - Price Drop And Exclusive $20 Instant Discount - Now Only $129
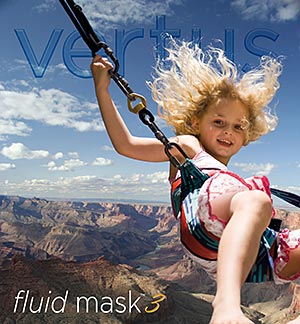 The 4 1/2 out of 5 star review of Fluid Mask 3 at MacWorld begins by saying that this "Photoshop plug-in takes the pain out of extracting backgrounds," and goes on to recommend the latest version, stating that "Fluid Mask 3.0.2 is a very effective tool for separating objects from their backgrounds. It offers a variety of useful features for tackling almost any difficult image, from wispy hair to complex foliage. Online video tutorials and live training sessions help ease the learning curve."
Our friends at Vertus, the makers of Fluid Mask 3 Photoshop Plugin, have set up a special exclusive discount for PhotoshopSupport.com. Buy now for only $129. Just follow this discount link and instantly get $20 off your purchase of Fluid Mask 3.
Fluid Mask 3 is designed for photographers, image editors, graphic designers and all those who take digital image editing seriously. In a streamlined interface and workflow, Fluid Mask 3 instantly shows key edges in the image and provides comprehensive easy to use tools that work with difficult-to-see edges and tricky areas like trees & lattices. Fluid Mask will also preserve all-important edge information for a professional quality cut out. Simply follow this discount link and pay only $129 for Fluid Mask 3.
![]()
Photoshop CS4 Extended Student Edition $199
 Students can purchase Adobe Photoshop CS4 Extended for $199.
Get all the features of Photoshop CS4 — and much more. Whether you work in design, motion graphics, architecture, education, engineering, medicine, or scientific research, Photoshop CS4 Extended - Student Edition is the perfect software for you.
Paint directly on 3D models and access all the power of Photoshop for 3D editing and compositing. Experiment freely with nondestructive image adjustments. Composite images, text, and graphics.
Work at peak efficiency in a streamlined and flexible interface. Edit motion graphics over multiple frames of imported video layers. And for accurate image analysis and visualization, take advantage of Photoshop CS4 Extended - Student Edition's precise measurement, counting, and logging tools.
Eligibility For Student Editions
Student Edition products are for purchase by higher education students only. A higher education student is defined as a full- or part-time student enrolled at a higher education institution defined as an accredited public or private university or college (including community, junior, or vocational college) that grants degrees requiring not less than the equivalent of two years of full-time study. Read more details at the Adobe site.
![]()
A Thank You To Our Friends, Partners & Sponsors!
![]() We'd like to thank our friends, partners and sponsors: Adobe, Google, Hostway, Apple, Peachpit Press, O'Reilly Media, Janita, Wiley Publishing, Creativepro.com, CreativeBits, Heathrowe, Smashing Magazine, The Photoshop Roadmap, Power Retouche Plugins, Wacom, Vertus Fluid Mask, Template Monster, onOne Software, Brusheezy, AV Bros. Plugins, Obsidian Dawn, BittBox, Sue Chastain, Mark Galer, and AutoFX.
We'd like to thank our friends, partners and sponsors: Adobe, Google, Hostway, Apple, Peachpit Press, O'Reilly Media, Janita, Wiley Publishing, Creativepro.com, CreativeBits, Heathrowe, Smashing Magazine, The Photoshop Roadmap, Power Retouche Plugins, Wacom, Vertus Fluid Mask, Template Monster, onOne Software, Brusheezy, AV Bros. Plugins, Obsidian Dawn, BittBox, Sue Chastain, Mark Galer, and AutoFX.
![]()
![]()
![]()


