Skin Retouching Tips In Photoshop CS4 - Photoshop CS4 Tutorial
 A fellow photographer was showing me some images the other day that he had captured with a camera that uses a plastic lens. The images had a certain attraction.
Although the images had some pretty shocking vignetting and heavy distortion he was drawn to the beautiful liquid smooth tones that the plastic lens was offering up. Most women who look at photographs of themselves would agree that crunchy detail is just not a good look.
A digital camera can be a very cruel tool that can capture way too much information. Most people would prefer their skin to appear smooth, but not featureless, and will thank the photographer when they can reveal a skin texture that does not shout its detail to the viewer. The craft of professional skin retouching is the ability to render perfect skin without giving your model the appearance of a plastic-fantastic shop window mannequin. Read the Skin Retouching Tips In Photoshop CS4 Photoshop tutorial.

Beauty Retouching Techniques DVD From Gry Garness - Advanced Photoshop Training - 3 Free Video Clips
 The Photoshop Beauty Retouching Techniques DVD From Gry Garness is a visual-practical DVD guide to professional beauty and portrait retouching using flexible solutions for a variety of photo retouching jobs, from flawless magazine covers to Photoshop portrait retouching. This is an educational tool aimed at intermediate to advanced Photoshop users. It's effectively a 13 hour one-to-one with Gry Garness, an experienced trainer and London-based retoucher, demonstrating graphics tablet based professional retouching through a great variety of images, with models and non-models. It's adaptable to all types of retouching - not just favouring one particular style.
3 Free Photoshop Beauty Retouching Video Clips
Watch 3 free video clips from this DVD (Tutorials are Photoshop CS5 updated, but relevant for all CS versions):
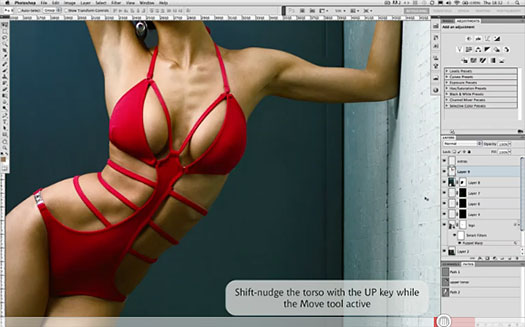
Remodelling A Figure In Photoshop
Skin Retouching - Pop the Highlights
Skin Retouching - Retouching The Brush Work

Wacom MasterClass Video Training - 9 Free Videos - 20% Discount Code
March 22, 2012
 Below are 9 free videos from the Wacom MasterClass Complete Collection. If you choose to purchase this product, make sure to use our exclusive discount coupon code Wacom20 for an instant 20% discount, which brings you 10 hours of expert video training for only $79.99.
This exceptional value includes all of Volumes 1–3 of the Wacom MasterClass collection, including lessons from artists Angie Taylor, Steve Caplin, Daniel Lieske, and Uli Staiger. In addition to a basic course covering the tablet’s tools and settings, you get training on everything from beauty retouching and painting in Photoshop to drawing in Illustrator and motion design with After Effects.
Each class features lessons with picture-in-picture live footage of the artist working with their pen and tablet, enabling you to see and learn from their techniques up close.
Basic Settings - Installing Your Tablet - Installing the Wireless Tablet
In this lesson you'll see how to install the Wacom tablet Intuos4 and connect it to your computer via Bluetooth. You'll also get some tips on optimizing the battery life of your tablet.
Basic Settings - Working with Pens - Pressure Sensitivity
In this tutorial you'll learn about the pressure sensitivity of the pen and how you can adjust its settings to suit the way you work in Photoshop.
Basic Settings - Working with Pens - Fine Tuning and Tilt Sensitivity
In this video you'll see how to use the Wacom Control Panel to fine-tune the click threshold and adjust tilt sensitivity to work with the new Art Pen.
Vol.1: Beauty Retouching - Removing Skin Blemishes - Spot Healing Tool: More Blemishes
A few small scars and wrinkles detract from the model's overall appearance, so in this video we'll get rid of them using the Spot Healing tool.
Vol.2: Drawing and Painting in Photoshop - Preliminaries - Warming Up with Scribbles
In this lesson we'll do some casual scribbling to get comfortable in the workspace and warm up the creative part of the brain.
Vol.2: Creating the Planet - Creating the Planet - Refining the Clouds
We'll nondestructively refine the appearance of our clouds in this video by adding a layer mask and an adjustment layer.
Vol. 3: 3D with Photoshop Crash Course - Creating a Complex Object from a Grayscale Image
You can create a new 3D object just by painting a 2D image – Photoshop uses the luminance information to build up a great landscape-like object! You'll see how it works in this video.
Vol.3: Motion Design with After Effects Painting Techniques - Clone Tool Basics
In this tutorial you'll learn the basics of the very powerful Clone tool. We'll also look at the options for offsetting cloned pixels in time.
Vol.3: SketchBook Pro Crash Course - Setting Everything Up - Wacom Control Panel
This video looks at the Wacom Control Panel and how to set it up. You'll get some ideas of things you might want to change, like the contents of the Radial menu and the ExpressKeys.
Wacom Intuos 5 Tablets
Wacom today announced the Intuos 5, the next generation lineup of pen tablets for professional photographers, designers and artists. Superior new features include multi-touch gesture support for intuitive input, an Express View display to facilitate an efficient workflow and wireless capabilities for convenience and comfort. Combined with Wacom’s renowned pen pressure and tilt sensitive pen, the state-of-the-art Intuos5 inspires creativity through an immersive experience.
The Intuos5, available today, comes in three models: Intuos5 touch Small ($229.95 USD), Medium ($349.95 USD) and Large ($469.95 USD).


HDR (High Dynamic Range) Must Know Info - A Condensed Chapter From Rick Sammon's HDR Secrets For Digital Photographers
 Here is some “must know” HDR (High Dynamic Range) info. It’s a condensed and modified version of a chapter from Rick Sammon’s HDR Photography Secrets (May 2010). This is just a starting point for HDR photography – but hey, you gotta start somewhere.
New to HDR? Here’s what it’s all about. You take exposures at the recommended exposure setting, and then over and under that setting – usually at +2 EV and at –2EV, but sometimes at greater extremes.
Then, using an HDR program like Photomatix, you combine your images into a single image that captures all the tones from your three (or more) images. How cool!
To create the HDR image, I use Photomatix Pro (a true HDR program) and Topaz Adjust (a plug-in the expands the range of an image).
See the Light & Determine Bracketing
The first step in creating a HDR image (or any photographic image for that matter) is seeing the light. Most important in HDR photography is seeing the contrast range in the scene – the difference between the shadow and highlight areas.
Seeing the color of the light, the direction of the light and the quality of the light is also important, because these factors also affect how we perceive a photograph. For now, however, we’ll only talk about contrast.
In the interior picture of a church in San Miguel de Allende, Mexico, the difference between the darkest and lightest parts of the scene is fairly wide.
In the picture of a quaint street corner in San Miguel, the contrast range is not nearly as wide as in my church picture. It’s the seeing and knowing the contrast range of a scene that helps determine how many exposures you need to capture the full dynamic range of the scene. That’s covered next. Read the full tutorial...

Exclusive 15% Discount On All Topaz Plugins - Use Coupon Code PHOTOSHOPSUPPORT - Includes Bundles And Upgrades
 Enter our exclusive discount coupon code PHOTOSHOPSUPPORT during the checkout process at Topaz Labs for an instant 15% discount on any Topaz product, including bundles and upgrades.
Topaz Labs Photoshop plug-ins are specifically designed to expand a photographer's creative toolbox by harnessing powerful image technology developments. Photographers everywhere are now taking advantage of the creative exposure effects, artistic simplification, unique edge manipulation, and top-of-the-line noise reduction offered in Topaz products. The Topaz Photoshop Plugins Bundle is a super powerful Photoshop plugins package that includes the following Topaz products:
Topaz Adjust
Deliver stunning and dynamic images with this uniquely powerful plug-in that features HDR-like abilities and enhances exposure, color and detail.
 Topaz Detail
A three-level detail adjustment plug-in that specializes in micro-contrast enhancements and sharpening with no artifacts.
Topaz ReMask
The fastest and most effective masking and extraction program with one-click mask refining.
Topaz DeNoise
Highest-quality noise reduction plug-in that removes the most noise and color noise while preserving the most image detail.
Topaz Simplify
Provides creative simplification, art effects, and line accentuation for easy one-of-a-kind art.
Topaz Clean
Take control of the detail depth of your images with extensive smoothing, texture control and edge enhancement tools.
Topaz DeJPEG
Drastically improves the quality of web images and other compressed photos.
Learn more about the Topaz Photoshop Plugins Bundle. Download a free trial version.

Enhancing 3D Renders In Photoshop CS5
This extensive Photoshop CS5 3D tutorial, Enhancing 3D Renders in Photoshop CS5, is from PSD Magazine and authored by Digital Tutors.
When creating and rendering objects from a 3D application, artists tend to focus on making everything look perfect. 3D artists often get frustrated due to the fact that no matter how perfect they make an image look, it can still seem fake. The problem is that sometimes 3D art looks fake because it is actually too perfect! With this tutorial, Digital-Tutors will teach you how Photoshop can be used to incorporate a number “imperfections” typically found in real-world cameras, giving your renders an appearance that is much closer to that of a photograph.

Many 3D applications will render out images that are clean, crisp and devoid of any imperfections. However, when trying to render images that are absolutely photorealistic, this can be something of a disadvantage. Take a look at a photograph from any real-world camera – there are lighting artifacts, lens distortions, film noise and other flaws that are almost always present. By using Photoshop to incorporate these real-world imperfections into your 3D renders, the end result will be much more natural and much more realistic.
Read the full tutorial, Enhancing 3D Renders in Photoshop CS5.

Photoshop Plugins & Photoshop Plugins Coupons
 We have full product pages and special exclusive discounts on Adobe Photoshop Plug-ins, including exclusive 15% specials on onOne Software's Genuine Fractals and Photoshop Plugin Suite.
Want some free Photoshop Plugins? See our amazing collection: The Best Free Photoshop Plugins - Free Photoshop Plugin Downloads. Here are our special exclusive discount coupon codes.
ONONE Photoshop Plugins — 10% Instant Discount Coupon
Enter coupon code - PSSPPT06 - during the checkout process at onOne Software for an instant 15% discount on any onOne Software product.
TOPAZ LABS Photoshop Plugins — 15% Instant Discount Coupon
Enter coupon code PHOTOSHOPSUPPORT during the checkout process at Topaz Labs for an instant 15% discount on any Topaz product, including bundles and upgrades.
FLUID MASK Photoshop Cutout Plugin — Instant $20 Off Discount
Vertus, the makers of Fluid Mask 3 Photoshop Plugin, have set up a discount deal. Buy now for only $129. Follow this link and get $20 off your purchase of Fluid Mask 3.
NIK Photoshop Plugins — 15% Instant Discount Coupon
Enter coupon code NIKPSS during the checkout process at Nik Software for an instant 15% discount on any Nik plugin or bundle.

Photoshop CS5 FX Book - Free 20 Page PDF Chapter - Integrating 3D Objects Into A Photographic Scene
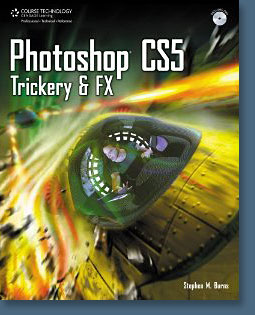 You can download a free 20-page PDF chapter from the Stepehn Burn's book, Photoshop CS5 Trickery & FX. The chapter, Integrating 3D Objects Into A Photographic Scene, shows you how to use 3D models from different programs in CS5, how to create workflow UV maps in your 3D program, and how to edit the 3D model’s surface with photographic images.
Photoshop CS5 Trickery & FX
As a digital artist, you have the advantage of being able to combine all of the creative art forms using your medium--the computer. Photoshop CS5 Trickery & FX shows you how to take your creativity and your art to a new level by blending your traditional artistic skills and vision with the powerful tools of Adobe Photoshop CS5. Photoshop CS5 combines 2D, 3D, and video into one interface, and this latest version of the software includes significant improvements in the 3D tools and functionality. Each chapter in the book is laid out as a complete tutorial that shows you how to use the amazing new Photoshop CS5 features to transform ordinary photos into incredible special effects and digital creations.
Stephen Burns has been a corporate instructor and lecturer in the application of digital art and design for the past 12 years. He has been exhibiting digital fine art internationally at galleries such as Durban Art Gallery in South Africa, Citizens Gallery at the Yokohama Museum of Art, and CECUT Museum of Mexico to name a few. One of his exhibitions won first place in the prestigious Seybold International digital arts contest.

Photoshop Tutorials By Master Illustrator Kevin Hulsey
 We are proud to be hosting some amazing Photoshop tutorials from master illustrator Kevin Hulsey. "I have found that because I started out working in airbrush, I look at Photoshop from a completely different vantage point than most younger 'computer-only' artists." Kevin told us. "My use of Photoshop directly mimics the methodology of a conventional airbrush illustrator. I get a lot of E-mail from students who have a difficult time in understanding approaches that seem completely natural to me. The great thing about Photoshop is that there are so many different roads to the same conclusion."
Please note that these are extensive tutorials and may take some time to load.
 Painting Techniques - tips and techniques for painting in Photoshop
 Ghosting Techniques - tutorial on how to create a transparent view using Photoshop
 Cruise Ship Cutaway - tutorial on using Photoshop to color line art


 How To Sharpen An Image In Photoshop — Advanced Sharpening Techniques
 Most if not all digital images require sharpening, even if shot on a state of the art digital megaresolution SLR with pin-sharp focusing. Most cameras or scanners can sharpen as the image is captured but the highest quality sharpening is to be found in the image editing software.
The best sharpening techniques are those that prioritize the important areas for sharpening and leave the smoother areas of the image well alone, e.g. sharpening the eyes of a portrait but avoiding the skin texture. These advanced techniques are essential when sharpening images that have been scanned from film or have excessive noise, neither of which needs accentuating by the Unsharp Mask. So let the project begin.
 Creating Selections With Photoshop's Pen Tool
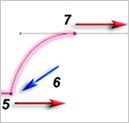 The Pen Tool is often used in the creation of sophisticated smooth-edged selections, but strictly speaking it is not one of the selection tools. The Pen Tool creates vector paths instead of selections; these, however, can be converted into selections that in turn can be used to extract or mask groups of pixels.
Although graphic designers are quite adept at using this tool, many photographers the world over have been furiously waving magic wands and magnetic lassos at the megapixel army and putting graphics tablets on their shopping lists each year in an attempt to avoid recognizing the contribution that this unique tool has to offer.
 Photoshop Masking & Montage Tutorial
 In this sample chapter from his new book, Photoshop CS3 Essential Skills, Mark Galer shows you Photoshop techniques that use selections and Photoshop masks to create amazing effects that can be applied to landscape images. As a bonus, you can also download high resolution versions of the images that are used in the tutorial, so you can work along with Mark.
This tutorial is an excellent way to become more familiar with Photoshop's powerful masking and selection tools.
 Working With Shadows In Photoshop - Advanced Shadow Techniques
 Learn the fine art of isolating and preserving delicate and complex shadows for transplantation to exotic new backgrounds. This tutorial reveals how to introduce a world of exciting textures to your ever so subtle... not... studio tabletop.
The flower for this tutorial was photographed (using a Fuji FinePix) on a cold winters morning in Victoria whilst the sand (shot on Kodachrome film) hails from the Great Indian Desert in Rajasthan. Unlikely bedfellows, but with a little craft the two can lie together comfortably within the same frame – but only if the subtle shadow is captured with all of its subtlety and delicately transplanted to its new home in the desert. This is how...!


Photoshop CS5 & Photoshop CS5 Extended - Best Deals From Adobe
 Adobe Photoshop CS5 delivers breakthrough capabilities to help you create images with impact. Refine your
images with reengineered photography tools for removing noise, adding grain, and creating high dynamic
range (HDR) images. Get precise results when making complex selections. Remove any image element and
see the space fill in almost magically. Paint with naturally textured brushstrokes and realistic color blends. Learn more about Photoshop CS5.
Adobe Photoshop CS5 Extended software helps you create the ultimate images
for print, the web, and video. Enjoy all the state-of-the-art editing, compositing,
and painting capabilities in industry-standard Photoshop CS5, and experience
fast performance thanks to cross-platform 64-bit support. Also create 3D extrusions
for logos, artwork, and motion graphics; edit 3D objects with advanced tools; and create and enhance motion-based content. Learn more about Photoshop CS5 Extended.
Find CS5 upgrade options and Creative Suite 5 deals at the Adobe Store. See CS5 pricing in UK currency at the Adobe UK Store. Visit the Adobe Special Offers page to find the latest deals. Save 80% on Adobe Student Editions. Try before you buy — download a free Photoshop CS5 trial.

Refine Edge - Best New Feature in Photoshop CS5
The Refine Edge feature has been completely revised for Photoshop CS5 and now has the WOW factor when it comes to creating composite images. Mark Galer gives it a test drive.

One of the most challenging montage or masking jobs in the profession of post-production editing used to be the hair lift. When the model had long flowing hair and the subject needed to change location many post-production artists would call in sick. If you got it wrong, just like a bad wig, it showed. Extract filters, Magic Erasers and Tragic Wands didn’t get us close but we now have a new Refine Edge feature in CS5 that has eased the burden of this task and made the task easier than ever before... Read the full Refine Edge - Best New Feature in Photoshop CS5 tutorial...


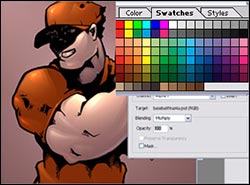 These two tutorials by Chris Arlidge at Steel Dolphin Creative walk you through the steps you need to create beautiful and realistic comic book art in full color. The tutorials make use of the channels palette extensively, but you can use layers with some modifications.
Digital Coloring - Part I - Preparing Line Art For Coloring
Step one of the digital coloring and coloring comics routine is to take scanned line art and prepare it for coloring. This tutorial explains how this is done from taking a dirty scan to creating an alpha channel to store your final line art.
Digital Coloring - Part II - The Render
This tutorial shows you how to fully render comic book art using industry techniques. If you don't have your own line art to use you'll find a link to some prepared line art that is offered as a free download. By following both tutorials carefully you'll be able to add vibrant colors to your comics that will look as good as the pros.

Free Photoshop CS4 & Photoshop Extended CS4 Videos - Russell Brown
Head on over to the always entertaining Dr. Brown's tutorial page and you'll find some great content, including the following Photoshop CS4 Video Tutorials:
CS4 Extended: 3D Quick-Look
Get ready for an incredible 3D experience, as you view this quick-look at some of the new 3D features in Adobe Photoshop CS4 Extended. This tutorial will take you through some of my favorite new tools for working, and experimenting, with 3D objects.
View QuickTime Tutorial; 4.5 MB
CS4 Extended: Spherical Panorama
 Discover one of the new 3D features in Adobe Photoshop CS4 Extended. In this tutorial you will learn how to wrap an image around the inside of a sphere, to create a 3D panorama. Then, simply step into this digital space and use some of the new Photoshop CS4 tools to look around your newly created world.
View QuickTime Tutorial; 7.7 MB
CS4 Extended: 3D Mesh from Grayscale
Bring 2D images back to life with this new Adobe Photoshop CS4 Extended technique for converting grayscale images into 3D objects. This tutorial will also demonstrate how to generate 3D depth maps directly from 2D images.
View QuickTime Tutorial; 9.7 MB
CS4 Extended: Advanced 3D Eclipse Animation
Learn about some of the advanced features in Adobe Photoshop CS4 Extended for animating 3D objects. In this project I will create a solar eclipse simulation from 2D, and video images of the earth and moon. Did I mention that this is an advanced tutorial?
View QuickTime Tutorial; 15.3 MB

Photoshop, Illustrator Text Effect Tutorial
With all the news about all the new features in Photoshop CS5, we thought it would be nice to publish a tutorial that could be used with an older version, like four versions back to Photoshop CS1. This tutorial can be used with any version of Photoshop CS, and will show you how to get that neat KAPOW! text effect, and it comes from Doug Cloud. He's a professional graphic artist and you can see his fine work at Doug Draws.

The inspiration for this tut comes from my love of cartoons, typography, and big bold strokes. When I was a kid I loved watching those old Batman movies. You know the ones where Batman and Robin would cuff the bad guys around and those wild action words would pop up on the screen - Whack! Biff! KaPow! Read full tutorial...


 There are two tutorials on the Greg Martin site that are truly quite remarkable — "Make A Realistic Star Field" and "Make A Planet." The Star Field tutorial will help you create awe-inspiring star fields, and the Planet tutorial shows how to create a simple, yet realistic-looking planet using Adobe Photoshop 7.
Greg Martin says: "My goal is to raise the bar for aspiring celestial artists everywhere by making the basic techniques to create realistic spatial elements available for all interested... It is up to the artist, however, to develop their own skill set and create truly dynamic compositions. Be forewarned... simple "planet and star" pieces are rapidly becoming the height of cliché... the challenge is out for YOU to break the mold and create the next unique and truly inspiring work of celestial art."
 go to "Make a Realistic Star Field" tutorial.
 go to "Make A Planet" tutorial.


 This is an extensive tutorial from Lunacore that details how to go about designing a glass ball in Photoshop that ends up looking very 3D.
On the Lunacore site, Reg says: "Most of my tutorials go beyond the basics of Photoshop. I never felt the need to write tutorials that explain these basics, when most of it is explained in Photoshop's manual/help, books or on different web sites. A lot of my tutorials are based on questions that beginners asked me over and over and/or what isn't clearly explained in the Photoshop's manual or help. Knowing how to use the tools is one thing but knowing when to use them, that's a different story. I try to help with that. It's my intention to write tutorials that are well written and easy to follow by a lot of people with different skill levels."
 go to "Create A 3D Glass Ball" tutorial.


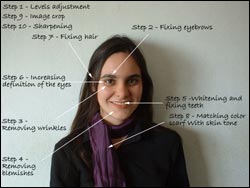 Here is another great tutorial from the Lunacore site that will keep you busy - How To Beautify A Face.
Lunacore tutorial writer Reg says: "This tutorial will show you how to beautify a face. The corrections that we're going to do will make the face look different, but at the same time we will avoid making the results look unnatural. Of course, the face we're going to work on is not going to look the same when we're done, but we will only make necessary and subtle changes. We will fix skin, remove blemishes and wrinkles, whiten and fix teeth, fix hair, fix eyebrows, increase definition in the eyes and crop and sharpen the image in the final steps.
"I'm not only going to show you how to beautify a face, but I will also make suggestions that can be useful for other projects. I will also explain how to use some of the tools involved and show you how to work in a non-destructive way."
 go to "How To Beautify A Face" tutorial.


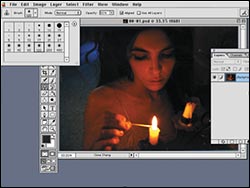 In this sample chapter from Creating Photomontages with Photoshop: A Designer's Notebook artist Odile Pascal guides you through the photomontage process and explains in detail how the original photo of a woman was transformed into an angel in Photoshop.
From the PDF: "After studying at the Beaux-Arts in Marseilles and working in filmmaking, I found a compromise between those two worlds, one in which I can put a character on stage, and then model, color, and texturize her using Photoshop. Paintings of women represent a large part of my work. Using costumes and accessories, I enjoy creating often baroque or timeless worlds, blending styles and eras, and drawing my inspiration from mythological and symbolist imagery. The resulting work, which is quite unlike traditional photography, is designed to create a fairy tale–like universe in a pictorial style close to that of the Italian Renaissance. I decided to avoid traditional representations of angels, with their characters dressed in white, with halos and big wings, set against a background of clouds..."
 Download "From Woman to Angel with Photoshop" PDF sample chapter. [2.0 MB]
 Buy the book at amazon.com (34% discount)


 Artist Nicolas Fructus takes you from sketch and digitalization to working with layers in this PDF tutorial taken from Illustrations With Photoshop: A Designer's Notebook. With detailed notes and sample files, Fructus guides you through the process of creating very complex and beautiful illustrations in Photoshop.
From the PDF: "My task was to create illustrations for nine chapters of a special issue of Casus Belli magazine devoted to a mythical city called Laelith. Each illustration was supposed to show the atmosphere of the neighborhood being described. The image presented here is of The High Terrace, a rich and colorful environment where Laelith’s leading citizens are found. The rocky spires are magicians’ towers — the highest points of the city — where occult experiments take place. The idea was to present the neighborhood as if seen by a wandering tourist, but at the same time suggest the ethereal but omnipresent power of magic in the city. This is why I chose the point of view of a person in a crowd, but with a very wide-angle view..."
From sketch and digitalization to working with layers, this PDF sample chapter tutorial from Illustrations With Photoshop: A Designer's Notebook guides you through the process of creating very complex and beautiful illustrations in Photoshop.
 Download "The High Terrace" PDF sample chapter. [1.6 MB]
 Buy the book at amazon.com (34% discount)


 In this PDF tutorial taken from Photo Retouching with Photoshop: A Designer's Notebook, artist Thibaut Granier shows you how to use retouching and photomontage techniques to create a matte painting.
From the PDF: "Among the many special effects techniques that are used in the film industry, matte painting is the cheapest solution. It is also the most commonly used when it is necessary to put in a decor that does not exist. For Julien Tycoon’s film Bloody Mallory, Mikros Image, a Parisian postproduction company, carried out special effects on over one hundred shots. I was entrusted with the creation of three matte paintings, one of which was to represent a night vision of an abandoned church, with a cemetery in the foreground. The atmosphere had to be eerie and haunted..."
 Download "Bloody Mallory" PDF sample chapter. (1.3 MB)
 Buy Photo Retouching with Photoshop at amazon.com (34% discount)
Buy Directly From Adobe's Online Store
Find upgrade options and Creative Suite deals at the Adobe USA Store. See pricing in UK currency at the Adobe United Kingdom Store. Visit the Adobe Special Offers Page to find the latest bundle and upgrade offers. Get up to 80% off at the Adobe Education Store.
Photoshop CS4 Tutorials and Resources
See our Photoshop CS4 Resource Center for Free Photoshop CS4 Tutorials, the Free Photoshop CS4 Trial Download and Free Photoshop CS4 Training.

Exclusive onOne Software 15% Instant Discount Coupon
 Enter our exclusive discount coupon code - PSSPPT06 - during the checkout process at onOne Software for an instant 15% discount on any onOne product. This includes Genuine Fractals and their amazing Photoshop Plug-In Suite.
OnOne’s new Plug-In Suite solves six of the most frequent problems photographers will encounter in Photoshop. This suite has been granted American Photos Magazine’s Editor’s Choice award for Top Image Editing Software. The Plugin Suite includes:
Genuine Fractals Pro is renowned by both photographers and printers for its finesse at increasing images to more than ten times their original size while maintaining the sharpness and detail you started with. Think of this as the industry standard for image resizing.
Mask Pro is used to remove the tough stuff — such as hair, smoke and glass — while retaining the fine detail. You choose what colors to keep, then paint away what you don’t need.
 PhotoTools Pro packs hundreds of high-calibre photographic effects into one user-friendly plug-in. It’s fast and easy to use. Gives your photos that pro quality look.
PhotoFrame Pro lets you enhance your pictures with hundreds of such design effects, or simply drop your image into a pre-fab layout in Photoshop, Lightroom or Aperture.
FocalPoint helps to control focus and minimize visual noise. Draw the eye to specific points in your images by using selective focus, depth-of-field and vignette effects.
PhotoTune lets you can compare images side-by-side and easily color correct and enhance them. PhotoTune optimizes the dynamic range, color and sharpness of your image without the need to know all the complicated controls in Photoshop like levels and curves.
Simply enter our exclusive discount coupon code - PSSPPT06 - during the checkout process at onOne Software for an instant 15% discount on any onOne product.

Nik Software 15% Instant Discount - Exclusive 15% Coupon
Enter our exclusive discount coupon code - NIKPSS - during the checkout process at Nik Software for an instant 15% discount on any Nik Software product. This exclusive discount coupon code can be applied to all the latest Nik Software Photoshop plugins, including Silver Efex Pro, Color Efex Pro, Viveza, Sharpener Pro, and Dfine.
Color Efex Pro 3.0
 52 photographic filters with over 250 effects for professional quality images.
Completely Original. Completely Indispensable.
Nik Software Color Efex Pro 3.0 filters are the leading photographic filters for digital photography. The award-winning Color Efex Pro 3.0 filters are widely used by many of today's professional photographers around the world to save time and get professional level results. Whether you choose the Complete Edition, Select Edition, or Standard Edition, you’ll get traditional and stylizing filters that offer virtually endless possibilities to enhance and transform images quickly and easily.
Patented U Point technology provides the ultimate control to selectively apply enhancements without the need for any complicated masks, layers or selections. Control color, light and tonality in your images and create unique enhancements with professional results. With 52 filters and over 250 effects found in Color Efex Pro 3.0, you can perform high quality retouching, color correction, and endless creative enhancements to your photographs. Download a free Trial version.
Viveza
 The most powerful tool to selectively control color and light in photographic images without the need for complicated selections or layer masks.
Two of the most important factors in creating great photography are color and light. Mastering the art of selectively correcting or enhancing each of these is now possible for every photographer without the need for complicated masks or selections, or expert-level knowledge of Photoshop. Integrating award-winning U Point technology, Viveza is the most powerful and precise tool available to control light and color in photographic images.
U Point powered Color Control Points, placed directly on colors or objects in an image (such as sky, skin, grass, etc.), reveal easy-to-use controls that photographers can use to quickly adjust brightness, contrast or color in a fraction of the time needed by other tools. With Viveza you’ll spend more time shooting photographs and save hours of image editing. Download a free Trial version.
Silver Efex Pro
 Complete power and control to create professional quality black and white images in one convenient tool.
Silver Efex Pro from Nik Software is the most powerful tool for creating professional quality black and white images from your photographs. For the first time, all the advanced power and control required for professional results have been brought together in one convenient tool.
Featuring Nik Software’s patented U Point technology to selectively control the tonality and contrast of the image, Silver Efex Pro includes advanced imaging algorithms to protect against unwanted artifacts, a comprehensive collection of emulated black and white film types, a variable toning selector for adding traditional toning techniques, over 20 one-click preset styles, and a state-of-the-art grain reproduction engine that help produce the highest quality black and white images possible from your color images while providing more freedom to experiment. Download a free Trial version to use Silver Efex Pro.
Enter our exclusive discount coupon code - NIKPSS - during the checkout process at Nik Software for an instant 15% discount. This exclusive discount coupon code can be applied to all the latest Nik Software Photoshop plugins, including Silver Efex Pro, Color Efex Pro, Viveza, Sharpener Pro, and Dfine.

Photoshop Masking Plugin Fluid Mask 3 - Price Drop And Exclusive $20 Instant Discount - Now Only $129
 The 4 1/2 out of 5 star review of Fluid Mask 3 at MacWorld begins by saying that this "Photoshop plug-in takes the pain out of extracting backgrounds," and goes on to recommend the latest version, stating that "Fluid Mask 3.0.2 is a very effective tool for separating objects from their backgrounds. It offers a variety of useful features for tackling almost any difficult image, from wispy hair to complex foliage. Online video tutorials and live training sessions help ease the learning curve."
Our friends at Vertus, the makers of Fluid Mask 3 Photoshop Plugin, have set up a special exclusive discount for PhotoshopSupport.com. Buy now for only $129. Just follow this discount link and instantly get $20 off your purchase of Fluid Mask 3.
Fluid Mask 3 is designed for photographers, image editors, graphic designers and all those who take digital image editing seriously. In a streamlined interface and workflow, Fluid Mask 3 instantly shows key edges in the image and provides comprehensive easy to use tools that work with difficult-to-see edges and tricky areas like trees & lattices. Fluid Mask will also preserve all-important edge information for a professional quality cut out. Simply follow this discount link and pay only $129 for Fluid Mask 3.

Did You Know You Could Create An Entire Website In Photoshop?
SiteGrinder Photoshop Plugin - Create Websites Instantly
 There often seems to be a strict division of labor within the world of web design and development. Creative professionals tend to stick to the Photoshop domain, while those well-versed in scripting are left to the task of implementing their work. Indeed, the two realms are quite different from each other, to which any of us even vaguely familiar with either can easily attest.
Essentially, Photoshop is a no-holds-barred design studio, offering the artist a seemingly endless array of creative options. On the other hand, HTML, CSS, Java and the like follow strict rules of engagement, requiring the developer to take any number of esoteric concerns into consideration in order to ensure that designs are properly displayed on the web.
Turn Photoshop Into A Complete Web Design Tool
SiteGrinder seeks to bridge this gap between design and development. Basically, this program turns Photoshop into an easy-to-use and fully functional web design tool. With SiteGrinder, designers will now have the freedom to totally let their creativity loose and then, without skipping a beat, transfer their designs to the web. Bringing esthetic concerns together with more practical considerations, this program is an amazingly powerful tool that would make a fantastic addition to any web designer's bag of tricks.
Generate Your Web Pages Directly From Photoshop
By generating web pages directly from Photoshop, you'll be able to spend much more time on the creative end of the spectrum, since you'll know right off the bat how well particular designs will translate to the web. No more going back to the Photoshop drawing board after getting a phone call from your development team, telling you that what you had envisioned doesn't have a chance of being displayed on the web. You can immediately visually and interactively test your designs, which permits you to then make changes to either esthetics or functions while it's still relatively early on in the design process.
Pricing and Availability
Mac OS X and Windows versions of the SiteGrinder unlockable demo are available now via download. SiteGrinder can be ordered from Media Lab's online store.

lynda.com Online Training Library Subscriptions Start At $25 A Month
 Subscriptions to the lynda.com Online Training Library start at just $25 a month, and provide anytime access to tens of thousands of video tutorials covering Photoshop, Illustrator, Dreamweaver, web design, digital imaging, 3D, digital video, animation, and many other topics. View free clips.
The company adds several new training courses to the library each week. For less than a dollar a day, members have the opportunity to stay current and keep skills sharp, learn innovative and productive techniques, and gain confidence and marketability - all at their own pace. Premium subscriptions include instructors’ exercise files so that members can follow along with the exact examples onscreen. Customers learn at their own pace and may stop, rewind, and replay segments as often as necessary. Learn more at lynda.com.

![]()
![]()
![]() Try before you buy. Download any Adobe product for a free 30 day trial.
Try before you buy. Download any Adobe product for a free 30 day trial.![]() See our Photoshop CS5 Tutorials Page for free Photoshop 12 video clips.
See our Photoshop CS5 Tutorials Page for free Photoshop 12 video clips.![]() Buy. Download. Create. Get Photoshop CS5 now at the Adobe Store.
Buy. Download. Create. Get Photoshop CS5 now at the Adobe Store.![]()


 These two tutorials by Chris Arlidge at Steel Dolphin Creative walk you through the steps you need to create beautiful and realistic comic book art in full color. The tutorials make use of the channels palette extensively, but you can use layers with some modifications.

 There are two tutorials on the Greg Martin site that are truly quite remarkable — "Make A Realistic Star Field" and "Make A Planet." The Star Field tutorial will help you create awe-inspiring star fields, and the Planet tutorial shows how to create a simple, yet realistic-looking planet using Adobe Photoshop 7.
 This is an extensive tutorial from Lunacore that details how to go about designing a glass ball in Photoshop that ends up looking very 3D.

 Artist Nicolas Fructus takes you from sketch and digitalization to working with layers in this PDF tutorial taken from Illustrations With Photoshop: A Designer's Notebook. With detailed notes and sample files, Fructus guides you through the process of creating very complex and beautiful illustrations in Photoshop.


