![]()
![]()
Try before you buy. Download any Adobe product for a free 30 day trial.
![]()

![]()
Window Seat: The Art of Digital Photography & Creative Thinking by Julieanne Kost
"Selective Adjustments"
(Pages 138-141 from Window Seat: The Art of Digital Photography & Creative Thinking - courtesy of O'Reilly Media.)
 When making adjustments to isolated areas in an image, people tend to make them in one of two ways:
- Make a selection and then add the adjustment layer.
- Add the adjustment layer to the entire image and then paint the adjustment layer mask to hide and reveal the adjustment in areas as needed.
Both methods yield similar results, so it's really just a matter of personal choice which technique you use. If you choose to make the selection first, you can use any of the selection tools by themselves or in combination with others and/or with the Select menu.
The Marquee tools are the most basic and can be quite useful. Holding down the shift key while dragging with the marquee tools constrains the selection to a perfect square or circle. Holding down the spacebar while clicking and holding the mouse button lets you reposition the point of origin while you're dragging the selection; let go of the spacebar to continue making the selection. You can add to, subtract from, and find the intersection of multiple selections with these (and other) tools using the icons in the Options bar.
The Lasso tools allow for free-form, hand-drawn selections, as well as those made by drawing straight lines between mouse clicks. The Magic Wand makes selections based on color and is controlled with the Tolerance option in the Options bar.
For more complex selections, you may find it's best to use the Pen tool, which offers vector and free-form options (including Bezier curves), which may be saved and then edited point by point. First, select the Pen tool and create a Work Path around the area you want to select. You can then add or subtract points along the path and move them around to make the path amazingly accurate. When you're happy with the path, save it (Save Path in the Paths palette pull-down menu), especially if it is extremely detailed, as you may decide you want to edit or use it again later. To create a selection from a path, choose Make Selection from the Paths pull-down menu to convert it into an active selection. Photoshop allows you to define edge parameters, including the amount of feathering along the edges of the selected area and whether anti-aliasing is on or off. When working with multiple paths and selections you have the option to turn the path into a new selection or add it to, subtract it from, or intersect it with any existing selections.
Once you have created a selection, use Edit >Transform or the Select menus to modify the selection boundary: make it larger or smaller, rotate, select similar colors, smooth, expand, and/or contract it. After a selection is transformed, its edges may need to be adjusted to blend in to the rest of the image. To soften the edge of a selection, choose Select→Feather and enter a pixel value. The higher the value, the softer the edge. If an edge needs to be modified unevenly (soft in one area, hard in another), use the Quick Mask mode or Layer masks (see 'Masking,' in the next section) with the Brush tool to selectively soften the edges as needed.
Once you have a selection around the areas that need to be modified, add the desired adjustment layer. Photoshop creates a layer mask from the selection, automatically isolating the adjustment to the previously selected (now masked) area. If you need to make changes to the selection, simply modify the mask (see 'Masking,' below). If you prefer to add the adjustment layer first, you can use masking techniques to hide and reveal the effects of the adjustment without initially making a selection.
 |
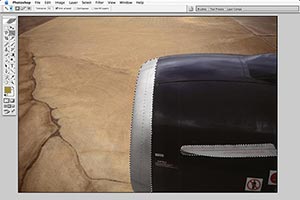
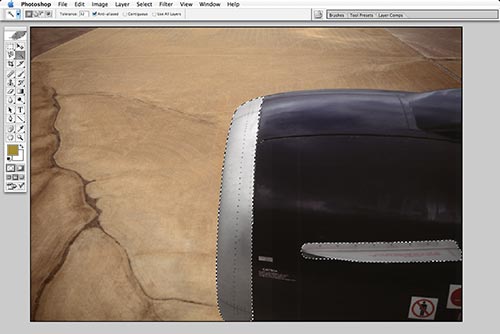
In this example, I used a combination of tools to select the gray metal on the jet engine: the Magic Wand for the basic selection and the Lasso tool to refine it.
 |
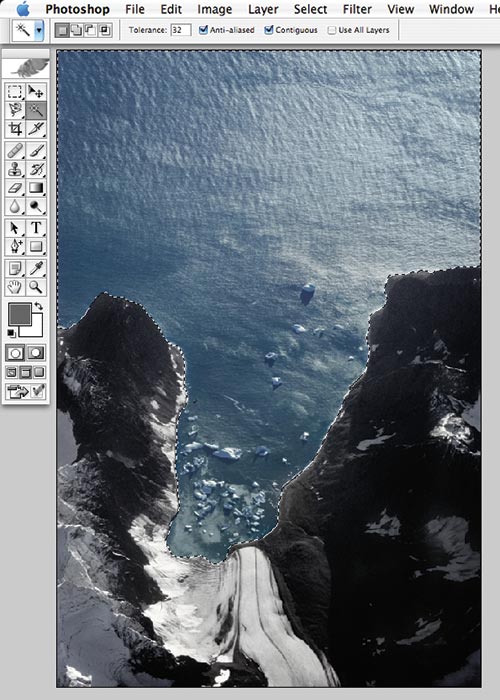
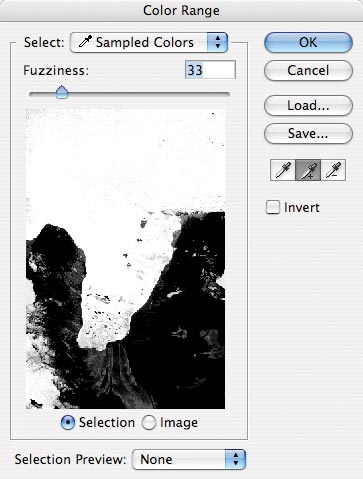
For this image, I used Color Range to select the water, then added an adjustment layer to remove some yellow in that area.
 |
Like the Magic Wand, Color Range (under the Select menu) selects pixels based on color. You can specify a predetermined range (such as reds or yellows) or use the eyedroppers to sample colors in the image. The Fuzziness slider adjusts the tolerance level; higher values capture a wider range of colors. Color Range also offers one the ability to select highlight, midtone, or shadow areas in the image.
Masking
In Photoshop, layer masks work the same regardless of the type of layer to which they're applied. Where a layer mask is white, you can see the content or effect of the layer; where a layer mask is black, the layer's content or effect is hidden.
Painting varying levels of gray on a mask will result in varying degrees of opacity of (or effect applied to) the layer below. The gradient tool can be used to create subtle transitions in layer masks: where the gradient is white, the content or effect is visible (unmasked); as the gradient becomes darker, the content or effect gradually becomes more and more hidden from view. There is a great variety of gradient styles from which to choose, including linear and radial gradients—and different styles can create significantly different effects. In addition, varying the tonality of the foreground and background grays in the gradients can dramatically affect the mask.
If you add an adjustment layer to an image without first making a selection and then need to remove the effect from portions of the image, paint with black on the adjustment layer's layer mask. Paint with white to reveal the adjustment if you inadvertently hide too much. Using a large, soft brush at low opacity on an adjustment layer's layer mask can help you achieve subtle dodging and burning effects by selectively hiding and revealing the effects of the adjustment layer.
To refine an adjustment, double-click the adjustment layer in the Layers palette. This displays the adjustment's dialog with its settings. Remember, you can adjust and readjust those settings as many times as you like without permanently affecting the original image because you're working on an adjustment layer, not on the actual image itself.
You can also use layer opacity and blend mode settings to change the way that the content or effect of one layer is applied to the layers below. For example, if you add a Curves adjustment layer to an image and want only the tonal values (not the colors) to change, apply the adjustment layer and set its blend mode to Luminosity. This prevents any color shifts in the image.
You can use the Layers palette to select, view, and disable layer masks. In the Layers palette, select a layer mask by clicking on its thumbnail. To view a mask, Opt (Mac)/ Alt (Win)-click on the mask icon. To display the composite image again, click on the eye icon. To temporarily disable a mask, shift-click on the mask icon.
Uncorrected image
 |

