![]()
![]() Buy. Download. Create. Order Photoshop CS4 now at the Adobe Store.
Buy. Download. Create. Order Photoshop CS4 now at the Adobe Store.
![]() Try before you buy. Download any Adobe product for a free 30 day trial.
Try before you buy. Download any Adobe product for a free 30 day trial.
![]()
![]()
Welcome To The May 2009 Photoshop Newsletter
Lots of special deals and new tips and tricks and free Photoshop brushes to celebrate the summer days that are almost here. Have fun!
![]()
Nik Sharpener Pro 3.0 Updated For Adobe Photoshop Lightroom 2 - 15% Exclusive Discount
 Nik Software announced today that Sharpener Pro 3.0, its popular digital photographic plug-in offering the most advanced and powerful sharpening solution for photographers, is now available for Adobe Photoshop Lightroom 2.3 and higher. Sharpener Pro 3.0 eliminates the guesswork typically required for achieving superior and consistent selective sharpening results. The update is available now as a free download to current owners.
Nik Software 15% Instant Discount
Enter our exclusive discount coupon code - NIKPSS - during the checkout process at Nik Software for an instant 15% discount on any Nik Software product. This exclusive discount coupon code can be applied to all the latest Nik Software Photoshop plugins, including Silver Efex Pro, Color Efex Pro, Viveza, Sharpener Pro, and Dfine.
Sharpener Pro 3.0 installs as a plug-in for Lightroom 2.3. Once installed, Sharpener Pro 3.0 is accessible via the Lightroom Photo>Edit In… menu. Edits made using the plug-in within Lightroom are non-destructive in nature, with edits applied automatically to a newly generated TIFF file and not the original. Sharpener Pro 3.0 also takes advantage of Lightroom’s efficiencies for everyday tasks, including the ability to edit multiple images in one session, increasing productivity for photographers.
Featuring Nik Software's patented U Point technology, Sharpener Pro 3.0 enables photographers to selectively sharpen objects within their images. U Point-powered Control Points are easy to use and offer precise control over sharpening intensity without the need to create complicated selections and layer masks.
Additional key features of Sharpener Pro 3.0 include:
 Output Sharpening — Provides the ultimate control to create perfectly sharpened images on all devices and media types such as display, inkjet, continuous tone, half tone, and hybrid tone
- Creative Sharpening — Enhances fine details and textures with new structure, focus, and local contrast tools for drawing attention to desired areas within the image
- Industry-First Sharpening Soft Proof — Allows detailed inspection of sharpening results on screen before printing, eliminating costly test prints
- Output Presets — Enables custom settings to be saved for consistent, professional results
- RAW Presharpener — Retains and enhances sharp details within images without amplifying noise and other artifacts
- Multi-Image Support (Aperture & Lightroom) — Provides compatibility with multi-image support in Aperture and Lightroom, allowing photographers to easily copy and paste settings between images to maintain consistency
- Powerful Selective Tool (Photoshop only) — Enables the use of Photoshop’s brush tools to paint in sharpening selectively
- Smart Filter Support (Photoshop only) — Provides compatibility with Adobe Photoshop’s Smart Objects enabling adjustments to sharpening after Sharpener Pro has been applied
The suggested retail price of Sharpener Pro 3.0 is $199.95. Upgrades from any previous version are available for $99.95. Enter our exclusive discount coupon code - NIKPSS - during the checkout process at Nik Software for an instant 15% discount on any Nik Software product. Sharpener Pro 3.0 installs as a plug-in for either Adobe Photoshop, Apple Aperture 2.1, or Lightroom and is available for Windows and Macintosh operating systems, including Vista and Leopard.
![]()
8 Tips For Speeding Up Your Navigation Around Photoshop
![]() Jennifer Farley is an Irish designer and design instructor based in Dublin. Her blog on Laughing Lion Design features Photoshop tips, tricks and tutorials. Here's a new collection of Photoshop tips from her — 8 Tips For Speeding Up Your Navigation Around Photoshop.
Jennifer Farley is an Irish designer and design instructor based in Dublin. Her blog on Laughing Lion Design features Photoshop tips, tricks and tutorials. Here's a new collection of Photoshop tips from her — 8 Tips For Speeding Up Your Navigation Around Photoshop.
I haven’t really written too many list posts, not sure why really, but here’s one today. These are 8 easy ways to speed up how you move around the interface in Photoshop. A keyboard press here, a keyboard press there and you will be flying around your workspace. Most of these I use without even thinking anymore so I hope you find them useful.
TIP
1 — Press Tab to hide your toolbox, options and palettes. This gives you much more room in your workspace and is a handy way to get an uncluttered view of your work. Roll your cursor over the edge of the left, right or top of the screen to display them again, roll your cursor away and they’ll hide again.
TIP
2 — To keep your toolbox on the screen but hide the palettes, hit Shift + Tab.
TIP
3— When you’re working with large documents or are zoomed in closely, the Page Up and Page Down keys move you one full screen up or down one full screen.
TIP
4 — Press Ctrl/Cmd + Page Up to move one full screen left, press Ctrl/Cmd + Page Down to move one full screen right.
TIP 5 — Press the Home key to jump to the top left corner of your image. Press the End key to jump to the bottom right corner.
TIP 6 — If you have more than one document open, press Ctrl/Cmd + Tab to cycle through each one in turn.
TIP
7 — When you have one or more documents open, you can match their magnification or match their location. To do this choose Window > Arrange to Match Zoom, Match Location or Match Zoom and Location.
TIP
8 — Hold Alt/Option + click on the info area on the bottom of the document window to quickly get more information about your open image.
![]()
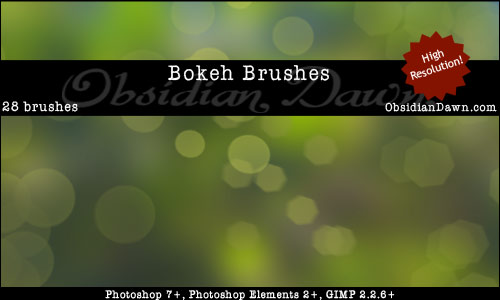
Bokeh Free Photoshop Brushes From Obsidian Dawn
This comes from several requests that I’ve gotten in the last few months. Some of you will know what bokeh is, and some may not. But ALL of you have seen it at one point or another, as long as you look at photographs or watch movies. Check out the preview image below for a visual example.
Bokeh is a Japanese term used in photography. It is used to describe the qualities of the area of a photo that is out of focus, and is used to help draw your eye to the subject of the photograph. Some pretty cool things happen with bokeh, too, and that’s what these brushes will help you to create. Also, keep your eye out for a bokeh tutorial that I’ll be coming out with, hopefully in a few days.
This set of Photoshop & GIMP brushes is composed of various bokeh designs. It comes with several brushes for painting your own bokeh, as well as some that are already put together into scattered groups like the ones you see in my preview image. Some are circles, some are polygons, some are more blurry than others. They are all high resolution, with an average size of about 2000 pixels.
Want Free Photoshop Brushes?
We've collected the most recent of Stephanie's original brushes on a special Obsidian Dawn Photoshop Brushes Page, with big preview images to give you an idea of each set. For her high resolution brushes, you can find a special collection on our high res brush page. Stephanie has also kindly put together her top 10 Photoshop brush tips to help you get the most out of your Photoshop brushes. See our Free Photoshop brushes Page for other places to find brushes.
![]()
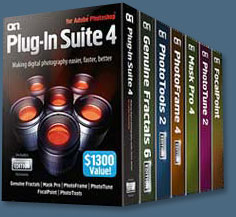
15% Discount On All onOne Software Plugins
 Enter discount coupon code PSSPPT06 during the checkout process at onOne Software for an instant 15% discount on any onOne Software product. This is a special offer exclusively for PhotoshopSupport.com visitors.
Genuine Fractals 6 adds several new features designed to help photographers get the best enlargements possible. These new features include texture presets, a new gallery wrap function, batch processing, tiling for smaller printers and support for Adobe Photoshop CS4, Adobe Photoshop CS4 Extended and Adobe Photoshop Lightroom 2.
Genuine Fractals 6 represents onOne Software's continuing commitment to provide photographers with the industry standard for resizing images with no loss in image quality and sharpness. Plug-In Suite 4.5 includes full versions of the following onOne Software products:
Genuine Fractals 6 Professional Edition can resize digital images over 1000% with no loss of detail or sharpness. Version 6 now includes texture presets, a gallery wrap feature, batch processing, tiling for small format printers, and support for Lightroom 2 and Aperture 2.1.
PhotoTools 2 Professional Edition is a flexible yet powerful Photoshop plug-in that utilizes the power of Photoshop Actions to provide a complete library of effects created by Kevin Kubota and Jack Davis. These effects may be previewed, stacked and blended together just like filters over a camera lens and its built-in batch processing engine helps improve productivity. Version 2 now includes a new effects library, over 120 new effects, masking capabilities and support for Lightroom 2 and Aperture 2.1.
PhotoFrame 4 Professional Edition can be used to create stunning border and edge effects that look like they came out of the darkroom. Users can select from over a thousand edges, including authentic film and artistic mediums. Version 4 now includes a new frame library, improved library management options, new content, output options, and integration with Lightroom 2 and Aperture 2.1.
Mask Pro 4.1 easily creates high-quality masks and selections even from tough subjects like hair and glass, making it easy to place a subject in a new background.
PhotoTune 2.2 provides professional quality color correction in an easy-to-use interface. PhotoTune 2.2 includes ColorTune for general color correction and SkinTune for color correcting skin tones accurately.
FocalPoint 1.0 simulates selective focus or tilt-shift lenses, helping photographers blur and/or vignette an image to focus a viewer's attention.
Enter our exclusive discount coupon code - PSSPPT06 - during the checkout process at onOne Software for an instant 15% discount on any onOne product.

![]()
How To Expand Rectangular Selections And Keep Them Crisp In Photoshop
Jennifer Farley is an Irish designer and design instructor based in Dublin. Her blog on Laughing Lion Design features Photoshop tips, tricks and tutorials. Here's a new Photoshop tip from her — Photoshop Tip: How To Expand Rectangular Selections And Keep Them Crisp.
If you make a rectangular selection in Photoshop, and you find it’s not big enough you COULD make it bigger by using Select > Modify > Expand. This will work if you only need to expand by about 4 or 5 pixels, any more than that and you’ll notice that the corners start to become round.
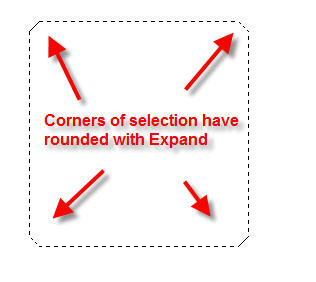
So here’s a better way to expand; 1- Make your selection. 2- Press Ctrl+T (win) or Cmd + T (mac) to bring up the Free Transform bounding box.

3- Simply click and drag one of the bounding box handles and pull your selection to the required size. Press Enter or Return to complete the transformation and voila! Nice crisp corners on your expanded selection. You can transform any selection of any shape in this way.
![]()
Free Update To Silver Efex Pro Installs As A Plug-in For Lightroom 2.3
 Nik Software announced that Silver Efex Pro, its popular digital photographic plug-in offering the most advanced, complete, and straightforward black-and-white solution, is now available for Lightroom 2.3 and Camera Raw 5.3 and higher. The update is available now as a free download to current owners of Silver Efex Pro.
15% Discount Coupon
Enter our exclusive discount coupon code - NIKPSS - during the checkout process at Nik Software for an instant 15% discount. This exclusive discount coupon code can be applied to all the latest Nik Software Photoshop plugins, including Silver Efex Pro, Color Efex Pro, Viveza, Sharpener Pro, and Dfine.
Download a free Trial version to use Silver Efex Pro on your own images for 15-days.
“With Silver Efex Pro now joining Viveza and Color Efex Pro for Lightroom, three of our most powerful products offer photographers even more efficient ways to apply image enhancements seamlessly within Lightroom,” said Michael J. Slater president and CEO of Nik Software. “Our goal is to provide compatibility with popular photo applications such as Lightroom. Offering these free updates for Lightroom enables our users to continue their workflow using their favorite plug-in products regardless of which application they use.”
 Silver Efex Pro installs as a plug-in for Lightroom 2.3, itself a free update from earlier versions and available for download. Once installed, Silver Efex Pro is accessible via the Lightroom Photo>Edit In… menu. Edits made using the plug-in within Lightroom are non-destructive in nature, with edits applied automatically to a newly generated TIFF file and not the original. It also takes advantage of Lightroom and its efficiencies for everyday tasks, like the ability to edit multiple images in one session, saving time and increasing productivity for photographers.
Nik Software also announces that all of its remaining photographic filter products are being updated to support Lightroom. The next plug-in will be Sharpener Pro 3.0. As these Lightroom-compatible versions become available, current owners will receive updates free of charge. All products are expected to be available by the end of the second quarter of 2009.
The fully compatible Silver Efex Pro product, offering support for Adobe Photoshop, Lightroom, and Apple Aperture, is available immediately for electronic delivery directly from Nik Software. Current owners of Silver Efex Pro may download a free update. The suggested retail price of Silver Efex Pro is $199.95. Silver Efex Pro installs as a plug-in for Adobe Photoshop, Lightroom or Apple Aperture 2.1 and is available for Windows and Macintosh operating systems, including Vista and Leopard.
Download a free Trial version to use Silver Efex Pro on your own images for 15-days.
Enter our exclusive discount coupon code - NIKPSS - during the checkout process at Nik Software for an instant 15% discount. This exclusive discount coupon code can be applied to all the latest Nik Software Photoshop plugins, including Silver Efex Pro, Color Efex Pro, Viveza, Sharpener Pro, and Dfine.
![]()
Software Training That’s Certifiably from lynda.com
 lynda.com, the award-winning provider of online software training and education for consumers, businesses and schools, today announced that it is offering a Certificate of Completion program for its vast Online Training Library. With more than 550 courses from industry-respected authors and professional trainers in topics ranging from digital photography, Web design, word processing, digital video, animation, and much more, customers may now earn an official Certificate of Completion when they finish a course at lynda.com. (See our discount coupon below.)
lynda.com is offering banners and links for members to use on their Web sites, blogs or social networking profile. Subscriptions to lynda.com range from $25 for one month to $375 for a Premium annual subscription. All subscriptions provide anytime access to more than 37,000 easy-to-use video tutorials. Premium subscriptions include instructors’ exercise files so that members can follow along with the exact examples onscreen. Customers learn at their own pace and may stop, rewind, and replay segments as often as necessary.
Use our special
lynda.com 20% off Coupon — SAVEPSS — and you will save 20% off a lynda.com Premium subscription. Get access to over 540 online training courses including Photoshop, Lightroom, Dreamweaver, Illustrator, Flash and more. At checkout, simply use coupon code SAVEPSS and you will instantly save 20% off a Premium Subscription. This coupon code will not be accepted on other lynda.com products or subscriptions and expires on August 1, 2009. Visit lynda.com.
![]()
How To Move A Locked Background Layer In Photoshop
Jennifer Farley is an Irish designer and design instructor based in Dublin. Her blog on Laughing Lion Design features Photoshop tips, tricks and tutorials. Here's a new Photoshop tip from her — Photoshop Tip: Moving The Background Layer.
A question that comes up fairly regularly in Photoshop class is; “why can’t I move the Background layer”. The layer is a bit of a funny one because when you look at it in the layers palette, you can see a little lock beside the name so it seems like you should just be able to uncheck the lock. Unfortunately, this doesn’t work!
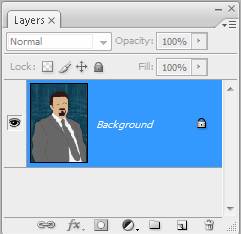
To unlock the Background layer and then move it wherever you want, all you need to do is double-click on the name (literally double-click on the word Background) in the layers palette, which brings up the new Layer dialog box. By default Photoshop offers you Layer 0 as a new name – simply accept this or type in a new name for your Background layer, then click OK.
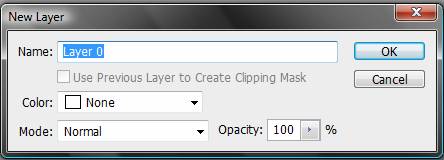
Now you can drag that layer anywhere you want in the layer stack.
![]()
AKVIS MultiBrush 4.0 - Photo Retouching Tools
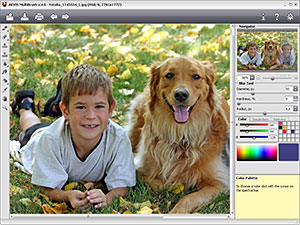 AKVIS Software Inc. announces the release of AKVIS MultiBrush v.4.0 for Windows and Macintosh. AKVIS MultiBrush makes it easy to retouch damaged photos and enhance portraits. It is available as a standalone application as well as a plugin to the mot popular photo editors. AKVIS MultiBrush is a new enhanced version of AKVIS Stamp, therefore the registered users of Stamp can activate MultiBrush for free.
AKVIS MultiBrush makes it easy to retouch photos and enhance portraits in Windows and Mac. Featuring a collection of healing and enhancement brushes, cloning and stamping tools, AKVIS MultiBrush helps artists, photographers and home users to perform portrait enhancement, retouch image flows and remove unwanted objects from digital pictures. AKVIS MultiBrush removes wrinkles, scars, scratches, and enhances imperfect skin on portraits in the most natural way. Spots, stains, and dust are easy to mask and remove.
AKVIS MultiBrush sells for $49.00 USD. Home users can enjoy the full line of AKVIS plugins in the AKVIS Alchemy bundle (Sketch, Chameleon, MultiBrush, Retoucher, Coloriage, Noise Buster, Decorator, Enhancer, LightShop, SmartMask, ArtSuite, Magnifier and ArtWork) for USD $325 USD, huge savings over purchasing each separately. One license allows activating the software on two computers, for example, on a desktop and on a laptop.
![]()
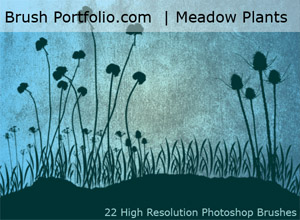
Free Meadow Plant Brushes And A Photoshop Brush Tutorial
BrushPortfolio.com just released a new tutorial explaining how to make Photoshop brushes from plants in your garden. This is the same technique used to create their latest set of Meadow Plant Brushes, a set of 22 high resolution Photoshop brushes created from photographs of decaying winter foliage. The brushes were vectorized in Adobe Illustrator and exported to Photoshop. They range in size from 1356 to 2500 pixels. This set is perfect for scrap book projects and card making. Happy Creating!
![]()
Dreamweaver CSS Tableless Web Design Tutorial
 There's a new Dreamweaver tutorial at the Adobe site, From table-based to tableless web design with CSS. From the intro:
Everyone is urging you to make the switch from table-based layouts to tableless, CSS-positioned layouts. You've certainly been thinking about it, but CSS layouts seem so unintuitive. You've established a workflow with tables that, well, works. Why should you change? After all, browsers will always render tables, and you understand their methods and issues.
All you have to do to get a design grid is fill out the Dreamweaver table dialog box. Would that it were so easy with CSS! Well, it can be—Dreamweaver includes CSS starter pages that provide a kind of CSS alternative to the table dialog box.
Part 1 of this tutorial gently guides you through the transition from tables to CSS, and demonstrates how in many ways CSS layouts are easier. You'll learn the basics of CSS layouts and see that there are many equivalencies between table and CSS concepts.
In Part 2 you'll learn to work with CSS starter pages as you convert a table-based design to a pure CSS design. You'll even get to add some "wow factor" to the design by using a Spry Accordion widget in the page.
Read the full From table-based to tableless web design with CSS tutorial.
![]()
Music Brushes - Free Photoshop Brushes
BrushPortfolio.com has just
released a new set of free Photoshop brushes — Music Brushes. The set includes 24 high resolution brushes featuring guitars, trumpets, swirls and musical notes. There are several brushes created from photos I took of a Fender Strat that are perfect for band posters and flyers. Each brush was created in Adobe Illustrator and exported to Photoshop. Happy creating!

![]()
New Canon Rebel T1i Records Video, Captures 15.1 Megapixel Stills - Canon Digital Rebel T1i Camera
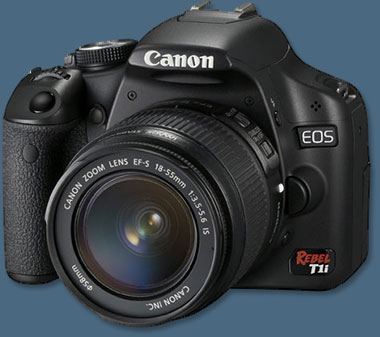 Canon U.S.A has introduced an addition to its Rebel lineup, the Canon EOS Rebel T1i Digital SLR camera. The new Canon Rebel T1i SLR incorporates some of the best technologies from the EOS 50D and EOS 5D Mark II models into an entry-level juggernaut. With a 15.1 megapixel CMOS sensor and HD video capture, along with the DIGIC 4 Imaging Processor, the Rebel T1i gives aspiring photographers plenty of reason to step-up to the latest and greatest model in the Rebel lineup.
The new Canon EOS Rebel T1i raises the entry-level bar with a host of enhanced Canon technologies now available in an entry-level DSLR. Along with the boost in megapixels and Canon's most advanced imaging processor to-date, this latest Rebel camera has also been enhanced with HD video capture, a 3.0-inch Clear View LCD (920,000 dots/VGA) monitor and user-friendly functions such as Auto Lighting Optimizer, Creative Auto Mode and Canon's Live View modes, all the right tools to open new doors for imaging enthusiasts. From high-resolution to high-definition, the new EOS Rebel T1i Digital SLR camera helps to give creative consumers a jumpstart on the next evolution in digital imaging.
![]()
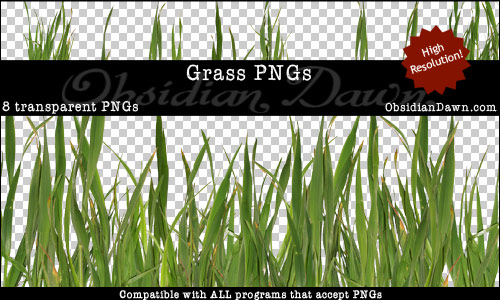
Grass Transparent PNGs From Obsidian Dawn
This set of various photos of grass as transparent PNGs can be used in any program that will support *.PNG files. Photoshop, GIMP, PSP, and many more. These images average about 2500 pixels (square-ish) in size @ 300 dpi. Included are various clumpings of grass, as well as a few blades of grass on their own. They all have a transparent background, and can be very easily copy/pasted into your own work. There is also a large grouping of the grass that I’ve already put together in various layers for you, for use as a foreground. You can use them on their own, layer them to give them a bit more depth, etc. etc.
![]()
Photographers Photoshop Slashes Prices 50/70%
To help creatives in these difficult times, Photographers Photoshop have decided to offer
unprecedented
discounts on their custom Photoshop 'actions' and movies. This will enable
artists to benefit from our software, save them time and give them
more creative ideas
at an outstanding value. Offer ends soon. This is a one-time offer that will never be available again. Please see the website for all information.

For a list of all the various Actions available and some free ones as well, see our Photoshop Actions Page.
![]()
Photoshop Guides And The Pixel Grid - Photoshop Tip
Jim Hoerricks' site, Forensic Photoshop, contains tutorials that deal with using Photoshop for forensic work. Jim has also written a book, Forensic Photoshop. Here is a new Photoshop CS4 tutorial from him — Helpful Guides.
"What did I do? What am I looking at? It looks like someone put a screen door over my image. How do I get this to go away?" It's an interesting question with a simple answer.
![]()
You're looking at a Pixel Grid. The Pixel Grid appears in magnifications above 500% and is enabled by default on systems that support the OpenGL acceleration.
To control the viewing of this grid, go to View>Show>Pixel Grid.
![]()
How does the grid help us? You can use the grid to assist in making precise adjustments to your masks or in getting your coordinate descriptions just right.
![]()
Photoshop, Bridge And Lightroom Tips And Tricks From Jay Nelson
Here's another collection of Photoshop, Bridge and Lightroom tips and tricks by Jay Nelson, the editor-in-chief of Design Tools Monthly.
Photoshop Portrait Popper
Photoshop can add a soft, darkened edge around any photo in mere seconds -- an effect known as Vignette. Choose Filter> Distort> Lens Correction, then drag the Vignette slider all the way to the left. To darken the edge color even more, grab the Midpoint slider and drag it slightly to the left.
 Use Help Menu to Find Menu Items
Today's design applications have lengthy menus filled with options. And some of them move around with each new version. (Thanks, Adobe!) If you don't use them every day, you can forget what's where. Mac OS X 10.5 Leopard comes to the rescue with its Help menu, available in every application at the far right end of the application's menus. Click on Help, then type part of the name of your menu item into its search field. The menu item containing your term will appear at the top of the list, and if you mouse over it, that menu will open and a gyrating arrow will point to the item you need. Clever!
Bridge's Carousel View
Bridge CS4 has a new view that helps quickly weed out the bad photos from the keepers. Just select the folder you want to work with, then press Command-B. Use your right- and left-arrow keys to navigate. Press down-arrow to remove an image from the set. When you're satisfied with what's left, click the Make Collection icon in the lower right corner of Review Mode. The photos will be gathered into a virtual collection that you can name.
The Magic Button in Lightroom
In Library Grid view in Photoshop Lightroom, there's a tiny badge (icon) in the bottom right corner of your photos that has a +/– on it. This tells you that the image has been edited in Lightroom. The Pencil badge tells you that a keyword has been applied. If you double-click either badge, it takes you to the panel where the adjustment was made, so you can re-edit it.
Click-drag Lightness, Hue and Saturation
Photoshop CS4 has a powerful new Targeted Adjustment tool hidden in the Curves and Hue/Saturation areas of the Adjustments panel -- it looks like a finger. When you click it, you can then click and drag on your image to change either the saturation or the hue of the pixels similar to where you clicked. For example, click and drag left or right on an object in your image to increase or decrease that object's saturation. You might want to try it on some lips. You can also click and drag up or down to change the object's hue -- try it on a shirt.
To use the Targeted Adjustment tool in the Curves Adjustments panel, click and drag up or down on your image to lighten and darken tones in an object.
The tool affects all similar pixels in the image, so you may want to first drag a rough selection around the area you want to affect.
Adjust Multiple Images in Camera Raw
In Adobe's Camera Raw application, you can adjust multiple images at the same time by selecting their thumbnails, then applying a change to the active image. Try it with the Crop tool, exposure or color temperature. To adjust just one of the images, click its thumbnail before making changes.
 Quick Color Boost in Photoshop CS4
Photoshop CS4 has a quick new way to make the colors in your image pop without harming your original image. It's called the Vibrance Adjustment layer and you can find it in the new Adjustments panel, or by clicking the half black/half white circle at the bottom of the Layers panel. Once you've created the Vibrance adjustment layer, drag the Vibrance slider all the way to the right and it'll intensify the colors in your image. Happily, it has less of an effect on bright colors (because they're already highly saturated) than on lighter tones, and it somehow manages to leave skin tones relatively unchanged.
Photoshop Adjustment Dialog Tricks
When in a Photoshop Image Adjustment dialog box such as Levels or Curves, many people think they don't have access to things outside the box. Here are not-so-obvious things you can do while Adjusting your images:
Hold the Spacebar any time you want to use the Hand tool to scroll around your image. And if you add the Command key, you'll get the Zoom tool and you'll be able to click, or click and drag to zoom in on your image. Add the Option key and you can zoom out with each click of the mouse button. For efficiency, type one of the following keyboard commands to zoom in and out on my images:
Command Plus (+) = Zoom In
Command Minus (-) = Zoom Out
Command Zero (0) = Fit on Screen
Option Command Zero (0) = 100% View
You can add Option to the top two commands to prevent the window that contains your image from changing size when you zoom.
You can also type Command-H to hide any guides or selection edges and use Command-; to hide guides but not selection edges. Type Command-R to show or hide the Rulers. You can open or close any palettes (like the Info Palette) by choosing its name from the Window menu. You can even change the measurement system the Info palette uses (RGB, HSB, CMYK, etc.) by clicking on the eyedropper icon within that palette.
If you turn on the Caps Lock key, your cursor will look like a crosshair whenever it's on top of your image. You can add a Color Sampler (with corresponding readout in the Info Palette) by holding Shift and clicking within your image, or Shift-Option-click to remove a Color Sampler that's already on your image.
If you're working on an image that is in RGB mode, but you plan on converting it to CMYK mode in the end, you can type Command-Y to turn on the Proof Colors feature. With default settings, that feature will show what your image would look like if it were converted into CMYK mode. And if you can't quite tell which areas of the image are shifting when you toggle Proof Colors on and off, try typing Shift-Command-Y to tell Photoshop to cover all the areas that will shift with gray.
Here are some things you can do inside an Adjustment dialog box. If there's a number active, you can use the Up and Down Arrow Keys to change that number. Adding Shift will change the number in larger increments. The Tab key will allow you to cycle through the different numbers you can change within a dialog box. Once you are finished with an adjustment, you can press Return or Enter to apply the adjustment, or to abort the adjustment, type Command-period. The Escape key does the same thing. Or, if you've completely screwed things up, you can type Option-Command-Period to reset the dialog box back to its default settings. If you've only half screwed up, type Command-Z to undo the last step you performed within the adjustment as a whole (before you click OK to apply the whole thing).
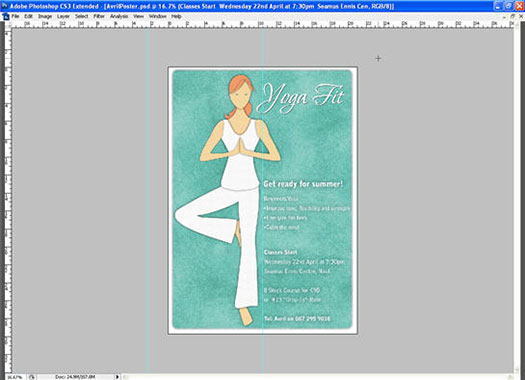
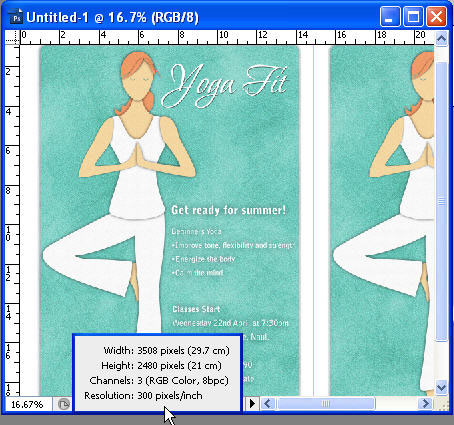
Tricks to Control New Document Sizes in Photoshop
• If you need a new Photoshop document the same size as a document you already have open, do this: start to create a new document (File> New), and then select the name of any open document from the Window menu on Photoshop's menu bar -- which is still miraculously available.
• If you create a new document in Photoshop while you have something on the Clipboard (for example, if you have copied something from an existing document), your new document will be sized to fit the pixels on the Clipboard.
• To make a new document the same size as the last new document you created, hold down the Option key while you choose File> New.
Search Everywhere At Once
Google Quick Search Box combines all Google search features with the Spotlight feature on your Mac. Type in a term, and find it anywhere on your Mac, or on Google Images, News, Products, Wikipedia, or YouTube! It's free!
Photo Calculator for Your iPhone
Photographers: there's an iPhone app called PhotoCalc ($2.99) that provides depth of field (DoF) and hyper-focal distance calculations, exposure reciprocation, and flash exposure calculations. It also includes Sunrise, a sunrise/sunset/solar noon calculator for your current location.
![]()
Adobe UK Special - Order Adobe Photoshop Elements 7 And Get 25% Off – Offer Ends June 1st, 2009
 Save 25% off Photoshop Elements 7 instantly with Adobe’s new dscount. This promotion went live today and will be good until June 1, 2009. Please note, it is only valid on the purchase of the full version of Adobe Photoshop Elements 7 for Windows (International English, Swedish, German and French language versions apply).
DE (Germany)
Sparen Sie 25% beim Kauf von Adobe® Photoshop® Elements 7 - Das Angebot Gilt Nur Bis Zum 1. Juni 2009.
FR (France)
Commandez Adobe Photoshop Elements 7 dès aujourd’hui et bénéficiez de 25 % de remise - Cette offre expire le 1er juin 2009.
SE (Sweden)
Beställ Adobe Photoshop Elements 7 och få 10% i rabatt.
CH FR (Swiss French)
Commandez Adobe Photoshop Elements 7 dès aujourd’hui et bénéficiez de 25 % de remise - Cette offre expire le 1er juin 2009.
CH DE (Swiss German)
Sparen Sie 25% beim Kauf von Adobe® Photoshop® Elements 7 - Das Angebot Gilt Nur Bis Zum 1. Juni 2009.
![]()
virtualPhotographer Photoshop Plug-in Update Includes More Effects and a New Stand-alone Photo Editor
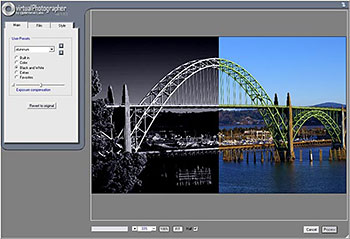 optikVerve Labs has updated virtualPhotographer, its free Photoshop plug-in filter that allows photographers and graphic artists to instantly apply high quality professional photographic effects to digital images with just one click.
The updated software features batch processing to apply effects to many photos simultaneously and a much larger resizable viewing window. The release also includes 200 preset one-click effects, including new favorites such as polarize, infrared, cross process, gradient, and other film and darkroom techniques. virtualPhotographer has been downloaded by millions of users worldwide.
optikVerve Labs also released a new stand-alone full-featured photo editor – virtualStudio – that can run virtualPhotographer and other plug-in filters. virtualStudio was developed as a quick and easy alternative to using a complex imaging application each time a photographer wants to add artistic effects to a photo.
![]()
Zeldman's "Taking Your Talent to the Web" Offered For Free
 Here's the scoop from the mighty Zeldman himself:
Rated Five Stars at Amazon.com since the day it was published, “Taking Your Talent to the Web” is now a free downloadable book from zeldman.com.
I wrote this book in 2001 for print designers whose clients want websites, print art directors who’d like to move into full–time web and interaction design, homepage creators who are ready to turn pro, and professionals who seek to deepen their web skills and understanding.
Here we are in 2009, and print designers and art directors are scrambling to move into web and interaction design. The dot-com crash killed this book. Now it lives again.
While browser references and modem speeds may reek of 2001, much of the advice about transitioning to the web still holds true. It’s yours. Enjoy.
![]()
Leaves And Flowers Photoshop Brushes
BrushPortfolio.com has released a new set of free Photoshop brushes called Leaves and Flowers. There are 20 brushes making up this eclectic set ranging in size from 630 to 2395 pixels. Each brush was made in Adobe Illustrator and exported to Photoshop at 300 dpi. Happy Spring!

![]()
Did You Know You Could Create An Entire Website In Photoshop?
SiteGrinder Photoshop Plugin - Create Websites Instantly
 There often seems to be a strict division of labor within the world of web design and development. Creative professionals tend to stick to the Photoshop domain, while those well-versed in scripting are left to the task of implementing their work. Indeed, the two realms are quite different from each other, to which any of us even vaguely familiar with either can easily attest.
Essentially, Photoshop is a no-holds-barred design studio, offering the artist a seemingly endless array of creative options. On the other hand, HTML, CSS, Java and the like follow strict rules of engagement, requiring the developer to take any number of esoteric concerns into consideration in order to ensure that designs are properly displayed on the web.
Turn Photoshop Into A Complete Web Design Tool
SiteGrinder seeks to bridge this gap between design and development. Basically, this program turns Photoshop into an easy-to-use and fully functional web design tool. With SiteGrinder, designers will now have the freedom to totally let their creativity loose and then, without skipping a beat, transfer their designs to the web. Bringing esthetic concerns together with more practical considerations, this program is an amazingly powerful tool that would make a fantastic addition to any web designer's bag of tricks.
 Generate Your Web Pages Directly From Photoshop
By generating web pages directly from Photoshop, you'll be able to spend much more time on the creative end of the spectrum, since you'll know right off the bat how well particular designs will translate to the web. No more going back to the Photoshop drawing board after getting a phone call from your development team, telling you that what you had envisioned doesn't have a chance of being displayed on the web. You can immediately visually and interactively test your designs, which permits you to then make changes to either esthetics or functions while it's still relatively early on in the design process.
Pricing and Availability
Mac OS X and Windows versions of the SiteGrinder unlockable demo are available now via download. SiteGrinder can be ordered from Media Lab's online store.
![]()
Photoshop Masking Plugin Fluid Mask 3 - Price Drop And Exclusive $20 Instant Discount - Now Only $129
 The 4 1/2 out of 5 star review of Fluid Mask 3 at MacWorld begins by saying that this "Photoshop plug-in takes the pain out of extracting backgrounds," and goes on to recommend the latest version, stating that "Fluid Mask 3.0.2 is a very effective tool for separating objects from their backgrounds. It offers a variety of useful features for tackling almost any difficult image, from wispy hair to complex foliage. Online video tutorials and live training sessions help ease the learning curve."
Our friends at Vertus, the makers of Fluid Mask 3 Photoshop Plugin, have set up a special exclusive discount for PhotoshopSupport.com. Buy now for only $129. Just follow this discount link and instantly get $20 off your purchase of Fluid Mask 3.
Fluid Mask 3 is designed for photographers, image editors, graphic designers and all those who take digital image editing seriously. In a streamlined interface and workflow, Fluid Mask 3 instantly shows key edges in the image and provides comprehensive easy to use tools that work with difficult-to-see edges and tricky areas like trees & lattices. Fluid Mask will also preserve all-important edge information for a professional quality cut out. Simply follow this discount link and pay only $129 for Fluid Mask 3.
![]()
Photoshop CS4 Extended Student Edition $199
Students can purchase Adobe Photoshop CS4 Extended for $199.
Get all the features of Photoshop CS4 — and much more. Whether you work in design, motion graphics, architecture, education, engineering, medicine, or scientific research, Photoshop CS4 Extended - Student Edition is the perfect software for you.
Paint directly on 3D models and access all the power of Photoshop for 3D editing and compositing. Experiment freely with nondestructive image adjustments. Composite images, text, and graphics.
Work at peak efficiency in a streamlined and flexible interface. Edit motion graphics over multiple frames of imported video layers. And for accurate image analysis and visualization, take advantage of Photoshop CS4 Extended - Student Edition's precise measurement, counting, and logging tools.
Eligibility For Student Editions
Student Edition products are for purchase by higher education students only. A higher education student is defined as a full- or part-time student enrolled at a higher education institution defined as an accredited public or private university or college (including community, junior, or vocational college) that grants degrees requiring not less than the equivalent of two years of full-time study. Read more details at the Adobe site.
![]()
A Thank You To Our Friends, Partners & Sponsors!
![]() We'd like to thank our friends, partners and sponsors: Adobe, Google, Hostway, Apple, Peachpit Press, O'Reilly Media, Janita, Wiley Publishing, Creativepro.com, CreativeBits, Heathrowe, Smashing Magazine, The Photoshop Roadmap, Power Retouche Plugins, Wacom, Vertus Fluid Mask, Template Monster, onOne Software, Brusheezy, AV Bros. Plugins, Obsidian Dawn, BittBox, Sue Chastain, Mark Galer, and AutoFX.
We'd like to thank our friends, partners and sponsors: Adobe, Google, Hostway, Apple, Peachpit Press, O'Reilly Media, Janita, Wiley Publishing, Creativepro.com, CreativeBits, Heathrowe, Smashing Magazine, The Photoshop Roadmap, Power Retouche Plugins, Wacom, Vertus Fluid Mask, Template Monster, onOne Software, Brusheezy, AV Bros. Plugins, Obsidian Dawn, BittBox, Sue Chastain, Mark Galer, and AutoFX.
![]()
![]()
![]()