![]()
![]() Buy. Download. Create. Get Photoshop now at the Adobe Store.
Buy. Download. Create. Get Photoshop now at the Adobe Store.
![]() Get Flash, Dreamweaver, Photoshop Extended with Adobe Web Premium.
Get Flash, Dreamweaver, Photoshop Extended with Adobe Web Premium.
![]()
![]() The Photoshop Blog offers the latest Photoshop news and software updates, Photoshop tips and tutorials, and random thoughts from graphic artist and Photoshop expert Jennifer Apple.
The Photoshop Blog offers the latest Photoshop news and software updates, Photoshop tips and tutorials, and random thoughts from graphic artist and Photoshop expert Jennifer Apple.
![]()
FRIDAY - SEPTEMBER 29 2006

 From MacWorld.com
Analysis: Aperture, Lightroom can both thrive
When Adobe followed the November 2005 release of Apple’s Aperture by putting out a beta of Lightroom, the stage was set for a battle over the digital photography space between two tech industry giants. Almost immediately, users and pundits began speculating on which company would prevail — Apple, with its head start and ease of use, or Adobe, with its long-standing dominance of the photo software market?
From John Nack
Crazy umbrella-cam/Flickr browser
I've mentioned some unusual cameras before, but this one takes a Special Jury Prize for Weirdness: The Pileus System is a functioning umbrella that can also capture still images and video, upload them to Flickr, and project other users' creations onto the umbrella's skin. Uploads are automatic, and twisting the grip browses Flickr and YouTube for related tags.
From creativepro.com
Photoshop How-To: Text Superman Would Love by Colin Smith
It's a bird, it's a plane, no! It's 3D block letters in Photoshop. Here's how to make text worthy of a superhero.
From Sue Chastain (about.com)
Combining Two Photos into One Page in Photoshop Elements
With this tutorial, I show brand new Photoshop Elements users how they can combine two photos onto one page. This is something you might want to do to show a before and after version of an image correction, or just to compare two pictures side-by-side. You'll also learn how to add some text to the new document, as this is another basic task that a new user may wish to learn.
From One onOne With Mike Wong
Optical Illusion
My mom sends me stuff like this all the time. I have no idea where she finds it or who sends it to her, but I thought I'd share this one. (See a bigger version on Mike's site.)
From Jan Kabili's Photoshop Online
Color to black and white part 1
Learn a couple of quick and dirty ways to convert a color photograph to black and white. The desaturate and hue saturation adjustments offer quick solutions. The results of these methods are similar, but the hue saturation adjustment is the better of the two, because it can be applied in an adjustment layer that doesn't change the underlying color photo.
Color to black and white part 2
Use two hue saturation adjustment layers to gain control over converting a color photo to black and white. The results are often close to what you'll get using a channel mixer adjustment (which we'll cover in the next show), but the interface is more intuitive for many folks.
Color to black and white part 3
The preferred way to convert a color image to black and white is with a Channel Mixer adjustment layer. This method gives you the most control and often produces the best results.
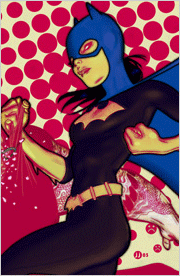
![]() As always, a special Batgirl thank you to James Jean
As always, a special Batgirl thank you to James Jean
![]() posted by Jennifer Apple | permalink | send comments
posted by Jennifer Apple | permalink | send comments
![]()
THURSDAY - SEPTEMBER 28 2006
New Tutorial — The Scraped Polaroid Picture Effect
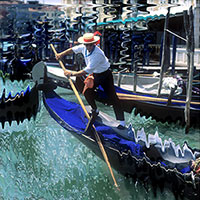 In the 1970s, the photographer Les Krims produced a set of images on Polaroid instant film on which the wet emulsion had been scraped and distorted. First known as the Krimsograph, and widely known after its use on the album cover of Peter Gabriel’s 3, the technique is now more commonly called “SX-70 manipulation,” after the camera favored by many enthusiasts. After using a camera, enlarger, or printer to expose the film, you have a few hours to use all sorts of sticks, spikes, and scrapers to push the wet chemicals around to produce striking results.
When you look closely at a scraped or manipulated Polaroid, you will usually notice strong, colorful patterns where the artist has drawn and dragged the emulsion layers. To mimic this effect, you’ll have to imitate this physical and highly individual process in addition to adding an uneven, light-colored mottling where the film’s background sometimes shows through. The film’s blues can be especially vivid and its yellows somewhat weak, so portraits tend to be less popular than bright scenes with skies and fluffy clouds. But anything goes. Scraped Polaroids also tend to be small, glossy, and borderless.
Read Scraped Polaroid Picture Effect — a sample recipe from the Photoshop Digital Studio Cookbooks, courtesy of O'Reilly Media.
![]() For more tutorials see our Photoshop Tutorials Page.
For more tutorials see our Photoshop Tutorials Page.
![]() posted by Jennifer Apple | permalink | send comments
posted by Jennifer Apple | permalink | send comments
![]()
How To Get Great Photos From Your Desktop Printer
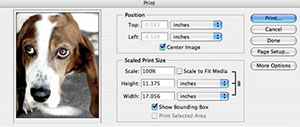 I often receive emails from people who need help printing their photos from Photoshop. I help when I can, but when I came across this great 4-part series by Ben Long from creativepro.com, I decided it would be a great info bundle to point to for answers. So here are the links to all four parts:
Get Great Photos from Desktop Printers: Part 1 — Selecting A Photo Printer
What you see on your monitor is usually not what you get from desktop printers.
Get Great Photos from Desktop Printers: Part 2 — Color Management, Soft Proofing, Make Your First Print.
There's no use pouring hours into shooting and editing photos if your prints are a muddy mess. In this installment, you'll learn how to whittle down the difference between screen and print with profiles and soft proofing.
Get Great Photos from Desktop Printers: Part 3 — Paper Profiling
Legalize out-of-gamut colors, simulate daylight, and other tips on producing prints that match what you see on your monitor.
Get Great Photos from Desktop Printers: Part 4 — Paper profiles, RIPs
If you've made it to part 4 of this series, you're serious about taking your photographic prints to the top of the quality scale. Here are the final tips you need to get there.
![]() posted by Jennifer Apple | permalink | send comments
posted by Jennifer Apple | permalink | send comments
![]()
WEDNESDAY - SEPTEMBER 27 2006

 From Adobe Creative Suite Video Podcast
Create Perfect Dashed Lines in Photoshop
Photoshop can do many things, most never think to use it to "draw" with. Special Guest Chita Hunter takes us through an easy method to get perfect dashed lines.
From Photoshop Killer Tips
Changing Channels
Use this shortcut to change channels in the adjustment dialogs.
From creativepro.com
Design How-To: Help Photos Tell a Story by John McWade
As a designer, you can't always control the quality and type of photos you must work with. But you can easily improve almost every photo with creative cropping.
From PhotoshopNews
Lightroom Beta 4: The Develop module
In this first part review we are going to concentrate on what’s new in the Develop module. This is the first chance to see how the Raw Shooter raw processing technology has been incorporated into Beta 4, and how Adobe has added more versatility to the tone and color edit controls. Some of the key new features are that you can drag-edit the histogram and have the ability to directly edit the tone curve plus make on-image tone curve edits.
From Gear Factor (wired.com)
360 Degree Photos In Two Seconds
Seitz, the Swiss manufacturer known for making cameras with jaw-dropping designs and price tags, has unveiled the Roundshot D3. In just a couple of seconds, this 360-degree camera will capture 470 million pixels worth of color and light. The D3 has an ISO range from 500 to 10,000 and works with lenses from 24mm to 250mm. The huge image files in produces are stored on a Mac Mini. Obviously for serious photogs only, the D3 hits the streets in January running $37,463 for the mobile version and $34,906 for the studio model.
From GetBrushes.com
 Annika’s “Old bones” Brushes
Another nice and inspirational gothic brush set consisting of sculptures of angels, trees, some script and a few buildings made by our friend Annika.
Annika’s “Good And Evil” Brushes
A good Photoshop brush collection for creating vintage/gothic looking backgrounds for your designs, or perhaps your website. A big thanks to Annika for this set.
From Photoshop TV
Photoshop TV Episode 48 (September 25, 2006)
Scott shows Camera RAW techniques for converting to black and white using saturation, shadows and contrast sliders, Dave explains the Blend If sliders in detail, and Matt has a split-toning effect with the Channel Mixer, Color Balance and Adjustment Layers.
![]() As always, a special Batgirl thank you to James Jean
As always, a special Batgirl thank you to James Jean
![]() posted by Jennifer Apple | permalink | send comments
posted by Jennifer Apple | permalink | send comments
![]()
TUESDAY - SEPTEMBER 26 2006
New Tutorial — The Van Gogh Effect
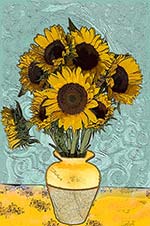 In the late 1880s, Dutch painter Vincent Van Gogh created his most famous works in a brief period while living in Arles, in southern France. These included Provençal landscapes, indoor scenes, and vases of sunflowers.
Influenced by Impressionism and Post-Impressionism, as well as by Japanese art, Van Gogh’s style is distinct and instantly recognizable. His work is characterized by thick swirls of solid color, as can be seen in many of his skies, but he also painted poplar trees and fields of waving crops.
In his sunflower paintings, Van Gogh limited his palette to golds, mustards, and contrasting blues, and he tended to compose the images within tight framing in order to focus the eye. The thick swirls form a backdrop for the slightly scruffy, withered petals of his flowers, outlined in prominent black lines.
Read Van Gogh Effect - Van Gogh's Sunflowers — a sample recipe from the Photoshop Digital Studio Cookbooks, courtesy of O'Reilly Media.
![]() For more tutorials see our Photoshop Tutorials Page.
For more tutorials see our Photoshop Tutorials Page.
![]() posted by Jennifer Apple | permalink | send comments
posted by Jennifer Apple | permalink | send comments
![]()
Breaking News: First Look at Aperture 1.5
creativepro.com senior editor Ben Long has posted a in-depth tour of the just-announced Aperture 1.5, Apple's pro-level digital imaging software. From the intro:
Aperture 1.0 was released last November, and though the program received many positive reviews for its breakthrough ideas regarding photography workflow and management, version 1.0 also took some knocks for its raw conversion quality, slow performance, and the fact that it forced you to import images into its managed library. With a managed library, the number of images that you can import into Aperture 1.0 is limited by the amount of space on the single volume where the library is held.
Apple responded quickly to these complaints, and within a couple of months, the company released version 1.1, which addressed the raw quality problems with a new, additional raw converter. It let you choose between converters and included excellent raw fine-tuning adjustments, including the unique Boost control that let you specify how much gamma correction to apply to converted raw files.
Now, less than a year after its initial release, Apple has produced another significant upgrade, in the form of Aperture 1.5. This free update adds several significant new features and, most importantly, addresses the issue of Aperture's closed library architecture. The result is a program that should quell the fears of any users who were hesitant to switch to Aperture due to image-management concerns.
Please note that this is not a review of Aperture 1.5. While I have tested a late beta, I'm reserving my final opinion and product rating until I can thoroughly test the shipping version.
![]() Read Breaking News: First Look at Aperture 1.5 at creativepro.com
Read Breaking News: First Look at Aperture 1.5 at creativepro.com
![]() Amazon.com is offering Apple Aperture at a discount price of 269.99
Amazon.com is offering Apple Aperture at a discount price of 269.99
![]() For tips and tricks visit Aperture Tricks
For tips and tricks visit Aperture Tricks
![]() For more on Aperture, see our Aperture Resource Center.
For more on Aperture, see our Aperture Resource Center.
![]() posted by Jennifer Apple | permalink | send comments
posted by Jennifer Apple | permalink | send comments
![]()
MONDAY - SEPTEMBER 25 2006

 From Adobe Creative Suite Video Podcast
Clone using Vanishing Point
The Clone Stamp Tool has been a long time favorite for most Photoshop users. However, trying to remove something that is on an angle or a different perspective is often challenging. Using the Vanishing Point feature you can remove images and add images with ease. In this episode I'll show you how.
From Sue Chastain (about.com)
Restore a Discolored Photo with Photoshop Elements
If you've got old photographs in your family album that have faded, you may wish to scan them in and then repair them using Photoshop Elements. Robert Redwood shows how simple it can be to restore a discolored photo in this guest tutorial.
From Photoshop Killer Tips
Put Your Layers Out to Separate Files
Use a free script to do the work for you.
What The Heck Is Hue Jitter?
Find out how to use one of the advanced settings with brushes.
From GetBrushes.com
Jenn B’s X-ray Brushes
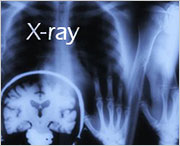 A collection of 9 Photoshop brushes showing various body parts (hands, head, neck, chest) gone trough an X-ray machine. Very medical brushes and slightly creepy too. If you like this kind of stuff or you’re in need of X-rays, then this is the set to try.
Jenn B’s Tech Brushes
An excellent and rather popular set of 15 tech shape brushes to give your designs a modern, clean look. Good for adding nice touches to blueprints or futuristic computer screens.
From Graphics.com
Free Photoshop Plugins, Part 5: Mehdi Plugins
Harald Heim continues his look at free plugins that are worth the download. The Mehdi Plugins are provided as a freeware collection of 26 Photoshop-compatible filter plugins and were first released in 2004. A few new plugins have been added since the first release, while some older ones have been updated.
From creativepro.com
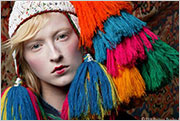 Kingston Icon of Photography Barbara Bordnick Shares Techniques Used to Produce Stunning Portraits
Barbara Bordnick will provide a new series of tips and tricks to be posted on Kingston's Icons of Photography Website. A self-taught photographer, Bordnick's work has included such innovative projects as a Polaroid-commissioned calendar of Great Women in Jazz and three immensely celebrated books of beautiful digital photographs, Searchings: Secret Landscapes of Flowers Volumes I, II, and III. Last year, her portrait of lyricist E.Y. "Yip" Harburg was made into a United States commemorative postage stamp, issued on April 28, 2005. Most recently Bordnick was awarded the International Photographic Council's Leadership Award at the United Nations.
![]() As always, a special Batgirl thank you to James Jean
As always, a special Batgirl thank you to James Jean
![]() posted by Jennifer Apple | permalink | send comments
posted by Jennifer Apple | permalink | send comments
![]()
Adobe Photoshop Lightroom Beta 4
 Just received this Photoshop Lightroom Beta 4 announcement from Adobe:
We're pleased to announce that Adobe Photoshop Lightroom beta 4 is now ready for you to download and use. This is the first release to reveal the full name we are giving to the product, as Lightroom takes its place as the newest member of the Photoshop family of digital imaging and photography software.
Beta 4 is our biggest milestone to date, with several enhancements and additions, including the achievement of full feature parity between the Windows and Mac OS versions of Lightroom. No matter which platform you prefer, you can now bring the full power of Lightroom beta to your photos. Lightroom Beta 4 also features:
- Groundbreaking changes in the way tone curve adjustments are made and displayed, giving you the highest quality results in an interface that's easier to use than ever before.
More streamlined and elegant user interface - We've made several changes to the look and feel based on your feedback in the earlier beta releases. - Customizable interface - You can now display only the controls you want to be visible.
Precision white balance selection tool - Facility to easily rename and convert files to DNG after they've been imported to the Lightroom library
- Increased interaction between Lightroom library organizational structure and the underlying file system
- Filter and search presets to more quickly find the photographs you want
- Better performance and improved interface for the Web module features
- Develop control improvements based on community feedback, including comments from the Pixmantec user community (welcome!)
There is a limited amount of time left for you to give us feedback on the Lightroom Beta project, so please continue sharing your opinions with us on the forums.
Get to know the Adobe Lightroom community, and show us all how you're using Lightroom. Upload and share your images using the Lightroom slideshow features, and visit the site to see what other photographers are creating. Visit the Lightroom Gallery today.
![]() For more on Lightroom, see our Lightroom Resource Center.
For more on Lightroom, see our Lightroom Resource Center.
![]() posted by Jennifer Apple | permalink | send comments
posted by Jennifer Apple | permalink | send comments
![]()
FRIDAY - SEPTEMBER 22 2006
New Tutorial — Andy Warhol Pop Art Silkscreen Effect
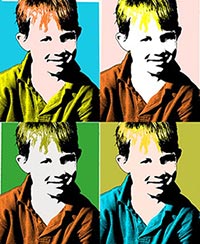 Almost synonymous with Pop Art, Andy Warhol was a painter, photographer, filmmaker, and publisher. In the mid-20th century he produced iconic silkscreen paintings of subjects as mundane as soup cans and as glamorous as Elvis Presley and Marilyn Monroe. These remain hugely popular, and have sparked countless imitations. Creating your own Pop Art-inspired images with Photoshop is easy, and great fun, too.
The silkscreen technique forces paint onto canvas through a high-contrast negative stencil attached to the fabric. The resulting image features strong blacks from the photograph, which can be simulated using Photoshop’s Threshold adjustment. In Warhol’s hands, crude blocks of garish, striking color were added to selected areas, and images were often duplicated with alternative color schemes.
Read Andy Warhol Pop Art Silkscreen Effect — a sample chapter from the Photoshop Digital Studio Cookbooks, courtesy of O'Reilly Media.
![]() For more tutorials see our Photoshop Tutorials Page.
For more tutorials see our Photoshop Tutorials Page.
![]() posted by Jennifer Apple | permalink | send comments
posted by Jennifer Apple | permalink | send comments
![]()
onOne Software Introduces Mask Pro 4
(NOTE: Enter discount coupon code PSSPPT06 during the checkout process at onOne Software for an instant 10% discount on any onOne Software product. This is a special offer exclusively for PhotoshopSupport.com visitors.)
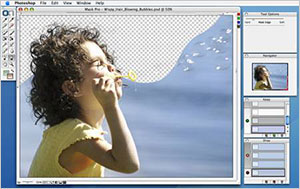 Mask Pro 4 provides a complete collection of Photoshop plug-in tools that allow users unprecedented flexibility when tackling the most challenging masking job. And this new version focuses on teaching the user how to best use each comprehensive toolset for masking a wide range of images.
And as in the previous version, onOne Software's Mask Pro 4 uses the concept of "keep colors" and "drop colors" chosen by the user and then based on those user selections, the Mask Pro algorithm will remove only those selected colors from an image. One of the strengths of Mask Pro is that when a "drop color" is found in another pixel, Mask Pro will remove only that color value from the pixel, leaving that pixel (or pixels) semi-transparent. This allows Mask Pro to minimize the edge halo effect often seen when masking a transparent object or edge.
"The process of masking or isolating an object from its surroundings is easy for most photographers and graphic artists to understand," said Craig Keudell, president of onOne Software. "However, in a real world image filled with overlapping colors and shapes the photographer needs powerful algorithms like those in Mask Pro 4 to help them keep up with the demands of a busy workflow."
"I do a lot of product shots for catalogs and traditionally, making high-quality clipping paths was a very time-consuming, but important part of my work flow," said Professional Photographer Jim DiVitale. "Incorporating Mask Pro into my workflow was a major change for the better as it has saved me hours of post-processing time so I can get back to shooting. What used to take me 20 minutes to do with traditional selection tools, I can now do in just two minutes with Mask Pro."
Recognizing that masking digital images can be a time-consuming job regardless of the tools used, Mask Pro 4 focuses on teaching users how to effectively complete a masking job through built-in training videos that detail how each tool works and when to use it.
Additional new features in version 4 include:
- New Keep/Drop detail view showing users the exact color values selected by the Keep & Drop Highlighters.
- Support for Wacom Pen Tablets including pressure sensitivity. If a user presses hard with their pen, they will get a hard edge to their mask. If they press lightly, they will get a soft, subtle edge to their mask.
- Improved Navigator windows allow users to see several views while masking a subject. The different views include a composite mode so users can see the new background appear as they mask allowing them to make immediate decisions on their mask and an Alpha channel view so they can see in black and white (and grey) how their mask will look.
 Mask Pro 4 is scheduled to ship in mid-October 2006 and a free update to version 4 adding support for 16-bit images will be available after the October ship date. Users who purchase Mask Pro 3 as of September 7, 2006 will receive the upgrade to Mask Pro 4 for free.
Exclusive 10% Discount On All onOne Products
Enter discount coupon code PSSPPT06 during the checkout process at onOne Software for an instant 10% discount on any onOne Software product. This is a special offer exclusively for PhotoshopSupport.com visitors. Vist our onOne Software Page for summaries and reviews of PhotoFrame Pro, Genuine Fractals, Mask Pro, Nik Sharpener, and The Photoshop Plugin Suite.
![]() posted by Jennifer Apple | permalink | send comments
posted by Jennifer Apple | permalink | send comments
![]()
THURSDAY - SEPTEMBER 21 2006

 From creativepro.com
Photoshop How-To: Something's Fishy
"Collage artist Maggie Taylor is a master hand at Photoshop. Discover how she turns one postcard and a couple of photos of water into a stunning, surreal scene."
From 37signals
The man behind Apple's design magic
Who Is Jonathan Ive? is BusinessWeek’s in-depth look at “the man behind Apple’s design magic.” Jonathan Ive usually stays in the shadows so it’s interesting to read more about his background and process.
From CreativeGuy
Changing your brush in Photoshop
When you’re working with the brush tool in Photoshop there are a lot of shortcuts to make it a bit easier on you. The following shortcuts assume you already have the brush tool active...
From Photoshop Killer Tips
Better Cropping Preview
Use this trip to help decide what the cropped image will look like.
From Jan Kabili's Photoshop Online
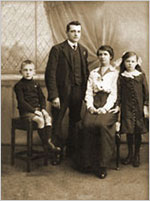 Sepia tone a photograph part 1
Learn two quick ways to sepia tone a photograph, with a photo filter adjustment layer and a hue saturation adjustment layer. Check back for part 2 of this episode, where I'll show you a third way to sepia tone, using a gradient map adjustment layer for even richer sepia tones.
Sepia tone a photograph part 2
Use a gradient map adjustment layer to sepia tone a photograph. This method maps different shades of browns, blacks, and whites to the grayscale tones in the image. The results are richer and more varied than you usually can achieve with the photo filter or hue saturation methods of sepia toning you learned in part 1 of this episode.
From Photoshop TV
Photoshop TV Episode 47
In this episode, taped live at the Expo hall of Photoshop World Las Vegas, Dave has a tutorial on creating a funky edge border from sampling a photograph, Matt shows how to make a specialized OS X wallpaper from scratch, and Scott has something special for photographers — using a gradient filter to darken skies, and image sampling and blend if sliders to create clouds.
From Graphics.com
Photoshop Fundamentals: Creating An Embroidery Effect
Simulate a stitched look by using Photoshop's Line tool, paths and some clever copying.
![]() As always, a special Batgirl thank you to James Jean
As always, a special Batgirl thank you to James Jean
![]() posted by Jennifer Apple | permalink | send comments
posted by Jennifer Apple | permalink | send comments
![]()
Free Bonus DVD With Every Total Training Purchase — A $1,000 Value
 With every purchase of a Total Training product you'll receive a complimentary copy of their bonus DVD, while supplies last. The DVD contains more than $1,000 worth of material crafted especially by Total Training's creative team and many of their industry partners, including Auto FX, Digital Anarchy, graphicxtras.com, and PhotoSpin.
Inside you'll find a hand-picked selection of bonus images, audio & video clips, templates, software, plug-ins, and discount offers to enhance your next project. To see what's included visit the Total Training site.
![]() posted by Jennifer Apple | permalink | send comments
posted by Jennifer Apple | permalink | send comments
Photoshop Plugin Review From Jay Nelson
Here is the latest Photoshop Plugin Review by Jay Nelson, the editor-in-chief of Design Tools Monthly.
![]()
The Best Image Enlarger
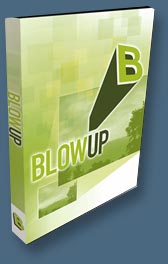 Alien Skin's Blow Up ($199 or $179 for Photoshopsupport.com visitors) is a new entry in the field of software that intelligently increases the resolution of an image for use at larger sizes. Along with OnOne Software's Genuine Fractals and pxl SmartScale, Blow Up finds edges in an image and maintains their smoothness while increasing pixel dimensions.
But unlike the other two, it also adds realistic grain to other areas that makes the result look more real and less flat. They claim that this plug-in for Photoshop CS or later can scale an image up to 10 times its original size without stairstep, halo, or fringe artifacts.
Uniquely, it supports CMYK, RGB, Lab, Grayscale, and Duotone image modes, resizes multilayered documents without flattening, can create a new image when resizing, and works with 8-, 16-, 32-bit and RAW images. It's also really fast on multiprocessor Macs.
Newspaper technology expert Kevin Slimp used Photoshop, Blow Up and Genuine Fractals to enlarge several images and then surveyed people for their opinions. All agreed that Photoshop's enlargement was the worst, and almost all thought Blow Up's was better than Genuine Fractals'. Read his review.
![]() For more plugins, see our Photoshop Plugins Page.
For more plugins, see our Photoshop Plugins Page.
![]() For more special offers from Alien Skin, see our Alien Skin Plugins Page.
For more special offers from Alien Skin, see our Alien Skin Plugins Page.
![]() posted by Jennifer Apple | permalink | send comments
posted by Jennifer Apple | permalink | send comments
![]()
TUESDAY - SEPTEMBER 19 2006

 From creativepro.com
Photoshop How-To: It's All There In Black and White by Rick Oldano
Black and white is beautiful, but it's not simple. Here are the best — and worst — ways to convert color images.
From Photoshop Killer Tips
Distorting Text
There are certain things you can’t do to type but this tip will show you how to get around that.
From Heathrowe
Plug-In Switch — Enable & Disable Filters
With hundreds of plug-in filters now available for expanding your host applications, it becomes essential to have a quick and easy way of organizing all the installed files. Plug-In Switch (free) was developed in order to help users disable filters on a temporary basis and re-enable them again when needed, without having to completely uninstall the plug-ins each time. Another handy time-saving tool. (Windows ONLY)
From Adobe Creative Suite Video Podcast
Color correct your image like a pro in Photoshop
Whether you're using a scanner or a digital camera chances are you've had images that required color corrections. In this episode you see how to color correct an image like a pro. We'll use Curves, Match Color and Adjustment Layers to make our adjustments.
From John Nack
Camera Raw 3.5 now available
 Adobe Camera Raw 3.5 has been released for Mac and Windows. Newly supported cameras: Kodak EasyShare P712, Nikon D2Xs, Panasonic DMC-FZ50, Panasonic DMC-L1, Sony A100. A couple of notes: The DNG Converter is now available as a universal binary for Intel-based Macintosh hardware. The new camera support added to Adobe Camera Raw 3.5 is not officially available in Adobe Lightroom beta 3. The Nikon D80, Canon 400D/Rebel XTi., and other new cameras were introduced too recently to make the cut for this release, but we're speeding up the development of ACR 3.6 to accommodate these new models.
From Sue Chastain (about.com)
Free Tiling Texture Materials from Spiral Graphics
If you're looking for some new textures to enhance your graphics projects, Spiral Graphics Inc. has recently released a royalty-free collection of 150 high-quality seamless metal and stone textures.
From Jan Kabili's Photoshop Online
Animate a layer mask
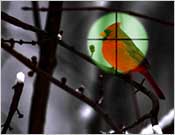 Learn to animate a layer mask in Photoshop CS2. We'll animate a night scope in a forest, but this technique can be used to make lots of novel animations. Think about some other ways you can put this technique to use: - animate a magnifying glass or a view through a telescope by scaling the two images differently, - animate a spotlight on a scene by lightening the image on the masked layer, - throw one of the images out of focus, - make one image black and white and leave the other in full color. Use your imagination!
From Graphic Design Bar
DesignerID
DesignerID is a wonderful online resource and community, created specifically to help designers make meaningful connections worldwide. Launched in February 2006 and swiftly gaining momentum, the site allows you opportunities to network locally and beyond, put portfolio pieces online, research niche markets, communicate within your field — the potential is tremendous.
![]() As always, a special Batgirl thank you to James Jean
As always, a special Batgirl thank you to James Jean
![]() posted by Jennifer Apple | permalink | send comments
posted by Jennifer Apple | permalink | send comments
![]()
MONDAY - SEPTEMBER 18 2006
New Photoshop Brush Set 'Vintage Halloween' From Kirsty
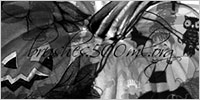 Kirsty sends this in: "Hi everyone, I'm a bit early, but I've got a Vintage Halloween brush set all ready, the second in the Vintage Holiday series :) It can be found at the usual address of 500ml Brushes. Have fun!"
The Vintage Halloween set contains 5 brushes of halloween images, including pumpkins.
![]() For more brushes, see our Photoshop Brushes Page.
For more brushes, see our Photoshop Brushes Page.
![]() posted by Jennifer Apple | permalink | send comments
posted by Jennifer Apple | permalink | send comments
![]()
From Veerle: How To Create A Grunge Brush And How To Create Patterns In Photoshop
There are 2 really good Photoshop tutorials at Veerle's blog. One steps you through creating seamless background patterns, which are great for blog layouts, and the other is a nice clear tutorial on how to create a grunge brush. Here are the intros and links:
Creating patterns in Photoshop CS2
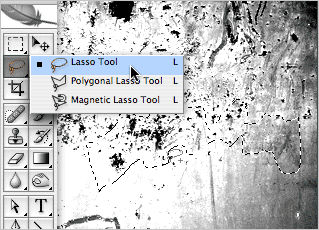 Have you ever wondered how you create a seamless pattern in Photoshop? It's easy and it's fun. Let me show you how...
Creating grunge brushes
My recent tutorial about creating pattern backgrounds sparked some questions from readers if I could do the same for something that is referred to as "grunge". The pattern tool is ok for repeating items but the grunge look gets it effectiveness just from the randomness I think. So I think it would be better if I show you how to make a grunge brush instead. I know several of those are available for download but there is nothing more rewarding then creating your own :)
![]() For more brushes, see our Photoshop Brushes Page.
For more brushes, see our Photoshop Brushes Page.
![]() posted by Jennifer Apple | permalink | send comments
posted by Jennifer Apple | permalink | send comments
![]()
FRIDAY - SEPTEMBER 15 2006

 From creativepro.com
Getting the Most Out Of Photo Object Masks
Thomas Kryton shows how to master the use of photo object clipping paths.
From One onOne With Mike Wong
Big Files in Photoshop
Earlier today, I was asked to settle a dispute between two of my co-workers. They were talking about a recent conversation had with a customer and one said that they were scaling an image with Genuine Fractals that was 20 feet by 30 feet at 300 ppi. One of my co-workers didn't think that Photoshop would let you save a file that big. So I was asked who was right? There was a lunch on the line here afterall... The answer is that if you're using Photoshop CS2, you can indeed create a file that is 20 feet by 30 feet at 300 ppi - In fact you could go bigger if you wanted as long as you turn on the preference to enable large document support (.PSB files) in Photoshop's preferences. (see blog post for instructions).
From John Nack
Photoshop 9.0.2 update available for Mac & Win
The Photoshop 9.0.2 update is now available for Mac OS X, along with the previously posted Windows update. (Both were initially posted together, but we found that a printing change made for OS 10.4 broke something on 10.3. That's now been addressed, but if you are running a pre-10.4 system and already applied the earlier 9.0.2 update and have encountered a printing crash, you'll want to reinstall CS2, then apply the new 9.0.2 update. Sorry for the lameness.)
Lightroom Podcast #21: Nevada Wier
 This podcast was recorded on Friday May 5th 2006, at the Santa Fe Workshop. Adobe Lightroom's Pro Photography Evangelist George Jardine speaks with travel photographer Nevada Wier about how she got started traveling and photographing in exotic locations. Nevada discusses in depth, the patience, waiting and effort that's often required to capture photos that "are all mine", as well as camera techniques that create "more complicated images that give a sense of the place". This enhanced podcast includes photos taken by Nevada, and they can be viewed on Photo and Video iPods. Only the audio track will be heard on other devices.
From Adobe Creative Suite Video Podcast
Introduction to Adobe ImageReady
If you have Adobe Photoshop CS2 (or any version since 5.5) you have Adobe ImageReady. It automatically installs with Photoshop. Many Photoshop users have no idea it's there or let alone what it's used for. In this episode we will take a look at how to create web rollovers from a Photoshop file. ImageReady is a web optimization tool as well as a good tool for creating animations from your layered Photoshop files.
From Graphic Design Bar
Free Pictographs
![]() Need some free iconography? The National Park Service has a treasure trove of their standard cartographic symbols and patterns available for download.
Need some free iconography? The National Park Service has a treasure trove of their standard cartographic symbols and patterns available for download.
From Graphicxtras.com
Graphicxtras.com release new items for Photoshop And Elements
Custom shapes 17 'slices' - 500 sliced paths and designs, all royalty-free, tangled brushes set (brushes pack 7); 160 spirals custom shapes in 'shapes pack 16' + many other additional sets. Also recently, added many new frames packs + font sets for use in Photoshop + items for Illustrator CS2. For more info about the products, please check out the graphicxtras.com website or contact support at graphicxtras.com.
![]() As always, a special Batgirl thank you to James Jean
As always, a special Batgirl thank you to James Jean
![]() posted by Jennifer Apple | permalink | send comments
posted by Jennifer Apple | permalink | send comments
![]()
THURSDAY - SEPTEMBER 14 2006
Stockvault.net Hosts Best Stock Photo Of 2006 Contest
 Stockvault.net has launched a competition aimed at photographers of all ages and backgrounds, both amateur and professional. The prize is $1,000 in cash, and is being offered for the best stock photo submitted to the site over the next three months.
Stockvault.net currently offers 4,700 hand-selected free images and photos, all of which are of a high quality and are at least 1600x1200 pixels in size. That standard will be mirrored in the competition, with high quality entries expected from all corners of the world. But don't be intimidated, as some of the best photos come from amateur photographers with basic equipment.
To enter the competition or learn more, please visit Stockvault.net.
![]() For more Free Stock Photo sites, see our Free Stock Photos Page.
For more Free Stock Photo sites, see our Free Stock Photos Page.
![]() posted by Jennifer Apple | permalink | send comments
posted by Jennifer Apple | permalink | send comments
![]()
Ben Long Releases Photoshop Elements Action Pack
 Mac-based Photoshop Elements users who have enviously eyed the automation capabilities of Photoshop CS2 now have access to a free set of automation tools that will let them batch process their images using Photoshop Elements. The Photoshop Elements Action Pack is a collection of 21 Automator Actions that let you drive Photoshop Elements from within Apple's Automator.
Bundled with every copy of Mac OS X 10.4 ("Tiger"), Automator is an application that lets you easily build complex automation routines by simply dragging together "actions" into a flowchart. While Photoshop Elements provides no internal Actions palette, nor hooks to any external scripting languages, the Automator/Photoshop Elements Action Pack combination lets you create complex automation workflows for Elements version 4, or any other version that shares the same menu structure.
The Photoshop Elements Action Pack lets you perform all of Elements' essential functions such as Auto Color, Auto Levels, Auto Smart Fix, and Auto Red Eye Reduction. In addition, you can easily resize images and save them in multiple formats, making it simple to create automated workflows that prep images for web output, email, or print work.
The Photoshop Elements Action Pack is built around the same architecture as the popular Photoshop CS/CS2 Action Pack, which means you can batch processes huge numbers of very large images without bogging Elements down.
The Elements Action Pack includes a 20-page manual, sample workflows, and sample images, and can be downloaded for free. If you find yourself so inclined, give the large PayPal button a press or two. Any size donation is greedily accepted.
![]() posted by Jennifer Apple | permalink | send comments
posted by Jennifer Apple | permalink | send comments
![]()
O'Reilly Publishes 'Photoshop Elements 5: The Missing Manual'
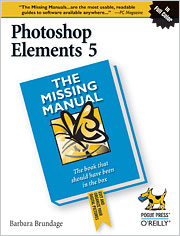 If you love scrapbooking, arranging photos in galleries, or creating cool slideshows set to music, you'll definitely want the just-announced Photoshop Elements 5. And for those serious about photography, the new version of Elements now includes Photoshop's most sophisticated drawing tool, Curves. This major upgrade combining Photoshop's power with Elements' simplicity gives digital photography enthusiasts the tools the pros use to make their pictures shine.
"The new version helps keep photos organized, makes top-notch prints and truly nifty creative projects," says Barbara Brundage, bestselling O'Reilly author and Photoshop Elements' expert. Adobe is really jumping on the scrapbooking bandwagon with this release. It's the must-have software for the scrapbooking hobbyist."
Indeed, the affordable Photoshop Elements 5, which starts shipping at the end of the month (only $65.99 at Amazon.com), has everything a digital photographer needs but a manual, adds Brundage. Adobe only provides a pamphlet and some help files. Enter Brundage's newest book, Photoshop Elements 5: The Missing Manual, to bridge this information gap.
"If you have an earlier version of Elements, you'll find a fair number of similarities in the basic editing functions, but Elements 5 gives you a lot of new ways to tackle old projects," says Brundage. Her new book clearly and concisely explains how all the new tools and commands work and when to use them. "With so many appealing new features, Photoshop Elements 5 is definitely a welcome, even essential update, no matter which version of Elements you might have used before."
This new Missing Manual explains in plain words how to use the new tools and state-of-the-art functions in Elements 5, including:
- Scrapbooking tools. For the first time, users can create multi-page documents, fancy photo arrangements with realistic-looking digital frames, and customized layouts for scrapbook projects.
- True black and white conversion. You could always remove color with Elements, but in Elements 5 it's easy to create stunning black and white shots from your color photos.
- Curves. Not a drawing tool, but one of the most sophisticated color adjustment tools from Photoshop. It's come to Elements in a simpler, easy-to-use form.
- Flash Web galleries. Wonderful, interactive photo galleries that let viewers do things like scroll through pictures (as though on a gallery wall), or "turn" the pages, book-style.
- Mapping tools. View photos like pins stuck in a Yahoo map, and share maps with friends so that they can click a spot on a map to see the photos you took of a particular location.
- Burst mode storage. If you use your camera's burst mode (multiple shots in quick succession), you can tell the Organizer to automatically create stacks of the photos from each burst.
Readers also have the option to head over to the Missing Manual web site for links to downloadable images for the tutorials mentioned in this book, to practice without using their own photos. You can also listen to a podcast interview with author Barbara Brundage.
![]() posted by Jennifer Apple | permalink | send comments
posted by Jennifer Apple | permalink | send comments
![]()
WEDNESDAY - SEPTEMBER 13 2006

 From creativepro.com
Make Your Own Time-Lapse Photography System
You'll need a little ingenuity, but not much money, to assemble this system. Then have fun while time flies!
From Photoshop Killer Tips
Larger Swatch Previews
Get your color swatches to look bigger on screen.
From John Nack
Lightroom Podcast #20: Michael Clark
Adobe Lightroom's Pro Photography Evangelist George Jardine speaks with extreme sports photographer Michael Clark. This enhanced podcast includes photographs from Michael Clark's exciting portfolio of climbing, mountain biking, and other extreme sports.
Sleek Photoshop->Flash integration sneak at Flashforward
I'm getting back to my Web roots here in Austin, and at today's Flashforward keynote speech, Flash PM Mike Downey gave a sneak peek of the integration with Photoshop that's planned for Flash 9.
From Layers Magazine
Realistic Cast Shadows
Scott Kelby shows how to create realistic looking cast shadows in Adobe Photoshop CS2.
From Adobe Creative Suite Video Podcast
Create an Animated Signature using Photoshop and ImageReady CS2
This episode takes a look at how to create layers in Photoshop CS2 that build up to your signature. Then we'll pop over to Adobe ImageReady to put the finishing touches on animating that signature so that it can be used on the web or in your email application.
 From Heathrowe.com
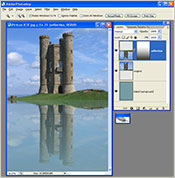
Create Faux Reflections in Photoshop
Helen Bradley shows you step-by-step how to add fun faux reflections to images with Photoshop.
Script Events Manager - Auto Stroke Paths
Utilize Photoshop CS2 Events Script Manager combined with a simple Action to automate stroking paths.
JPEG Lossless Resave plug-in for Adobe Photoshop
A tool designed to avoid recompression loss when editing and resaving JPEG images in Photoshop. The plug-in takes advantage of the fact that JPEG images consist of a number of small independent blocks and does not recompress blocks that don't have to be changed.
![]() As always, a special Batgirl thank you to James Jean
As always, a special Batgirl thank you to James Jean
![]() posted by Jennifer Apple | permalink | send comments
posted by Jennifer Apple | permalink | send comments
![]()
TUESDAY - SEPTEMBER 12 2006
Adobe Announces Photoshop Elements 5
 The Adobe website has posted information about the release of Photoshop Elements 5:
"Adobe Photoshop Elements 5.0 software combines power and simplicity so you can do more with your photos. Instantly fix flaws or adjust color and lighting with new advanced controls. Quickly drop your photos into customizable layouts and show off your creativity with dynamic web photo galleries created using Flash technology. And view all your photos and video clips in one convenient place."
![]() See the Photoshop Elements 5 page at Adobe for more features and news.
See the Photoshop Elements 5 page at Adobe for more features and news.
![]() Photoshop Elements 5.0 - Special Offer - only $65.99 at Amazon.com.
Photoshop Elements 5.0 - Special Offer - only $65.99 at Amazon.com.
![]() posted by Jennifer Apple | permalink | send comments
posted by Jennifer Apple | permalink | send comments
![]()
New Photoshop Plugin 'ArtStudioPro' From Twisting Pixels
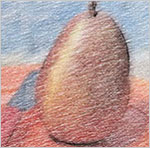 Twisting Pixels has announced ArtStudioPro, a simple Photoshop plugin that will convert photos into paintings and drawings. ArtStudioPro includes over 30 special effect filters that help users create the look of a masterpiece with just a few clicks of the mouse. It's easy to create a natural-looking media by simply loading an image and choosing an effect media such as Colored Pencil, Crayon, Marker, Technical Pen or Watercolor.
ArtStudoPro includes 25 Supporting Effects: Colored Pencil Brush, Colored Pencil Fill, Colored Pencil Inside, Colored Pencil Outside, Colored Pencil Outline, Colored Pencil Shade Outline, Crayon Brush, Crayon Inside, Crayon Outside, Marker Brush, Marker Outside, Marker Strokes, Paper Texture, Restore Original, Technical Pen Brush, Technical Pen Outline, Underlayment, Watercolor Base, Watercolor Blend Strokes, Watercolor Brush, Watercolor Details, Watercolor Dry Strokes, Watercolor Wash, & Watercolor Wet Strokes.
Find out more about ArtStudioPro at the Twisting Pixels site.
![]() posted by Jennifer Apple | permalink | send comments
posted by Jennifer Apple | permalink | send comments
![]()

 From creativepro.com
Make Photoshop and Flash Fast Friends
When you know the tricks, Photoshop and Flash can integrate nicely, saving you lots of time and trouble. Discover the most efficient methods for importing content created with Photoshop CS2 into Flash Professional 8, while maintaining as much of the original appearance as possible.
In the "PSD to Flash" video, you'll learn what happens when you bring a layered Photoshop file into Flash 8. In "Photoshop CS2 Tips for Image Quality," you'll find out how to downsample large images so they look as good as possible in the final output.
From Graphics.com
Setting Up An Efficient Photoshop Workspace
Eddie Tapp shows how to set up your workspace for more efficient production.
From Photoshop Killer Tips
Reverse Layer Mask
Find out how to add layer masks that hide everything and let you selectively paint back.
 From Adobe Creative Suite Video Podcast
Create Web Photo Galleries from the Bridge
Now with the Bridge you can preview and select images that you want to publish to the web. In this episode I'll show you how to take advantage of Photoshop's latest web galleries and to get the exact look and feel that you want. I'll also show you how to protect your images on the web so that are not easily copied.
From John Nack
FlashFilterLab: Visual effects builder for Flash
As I've mentioned previously, I came to Adobe to hijack the brains of people smarter than me, getting them to make crazy technology accessible to regular creative folks. Along those lines, it's great to see FlashFilterLab, a free project that lets you leverage the Flash Player's new runtime filter effects by using a drag-and-drop visual system instead of writing code. The FFL gallery encourages sharing & community review. Nice!
And speaking of brushes...
The Adobe Web team has now re-launched the Adobe Exchange, combining the content of the former Adobe & Macromedia exchanges. The Photoshop section now contains brushes, shapes, actions, and more.
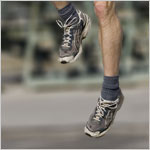
From Two Minute Photoshop Tricks
Depth of Field
Make your subjects pop from your photos background by simulating a decrease in depth of field. This trick includes tips on: Extracting objects, hiding/showing layers and layer management, selective blurring and blur gradation.
![]() As always, a special Batgirl thank you to James Jean
As always, a special Batgirl thank you to James Jean
![]() posted by Jennifer Apple | permalink | send comments
posted by Jennifer Apple | permalink | send comments
![]()
Pantone Unveils The Top 10 Colors For Spring 2007
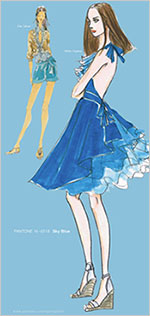 Tarragon is the freshly cut stem to the blossoming shades of sweet Strawberry Ice, warm Golden Apricot and violet-infused Hollyhock. Cafe Creme is the rich, creamy contrast to the serenity of calming Sky Blue or the deliciousness of refreshing Grapemist. The yellow glow of gleaming Green Sheen and the blushing beauty of diaphanous Silver Peony reflect the infusion of life brought by spring. Ooooolala!
Each season, Pantone surveys the designers showing at New York Fashion Week to collect feedback on prominent collection colors, color inspiration, color philosophy and each designer's signature shade. This information is used to create the PANTONE Fashion Color Report and serves as a reference tool throughout the year for fashion enthusiasts, reporters and retailers. The top 10 most directional women's ready-to-wear colors for spring 2007 (along with printing values) are:
PANTONE 12-1206 Silver Peony C= 3 M=13 Y=15 K=0
PANTONE 15-0326 Tarragon C=37 M=7 Y=60 K=0
PANTONE 16-3801 Opal Gray C=34 M=21 Y=28 K=0
PANTONE 14-1041 Golden Apricot C=8 M=26 Y=70 K=0
PANTONE 19-2924 Hollyhock C=55 M=97 Y=14 K=3
PANTONE 13-0648 Green Sheen C=13 M=5 Y=72 K=0
PANTONE 16-3929 Grapemist C=57 M=28 Y=1 K=0
PANTONE 16-1220 Café Crème C=19 M=38 Y=45 K=5
PANTONE 16-1720 Strawberry Ice C=1 M=56 Y=29 K=0
PANTONE 14-4318 Sky Blue C=45 M=9 Y=8 K=0
The PANTONE Fashion Color Report Spring 2007 is available online at the Pantone site.
![]() posted by Jennifer Apple | permalink | send comments
posted by Jennifer Apple | permalink | send comments
![]()
FRIDAY - SEPTEMBER 08 2006

 From creativepro.com
Keeping It Real: Part 1 by Colin Smith
"Use Photoshop to create images that look like real interfaces for MP3 players. In this tutorial, you'll learn how to create the basic interface shape and add depth to the shape for greater realism."
Keeping It Real: Part 2 by Colin Smith
"Complete this Photoshop tutorial on creating a realistic-looking interface for a music player. In this installment, you'll layer a convincingly realistic LCD on top of the shape, and finally, add buttons to the display."
From SwissMiss
AIGA | design and business ethics
AIGA has released a series of brochures outlining the critical ethical and professional issues encountered by designers and their clients. The series, entitled "Design Business and Ethics," examines the key concerns a designer faces in maintaining a successful practice and speaks directly to the protection of individual rights.
- Client's guide to design
- Business and ethical expectations for professional designers
- Use of fonts
- Use of illustrations
- Use of software
- Guide to copyright
- Use of photography
- Sales tax
- Print design and environmental responsibility
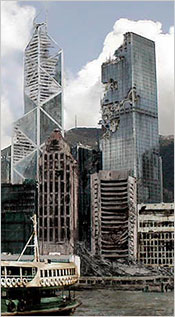 From CreativeBits
How to destroy a city in PS
Very cool tutorial on how to create ruins out of perfectly nice city.
From John Nack
Lightroom Podcast #18: Maggie Hallahan
San Francisco photographer Maggie Hallahan talks about her personal technique for approaching candids while shooting in another country, the editorial style she uses for storytelling with photography, and the variety of interesting subjects she found in Iceland.
Maggie gives us a glimpse into her camera technique, describing some of the lighting and bracketing techniques she employed during the trip. This "enhanced" podcast includes photos taken by Maggie in Iceland, and they can be viewed on Photo and Video iPods. Only the audio track will be heard on other devices.
From Photoshop Killer Tips
Save Time Typing
Learn how to let Photoshop change your letters to all caps, lowercase, etc.
Smarter Filters
Learn how to reapply the last settings using the smarter filters in CS2.
Pick A Color From Anywhere
Find out how to use Photoshop’s eyedropper to pick colors from anywhere on your screen.
![]() As always, a special Batgirl thank you to James Jean
As always, a special Batgirl thank you to James Jean
![]() posted by Jennifer Apple | permalink | send comments
posted by Jennifer Apple | permalink | send comments
![]()
THURSDAY - SEPTEMBER 07 2006
Wacom Intuos3 4x6 Provides Superior Pen Control For Widescreen Users
Wacom's patented new Wacom Intuos3 4x6 pen tablet is designed for serious photographers, designers and artists seeking optimal pen control and comfort when working with a widescreen display.
The Intuos3 4x6 joins Wacom's Intuos3 6x11 and 12x19 models to form a complete range of professional pen tablets that feature active areas matched to the screen aspect ratio of widescreens and dual monitors.
 This latest Intuos tablet provides 20% more active area than the model it replaces (Wacom Intuos3 4x5).
The Intuos3 4x6 comes with all the features that have made the Intuos3 line of pen tablets the de facto standard among serious photographers, designers and artists. Intuos3 turns on the full power of Photoshop, Corel Painter and over 100 other leading software applications with its intuitive controls.
Four programmable ExpressKeys(TM) and one finger-sensitive Touch Strip, located on the left side of the tablet surface, are within easy reach for modifier keys, keyboard shortcuts, scrolling, zooming, controlling brush size and more. The comfortable cordless, battery-free Grip Pen offers 1,024 levels of pressure sensitivity for superior creative input and, when used alternately with the ergonomic five-button Intuos3 mouse, reduces repetitive motion. In addition, the Intuos3 4x6 is sized to be easily placed in a laptop bag or briefcase.
"We feel that the timing of this introduction nicely anticipates the needs of the market," said Michael Marcum, Director of Product Management for Wacom Technology. "It's estimated in a recent IDC study that 38.5 million widescreen laptops are to ship in 2006. By 2009, that number is expected to climb to over 95 million."
The Wacom Pen Experience And Windows Vista
Windows Vista introduces significant pen input features for a faster, easier and more efficient computing experience. Wacom pen users will enjoy intuitive new Vista-enabled note taking resources, handwriting recognition and time-saving gesture control options. All versions of Vista (except Home Basic) provide complete pen functionality, offering communication and navigation benefits that enhance the overall computing experience. Select aspects of the experience include:
Note Taking — Microsoft Journal is an application exclusively for the benefit of users working with a digital pen. Journal simulates a physical notebook, but with all the advantages of a digital medium. The pen can be used in Journal to jot notes and capture quick sketches providing valuable collaboration options for use at home, school and work. Journal also incorporates a powerful search engine that can even locate handwritten content.
Handwriting Recognition — Vista introduces intelligent handwriting recognition as a natural supplement to keyboard input. This new recognition technology efficiently and accurately converts a wide variety of handwriting styles into typed text. For example, during a brainstorming session, a pen user can scribble down ideas and sketch concepts for collaboration with colleagues. The user has the option to share the information in handwritten form or convert it to typed text. In addition, the eraser end of a Wacom pen automatically activates an eraser tool to quickly and easily remove mistakes.
Gestures — There are a variety of pen gestures available within Vista that enable users to navigate faster and that greatly enhance the overall computing experience. Flicks offers eight customizable gestures with actions determined by the user and Scratch Out allows pen users to delete text automatically with a scratching motion of the pen over the targeted text.
Bringing Office 2007 to Life
Office 2007 applications such as Word, Excel, Outlook, PowerPoint and OneNote running on Vista all support digital mark-up with a Wacom pen and provide easy access to digital inking tools for intuitive collaboration. Users can select a pen or highlighter tool to jot notes, create rough sketches or mark up documents, spreadsheets, presentation slides and e-mail messages.
Valuable Software Included
The Intuos3 4x6 ships with valuable software for Windows and Mac OS. Included in the box are Adobe Photoshop Elements 4 for digital photo editing, Corel Painter Essentials 3 for creating natural media art, Nik Color Efex Pro 2 IE for selectively applying photographic enhancements, and Wacom Brushes 2 for even more brush choices in recent versions of Photoshop and Photoshop Elements.
![]() Read our article about switching to a pen tablet for design work.
Read our article about switching to a pen tablet for design work.
![]() See more Wacom products on our Wacom Pen Tablets Page.
See more Wacom products on our Wacom Pen Tablets Page.
![]() Buy The Wacom Intuos3 6X8 Pen Tablet at Amazon.com for $281.95 (top seller)
Buy The Wacom Intuos3 6X8 Pen Tablet at Amazon.com for $281.95 (top seller)
![]() posted by Jennifer Apple | permalink | send comments
posted by Jennifer Apple | permalink | send comments
![]()
TUESDAY - SEPTEMBER 06 2006

 From Adobe Design Center
Basic photo corrections in Photoshop CS2
Learn how to use Photoshop to acquire, resize, and retouch a photo intended for print layout in this lesson of four excerpted from Adobe Photoshop CS2 Classroom in a Book.
Correcting and enhancing digital photographs
See how to refine, archive, and preserve your digital images for prosperity.
Typographic design with Photoshop CS2
In this lesson check out the powerful text tools in Photoshop.
Animating GIF images for the web
Discover how to use Adobe ImageReady to create animated GIF images for web pages.
From John Nack
Flex Your Textures: New plug-in & free downloads
Check out Dave Nagel's Texture Generators, a set of 15 actions for creating paper and other rough textures. Dave's article for Digital Producer Magazine links to the actions and walks through how to use them.
From Photoshop TV
 Photoshop TV Episode 46 (September 4, 2006)
Scott shows you a quick way to preview your images in black and white format in Adobe Bridge and has a follow up tip for previewing in Photoshop. Matt has a tutorial on creating a Flash animation with Photoshop and ImageReady. Dave creates a wild 3D abstract using the 3D Transform Filter.
From Matt Kloskowski's Photoshop Killer Tips
Two windows = Same Image
Find out how to get two windows of the same exact image.
Retouching Tip
Find out how the surface blur filter saves you time when retouching photos.
From Jan Kabili's Photoshop Online
 Spice up a photo with a gradient background
A background gradient is a great way to add color, focus, and spice to a photograph. In just a few easy steps you can jump the subject of your photo onto its own layer, and create a glowing radial gradient behind the subject.
From creativepro.com
Design How-To: Unleash the Action!
A still photo is real life on pause. Here's how to get things moving again -- and get plenty of attention for your designs. When you have a dynamic photo, the worst thing you can do is dilute its energy with type that gets in the way. In this how-to, master designer John McWade shows how to help a great picture roar off the page.
![]() As always, a special Batgirl thank you to James Jean
As always, a special Batgirl thank you to James Jean
![]() posted by Jennifer Apple | permalink | send comments
posted by Jennifer Apple | permalink | send comments
![]()
SiteGrinder 2.0.2 Update Released
 A new free bugfix release of SiteGrinder is now available for download. This update to 2.0.2 is recommended for all SiteGrinder 2 Basic and Pro users. SiteGrinder 2.0.2 adds ColdFusion <cfinclude> as an option for dynamic binding to external HTML.
Also, SiteGrinder 2.0.2 changes the way that horizontal menus are handled. Horizontal menus created with Photoshop POINT text are "pixel perfect" and exactly match the text placement as it appears in your Photoshop document. But horizontal menus created with Photoshop PARAGRAPH text boxes are automatically vertically centered in the paragraph box and aligned and distributed across the width of the box - this is a return to the way menus were handled with SiteGrinder 1.
You can read my review of SiteGrinder here.
Mac OS X and Windows versions of the SiteGrinder unlockable demo are available now via download. SiteGrinder 2 can be ordered from Media Lab's online store.
![]() posted by Jennifer Apple | permalink | send comments
posted by Jennifer Apple | permalink | send comments
![]()
Get The Latest Photoshop Brush Sets At GetBrushes.com
There's a new brush site on the block, GetBrushes.com. What you'll find is a nicely organized collection of Photoshop brushes in a very web 2.0 look-and-feel design.
 The site features reviews of the best free brushes available, and offers them sorted for you by author and by type, including brush details, some sample screenshots and usage examples.
You can also access a growing forum that is focused on the brush community. We had a little chat with site owner Ivan Dilber about his project and here's what transpired:
What makes your site different from other brush sites?
GetBrushes.com is easy to navigate and far less cluttered than most sites, plus all the site's content is fully categorized and easily searchable, and much more informative than your average brush site. In that sense browsing trough GetBrushes.com will be time saving because you have a clear idea on how to find something, and you can know right away whether a particular collection is the right one for your needs.
When looking on a particular brush set, you will not only get information about the Photoshop version it is compatible with, the size of the pack or the number of brushes that are in the set, but you will also get brush usage example images (created by the editors or brush authors themselves), and a screenshot of the brushes within the Photoshop application. The brushes are also rated not only by the editors, but by the users as well, which gives you a better perspective on the quality of the brush.
What was the inspiration behind it?
 While there's lots and lots of free brushes available on the net, it's often very hard and time consuming to find the ones you need. There are so many sites offering just a few sets (mostly personal/ portfolio sites), good brushes are scattered throughout cyberspace and it can get quite tiresome to look for them. Plus, most of the time you have to download and install the brush pack first, only to see how it looks and works and if it suitable for your needs.
As digital artists and designers using Photoshop brushes on daily bases — and for both work and fun — we were very and painfully aware of this problem. At some point we decided to take the initiative and make a site that we hope to be a roadmap to every quality brush set available online, so that people don't have to Google trough hundreds or thousands of sites anymore. We already did that for them.
How fast is the inventory growing?
We're adding new brushes on a daily basis, we currently have over 130 brush sets and more to come. We usually add from 1 to 5 brush sets a day, which is the amount of sets we can check out and review before adding them to our listings. We run this site on a voluntary bases, working in our free time, but hopefully we'll get more stuff and speed up the brush adding process.
What's in store ahead?
We will, of course, continue to add new quality brushes, but we also plan to work more on building a community of brush users and makers. In addition to the Forum that was recently started, we plan to give an option to brush authors to create their personalized portfolios, showcase galleries and blogs. We're also preparing a couple of tutorials related to brush making, and due to increasing interest, somewhere in the near future we will be setting up a place on GetBrushes.com for brush sets for other popular graphic tools like Gimp, Paint Shop Pro, Adobe Illustrator and perhaps Inkscape.
 And so how does someone submit a brush set to your site?
On the "Contact Us" page there's a form for sending us a message. We encourage brush makers to use this form and get in touch with us. We would love to check out their stuff and put them in the spotlight.
Give us some tips on how to find brushes on your site.
All brushes are sorted by category (example: Grunge, abstract, nature etc.) and by author. Also if you need a specific set, or you're searching for a particular keyword, you can always use the search box at the top of every page. In addition, there is a list of the 10 most recently added brushes, so that regular visitors can easily see what's new. There's also a "Featured Brushes" section on the home page, where we show what we believe to be the 3 hottest brushes around.
Tell us a little about your forums.
Our forum started working just a few days ago, and we are still actively working on adding new features and fine tuning it. However, the number of registered users is growing pretty fast, and we already have a number of regular visitors. The main reason behind starting a forum was to allow us an easy way to get feedback from our visitors, to feel the pulse of the artistic community more closely, and also to allow visitors to communicate both with us and with other visitors, to exchange useful information, to ask for help or for brushes they are looking for, and of course, to meet new people, relax and have fun.
Thanks for the chat Ivan, and good luck with your brush site!
![]() Visit GetBrushes.com.
Visit GetBrushes.com.
![]() For more brushes, see our Photoshop Brushes Page.
For more brushes, see our Photoshop Brushes Page.
![]() posted by Jennifer Apple | permalink | send comments
posted by Jennifer Apple | permalink | send comments
![]()
SATURDAY - SEPTEMBER 02 2006
September's Brush Sets And Textures From Janita
The lovely and multi-talented Janita has sent us her September package of free brushes for your exclusive downloading pleasure. These packs are previews that she offers only to our site (thanks Janita!). And so what enchanting brushy gifts are in store this time? In Janita's own words...
Another Mermaid is one of the illustration sets I've made lately. All brushes in there are pretty large, some around 1024 pixels and some smaller. The set is a watercolor, grungy one but reminds me of the ocean, that's why I've named it like this.
Memories #4 my beloved doodles. I am actually in love with the little mermaid and this die-cute shark. Doesn't he looks so scary? Well, this set version is pre-colored, I've added some shadows and bubbles here and there. All brushes are very large and actually made by request and for designing a babybook. Means the quality is extremely high here!
Not A Big Thing again some of my ink experiments. Doing this set has ruined one of my shirts cause I've kinda thrown the pen around on the paper and didn't notice the ink won't be on there only. Well, at least the set turned out wonderful. Large brushes again and the same ones smaller for all the Photoshop 6.0 users who cannot resize brushes. You guys should upgrade to version 7.0 by the way ~.^
Texture #58 this one was inspired by Hanna Werning I have bought some postcards and wrapping paper from, scanned some parts and turned them into a brushy texture. There's also a brushset online that includes these petals and butterflies. Her designs really are cute and chaos. How much I love it that way...
You can download all the new brush sets and the textures below, but also make sure to visit Janita's site Seishido and then help us spread the word about her amazing Photoshop brush resources. Oh, and don't forget to join her newsletter!
![]() Download Another Mermaid (zip - 575 KB)
Download Another Mermaid (zip - 575 KB)
![]() Download Memories #4 (zip - 1,430 KB)
Download Memories #4 (zip - 1,430 KB)
![]() Download Not A Big Thing (zip - 160 KB)
Download Not A Big Thing (zip - 160 KB)
![]() Download Texture #58 (zip - 630 KB)
Download Texture #58 (zip - 630 KB)
![]() For more brushes, see our Photoshop Brushes Page.
For more brushes, see our Photoshop Brushes Page.
![]() posted by Jennifer Apple | permalink | send comments
posted by Jennifer Apple | permalink | send comments
![]()
Filter Forge Tutorial - Create A Stunning Rock Texture
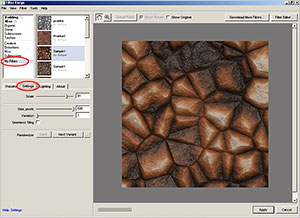 Our Photoshop pal Enrique Flouret over at The Photoshop Roadmap has unleashed another one of his extensive tutorials.
This one is doubly appealing as not only will you learn some tips and tricks for texture creation, but you'll also get a hands-on experience of working with Filter Forge (see my post about Filter Forge here).
The tutorial uses Filter Forge to create a stunningly realistic rock texture.
Here's the intro:
- This is not a review since I haven't tested Filter Forge in its fully potential. Instead, I will show you how to create a great looking wet and muddy rock ground texture that could be VERY difficult to do with Photoshop without the help of external plugins.
Just a quick note about Filter Forge: It is an educational program in terms of how you can visualize a diagram of the components of a texture or an effect. Most of the times, we use Photoshop following step by step instructions without really knowing why things happen. This program, instead, displays, in a single view, all the steps or components used to build the texture or filter and you can tweak them in a non-linear way. This feature alone is worth the program's price in educational terms.
Visit the Filter Forge product page to request a Beta testing account and return to this tutorial.
So have a look through Enrique's "Creating A Wet And Muddy Rocks Texture With Filter Forge" tutorial and take some time to give Filter Forge a try.
![]() posted by Jennifer Apple | permalink | send comments
posted by Jennifer Apple | permalink | send comments
![]()
FRIDAY - SEPTEMBER 01 2006

 From Michael A. Covington
Photoshop for Aerial Photographs
"Pictures taken out the window of an airplane usually look hazy and washed-out. These faults are easy to cure by processing the image with Photoshop. In what follows, I'll show you how I processed an aerial photograph with Photoshop CS."
From Colleen Wheeler
Looking Ahead to Photoshop World Las Vegas 2006
"Gearing up for Photoshop World in Las Vegas next week. It’s always interesting to watch thousands of photographers, graphic artists, designers, and other creative types come together all for the love of (or at least the preoccupation with) a single computer program. Here’s my list of must-sees so far..."
From PhotoshopNews
Digital Outback Photo Releases Free Script
"The Digital Outback Photo web site has released a free Photoshop Batch processor: XBatch. XBatch is simple to use and produces batch operations like Image Processor in Photoshop CS2 but maintains the folder hierarchy of the original folder of images."
The Making of the Lightroom DVD
"Michael Reichmann of The Luminous Landscape has released his second Lightroom Video Tutorial DVD featuring Michael and myself (Jeff Schewe) with discussions about Lightroom and tutorials on how to use Lightroom Beta 3. The DVD is available for $14.99 directly from the web site and is available to regular Video Journal subscribers for $5.00 off."
From Lunacore Photoshop Blog
The Wonderful World of Early Photography
A look at the history of photography.
 From Jay Savage At DownloadSquad
Supercharge Photoshop Elements: channels and layers and masks, oh, my!
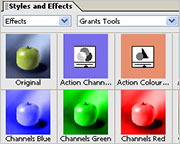
"Photoshop Elements is a great program for beginning photographers, but it lacks some basic functionality advanced users expect. One enterprising user, though, has developed a workaround to approximate some of the more glaring omissions. Elements Tools is a set of Photoshop elements actions that gives some basic options for channel mixing, color balance, curves, layer mask, and quick mask, as well as some element alignment tools."
From CreativeGuy
Pantone to CMYK to REGB Hex color chart
"LogoOrange has a handy color reference chart listing Pantone colors, their CMYK numerical counterparts, as well as the RGB Hex value for easy Web use."
 Creating planets out of your panoramic photos
"The 'Polar Panorama Effect' is a great effect to apply to your photos to turn them into unique pieces of art. It takes a panoramic (or landscape) photo and uses the Polar Coordinates filter of Photoshop CS or The Gimp to create a circular image that seems to wrap the panorama around a planet."
![]() As always, a special Batgirl thank you to James Jean
As always, a special Batgirl thank you to James Jean
![]() posted by Jennifer Apple | permalink | send comments
posted by Jennifer Apple | permalink | send comments
![]()
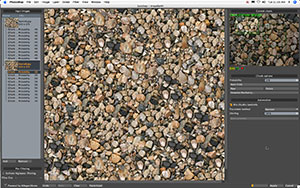
Luxology Releases imageSynth Texture And Tiling Plug-in For Photoshop
 Luxology have announced it is now offering its unique imageSynth plug-in for Photoshop CS and CS2. imageSynth is advanced technology that allows Photoshop users to quickly and easily create seamless textures, synthetic images, backgrounds, and generate high-resolution images from low-resolution sources.
Previously available exclusively to modo users, the imageSynth plug-in is now available to the entire Photoshop community and can be purchased directly from the Luxology website at modo3d.com.
“imageSynth is very beneficial for accomplishing a myriad of tasks that go beyond traditional 3D applications,” said Brad Peebler, president and co-founder of Luxology. “Our modo user community has raved about imageSynth for months and we decided it was time to make this unique tool available to all Photoshop users who need a fast and simple solution for creating synthetic images.”
Generate Textures
“The imageSynth plug-in provides a quick and robust way to generate useful textures. This appeals to a wide variety of Photoshop users from game developers to architects and graphic designers who will use imageSynth as a part of their own unique workflows,” said Kevin Connor, senior director of product management for Digital Imaging at Adobe.
 “With innovative companies like Luxology continuing to find new ways to extend the capabilities of Photoshop, the ecosystem of solutions for our customers keeps getting better.”
The plug-in is simple to use and lets designers create high-quality, tiling images based on simple seed images that are fed to the plug-in inside of Photoshop.
Seamless Tiling
imageSynth quickly processes the images and generates new images that are unique and will tile together seamlessly, making them ideal for use as backgrounds, brushes or texture maps. Users can manually control how the resulting image is built up spatially or use automatic options to generate the final, tiling image. imageSynth also allows users to produce a new single image that originally came from separate image sources.
“I'm often called upon to make large tiling images and imageSynth is my secret weapon for simplifying this time consuming task,” said James Darknell, art director at Mutant Pixel Digital Design Labs. “It is innovative and artist-empowering tools like modo and imageSynth that put Luxology so far ahead of the competition in my book.”
“imageSynth is at the top of my list when it comes to ‘must-have’ plug-ins for Photoshop,” said Dan Ablan, president of AGA Digital Studios Inc., and founder of 3D Garage.com. “It is without a doubt the fastest and easiest way to create seamless textures for my 3D work.”
Pricing and Availability
The imageSynth plug-in is available for USD $99 and can be purchased directly from modo3d.com. imageSynth works with both the Windows and Macintosh versions of Adobe Photoshop CS1 or higher. The product comes with documentation and video tutorials that explain how to use the plug-in to create new and unique images. Purchasers of imageSynth are welcome to use the plug-in on both the PC and the Mac as needed. For more information or to view sample images created with imageSynth, please visit the Luxology website.
About Luxology
Based in San Mateo, Calif., Luxology LLC is an independent technology company developing next-generation 3D content creation software that enhances productivity via artist-friendly tools powered by a modern underlying architecture. Founded in 2002 by Allen Hastings, Stuart Ferguson and Brad Peebler, Luxology is home to some of the top 3D engineering expertise in the industry. For more information on Luxology, its flagship product modo, and the active modo community, please visit www.modo3d.com.
![]() posted by Jennifer Apple | permalink | send comments
posted by Jennifer Apple | permalink | send comments
![]()
SEE PREVIOUS POSTS FROM THE AUGUST 2006 BLOG...
![]()
Technorati Tag: Photoshop
More blogs about Photoshop.
![]()
Exclusive Special Offer - Fluid Mask 2.0 - $189
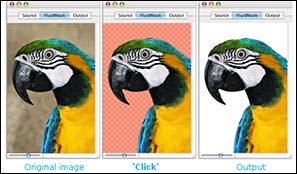 Fluid Mask 2.0 is based on breakthrough segmentation technology inspired by the way the eye, optic nerve and brain perform visual processing. When an image is loaded, Fluid Mask's segmentation engine analyses the distribution of colors, finding the natural groups within the image. Together with information calculated about edges, gradients and textures, a model is constructed which divides the images into objects.
Vertus Software is offering Fluid Mask at the special 'friends and partner' discounted rate of just $189 - PLUS free upgrades for the next 6 months.
New Features Of Fluid Mask 2.0
- Importing and exporting 16 bit color images
- Improved mask selections — especially on compressed images and fiddly cut-out tasks — making selecting your mask faster and more accurate
- Increases mask selection usability (a completely new image information layer IIL) giving you confidence with your selections, and helping you to learn how to use Fluid Mask easily.
This is an exclusive offer to visitors of PhotoshopSupport.com. To qualify, visit the Fluid Mask Discount Price page. Find out more about Fluid Mask on our special Fluid Mask Page.
![]()
Exclusive 10% Discount On All onOne Products
 Enter discount coupon code PSSPPT06 during the checkout process at onOne Software for an instant 10% discount on any onOne Software product. This is a special offer exclusively for PhotoshopSupport.com visitors. Vist our onOne Software Page for summaries and reviews of PhotoFrame Pro, Genuine Fractals, Mask Pro, Nik Sharpener, and The Photoshop Plugin Suite.
From the PhotoFrame Pro Review by Jennifer Apple: "PhotoFrame Pro 3 offers an upgraded batch of new features, making this plug-in even more of a valuable asset for the professional graphic designer or amateur digital photographer alike! The folks at onOne software have compiled what is arguably the most comprehensive collection of border and edge effects available on the plugin market right now. You can treat your digital images to the thousands of new frames offered in PhotoFrame Pro 3, ranging from crisp black and white to brilliant RGB color — from abstract edging effects to realistic frame-and-matte simulations."
![]() Read the full PhotoFrame Pro review.
Read the full PhotoFrame Pro review.
![]()


