![]()
![]() Buy. Download. Create. Get Photoshop now at the Adobe Store.
Buy. Download. Create. Get Photoshop now at the Adobe Store.
![]() Get Flash, Dreamweaver, Photoshop Extended with Adobe Web Premium.
Get Flash, Dreamweaver, Photoshop Extended with Adobe Web Premium.
![]()
![]() The Photoshop Blog offers the latest Photoshop news and software updates, Photoshop tips and tutorials, and random thoughts from graphic artist and Photoshop expert Jennifer Apple.
The Photoshop Blog offers the latest Photoshop news and software updates, Photoshop tips and tutorials, and random thoughts from graphic artist and Photoshop expert Jennifer Apple.
![]()
![]() Adobe Releases Photoshop CS2 Update (9.0.1)
Adobe Releases Photoshop CS2 Update (9.0.1)
![]() Photo Recovery Center with hard drive recovery and digital photo recovery.
Photo Recovery Center with hard drive recovery and digital photo recovery.
![]()
THURSDAY - JUNE 29 2006
Adobe Aquires Pixmantec - RawShooter Products
![]() Adobe has acquired the technology assets of Pixmantec ApS, makers of digital imaging software that provides advanced workflow management and processing capabilities for digital camera raw files.
Adobe has acquired the technology assets of Pixmantec ApS, makers of digital imaging software that provides advanced workflow management and processing capabilities for digital camera raw files.
"With high quality digital cameras now within reach of every photographer, customers are gravitating to raw file formats that allow them to get more control over final results," said John Loiacono, senior vice president of Creative Solutions at Adobe. "By combining Pixmantec’s raw processing technology and expertise with our own, we’re continuing to deliver on the promise that even your existing raw files can be processed with increasing quality as our software technology evolves."
![]() Pixmantec is a privately held company headquartered in Copenhagen, Denmark and currently ships the RawShooter line of digital photography software products. Adobe plans to integrate Pixmantec raw processing technologies into Lightroom and wherever customers will be working with raw files.
Pixmantec is a privately held company headquartered in Copenhagen, Denmark and currently ships the RawShooter line of digital photography software products. Adobe plans to integrate Pixmantec raw processing technologies into Lightroom and wherever customers will be working with raw files.
In preparation for this integration, the Pixmantec RawShooter Premium product is being discontinued, though the free RawShooter Essentials product will continue to be available until the Lightroom public beta program is completed. Existing Pixmantec customers will continue to be supported by Adobe and will be provided with an upgrade path to the Adobe digital imaging product family.
![]() posted by Jennifer Apple | permalink | send comments
posted by Jennifer Apple | permalink | send comments
![]()
The Trick To Tricky Extractions
![]() Adobe's own Julieanne Kost (Photoshop guru and instructor supreme) showed this at the Photoshop World Conference & Expo, and it had everybody's jaw dropping, but little has been said of it since, even though it's built into Photoshop CS2's Extract function (found under the Filter menu).
Adobe's own Julieanne Kost (Photoshop guru and instructor supreme) showed this at the Photoshop World Conference & Expo, and it had everybody's jaw dropping, but little has been said of it since, even though it's built into Photoshop CS2's Extract function (found under the Filter menu).
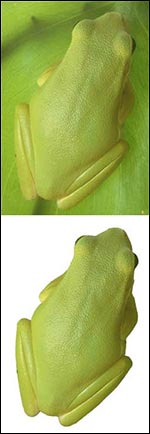
It's called Textured Image and you use it when you're dealing with a tough extraction — a person with a dark shirt posing on a dark background, for example — and Extract can't really tell where the shirt ends and the background begins. Turning this on helps detect the edges by examining the texture, and if it detects a texture (like you might find in a shirt), it can often help pull you out of a tight situation.
![]() reprinted by permission and sponsored by the NAPP
reprinted by permission and sponsored by the NAPP
![]() posted by Jennifer Apple | permalink | send comments
posted by Jennifer Apple | permalink | send comments
![]()
WEDNESDAY - JUNE 28 2006
StockVault - Free Stock Photos And Textures - Interview
We're pleased to offer you an interview with Bjorgvin Gudmundsson, the mastermind behind one of our favorite free stock photography sites, StockVault. You'll get to know the background of the site and its creator, so you'll have a better idea about where your photos are coming from. You wouldn't want to download a stock photo from just anyone, now would you?
 Read on for a transcript of our conversation, and when you're done, stick around and take a look at our extensive collection of free photo resources on our Free Stock Photos Page.
What is the easiest way to find a specific image when I'm pressed for time?
Go to the www.stockvault.net main page and use the "Quick Search" form in the page header to search for your keyword. If you can't find what you are looking for you can try and search our categories for that specific image, since a small fraction of our gallery is still not keyworded.
What about if I need an image that you don't have featured? Can I make a special request?
Yes, you can use the suggestion form in the header area to suggest an image. We will do our best to get these shots, but we can't promise anything, unfortunately.
Are your photos free to use for my own personal design needs? What about commercially — if I'm running my own design firm and need something for a client's project, for example?
All the images in the gallery are free for personal and educational purposes. We do not sell the images, nor allow them to be used commercially.
Where do you find most of your photos?
Most of the images were taken by me personally, and I also have a small group of great photographers that submit their own images on a semi-regular basis.
I have a number of photographs that I think would be useful for your site's directory. Do you accept submissions?
Yes we do, if the images were taken by you and don't brake any copyright laws. Please contact me for more information on how to become a submitter.
What is your personal/professional background with digital photography and design?
I've been designing since 1998. I studied Multimedia Integration back in 2000, and have worked both as a full time designer and had my own agency for a few years. Photography has been a hobby of mine for many years, and it's what I use most of my limited spare time on.
What made you want to start StockVault.net?
At the time, back in 2001 the need for free textures and photos amongst designers who were into Photoshop Battles (tennis) was increasing by the day. There weren't many good free stock photo resources around and that's when I started building a small image gallery at my personal site b-man.dk.
A few years later I started stockvault.net and the gallery has been growing ever since. Another reason is my interest in design and photography, I always wanted to make my own free stock photo site.
What makes StockVault.net stand out from the rest of its counterparts in the stock photo site field?
I think that our images are always getting better and better. We are not trying to compete with sites such as sxc.hu, which has tens of thousands of photos. I would like to think that Stockvault.net has more to offer than just stock photos, as we offer tutorials, articles and other webmaster resources.
We are always experimenting with new things, and we have the Drive to keep it up in the future. You can expect Stockvault.net to continue to grow and change in the near future. I have big plans for it.
Well thanks Bjorgvin — and continued success in all that you do!
Visit StockVault.net.
![]() For more Free Stock Photo sites, see our Free Stock Photos Page.
For more Free Stock Photo sites, see our Free Stock Photos Page.
![]() posted by Jennifer Apple | permalink | send comments
posted by Jennifer Apple | permalink | send comments
![]()
Lost Your Cursor? Find It Fast!
![]() Photoshop's cursors can be easy to lose onscreen, especially if you're working on a big screen or with the crosshair cursor (meaning you have the Caps Lock key engaged).
Photoshop's cursors can be easy to lose onscreen, especially if you're working on a big screen or with the crosshair cursor (meaning you have the Caps Lock key engaged).
Well, the next time you're working on an image, and say to yourself, "Hey, where the heck is my cursor?" (but you use a different word in place of "heck"), try this-just hold the Spacebar down for a moment. This temporarily changes your cursor into the Hand tool, whose icon is larger, white, and easy to see. Once it appears, you'll see right where your cursor is, and you can release the Spacebar.
![]() reprinted by permission and sponsored by the NAPP
reprinted by permission and sponsored by the NAPP
![]() posted by Jennifer Apple | permalink | send comments
posted by Jennifer Apple | permalink | send comments
![]()
TUESDAY - JUNE 27 2006
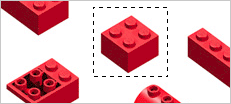
How To Create Lego Bricks - Photoshop Brush Tutorial
Enrique over at the Photoshop Roadmap has devised a clever little Lego brush tutorial that will step you through the way to building a little army of bricks that you can then save as a brush set. Once loaded you can go crazy painting all sorts of Lego things. He's also made the brush set files available for download.
Two versions of the set were created (a normal and a negative version) to achieve different results while painting over a white or black background. So give the tutorial a spin, then download the Lego brush sets and have fun!
![]() For more brushes, see our Photoshop Brushes Page.
For more brushes, see our Photoshop Brushes Page.
![]() posted by Jennifer Apple | permalink | send comments
posted by Jennifer Apple | permalink | send comments
![]()
Photoshop Tip: Make That Options Bar Float
![]() You may not realize it, but the Options Bar, which seems permanently docked at the top of your work area, can actually be redocked to the bottom of your screen, or you can make it into a floating palette. To make it float, just click on the little tab on the far-left side of the bar, drag it away, and viola, it floats. To dock it at the bottom of the screen, drag the tab down to the bottom left-hand side of your screen and it snaps into place. You can even hide the Options Bar altogether by choosing Options from the Windows menu. You can always get it back by double-clicking on any tool.
You may not realize it, but the Options Bar, which seems permanently docked at the top of your work area, can actually be redocked to the bottom of your screen, or you can make it into a floating palette. To make it float, just click on the little tab on the far-left side of the bar, drag it away, and viola, it floats. To dock it at the bottom of the screen, drag the tab down to the bottom left-hand side of your screen and it snaps into place. You can even hide the Options Bar altogether by choosing Options from the Windows menu. You can always get it back by double-clicking on any tool.
![]() reprinted by permission and sponsored by the NAPP
reprinted by permission and sponsored by the NAPP
![]() posted by Jennifer Apple | permalink | send comments
posted by Jennifer Apple | permalink | send comments
![]()
FRIDAY - JUNE 23 2006
Bitmap And Vector Graphics Explained
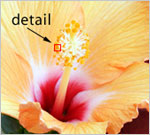 Ever find yourself reading an article about graphic design, hoping to pick up a few pointers to improve your portfolio or workflow, only to realize that you aren't even exactly sure what all the terminology being tossed around actually means? Trust us, we've been there, too – and we've got the search engine history to prove it. That's why we're pleased that Chance Agrella lent us his decoder ring expertise, with this piece on bitmap and vector graphics.
Using clear and easy-to-understand language, Chance outlines exactly what these two basic types of images are. Plus, unlike some other how-to guides out there, you won't need another tutorial to help you understand this tutorial! He also provides us with visual representations, appealing to those of us who learn just a little bit more easily when we can see exactly what we're being taught right in front of our eyes.
 You'll learn straightforward definitions of what bitmap and vector images are, how they're similar to and how they differ from each other, as well as their respective advantages and disadvantages. Image size and resolution are explained so clearly that you'll wonder how you ever had difficulty pinning down an exact definition of their meaning. You'll also learn how to work with bitmap and vector images, in terms of figuring out which best suits your particular creative needs.
But you don't have to listen to us to know how useful this article is – read Bitmap And Vector Graphics Explained and let Chance show you the benefits of his knowledge himself!
![]() posted by Jennifer Apple | permalink | send comments
posted by Jennifer Apple | permalink | send comments
![]()
Photoshop Tip: Making Your Guide Flip
![]() Just like most page-layout applications, Photoshop has non-printing guides you can pull out anytime you need to align objects or type, but there’s also a trick for flipping the guides. To access the guides, make your rulers visible by pressing Command-R (PC: Control-R), then click-and-hold within one of the rulers and drag out a guide. If you pull out a horizontal guide from the top ruler, but really wanted a vertical guide, just press the Option key (PC: Alt key) as you drag and your guide will flip from horizontal to vertical (pretty slick).
Just like most page-layout applications, Photoshop has non-printing guides you can pull out anytime you need to align objects or type, but there’s also a trick for flipping the guides. To access the guides, make your rulers visible by pressing Command-R (PC: Control-R), then click-and-hold within one of the rulers and drag out a guide. If you pull out a horizontal guide from the top ruler, but really wanted a vertical guide, just press the Option key (PC: Alt key) as you drag and your guide will flip from horizontal to vertical (pretty slick).
You can pull out as many guides as you need (there’s probably a limit to how many you can use, but we’ve never reached it). When you’re done using a guide, just use the Move tool (V) to drag it back to the ruler where it came from. To remove all of your guides at once, choose Clear Guides from the View menu.
![]() reprinted by permission and sponsored by the NAPP
reprinted by permission and sponsored by the NAPP
![]() posted by Jennifer Apple | permalink | send comments
posted by Jennifer Apple | permalink | send comments
![]()
WEDNESDAY - JUNE 21 2006
onOne Software Launches PhotoFrame Pro 3
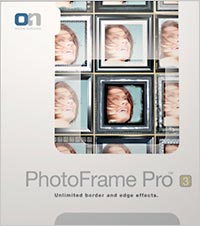 onOne Software Inc. have announced the immediate availability of PhotoFrame Pro 3, the award-winning border and edge effect plug-in for Adobe Photoshop and Adobe Photoshop Elements. (See below for exclusive discount code.)
"We are very excited to announce this new version of PhotoFrame Pro 3," said Craig Keudell, President of onOne Software. "PhotoFrame Pro 3 is packed with new features that our users have been asking us to deliver. Not only have we added thousands of new frames to the already deep collection, but we've made this version even easier to use so users will be able to focus solely on creating a unique frame for their digital images."
PhotoFrame Pro 3 adds several new features that enhance the user's experience, making it easier than ever to view and apply the thousands of frames that come with the latest version. New features available in PhotoFrame Pro 3 include:
- Built-In Frame Browser that displays the thousands of included frames in a single, searchable palette within PhotoFrame Pro.
- Frame Preview Grid that allows users to preview and compare several frames at once to see how they will look on the original image.
- Ability to apply an edge effect as a layer mask in Photoshop to ensure a non-destructive workflow while maintaining a high-degree of flexibility and creativity.
- Realistic color frames in a wide variety of sizes to fit any image
- "Randomizer Mode" will randomly layer a combination of frames to an image complete with random settings for each frame
- Built-in links to video tutorials showing how to get the most out of PhotoFrame
- Enhanced User Interface with a new Texture Browser and a new Preset Browser
Pricing and distribution
PhotoFrame Pro 3 is available now for a new lower price of $159.95, £93.61 (ex VAT) Upgrades from previous versions of PhotoFrame Pro are available for $69.95, £40.94 (ex VAT). The new version of PhotoFrame Pro is included in the Photoshop Plug-in Suite which consists of PhotoFrame Pro 3.0, Genuine Fractals 4.1, Mask Pro 3.0 and Intellihance Pro 4.1.
Exclusive 10% Discount On PhotoFrame Pro
Enter discount coupon code PSSPPT06 during the checkout process for an instant 10% discount exclusively for PhotoshopSupport.com visitors. PhotoFrame Pro 3 is available from onOne Software.
Compatibility
PhotoFrame Pro 3 and the other plug-ins in the Photoshop Plug-In Suite are compatible with Photoshop CS2 on both Mac OS X and Windows XP.
Read my full review of PhotoFrame Pro 3 - which includes a link to a free demo.
![]() posted by Jennifer Apple | permalink | send comments
posted by Jennifer Apple | permalink | send comments
![]()
TUESDAY - JUNE 20 2006
Photoshop Plugin Reviews From Jay Nelson
Here are the latest Photoshop Plugin Reviews by Jay Nelson, the editor-in-chief of Design Tools Monthly. (Because we are offering a 10% discount on onOne Software products we are reprinting Jay's review of PhotoFrame Pro 3.)
Realistic Lighting Controls
PhotoWiz LightMachine ($70) is a plug-in for Photoshop that performs many kinds of light adjustments in photos. (The examples on their website are extremely impressive.)
For example, you can bring detail out of dark shadows while separately maximizing detail in highlight areas; you can shine spotlights onto the scene; and you can selectively replace colors in objects. Its Auto Mask feature makes it easy to select areas for adjustment, and special controls let you add sunsets, glows, polarizing filters and apply selective black-and-white — with realistic results.
onOne Software's PhotoFrame Pro 3
onOne Software's PhotoFrame Pro 3 ($160; $70 for upgrades from previous versions) is a plug-in for Photoshop CS or CS2 that lets you interactively add border and edge effects to images. It includes thousands of frames and mattes in black and in RGB color, from abstract to realistic, including film emulsion and classic wood and metal frames.
A new frame browser lets you search by category and save Favorites. A Frame Preview Grid shows several of your frame choices next to your image, to help you choose one. A Random Frame Generator adds several different frames, to jump-start your creativity.
Frames can be added as a layer mask for editing in Photoshop, and up to 32 can be combined to create a new look. PhotoFrame also supports frame files from other Photoshop plug-ins.
![]() For more plugins, see our Photoshop Plugins Page.
For more plugins, see our Photoshop Plugins Page.
![]() posted by Jennifer Apple | permalink | send comments
posted by Jennifer Apple | permalink | send comments
![]()
Thanks Photoshop Kid – Whoever You Are
In response to the NAPP tip Find The Center Of Any Document, a mysterious stranger by the name of Photoshop Kid sent this in: "A cleaner way to do this is View> New Guide> 50% Horizontal, and then View> New Guide> 50% Vertical. Where the lines cross is your centre."
Works just right.
![]() posted by Jennifer Apple | permalink | send comments
posted by Jennifer Apple | permalink | send comments
![]()
FRIDAY - JUNE 16 2006
Buy Any onOne Software Product With Our Exclusive 10% Discount
The best Photoshop plugins just got even better with some sweet discounts from our friends at onOne Software. It's really very simple — just enter discount coupon code PSSPPT06 during the checkout process at onOne Software for an instant 10% discount on any onOne Software product. This is a special offer exclusively for PhotoshopSupport.com visitors. If you are unfamiliar with these plugins, visit our new onOne Software page to read summaries and reviews of PhotoFrame Pro, Genuine Fractals, Mask Pro, Nik Sharpener, and The Photoshop Plugin Suite. Below are snips from my review of the new PhotoFrame Pro 3:
PhotoFrame Pro 3 offers an upgraded batch of new features, making this plug-in even more of a valuable asset for the professional graphic designer or amateur digital photographer alike! The folks at onOne software have compiled what is arguably the most comprehensive collection of border and edge effects available on the plugin market right now. You can treat your digital images to the thousands of new frames offered in PhotoFrame Pro 3, ranging from crisp black and white to brilliant RGB color — from abstract edging effects to realistic frame-and-matte simulations.
onOne Software truly seem to have the customer's best interests at heart, as you can tell by the fact that they've set it up so that you can download a free, 30 day trial version of PhotoFrame Pro 3 from their main website. As well, just to be sure that you have full knowledge of what this plug-in entails before you hand over your hard-earned dollars, they've also created an online gallery of all new frames included in the Pro 3 version that you can browse through.
At the onOne Software site you can find some free online tutorials that are offered for PhotoFrame Pro 3. Featured in Flash movie format, these tutorials will whisk you through all of the new features. It's almost like PhotoFrame Pro 3 provides you with your very own in-house training, letting you learn at your own pace and in the comfort of your own home or office.
![]() Read the full PhotoFrame Pro 3 review (includes link to free demo).
Read the full PhotoFrame Pro 3 review (includes link to free demo).
![]() Read more about The Photoshop Plugin Suite.
Read more about The Photoshop Plugin Suite.
![]() For more plugins, see our Photoshop Plugins Page.
For more plugins, see our Photoshop Plugins Page.
![]() posted by Jennifer Apple | permalink | send comments
posted by Jennifer Apple | permalink | send comments
![]()
Latest Adobe Photoshop Tech Documents
![]()
Here are the latest top issues from the Photoshop Support Knowledgebase:
- Error 1305 when you try to install an Adobe product (Windows)
- Installation freezes on Intel-based Macintosh with QuickTime 7.1 (Adobe Creative Suite 2, After Effects 7.0, Photoshop CS2, InDesign CS2, InCopy CS2)
- Activation of Adobe Creative Suite 2 fails on Intel-based Macintosh computers with QuickTime 7.1
- Photoshop crashes when you open files from or save files to a network volume (CS and CS2 on Mac OS X v10.4.6)
![]() Visit the Photoshop Support Knowledgebase for the latest information.
Visit the Photoshop Support Knowledgebase for the latest information.
![]() You can also register to receive automatic updates at the Adobe site.
You can also register to receive automatic updates at the Adobe site.
![]() posted by Jennifer Apple | permalink | send comments
posted by Jennifer Apple | permalink | send comments
![]()
THURSDAY - JUNE 29 2006
Adobe Aquires Pixmantec - RawShooter Products
![]() Adobe has acquired the technology assets of Pixmantec ApS, makers of digital imaging software that provides advanced workflow management and processing capabilities for digital camera raw files.
Adobe has acquired the technology assets of Pixmantec ApS, makers of digital imaging software that provides advanced workflow management and processing capabilities for digital camera raw files.
"With high quality digital cameras now within reach of every photographer, customers are gravitating to raw file formats that allow them to get more control over final results," said John Loiacono, senior vice president of Creative Solutions at Adobe. "By combining Pixmantec’s raw processing technology and expertise with our own, we’re continuing to deliver on the promise that even your existing raw files can be processed with increasing quality as our software technology evolves."
Pixmantec is a privately held company headquartered in Copenhagen, Denmark and currently ships the RawShooter line of digital photography software products. Adobe plans to integrate Pixmantec raw processing technologies into Lightroom and wherever customers will be working with raw files.
In preparation for this integration, the Pixmantec RawShooter Premium product is being discontinued, though the free RawShooter Essentials product will continue to be available until the Lightroom public beta program is completed. Existing Pixmantec customers will continue to be supported by Adobe and will be provided with an upgrade path to the Adobe digital imaging product family.
![]() posted by Jennifer Apple | permalink | send comments
posted by Jennifer Apple | permalink | send comments
![]()
The Trick To Tricky Extractions
![]() Adobe's own Julieanne Kost (Photoshop guru and instructor supreme) showed this at the Photoshop World Conference & Expo, and it had everybody's jaw dropping, but little has been said of it since, even though it's built into Photoshop CS2's Extract function (found under the Filter menu).
Adobe's own Julieanne Kost (Photoshop guru and instructor supreme) showed this at the Photoshop World Conference & Expo, and it had everybody's jaw dropping, but little has been said of it since, even though it's built into Photoshop CS2's Extract function (found under the Filter menu).
It's called Textured Image and you use it when you're dealing with a tough extraction — a person with a dark shirt posing on a dark background, for example — and Extract can't really tell where the shirt ends and the background begins. Turning this on helps detect the edges by examining the texture, and if it detects a texture (like you might find in a shirt), it can often help pull you out of a tight situation.
![]() reprinted by permission and sponsored by the NAPP
reprinted by permission and sponsored by the NAPP
![]() posted by Jennifer Apple | permalink | send comments
posted by Jennifer Apple | permalink | send comments
![]()
WEDNESDAY - JUNE 28 2006
StockVault - Free Stock Photos And Textures - Interview
We're pleased to offer you an interview with Bjorgvin Gudmundsson, the mastermind behind one of our favorite free stock photography sites, StockVault. You'll get to know the background of the site and its creator, so you'll have a better idea about where your photos are coming from. You wouldn't want to download a stock photo from just anyone, now would you?
Read on for a transcript of our conversation, and when you're done, stick around and take a look at our extensive collection of free photo resources on our Free Stock Photos Page.
What is the easiest way to find a specific image when I'm pressed for time?
Go to the www.stockvault.net main page and use the "Quick Search" form in the page header to search for your keyword. If you can't find what you are looking for you can try and search our categories for that specific image, since a small fraction of our gallery is still not keyworded.
What about if I need an image that you don't have featured? Can I make a special request?
Yes, you can use the suggestion form in the header area to suggest an image. We will do our best to get these shots, but we can't promise anything, unfortunately.
Are your photos free to use for my own personal design needs? What about commercially — if I'm running my own design firm and need something for a client's project, for example?
All the images in the gallery are free for personal and educational purposes. We do not sell the images, nor allow them to be used commercially.
Where do you find most of your photos?
Most of the images were taken by me personally, and I also have a small group of great photographers that submit their own images on a semi-regular basis.
I have a number of photographs that I think would be useful for your site's directory. Do you accept submissions?
Yes we do, if the images were taken by you and don't brake any copyright laws. Please contact me for more information on how to become a submitter.
What is your personal/professional background with digital photography and design?
I've been designing since 1998. I studied Multimedia Integration back in 2000, and have worked both as a full time designer and had my own agency for a few years. Photography has been a hobby of mine for many years, and it's what I use most of my limited spare time on.
What made you want to start StockVault.net?
At the time, back in 2001 the need for free textures and photos amongst designers who were into Photoshop Battles (tennis) was increasing by the day. There weren't many good free stock photo resources around and that's when I started building a small image gallery at my personal site b-man.dk.
A few years later I started stockvault.net and the gallery has been growing ever since. Another reason is my interest in design and photography, I always wanted to make my own free stock photo site.
What makes StockVault.net stand out from the rest of its counterparts in the stock photo site field?
I think that our images are always getting better and better. We are not trying to compete with sites such as sxc.hu, which has tens of thousands of photos. I would like to think that Stockvault.net has more to offer than just stock photos, as we offer tutorials, articles and other webmaster resources.
We are always experimenting with new things, and we have the Drive to keep it up in the future. You can expect Stockvault.net to continue to grow and change in the near future. I have big plans for it.
Well thanks Bjorgvin — and continued success in all that you do!
Visit StockVault.net.
![]() For more Free Stock Photo sites, see our Free Stock Photos Page.
For more Free Stock Photo sites, see our Free Stock Photos Page.
![]() posted by Jennifer Apple | permalink | send comments
posted by Jennifer Apple | permalink | send comments
![]()
Lost Your Cursor? Find It Fast!
![]() Photoshop's cursors can be easy to lose onscreen, especially if you're working on a big screen or with the crosshair cursor (meaning you have the Caps Lock key engaged).
Photoshop's cursors can be easy to lose onscreen, especially if you're working on a big screen or with the crosshair cursor (meaning you have the Caps Lock key engaged).
Well, the next time you're working on an image, and say to yourself, "Hey, where the heck is my cursor?" (but you use a different word in place of "heck"), try this-just hold the Spacebar down for a moment. This temporarily changes your cursor into the Hand tool, whose icon is larger, white, and easy to see. Once it appears, you'll see right where your cursor is, and you can release the Spacebar.
![]() reprinted by permission and sponsored by the NAPP
reprinted by permission and sponsored by the NAPP
![]() posted by Jennifer Apple | permalink | send comments
posted by Jennifer Apple | permalink | send comments
![]()
TUESDAY - JUNE 27 2006
How To Create Lego Bricks - Photoshop Brush Tutorial
 Enrique over at the Photoshop Roadmap has devised a clever little Lego brush tutorial that will step you through the way to building a little army of bricks that you can then save as a brush set. Once loaded you can go crazy painting all sorts of Lego things. He's also made the brush set files available for download.
Two versions of the set were created (a normal and a negative version) to achieve different results while painting over a white or black background. So give the tutorial a spin, then download the Lego brush sets and have fun!
![]() For more brushes, see our Photoshop Brushes Page.
For more brushes, see our Photoshop Brushes Page.
![]() posted by Jennifer Apple | permalink | send comments
posted by Jennifer Apple | permalink | send comments
![]()
Photoshop Tip: Make That Options Bar Float
![]() You may not realize it, but the Options Bar, which seems permanently docked at the top of your work area, can actually be redocked to the bottom of your screen, or you can make it into a floating palette. To make it float, just click on the little tab on the far-left side of the bar, drag it away, and viola, it floats. To dock it at the bottom of the screen, drag the tab down to the bottom left-hand side of your screen and it snaps into place. You can even hide the Options Bar altogether by choosing Options from the Windows menu. You can always get it back by double-clicking on any tool.
You may not realize it, but the Options Bar, which seems permanently docked at the top of your work area, can actually be redocked to the bottom of your screen, or you can make it into a floating palette. To make it float, just click on the little tab on the far-left side of the bar, drag it away, and viola, it floats. To dock it at the bottom of the screen, drag the tab down to the bottom left-hand side of your screen and it snaps into place. You can even hide the Options Bar altogether by choosing Options from the Windows menu. You can always get it back by double-clicking on any tool.
![]() reprinted by permission and sponsored by the NAPP
reprinted by permission and sponsored by the NAPP
![]() posted by Jennifer Apple | permalink | send comments
posted by Jennifer Apple | permalink | send comments
![]()
FRIDAY - JUNE 23 2006
Bitmap And Vector Graphics Explained
Ever find yourself reading an article about graphic design, hoping to pick up a few pointers to improve your portfolio or workflow, only to realize that you aren't even exactly sure what all the terminology being tossed around actually means? Trust us, we've been there, too – and we've got the search engine history to prove it. That's why we're pleased that Chance Agrella lent us his decoder ring expertise, with this piece on bitmap and vector graphics.
Using clear and easy-to-understand language, Chance outlines exactly what these two basic types of images are. Plus, unlike some other how-to guides out there, you won't need another tutorial to help you understand this tutorial! He also provides us with visual representations, appealing to those of us who learn just a little bit more easily when we can see exactly what we're being taught right in front of our eyes.
You'll learn straightforward definitions of what bitmap and vector images are, how they're similar to and how they differ from each other, as well as their respective advantages and disadvantages. Image size and resolution are explained so clearly that you'll wonder how you ever had difficulty pinning down an exact definition of their meaning. You'll also learn how to work with bitmap and vector images, in terms of figuring out which best suits your particular creative needs.
But you don't have to listen to us to know how useful this article is – read Bitmap And Vector Graphics Explained and let Chance show you the benefits of his knowledge himself!
![]() posted by Jennifer Apple | permalink | send comments
posted by Jennifer Apple | permalink | send comments
![]()
Photoshop Tip: Making Your Guide Flip
![]() Just like most page-layout applications, Photoshop has non-printing guides you can pull out anytime you need to align objects or type, but there’s also a trick for flipping the guides. To access the guides, make your rulers visible by pressing Command-R (PC: Control-R), then click-and-hold within one of the rulers and drag out a guide. If you pull out a horizontal guide from the top ruler, but really wanted a vertical guide, just press the Option key (PC: Alt key) as you drag and your guide will flip from horizontal to vertical (pretty slick).
Just like most page-layout applications, Photoshop has non-printing guides you can pull out anytime you need to align objects or type, but there’s also a trick for flipping the guides. To access the guides, make your rulers visible by pressing Command-R (PC: Control-R), then click-and-hold within one of the rulers and drag out a guide. If you pull out a horizontal guide from the top ruler, but really wanted a vertical guide, just press the Option key (PC: Alt key) as you drag and your guide will flip from horizontal to vertical (pretty slick).
You can pull out as many guides as you need (there’s probably a limit to how many you can use, but we’ve never reached it). When you’re done using a guide, just use the Move tool (V) to drag it back to the ruler where it came from. To remove all of your guides at once, choose Clear Guides from the View menu.
![]() reprinted by permission and sponsored by the NAPP
reprinted by permission and sponsored by the NAPP
![]() posted by Jennifer Apple | permalink | send comments
posted by Jennifer Apple | permalink | send comments
![]()
WEDNESDAY - JUNE 21 2006
onOne Software Launches PhotoFrame Pro 3
onOne Software Inc. have announced the immediate availability of PhotoFrame Pro 3, the award-winning border and edge effect plug-in for Adobe Photoshop and Adobe Photoshop Elements. (See below for exclusive discount code.)
"We are very excited to announce this new version of PhotoFrame Pro 3," said Craig Keudell, President of onOne Software. "PhotoFrame Pro 3 is packed with new features that our users have been asking us to deliver. Not only have we added thousands of new frames to the already deep collection, but we've made this version even easier to use so users will be able to focus solely on creating a unique frame for their digital images."
PhotoFrame Pro 3 adds several new features that enhance the user's experience, making it easier than ever to view and apply the thousands of frames that come with the latest version. New features available in PhotoFrame Pro 3 include:
- Built-In Frame Browser that displays the thousands of included frames in a single, searchable palette within PhotoFrame Pro.
- Frame Preview Grid that allows users to preview and compare several frames at once to see how they will look on the original image.
- Ability to apply an edge effect as a layer mask in Photoshop to ensure a non-destructive workflow while maintaining a high-degree of flexibility and creativity.
- Realistic color frames in a wide variety of sizes to fit any image
- "Randomizer Mode" will randomly layer a combination of frames to an image complete with random settings for each frame
- Built-in links to video tutorials showing how to get the most out of PhotoFrame
- Enhanced User Interface with a new Texture Browser and a new Preset Browser
Pricing and distribution
PhotoFrame Pro 3 is available now for a new lower price of $159.95, £93.61 (ex VAT) Upgrades from previous versions of PhotoFrame Pro are available for $69.95, £40.94 (ex VAT). The new version of PhotoFrame Pro is included in the Photoshop Plug-in Suite which consists of PhotoFrame Pro 3.0, Genuine Fractals 4.1, Mask Pro 3.0 and Intellihance Pro 4.1.
Exclusive 10% Discount On PhotoFrame Pro
Enter discount coupon code PSSPPT06 during the checkout process for an instant 10% discount exclusively for PhotoshopSupport.com visitors. PhotoFrame Pro 3 is available from onOne Software.
Compatibility
PhotoFrame Pro 3 and the other plug-ins in the Photoshop Plug-In Suite are compatible with Photoshop CS2 on both Mac OS X and Windows XP.
Read my full review of PhotoFrame Pro 3 - which includes a link to a free demo.
![]() posted by Jennifer Apple | permalink | send comments
posted by Jennifer Apple | permalink | send comments
![]()
TUESDAY - JUNE 20 2006
Photoshop Plugin Reviews From Jay Nelson
Here are the latest Photoshop Plugin Reviews by Jay Nelson, the editor-in-chief of Design Tools Monthly. (Because we are offering a 10% discount on onOne Software products we are reprinting Jay's review of PhotoFrame Pro 3.)
Realistic Lighting Controls
 PhotoWiz LightMachine ($70) is a plug-in for Photoshop that performs many kinds of light adjustments in photos. (The examples on their website are extremely impressive.)
For example, you can bring detail out of dark shadows while separately maximizing detail in highlight areas; you can shine spotlights onto the scene; and you can selectively replace colors in objects. Its Auto Mask feature makes it easy to select areas for adjustment, and special controls let you add sunsets, glows, polarizing filters and apply selective black-and-white — with realistic results.
onOne Software's PhotoFrame Pro 3
 onOne Software's PhotoFrame Pro 3 ($160; $70 for upgrades from previous versions) is a plug-in for Photoshop CS or CS2 that lets you interactively add border and edge effects to images. It includes thousands of frames and mattes in black and in RGB color, from abstract to realistic, including film emulsion and classic wood and metal frames.
A new frame browser lets you search by category and save Favorites. A Frame Preview Grid shows several of your frame choices next to your image, to help you choose one. A Random Frame Generator adds several different frames, to jump-start your creativity.
Frames can be added as a layer mask for editing in Photoshop, and up to 32 can be combined to create a new look. PhotoFrame also supports frame files from other Photoshop plug-ins.
![]() For more plugins, see our Photoshop Plugins Page.
For more plugins, see our Photoshop Plugins Page.
![]() posted by Jennifer Apple | permalink | send comments
posted by Jennifer Apple | permalink | send comments
![]()
Thanks Photoshop Kid – Whoever You Are
In response to the NAPP tip Find The Center Of Any Document, a mysterious stranger by the name of Photoshop Kid sent this in: "A cleaner way to do this is View> New Guide> 50% Horizontal, and then View> New Guide> 50% Vertical. Where the lines cross is your centre."
Works just right.
![]() posted by Jennifer Apple | permalink | send comments
posted by Jennifer Apple | permalink | send comments
![]()
FRIDAY - JUNE 16 2006
Buy Any onOne Software Product With Our Exclusive 10% Discount
The best Photoshop plugins just got even better with some sweet discounts from our friends at onOne Software. It's really very simple — just enter discount coupon code PSSPPT06 during the checkout process at onOne Software for an instant 10% discount on any onOne Software product. This is a special offer exclusively for PhotoshopSupport.com visitors. If you are unfamiliar with these plugins, visit our new onOne Software page to read summaries and reviews of PhotoFrame Pro, Genuine Fractals, Mask Pro, Nik Sharpener, and The Photoshop Plugin Suite. Below are snips from my review of the new PhotoFrame Pro 3:
PhotoFrame Pro 3 offers an upgraded batch of new features, making this plug-in even more of a valuable asset for the professional graphic designer or amateur digital photographer alike! The folks at onOne software have compiled what is arguably the most comprehensive collection of border and edge effects available on the plugin market right now. You can treat your digital images to the thousands of new frames offered in PhotoFrame Pro 3, ranging from crisp black and white to brilliant RGB color — from abstract edging effects to realistic frame-and-matte simulations.
onOne Software truly seem to have the customer's best interests at heart, as you can tell by the fact that they've set it up so that you can download a free, 30 day trial version of PhotoFrame Pro 3 from their main website. As well, just to be sure that you have full knowledge of what this plug-in entails before you hand over your hard-earned dollars, they've also created an online gallery of all new frames included in the Pro 3 version that you can browse through.
At the onOne Software site you can find some free online tutorials that are offered for PhotoFrame Pro 3. Featured in Flash movie format, these tutorials will whisk you through all of the new features. It's almost like PhotoFrame Pro 3 provides you with your very own in-house training, letting you learn at your own pace and in the comfort of your own home or office.
![]() Read the full PhotoFrame Pro 3 review (includes link to free demo).
Read the full PhotoFrame Pro 3 review (includes link to free demo).
![]() Read more about The Photoshop Plugin Suite.
Read more about The Photoshop Plugin Suite.
![]() For more plugins, see our Photoshop Plugins Page.
For more plugins, see our Photoshop Plugins Page.
![]() posted by Jennifer Apple | permalink | send comments
posted by Jennifer Apple | permalink | send comments
![]()
Latest Adobe Photoshop Tech Documents
Here are the latest top issues from the Photoshop Support Knowledgebase:
- Error 1305 when you try to install an Adobe product (Windows)
- Installation freezes on Intel-based Macintosh with QuickTime 7.1 (Adobe Creative Suite 2, After Effects 7.0, Photoshop CS2, InDesign CS2, InCopy CS2)
- Activation of Adobe Creative Suite 2 fails on Intel-based Macintosh computers with QuickTime 7.1
- Photoshop crashes when you open files from or save files to a network volume (CS and CS2 on Mac OS X v10.4.6)
![]() Visit the Photoshop Support Knowledgebase for the latest information.
Visit the Photoshop Support Knowledgebase for the latest information.
![]() You can also register to receive automatic updates at the Adobe site.
You can also register to receive automatic updates at the Adobe site.
![]() posted by Jennifer Apple | permalink | send comments
posted by Jennifer Apple | permalink | send comments
![]()
THURSDAY - JUNE 15 2006
Photoshop Workflow Setups: Eddie Tapp On Digital Photography - Sample Chapter
From creativepro.com comes a sample chapter from a new Photoshop book on workflow setups called Photoshop Workflow Setups: Eddie Tapp On Digital Photography.
From the intro: "Photoshop has so many different work areas and tools that it can confuse digital photographers. Here's how to set up your workflow so you're efficient, not intimidated.
Photoshop practically seethes with menus, palettes, and tools. If you get confused by how they work — much less how they should work for your needs — this article is just what you need. After you set up the general workspace so it's efficient, using Photoshop will be a more pleasing experience."
Photoshop Workflow Setups: Eddie Tapp On Digital Photography is due to be on shelves in July. In the meantime, you can download the free PDF at creativepro.com
![]() posted by Jennifer Apple | permalink | send comments
posted by Jennifer Apple | permalink | send comments
![]()
New Photoshop Brush Set 'Famous Movie Monsters' From Kirsty
 The amazingly gifted brush diva Kirsty sends this in: "A new brushset with the theme Famous Movie Monsters has been added, so go check it out at the usual address: 500ml Brushes. Hope you like it!"
The set contains 8 brushes of well known movie monsters, most of which are from the 1950s or earlier. And yes, the Creature from The Black Lagoon does make an appearance in this perfectly ghoulish set!
![]() For more brushes, see our Photoshop Brushes Page.
For more brushes, see our Photoshop Brushes Page.
![]() posted by Jennifer Apple | permalink | send comments
posted by Jennifer Apple | permalink | send comments
![]()
Photoshop World Conference & Expo – $100 Advance Sign-up Discount
Photoshop World Conference & Expo, to be held Sept. 7-9 at the Mandalay Bay Resort & Casino, Las Vegas, is offering an advance registration discount of $100 now through Friday, Aug. 4th. Registration is open at www.photoshopworld.com or by calling 800-738-8513, Monday-Friday, 8:30 AM – 7:00 PM EST.
Photoshop World's educational offerings are ideal for creative pros and novices. Conference attendees may choose from 10 pre-conference workshops, more than 70 class sessions, plus 10 bonus sessions offered during the conference's two-day Tech Expo. View the complete schedule.
The conference features 36 of the who's who of Photoshop, design and photography, including Deke McClelland, Dave Cross, Ben Willmore, Julieanne Kost, Russell Brown, Jim DiVitale, Moose Peterson, Joe McNally, Vincent Versace, Bert Monroy, Jay Maisel and more.
![]() posted by Jennifer Apple | permalink | send comments
posted by Jennifer Apple | permalink | send comments
![]()
Photoshop Tip: Find The Center Of Any Document
![]() Need to find the exact center of your image? All you need is a layer filled with your Foreground color, and Photoshop will do the rest (okay, you have to do a little, but Photoshop will certainly help).
Need to find the exact center of your image? All you need is a layer filled with your Foreground color, and Photoshop will do the rest (okay, you have to do a little, but Photoshop will certainly help).
First, click on the Create a New Layer icon in the Layers palette and press Option-Delete (PC: Alt-Backspace) to fill it with your Foreground color. Make your rulers visible (press Command-R [PC: Control-R]) and drag a guide down from the top ruler. When you get close to the center of the image, the guide will automatically snap to the exact horizontal center. Do the same with the side ruler, and it automatically snaps to the vertical center of your image. (Note: If there’s not any snapping going on, be sure Snap is turned on under the View menu.)
![]() reprinted by permission and sponsored by the NAPP
reprinted by permission and sponsored by the NAPP
![]() posted by Jennifer Apple | permalink | send comments
posted by Jennifer Apple | permalink | send comments
![]()
TUESDAY - JUNE 13 2006
Lightroom Beta 3 Available At Adobe Labs
 From John Nack's blog: The second major update to the Lightroom Public Beta is now available on Adobe Labs. This release remains Mac-only, but the Lightroom Beta for Windows will be available this summer and more public Betas are scheduled to follow with additional functionality. Beta 3 for Mac includes the following updates:
- Before and After views in Develop
- History of Develop edits provided
- Live preview of HTML/Flash web output in new Web Module
- Auto Import or Hot Folder support
- Better handling of PSD and TIFF files
- Resolution control in Export
- Additional straighten tool
- Saving module settings with collections and shoots
- Keyword import/export
- User can specify a custom order for images in a collection or shoot
- More options for filtering based on rating
- Ability to not filter lists with search string/rating
- Black point compensation in Print
- Can specify Develop preset to apply during import
As always, we're eager to hear photographers' thoughts/rants/raves on what's needed in this professional workflow application. Click the Community tab on the Lightroom product page for links to the forums. Thanks in advance for your insights.
![]() For more on Lightroom, see our Lightroom Resource Center.
For more on Lightroom, see our Lightroom Resource Center.
![]() posted by Jennifer Apple | permalink | send comments
posted by Jennifer Apple | permalink | send comments
![]()
Jeff Schewe At PhotoshopNews Covers Lightroom Beta 3
From PhotoshopNews: "Beta 3 brings a variety of new functionality including a new module and refinements of other modules. Also added is a new 'Watched Folder' function to automatically import files into Lightroom when new files are added to a specified folder. It should also be noted that the application name has been changed from just ‘Lightroom’ to ‘Adobe Lightroom’. Hopefully, this will be the last name change.
"Read the rest of this story for an in depth look at Beta 3."
Filled with lots and lots of screen shots and detailed commentary, this is an amazingly comprehensive look at Adobe Lightroom Beta 3 - so make sure to have a look.
![]() For more on Lightroom, see our Lightroom Resource Center.
For more on Lightroom, see our Lightroom Resource Center.
![]() posted by Jennifer Apple | permalink | send comments
posted by Jennifer Apple | permalink | send comments
![]()
SATURDAY - JUNE 10 2006
Fluid Mask 2.0 For PC And Macintosh - Plus Exclusive Special Offer Discount Price
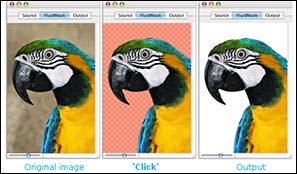
 Vertus, the leader in image cut-out technology, have announced the release of Fluid Mask 2.0, a major upgrade to its Adobe Photoshop plug-in. Fluid Mask 2.0 boasts a set of new features designed to improve usability and results. A key feature is the new Edge Overlay that shows for the first time clean object edges within an image before masking commences. Suddenly masking's become a whole lot easier - it's now possible using Fluid Mask 2.0 to select, group and mask objects in images to make great cut-outs.
Discount Price - Fluid Mask 2.0 - $189
Vertus Software is offering Fluid Mask at the special 'friends and partner' discounted rate of just $189 - PLUS free upgrades for the next 6 months. This is an exclusive offer to visitors of PhotoshopSupport.com. To qualify, visit the Fluid Mask Discount Price page.
New Fluid Mask 2.0 Features
Fluid Mask 2.0 delivers a revolutionary new-look masking interface and process, designed to help users meet cut-out challenges.
- The feature and process changes in Fluid Mask 2.0 clearly demonstrate the breakthrough nature of Vertus' new segmentation algorithms - for the first time they show objects in "real world" images with accurate and smooth edges which are largely free of the distorting effects of image compression and other artifacts present in many images.
- Masking is now simply a process of selecting objects displayed in the Edge Overlay view - similar to coloring by numbers. Using Fluid Mask is simpler to perform and easier to grasp than ever before, resulting in more confident masking and better cut-outs.
- The new Edge Detection Options panel transforms the process of managing mask application. It's an intuitive and user friendly interface, replacing the original Image Information Layer. Adjustments are made using simple and easy to understand controls, producing new object boundaries displayed in the Edge Overlay view.
- Fluid Mask 2.0 now supports 16 bit as well as 8 bit color for RGB and CMYK images.
- The Global brush has an added strength slider to permit fine adjustments to its sensitivity. It's now capable of identifying not just similar colors throughout the image, but also similar textures, giving it greater discrimination power and producing more accurate selections.
- The Local brush strength adjustment has improved. There is now a slider to discriminate and group selection of objects of similar color in areas of complexity and fine detail, making selections of hair and other fine detail more controllable and accurate.
Amazing Plugin Technology
 Fluid Mask 2.0 is based on breakthrough segmentation technology inspired by the way the eye, optic nerve and brain perform visual processing. When an image is loaded, Fluid Mask's segmentation engine analyses the distribution of colors, finding the natural groups within the image. Together with information calculated about edges, gradients and textures, a model is constructed which divides the images into objects.
Availability
Fluid Mask 2.0 is available on the Vertus website and purchasers will be entitled to 6 months free upgrades. All registered users of the first version of Fluid Mask will receive a free upgrade to version 2.0 for both Windows and Mac platforms. Upgrades are available directly from Vertus.
Discount Price - Fluid Mask 2.0 - $189
Vertus Software is offering Fluid Mask at the special 'friends and partner' discounted rate of just $189 - PLUS free upgrades for the next 6 months. This is an exclusive offer to visitors of PhotoshopSupport.com. To qualify, visit the Fluid Mask Discount Price page.
See it in Action
It is now also possible to see Fluid Mask 2.0 in action. Vertus now broadcasts a live Web-Cast demonstrating fluid mask most days showcasing the features and core functionality of Fluid Mask 2.0.
![]() For more about Fluid Mask, see our Fluid Mask Page.
For more about Fluid Mask, see our Fluid Mask Page.
![]() For more plugins, see our Photoshop Plugins Page.
For more plugins, see our Photoshop Plugins Page.
![]() posted by Jennifer Apple | permalink | send comments
posted by Jennifer Apple | permalink | send comments
![]()
Media Lab Release SiteGrinder 2 Basic and SiteGrinder 2 Pro - Plus SiteGrinder/PSD2FLA Bundle Offer
Media Lab have announced the release of SiteGrinder 2 Basic and SiteGrinder 2 Pro, new versions of its genre-breaking website production plug-in for Photoshop. For over a year the first version of SiteGrinder has been empowering web beginners and experts alike to convert Photoshop designs into sophisticated web pages in a single click via an unprecedented intuitive method of adding one-word hints, such as "button" or "menu", to the names of layers in Photoshop. SiteGrinder 2, now divided into Basic and Pro versions, adds an enormous array of features which vastly increase the variety of web elements users can generate without ever leaving the familiar environment of Photoshop.
What SiteGrinder Does
All versions of SiteGrinder generate web pages with graphics, styled and even scrolling web text, rollover buttons, popups, and multi-level menus. Interactive elements can be constructed from graphics, text, or a mix of both, and function across multiple web pages that are automatically linked to one another.
"The elegance of SiteGrinder's basic idea - that naming Photoshop layers is a great way to indicate the intended functions of those layers - produces an unusual combination of both power and simplicity. Using SiteGrinder is a little like finally getting a TiVo after struggling with your VCR for ten years!" says Media Lab President Tom Summerall.
New Features of SiteGrinder 2 Basic and Pro
SiteGrinder 2 comes in two editions, Basic and Pro. SiteGrinder 2 Basic builds upon the groundwork laid by SiteGrinder 1 and is faster, has better reporting, and generates better CSS, as well as intelligently merging graphics for users automatically.
"SiteGrinder 2 Basic stays true to the ideals of SiteGrinder 1 - making a standards compliant web site that has a high degree of fidelity to the original Photoshop file." explains Media Lab CEO Chris Perkins "but SiteGrinder 2 Pro goes places Photoshop never could and we start to treat the Photoshop document more like a guide and less like a frozen picture. There are no form creation tools in Photoshop, but with SiteGrinder 2 Pro you can make forms easily by just typing into a text field and putting underscores where you want to collect information. SiteGrinder will build the form from that description. It's amazing."
SiteGrinder 2 Pro adds seven distinct new industry-leading features to SiteGrinder.
- image gallery creation
- animated Flash slideshow creation
- importing of external multimedia files such as Flash animation and video
- easy integration with external HTML files
- sophisticated support for background tiles and images
- easy creation of custom web forms including email forms
- vertically expanding pages that can expand to fit growing content
Amazing Image Galleries
 SiteGrinder 1 attracted the interest of Photographers who were delighted to suddenly be capable of creating their own websites to display their portfolios. SiteGrinder 2 Pro aims a large number of its new features squarely at photographers to let them create galleries where they control the exact look and design. Thus, photographers can put their best (and very personal) foot forward, rather than being trapped by some canned template.
- One page design creates an entire gallery. SiteGrinder 2 Pro can generate an entire gallery of images from a single page design with just a few layers to indicate where images, thumbnails, and navigation buttons should appear.
- Thorough metadata support. SiteGrinder 2 Pro can exploit the information that digital cameras and Photographers place in jpeg files in a variety of ways. Styled metadata can appear anywhere on a page. Position and style are determined by standard Photoshop type layers.
- Automatic thumbnails and navigation. Most galleries use thumbnails, small versions of Photographs, to help users navigate to the right image. SiteGrinder 2 Pro has simple techniques to generate an infinite variety of thumbnail treatments. Most importantly, SiteGrinder 2 Pro automatically links thumbnails to allow them to navigate to full-size images. Thumbnails can even employ image metadata for additional customization.
Pricing and Availability
Mac OS X and Windows versions of the SiteGrinder unlockable demo are available now via download. Introductory pricing for the download version is US $249 for the Pro edition and $129 for Basic. SiteGrinder 2 can be ordered from Media Lab's online store. Also look for the special 30% bundle offer.
About Media Lab
Based in Longmont, Colorado, Media Lab Inc. has been bringing Photoshop designs to interactive life as Web pages and Macromedia Director & Flash movies for over a decade. Media Lab's award-winning web-page design tool PhotoWebber has received numerous favorable reviews since it was introduced in April, 2000. The company's multimedia design tools - PhotoCaster, PSD2FLA, and AlphaMania - have been used to create pioneering special effects seen at the EPCOT Center at Disney World in Florida, in numerous music videos and in motion pictures such as "X-Men 2", "Spiderman 2", "Air Force One", and "Armageddon". Media Lab can be reached via the web site at www.medialab.com, by email at press@medialab.com, by phone at 800-282-5361 or 303-546-7929.
![]() For more plugins, see our Photoshop Plugins Page.
For more plugins, see our Photoshop Plugins Page.
![]() posted by Jennifer Apple | permalink | send comments
posted by Jennifer Apple | permalink | send comments
![]()
THURSDAY - JUNE 08 2006
Sample Chapter - Preparing Images For Print
We've posted a fourth sample chapter from Window Seat: The Art of Digital Photography & Creative Thinking by Julieanne Kost, courtesy of O'Reilly Media. From the intro:
 I do a few last things to prepare an image for print. If the image has multiple layers, I flatten it because working with a flattened image is faster (it's smaller and Photoshop doesn't need to think about how to display multiple layers). Then I make sure the image is the correct size. Because of the algorithms Photoshop uses for sizing images, I prefer Photoshop's Image Size command over the printer driver when resizing images.
If the image needs just a slight adjustment, I'll use the Bicubic interpolation to resample the image. If it needs to be resampled up dramatically, I use the Bicubic Smoother option; for resampling down, the Bicubic Sharper. If images need sharpening after resizing, I use either the Unsharp Mask or the Smart Sharpen filter. I can also perform selective sharpening by duplicating the image onto a second layer, sharpening that layer, and then using a layer mask to reveal or hide parts of the sharpened layer.
Read Preparing Images For Print
![]() posted by Jennifer Apple | permalink | send comments
posted by Jennifer Apple | permalink | send comments
![]()
Filter Forge Plugin For Photoshop Enters Public Beta Testing
Filter Forge Inc., have released a public beta version of Filter Forge, a high-end plugin for Photoshop that allows computer artists to build their own filters – seamless textures, visual effects, distortions, patterns, backgrounds, and more. The key features of Filter Forge include a visual filter editor and a free online library of user-created filters to which anyone can contribute.
Filter Forge can produce a wide range of textures and effects which include organic structures, metallic and rocky surfaces, distortions, abstract textures, repeating patterns, color corrections, and more. All filters are adjustable and editable, seamlessly tiled, resolution-independent, and support real-world HDRI lighting. Also, filters can automatically generate diffuse, specular, bump, and normal maps, which makes Filter Forge a great tool for artists creating 3D models and environments, architectural visualization and high-end game content.
The key feature of Filter Forge is the Filter Editor, a visual node-based environment that allows users to build custom filters without writing any code. Filters are assembled by connecting components into a network to combine their effects. Components include familiar operations such as blurs, gradients, color adjustments, distortions, and blending; as well as 7 types of seamless fractal noise, HLS and HSY color models, color-preserving adjustments, and more. For end-users, the filter internals are hidden behind a simple set of filter controls – so that anyone can immediately benefit from filters without knowing what is inside them.
Another major feature is the Filter Library, a free online repository of user-created filters to which anyone can contribute. Access to the Filter Library is built directly into Filter Forge, so users do not need to browse any websites to download new filters. The Library already contains over 50 filters created by staff designers, with at least 100 filters planned for the commercial release. Users who contribute good filters to the Library can earn rewards, including a free copy of Filter Forge – details can be found at the Filter Forge website.
The public beta version of Filter Forge is available upon registration and approval. The beta is currently Windows-only, with the OS X version for both Intel and PowerPC processors in development. The final commercial version will be priced between $200 and $300 – or free for contributors of good filters – and is planned for release this fall. Examples of the filters can be seen at www.filterforge.com.
![]() For more about plugins, see our Photoshop Plugins Page.
For more about plugins, see our Photoshop Plugins Page.
![]() posted by Jennifer Apple | permalink | send comments
posted by Jennifer Apple | permalink | send comments
![]()
Photoshop Tip: Navigating The Brush Picker Like A Pro
![]() Now that you’ve learned how to bring up the Brush Picker right where you want it, it wouldn’t hurt to learn this quick navigation tip to keep you from spending more time there than necessary. Once you’ve selected a brush in the Picker, just use the Arrow keys on your keyboard to navigate up, down, left, or right to other brushes in the Picker.
Now that you’ve learned how to bring up the Brush Picker right where you want it, it wouldn’t hurt to learn this quick navigation tip to keep you from spending more time there than necessary. Once you’ve selected a brush in the Picker, just use the Arrow keys on your keyboard to navigate up, down, left, or right to other brushes in the Picker.
Once you choose a brush and you are no longer in the Brush Picker, you can use the Period and Comma keys to move forward and backward through the different brushes. Shift-Comma and Shift-Period will jump you to the first and last brushes in the Brush Picker, respectively.
![]() reprinted by permission and sponsored by the NAPP
reprinted by permission and sponsored by the NAPP
![]() posted by Jennifer Apple | permalink | send comments
posted by Jennifer Apple | permalink | send comments
![]()
WEDNESDAY - JUNE 07 2006
Master's Collection: Total Training for Advanced Flash Professional 8 ActionScript - Plus Free Clips
This latest offering from Total Training targets the more advanced Flash enthusiast among us, although the intermediately experienced will likewise find much value in these tutorials.
Total Training really seemed to respond to both the success of its popular Advanced Flash Professional 8 title and the subsequent outpouring of consumer demand for a title that focused on the more advanced aspects of ActionScript. Spanning over 11 hours of comprehensive training spread over 2 DVD-ROMs, this Total Training series runs on both Windows and Mac OS.
True to their claims of unleashing your creative potential, Total Training for Advanced Flash Professional 8 ActionScript offers advanced tutorials on the industry's most advanced authoring environment for creating interactive websites. You'll get a quick refresher in scripting basics before diving right into how ActionScript works and how best to include it in your applications.
Working through the interactive lessons, you'll tackle the advanced capabilities of ActionScript for looping movie clips, playing sounds and creating menu buttons. And as if that wasn't enough, you'll also learn how to create compelling 2D animations and push the limits of video content.
As always, Total Training offers you an alternative to costly seminars and training manuals. With their tutorials, you can easily learn at your own pace, stopping and starting whenever you need to spend a little more time on a particular topic or when your interest has been piqued by a certain feature. It's the closest you'll get to having your own personal Flash tutor at your beck and call!
Free Video Clip Samples
The following clips are courtesy of Total Training and are all in High Definition (HD). Benefits of HD include a 165% larger screen size for viewing on a computer monitor, crystal-clear image capture to easily read text and fine details, and higher frame rate support for smoother playback.
![]() Using Event Handlers And Layers.
Using Event Handlers And Layers.
![]() How To Duplicate Multiple Graphics.
How To Duplicate Multiple Graphics.
![]() How To Embed Fonts In A Flash Movie.
How To Embed Fonts In A Flash Movie.
![]() How To Create A Script To Generate Thumbnails.
How To Create A Script To Generate Thumbnails.
![]() Working With Text Properties In Flash.
Working With Text Properties In Flash.
![]() For more on Flash, including free video tutorials, see our Flash Resource Center.
For more on Flash, including free video tutorials, see our Flash Resource Center.
![]() posted by Jennifer Apple | permalink | send comments
posted by Jennifer Apple | permalink | send comments
![]()
Photoshop How-To: Merge Two Images for a Custom Collage
 Colin Smith of the PhotoshopCafe has a new Photoshop how-to article at creativepro.com. From the intro:
"Maybe you're feeling artistic, or maybe you need to take uninspired stock photography to a new level. Whatever the reason, here's how to combine two photos into one you won't find anywhere else. These collaging techniques use Photoshop's channels and layers. You will learn several techniques that you can adapt to add a pro touch to your montages and collages."
Read Photoshop How-To: Merge Two Images for a Custom Collage at creativepro.com.
![]() posted by Jennifer Apple | permalink | send comments
posted by Jennifer Apple | permalink | send comments
![]()
Photoshop Tip: Stop The "click-and-jump-to-that-layer" Blues
![]() Problem: All of a sudden, every time you click on a layer with the Move tool, it jumps to that layer. Solution: Somehow you turned on a feature called Auto Select Layer, which lets you make a layer active by just clicking on it with the Move tool. To turn this feature off, press V to get the Move tool, and up in the Options Bar, turn off the checkbox for Auto Select Layer. Besides, you never really need to turn this feature on, because you can just hold the Command key (PC: Control key) and click on any layer in your image window.
Problem: All of a sudden, every time you click on a layer with the Move tool, it jumps to that layer. Solution: Somehow you turned on a feature called Auto Select Layer, which lets you make a layer active by just clicking on it with the Move tool. To turn this feature off, press V to get the Move tool, and up in the Options Bar, turn off the checkbox for Auto Select Layer. Besides, you never really need to turn this feature on, because you can just hold the Command key (PC: Control key) and click on any layer in your image window.
![]() reprinted by permission and sponsored by the NAPP
reprinted by permission and sponsored by the NAPP
![]() posted by Jennifer Apple | permalink | send comments
posted by Jennifer Apple | permalink | send comments
![]()
TUESDAY - JUNE 06 2006
Sample Chapter - Processing Using Adobe Camera Raw
We've posted a third sample chapter from Window Seat: The Art of Digital Photography & Creative Thinking by Julieanne Kost, courtesy of O'Reilly Media. From the intro:
 When making adjustments to isolated areas in an image, people tend to make them in one of two ways:
• Make a selection and then add the adjustment layer.
• Add the adjustment layer to the entire image and then paint the adjustment layer mask to hide and reveal the adjustment in areas as needed.
Both methods yield similar results, so it's really just a matter of personal choice which technique you use. If you choose to make the selection first, you can use any of the selection tools by themselves or in combination with others and/or with the Select menu.
The Marquee tools are the most basic and can be quite useful. Holding down the shift key while dragging with the marquee tools constrains the selection to a perfect square or circle. Holding down the spacebar while clicking and holding the mouse button lets you reposition the point of origin while you're dragging the selection; let go of the spacebar to continue making the selection. You can add to, subtract from, and find the intersection of multiple selections with these (and other) tools using the icons in the Options bar.
Read Selective Adjustments
![]() posted by Jennifer Apple | permalink | send comments
posted by Jennifer Apple | permalink | send comments
![]()
Brushes Right Where You Want 'em
![]() Here's a tip that gives you a faster and more convenient way to switch to another preset brush without using the Brushes palette — and you might find that you like it even better. Just press the Control key, then click within your image (PC: Right-click) and the Brush Picker will appear directly under your cursor. Plus, you can even change the Master Diameter of the brush that you choose in the Picker.
Here's a tip that gives you a faster and more convenient way to switch to another preset brush without using the Brushes palette — and you might find that you like it even better. Just press the Control key, then click within your image (PC: Right-click) and the Brush Picker will appear directly under your cursor. Plus, you can even change the Master Diameter of the brush that you choose in the Picker.
This is one you'll have to try to appreciate the sheer speed and convenience of putting your brushes at your fingertips anytime.
![]() reprinted by permission and sponsored by the NAPP
reprinted by permission and sponsored by the NAPP
![]() posted by Jennifer Apple | permalink | send comments
posted by Jennifer Apple | permalink | send comments
![]()
FRIDAY - JUNE 02 2006

Here's my latest collection of Photoshop goodies. This edition spotlights 5 tutorials from Graphics.com, and some enchanting posts from John Nack.
Tutorials From Graphics.com
Eliminating Image Banding in Photoshop
Doug Nelson suggests using the Add Noise filter to add pixel variation to adjacent tones. From the intro: "When banding occurs in images, it can be mistaken for posterization, but it's more complex than that. Banding is caused by the failure of an algorithm during an image conversion, such as switching to a new color mode. If too many near-identical image tones spread out farther than its computational area, the algorithm can fail, and the conversion may produce tonal edges called bands. To eliminate banding, use the Add Noise filter to add pixel variation to adjacent tones."
Creating a Figural Illustration in Photoshop
Pascal Yelle begins with an anatomy book and the Shear filter in Photoshop. From the intro: "Using an anatomy book as reference material, Pascal Yelle created organic shapes by drawing rough shapes with the Lasso tool on their own respective layers. Selecting the Gradient tool, Yelle chose a White to Black gradient, Command/Ctrl-clicked each layer to load as a selection, and clicked the Lock transparent pixels icon in the Layer palette. To add shadows, he applied various Linear gradients to each shape. Yelle sometimes brushed the edges of the shapes with black to help define them, then went in with the Eraser tool to fade other parts on layer masks. To make the shapes more organic, he choose Filter > Distort > Shear, clicked the Wrap Around option, and set points to pull curves in the Shear pictogram while watching the Preview window."
Create An Overall Color Scheme Using Grayscale in Photoshop
Simon Tuckett suggests connecting disparate images together with a grayscale-based color scheme. From the intro: "Grayscale images, desaturated process color images, over-saturated RGB images... they never seem to mix well in a project. One way to tie a group of disparate images together is to create an overall color scheme by applying specific colors to different points on a Grayscale tonal range. It sounds complicated, but it's easier than you think."
Optimizing Underexposed Images With Photoshop
Jay Kinghorn uses Levels and Curves adjustments in each RGB channel and the Info palette. From the intro: "The Color Sampler tool, in the Eyedropper tool options, is invaluable for tracking color and tonal corrections at key points in an image. Open an underexposed image with a blue cast, and make sure your Info palette is visible (Window > Info or F8). Select the Color Sampler tool and click to place points on key highlight, midtone, and shadow areas. Look for areas of neutral color like a white collar, a gray sidewalk, or white clouds."
Create Patterns With the Distort Filters in Photoshop
Dale Glaser shows how to create a wide range of abstract patterns using Photoshop filters. From the intro: "This technique is not precise — in fact, you might not ever be able to recreate your final image. That's because there are at least two points of randomness: the image you originally create with the Gradient tool and selecting Randomize in the Wave filter. For that reason, I recommend that you create a duplicate layer after each step and name the layers as you go. But for every variation you try, keep in mind that the primary idea is to direct and manage the flow of colors."
A Clickable Feast From John Nack
John Nack has been posting some very interesting links pertaining to the world of Photoshop and photography. Here's a sampling:
Photoshop TV visits Adobe HQ — "The guys at the NAPP have included a quick visit to Adobe San Jose in Episode 32 of Photoshop TV."
Through a cold lens — "A macro lens made from a Pringles can? Someone's been there, done that. A pinhole camera made from an airplane hanger? Sorry--beaten to the punch. So how's an enterprising photo geek to distinguish himself? How about taking photos through a lens made of ice?"
Infinite mosaics — "Andries Odendaal (of Wireframe fame) has created Information, an endlessly zoomable series of photomosaics."
Adobe gets del.icio.us — "Adobe folks have started populating del.icio.us, the popular shared bookmarking application, with interesting bits relevant to Adobe apps & users."
More visual trickery — "Street artist Julian Beever creates eye-popping photorealistic chalk art that makes pedestrians swerve out of the way."
Photoshop & the Dead Sea Scrolls — "Ah--here's a great example of a non-traditional use of Photoshop that I've been wanting to share for a while. Researchers at USC's West Semitic Research Project have been using Photoshop to aid in analyzing the Dead Sea Scrolls and other historic texts."
![]() As always, a big Batgirl thank you to James Jean
As always, a big Batgirl thank you to James Jean
![]() posted by Jennifer Apple | permalink | send comments
posted by Jennifer Apple | permalink | send comments
![]()
THURSDAY - JUNE 01 2006
QuickTime Update Fixes Adobe CS2 Install Issues
(From MacWorld) Apple released an update for QuickTime on Wednesday that the company confirms fixes an issue with installing Adobe Creative Suite 2 (CS2) on Apple’s Intel-based Macs. Problems with installing and launching CS2 were being reported shortly after QuickTime 7.1 was released. The update is available from the software update control panel or directly from Apple’s Web site.
![]() posted by Jennifer Apple | permalink | send comments
posted by Jennifer Apple | permalink | send comments
![]()
Photoshop Automator Action Pack Updated
Ben Long at Complete Digital Photography has released a small but important upgrade to the Photoshop Action Pack, a collection of 73 actions which let you automate Photoshop CS or CS2 using Apple's Automator.
The new version provides full support for Intel-based Macs (in version 2, roughly a dozen actions wouldn't work or would crash when running on Intel Macs), as well as two new actions and several bug fixes and feature additions.
Automator, built-in to Mac OS X 10.4 ("Tiger") lets you create automation procedures by stringing together simple actions into "workflows." These workflows can be triggered and controlled in many different ways. While Photoshop provides its own Actions mechanism and batch processor, the Photoshop Action Pack provides a few features that Photoshop's built-in facility doesn't have.
First, it gives you simple logic operations that let you build workflows that operate differently depending on the properties of your images. Second, because Automator can control other applications, you can build workflows that span multiple programs.
The Photoshop Action Pack version 2.2 can be downloaded for free. Independent lab testing has shown that you'll feel much better using the Action Pack if you make a Paypal donation while visiting the page (or at any point thereafter, for that matter).
![]() posted by Jennifer Apple | permalink | send comments
posted by Jennifer Apple | permalink | send comments
![]()
Official 2006 Photoshop Elements Techniques Scrappy Awards Contest Call for Entries
For thousands of digital scrapbookers looking to show off their creative work, there is the newly launched 2006 Scrappy Awards design contest sponsored by Photoshop Elements Techniques newsletter. This is the first scrapbook design contest held exclusively for Photoshop Elements users and offers over $10,000 in sponsor prizes from Adobe, Wacom, B+H Photo-Video-Audio, ColorVision, iStockphoto, Peachpit Press, and more.
"This is an excellent opportunity for digital scrapbookers to showcase their best work and hopefully win some of the most cutting-edge tools out there," said Matt Kloskowski, editor-in-chief of Photoshop Elements Techniques. "Then the winners can use those tools to create more funky and fantastic scrapbook designs."
The 2006 Scrappy Awards contest is free to enter. Entrants may submit a single digital scrapbook page created in Photoshop Elements in any of ten categories: Sports, Holiday, Patriotic, Wedding, Graduation, Family, Love/Romance, Travel, Baby, and Pet. Although digital scrapbookers may enter multiple categories, they may only submit one page design per category. 10 winners will be selected — one from each category — and awarded a prize package worth approximately $800. In addition, one Best of Show winner will be awarded a prize package worth approximately $2,600. Each winning design will be published in Photoshop Elements Techniques newsletter and on its companion website.
The deadline for entries is 12:00 midnight EST, June 30, 2006. Winners will be announced September 8, 2006. Official contest rules and entry information are available at the Scrappy Awards site.
![]() posted by Jennifer Apple | permalink | send comments
posted by Jennifer Apple | permalink | send comments
![]()
Online Training Helps PS Elements Users Master Layers
 A new in-depth online training course at the Photoshop Elements Techniques website leads Photoshop Elements beginners through one of the most important features in any digital imaging program — Layers. "Using Layers in Photoshop Elements" by Matt Kloskowski, editor-in-chief of the Photoshop Elements Techniques newsletter, consists of 21 easy-to-understand lessons.
Participants have 60 days to complete the lessons so they can work on the course when they have the time. They'll learn everything from what a Layer is and why they need to use them, to combining images into collages and creating Layer masks. The cost of the course is $19.95 for Photoshop Elements Techniques subscribers or $24.95 for non-subscribers. For a detailed list of lessons or information about the other Photoshop Elements online classes available, go to the Photoshop Elements Techniques site.
![]() posted by Jennifer Apple | permalink | send comments
posted by Jennifer Apple | permalink | send comments
![]()
SEE PREVIOUS POSTS FROM THE MAY 2006 BLOG...
![]()
Technorati Tag: Photoshop
More blogs about Photoshop.
![]()