![]()
![]() Buy. Download. Create. Get Photoshop now at the Adobe Store.
Buy. Download. Create. Get Photoshop now at the Adobe Store.
![]() Get Flash, Dreamweaver, Photoshop Extended with Adobe Web Premium.
Get Flash, Dreamweaver, Photoshop Extended with Adobe Web Premium.
![]()
![]() The Photoshop Blog offers the latest Photoshop news and software updates, Photoshop tips and tutorials, and random thoughts from graphic artist and Photoshop expert Jennifer Apple.
The Photoshop Blog offers the latest Photoshop news and software updates, Photoshop tips and tutorials, and random thoughts from graphic artist and Photoshop expert Jennifer Apple.
![]()
THURSDAY - OCTOBER 19 2006
Depth Of Field Generator PRO Now At version 3
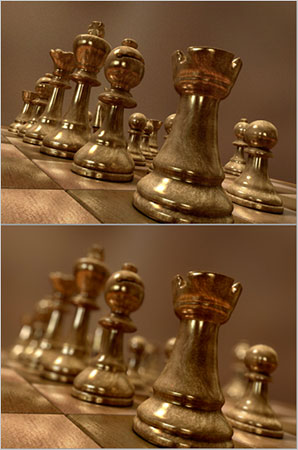 Depth of Field Generator PRO is the result of an ongoing research, development and programming collaboration between Richard Rosenman and Martin Vicanek to produce a Photoshop plugin capable of delivering high quality, sophisticated Depth of Field and Bokeh effects as a post process.
Depth Of field (DOF) is the amount of distance between the nearest and furthest objects that appear in acceptably sharp focus as seen by a camera lens. This field varies with the focal length of the lens, its f-stop setting, and the wavelength of light.
Depth of field is heavily used in photography, film and computer graphics as a creative element, in typical examples ranging from portraiture to macro photography. In photography, DOF is governed by three factors: aperture, lens focal length and shooting distance. Many consumer class cameras, however, do not provide sufficient and independent control of these parameters. Digital cameras, in particular, usually show a wide depth of field - i.e. they are more tolerant to defocus effects.
While this may be welcome in some instances (e.g. snapshot applications), it is often a serious deficiency in others (e.g. portraiture/macro photography). In computer graphics, physically accurate DOF can be effectively generated using complex raytracing techniques that tend to increase rendering times significantly. As a result, computer generated broadcast, print and film production often lacks DOF as a consequence of the lengthy calculation times.
Depth of Field Generator PRO is available in two versions. v1.5 is intended for photographers and digital artists who require DOF processing on single frames only with a limited feature set. v3.0 is intended for photographers, digital artists and production studios who require DOF processing for animation, video, film and print, or for those who wish to have additional DOF control using v3.0's advanced features.
DOF PRO Depth Map
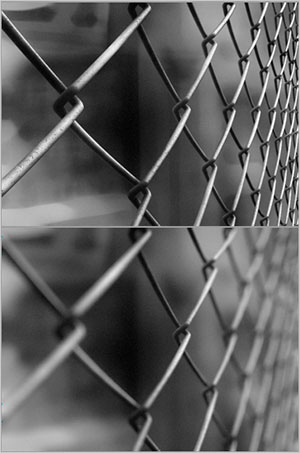 Depth of Field Generator PRO features numerous modes of operation to suit virtually any requirement. In its most powerful mode, DOF PRO uses a specified depth map to derive an accurate DOF effect. A Depth Map is a grayscale image where the grey level at any given point represents the distance of the object from the camera at the same point in the original image.
Most 3D Computer Graphics applications are easily capable of producing depth maps along with the rendered image. For photographic images, the user has to create the depth map manually which can be greatly facilitated through the use of the filter's powerful gradient features. DOF PRO v3.0 can not only accept single frame source and depth maps, but also animated sequences in a wide variety of file formats.
Depth of Field Generator PRO v3.0 features full batch / animation / keyframing capabilities internally from within the filter. This eliminates the setup time required for Photoshop actions and allows batch / animation / keyframing capabilities to be used from within any host capable of running Photoshop compliant filters. For a complete list of compatible hosts, see the compatibility list.
DOF PRO Photometric Burnout
Photometric Burnout is a specific effect that occurs when a subject is photographed in front of an intense backlight (natural or artificial). This produces overexposed image areas in which the subject appears to be silhouetted against the background and it's edges become corroded and contracted.
Burnouts are quite different than blurs because the corroded edges of the subject(s) remain sharp and faithfully represent the camera's aperture shape. Since DOF PRO uses optically correct DOF algorithms, photometric burnouts can be easily simulated with virtually no setup time involved.
You may download the plugin and try it.
![]() posted by Jennifer Apple | permalink | send comments
posted by Jennifer Apple | permalink | send comments
![]()
Using Photoshop Lightroom, Part 1 - By Ben Long
creativepro.com senior editor and digital photo go-to guy Ben Long has posted his first installment of tips and strategies for using Adobe's free beta 4 of Photoshop Lightroom to import and organize your photographs. From the intro:
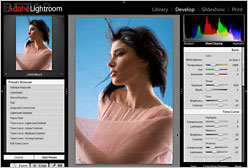 If you're a digital photographer who normally works in Photoshop, you owe it to yourself to try Photoshop Lightroom, a workflow-management/image-processing tool that's now a free beta and should ship in a final version early next year. While Lightroom lacks many of Photoshop's editing functions -- there are no brushes, rubber stamps, layers, or text tools in Lightroom -- its digital photography workflow may be better for you than a combination of Photoshop and Bridge, or Photoshop and your operating system's file manager.
I'm going to look at a few simple concepts that will make your switch from Photoshop to Lightroom easier. Don't worry; this "switch" is not a one-way trip. If you decide you're not interested in continuing with Lightroom, you can easily go back to your current workflow.
In this first installment, I'll cover Lightroom's importing and organization features. In Part 2, I'll go into Lightroom's editing tools and how they compare to Photoshop's. Part 3 will cover output.
What You'll Find in Lightroom
Photoshop is the best general-purpose graphics application out there. Everyone from photographers to Web designers to pre-press experts to feature film special effects companies use Photoshop. But because it can be all of these things to all of these people, it's not designed specifically for the way a photographer needs to work. For example, when you're just back from a shoot, you typically want to work through your images quickly, sorting them and applying corrections. Lightroom makes that post-production much faster because you don't have to hassle with open and save dialogs, or with keeping track of files.
You should find that Lightroom can handle 80 to 90% of your editing tasks. What it won't handle is selective editing -- the type that usually requires a masking operation -- and painting operations.
Read tips and strategies for Photoshop Lightroom by Ben Long.
![]() For more on Lightroom, see our Lightroom Resource Center.
For more on Lightroom, see our Lightroom Resource Center.
![]() posted by Jennifer Apple | permalink | send comments
posted by Jennifer Apple | permalink | send comments
![]()
WEDNESDAY - OCTOBER 18 2006
Logitech NuLOOQ Navigator Photoshop Device Now Supports Windows, New Applications
 Sometimes coming late to the game is not such a bad thing, because when it involves software and hardware you can save a lot of money. And so I'm glad I waited to get a NuLOOQ because Logitech has lowered the price to a very reasonable $79.
So what is this weird thing with the rubber-like ring and the bizarre name? Read on for a press release mashup and some product highlights...
The NuLOOQ navigator is an innovative device used in conjunction with a mouse and a keyboard that allows people to better navigate and manipulate graphics and multimedia files. It significantly reduces repetitive use of shortcut keys or palette access typically needed to navigate images and documents, or to adjust values such as brush size, font size and even volume.
Applications running on either the Windows XP operating system or the Macintosh OS X, that work with the NuLOOQ navigator, include Illustrator CS2, InDesign CS2, Photoshop CS2, Adobe Bridge, Adobe Photoshop Elements 4.0, Final Cut Pro, Adobe Premiere Pro, iMovie, iTunes, Microsoft Office Word and Excel, and Safari. For added flexibility, NuLOOQ navigator can be easily configured to support virtually any application.
The NuLOOQ navigator is a creative partner to a mouse and a tablet or keyboard.
Approximately the size and shape of half a tennis ball, this stationary device has a moveable rubber-like ring (the navring) for easy navigation — including simultaneous panning and zooming — of images and documents. Located on top of the NuLOOQ navigator, a circular touch-sensitive disk (the tooltuner) can be used to precisely adjust tool or system attributes, such as brush or font size. The NuLOOQ navigator also has five embedded programmable buttons (triggerpoints) for calling up frequently used tools or commands. Additional features include:
 Effortless navigation: Logitech's innovative navring can be moved in six directions — left, right, up, down, and twist clockwise and counter clockwise — for navigating images and documents. Using just two fingers to nudge the navring, people can navigate to the right, left, or diagonally for full, 360-degree panning and zooming.
- Precise adjustment of brush size or font attributes: The unique touch-sensitive, circular disk tooltuner enables people to fine-tune a number of different values based on the application. It's easy to quickly adjust the brush size in Photoshop, font size in Word, leading and tracking in InDesign, or to scrub video in iMovie or even to adjust volume in iTunes.
 Two Finger Navigation: Gently nudge the gray ring forward, backwards, up, down, twist clockwise or counter clockwise to navigate around your digital picture, illustration, documents, spreadsheets or anything you can program. Control, what, where and how fast to navigate with just two fingers!
- Quick command access: Five built-in triggerpoint buttons embedded in the tooltuner provide instant access to commands, shortcuts and modifier keys, and are fully programmable. For added convenience, NuLOOQ automatically detects which application is active, making custom configurations possible.
 Quick Click to Commands
A simple click or tap and quickly execute your shortcut command. Map undo and redo or access a tool, or play/pause or whatever you need right at your finger tips.
- User configurable for virtually any application: NuLOOQ navigator is preconfigured to work out of the box for a range of applications, and can be configured for virtually any application. For example, people can scrub timelines in video and audio applications, scroll through pages in a browser and control iTunes quickly without bringing iTunes to the foreground.
NuLOOQ Professional Series users can continue downloading and using NuLOOQ navigator drivers for both Mac OS X and Windows. NuLOOQ tooldial, which was previously available as a standalone product and as a component of NuLOOQ Professional Series, is no longer available.
Pricing and Availability
The Logitech NuLOOQ navigator has a suggested retail price in the U.S. of $79.99 and will be available through select resellers and major computer and electronics superstores, as well as through Logitech's online store. Current NuLOOQ navigator or NuLOOQ Professional Series users can download the NuLOOQ navigator Windows driver free of charge in mid-October from www.logitech.com. More information about the Logitech NuLOOQ navigator is available at www.logitech.com/nulooq.
![]() For discounts on Photoshop software and gear, see our Special Offers Page.
For discounts on Photoshop software and gear, see our Special Offers Page.
![]() posted by Jennifer Apple | permalink | send comments
posted by Jennifer Apple | permalink | send comments
![]()
TUESDAY - OCTOBER 17 2006

 From Sue Chastain (about.com)
PicaJet Free Edition 2.5 Review
PicaJet Free Edition 2.5 is a powerful organizer for your digital photos. Its printing and sharing options are quite limited, but for organizing, browsing, and light editing of your digital photos it is very impressive.
From Heathrowe
The Tell Your Story Project
The project is brought to you by Adobe Photoshop Lightroom beta and seeks five images from your strongest photo essay. Selected collections from the Tell Your Story project will be on exhibit at the PhotoPlus Expo Show in New York City, November 2-4, 2006.
From Adobe Creative Suite Video Podcast
Turn a Photo into a Sketch
This tutorial comes from Justin Seeley. Justin is the host of the Photoshop Quicktips podcast. Justin was the star at Photoshop World Midnight Madness this past September with his winning tip of turning a photo into a sketch. His tip won the contest and his prize was a new iPod with video. I asked Justin if I could share his tip with you and he said absolutely. So here it is.
From Metacafe
Model Evolution With Makeup And Photoshop
Reginald Pike's Tim Piper & Yael Staav take us from model to billboard in under 60 seconds in this impressive new spot from Dove.
From GetBrushes.com (Halloween Edition!)
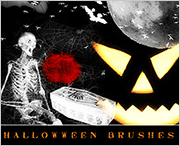 Anodyne Halloween Brushes
With Halloween not too far away it is not a bad idea to add another Halloween brush pack to our database. This time Photoshop brushes made by Anodyne. This is a nice little pack with medium to large brushes of all the Halloween essentials, pumpkins, skulls, black cats, bats and more
Jenn B’s Halloween Brushes
Some nifty Photoshop brushes showing scary, Halloween items to inspire and spice up your work. Skelletons, a spooky pumpkin carving, some bats, a ton of bids (ravens and crows). Enough to put a chill down your spine.
From ReviewZine
Turning A Portrait Into A Stone Statue With Photoshop
This is a simple tutorial on how you can make a statue from a portrait with Photoshop. It is highly recommended if you’re using a close up portrait of a woman/man.
From Layers Magazine
Close-ups
In part one of a series of tips on close-up photography, Rick Sammon shows the advantages of using a ring light to create shadowless light.
From Graphic Design Bar
![]() Ellen Lupton: Free Font Manifesto
Ellen Lupton: Free Font Manifesto
Ellen Lupton is on a mission to bring quality type to the masses for no charge — "free fonts as a social idea."
From Photoshop Killer Tips
Flattening Without Flattening
Use this tip to flatten your layers without actually flattening them.
Better Layer Styles
Learn where to get killer looking layer styles right in Photoshop.
A Better Bridge Location
Keep your Bridge window the size you want and in the place that you want.
![]() As always, a special Batgirl thank you to James Jean
As always, a special Batgirl thank you to James Jean
![]() posted by Jennifer Apple | permalink | send comments
posted by Jennifer Apple | permalink | send comments
![]()
The Photoshop Guys Release Photoshop TV Episode 51
 Here's the show summary from the PSTV site of episode 51 of Photoshop TV: "Scott turns a not-so-interesting photo into a very cool design with Quick Mask. Matt and Scott show you how to get perfect white balance with the ExpoDisc from ExpoImaging. Dave has a tutorial on creating flexible lighting effects with the Lighting Effects filter and Lens Flare, and Matt creates automatic actions using Photoshop’s Script Editor."
The show also includes the latest Photoshop and NAPP news, some Photoshop trivia, and a contest.
You can watch Photoshop TV online at the Photoshop TV website, or you can subscribe by going to Apple's iTunes Music Store and searching for "Photoshop TV" in the podcast directory search, or go directly (link opens iTunes app).
Also in this show Matt sends a shout-out to our blog. Love it! Thanks Matt — it's very much appreciated!
![]() For a list of other Photoshop podcasts, see our Photoshop Podcast Directory
For a list of other Photoshop podcasts, see our Photoshop Podcast Directory
![]() posted by Jennifer Apple | permalink | send comments
posted by Jennifer Apple | permalink | send comments
![]()
A Photoshop Recipe For Giraffe Extractions
While working on a web design project recently the client asked to incorporate an image they'd purchased at istockphoto of a giraffe walking downtown, and the more I looked at the image the more intrigued I was by the fine work of extraction the photographer, Josh Blake, had achieved. Always curious about the different techniques Photoshop artists use, an email was sent off with a very simple question: "What steps did you take in Photoshop to get the giraffe to walk the streets of Philly?" And here is what Josh replied:
- Ok, here are the steps... at least what I can remember... it was a while ago when I made that photo! lol...

- First, I took my giraffe photo and used the extract feature in Photoshop to remove the body from the zoo type background that it was in. Sometimes, extract doesn't always cut it out perfectly, so you have to just look closely at it and sometimes paint back in the original photo of what got deleted where it needs to be with the "history brush tool" in the menu.
Next, bring the extracted giraffe into the new background image..in this case... the city photo. Make sure it's on its own layer in the new photo.
I used the "match color" tool under... Image-Adjustments-Match Color menu... and under that, you have to choose the source photo and then the layer that you want it to match the coloring to. Sometimes this takes tweaking and sliding of the sliders, but just eyeball it and get it to match as closely as possible to the background image.
In my photo of the giraffe, the tail didn't extract well because it was against some trees in the background, so I had to make half of it from scratch. I just picked a small airbrush from the brushes menu... then I used the Brushes palette to change it to a small fade.
Then, by hand, I just drew in each hair from the tail as it would have been there swishing in the air. Took a little while to get the flow just right, but if you play around with it, you'll eventually get the hang of it. I believe that I just used the dodge tool to lighten some of the hair and give it highlights.
Now, the mane area of the giraffe wasn't blending into the background believably just from the extraction tool... so I had to use the "smudge" tool by hand to blend little hairs and make them fade out into the background so you couldn't see the extraction line and also so it didn't look "cut out of another photo".
Lastly, the neck of the giraffe had some sunlight on it already, but it wasn't matching the brightness of the city street... so I used the dodge tool to brighten up just the highlights and a little of the midtones of the neck to match the brightness of the sunlight overall.
That's it. That's how I got the giraffe to walk the streets of Philly! :)
Very cool. Thanks for the tutorial, Josh — and now it's back to work!
![]() For a list of other Photoshop podcasts, see our Photoshop Podcast Directory
For a list of other Photoshop podcasts, see our Photoshop Podcast Directory
![]() posted by Jennifer Apple | permalink | send comments
posted by Jennifer Apple | permalink | send comments
![]()
MONDAY - OCTOBER 16 2006
Altia PhotoProto Photoshop Plugin - Exclusive Discount
 Altia have just released a new commercial plug-in for Photoshop and joined the Adobe Solutions Network. The product, Altia PhotoProto, is a tool that automatically turns Photoshop artwork into a working, interactive prototype that can be packaged, emailed and run on a Mac or PC. With PhotoProto you can:
- Transform static Photoshop graphics into interactive prototypes.
- Create buttons, sliders, knobs, readouts, screens and more.
- Automatically export perfectly trimmed artwork with alpha channels intact (in PNG format).
- Send prototypes for colleagues and customers to try on their Macs or PCs.
- Play MP3s, AVIs and DirectX 3D models as part of your prototype (currently only on Windows).
PhotoProto walks through your Photoshop file, exports all images and references them in a file that the PhotoProto player displays. You simply name and arrange your layers and PhotoProto automatically assigns the appropriate behavior. Name a layer “button” and the images can be pressed like a button in the player. Name a set of screens, and a multi-view application comes alive.
Companies like Chrysler, Visteon and Ford are already using PhotoProto for next generation dash displays and in-car infotainment, audio and navigation. PhotoProto allows you to automatically generate a stand-alone prototype model from your Photoshop artwork that you can give to customers or colleagues.
You can find out more about PhotoProto at the Altia site. They have some interesting videos that explain the software in detail. There's also a PhotoProto contest with just sweet prizes.
Exclusive 10% Discount For PhotoProto
You can download a free demo, and if you are interested in purchasing, Altia has given us an exclusive discount. Just follow this special offer link and when you reach their website you'll receive a 10% discount.
![]() For more plugins, see our Photoshop Plugins Page.
For more plugins, see our Photoshop Plugins Page.
![]() For more discounts on Photoshop software and gear, see our Special Offers Page.
For more discounts on Photoshop software and gear, see our Special Offers Page.
![]() posted by Jennifer Apple | permalink | send comments
posted by Jennifer Apple | permalink | send comments
![]()
FRIDAY - OCTOBER 13 2006
New Tutorial - Daguerreotypes - Louis Daguerre Effect
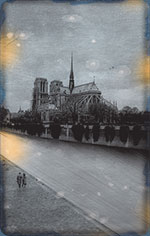 The world’s first photographic process was announced in Paris in 1839 by Louis Daguerre. It used a silver-plated copper sheet that was sensitized with iodine, exposed, and then developed in mercury vapor. Early images were of architectural subjects or landscapes, but soon the process was also used for portraiture, and it became particularly popular in France and America.
Daguerreotypes were positive images, one-offs, and the process was obsolete within a decade, as soon as new techniques allowed multiple photographs to be printed from negatives. But if you ever get the opportunity to compare early photographs in museums or exhibitions, it would be surprising if you didn’t find the Daguerreotypes to be some of the most magical objects on display.
Early Daguerreotype exposure times were long, so moving subjects such as water and people usually appeared blurred. Photoshop’s Motion Blur filter is ideal for simulating this, but requires a little care in its application because Daguerreotypes recorded other, static objects in fine detail.
Read Daguerreotypes - The Louis Daguerre Effect — a sample recipe from the Photoshop Digital Studio Cookbooks, courtesy of O'Reilly Media.
![]() For more tutorials see our Photoshop Tutorials Page.
For more tutorials see our Photoshop Tutorials Page.
![]() posted by Jennifer Apple | permalink | send comments
posted by Jennifer Apple | permalink | send comments
![]()
Bert Monroy Launches PixelPerfect Photoshop Podcast
![]() Digital artist extraordinaire Bert Monroy has created a podcast titled PixelPerfect that is distributed through revision3.com, a new site associated with Kevin Rose from TechTV fame, on which Bert was a frequent guest.
Digital artist extraordinaire Bert Monroy has created a podcast titled PixelPerfect that is distributed through revision3.com, a new site associated with Kevin Rose from TechTV fame, on which Bert was a frequent guest.
I watched the "Using Photoshop in fantasy art" episode and it was wonderful.
The first nice thing about this podcast is the quality- which is super clear, HD perfect, and delivered in a nice widescreen format. But the best part is that Bert spends lots of time explaining all the various details in his creations, making sure you understand Photoshop concepts and tools as he goes along.
![]() PixelPerfect is a totally professional, totally enjoyable podcast, and a great resource for any aspiring Photoshop artist — and at over 15 minutes, this is a pretty amazing training freebie! There are 2 episodes so far:
PixelPerfect is a totally professional, totally enjoyable podcast, and a great resource for any aspiring Photoshop artist — and at over 15 minutes, this is a pretty amazing training freebie! There are 2 episodes so far:
Episode 1 - Using Photoshop in fantasy art
Create lightning, sparkles, and a mystical vortex the same way professional effects and movie matte artists do.
Episode 2 - Patterns and Animations
Watch as Bert teaches how Photoshop is also capable of animation.
So go and download and be amazed!
![]() posted by Jennifer Apple | permalink | send comments
posted by Jennifer Apple | permalink | send comments
![]()

 From Sue Chastain (about.com)
JPEG Myths and Facts
With the explosion of scanners, digital cameras and the World Wide Web, the JPEG image format has quickly become the most widely used digital image format. It's also the most misunderstood. Here's a collection of some common misconceptions and facts about JPEG images.
• JPEG Myths and Facts
• Should You Capture Digital Photos In Raw or JPEG Format?
• The Pitfalls of JPEG Compression
From Kris Geens
BrushFed
Have a look around for some nice free brushes for Photoshop 6/7/CS/CS2. Place your cursor over the preview area to view live samples.
From GraphicDesignBar
Sticks + Stones
The Sticks + Stones project is an exploration of labeling and stereotyping in graphic design. Design students collaborated to examine the "judgments that we all make as citizens and designers." Interesting project. Makes me wish we'd discussed things like this in art school, where stereotypes and judgements were often the defaults for good design communication. Hmm...
From creativepro.com
 Photoshop How-To: Make a New Image Look Old by Scott Kelby & Felix Nelson
Take just two images — one textured surface and one sign or poster — and meld them into instant antiquity.
From Graphics.com
Photoshop Fundamentals: Give An Image Emphasis
Grab audience attention by exaggerating part of an image.
Duotones and Photographic Reproduction
Stephen Johnson reveals the secrets of Photoshop duotone creation.
From Heathrowe
Anthropics Technology announces new milestone in image processing techniques
Ground-breaking image processing firm Anthropics Technology has developed a unique image processing capability which enables unskilled users to achieve pro quality touchup in just 2-3 minutes that would otherwise only be possible in 1-2 hours for a skilled artist using Photoshop. This is now offered as a flexible and cost-effective package called “Portrait Professional™” to the world’s booming digital photography market.
![]() As always, a special Batgirl thank you to James Jean
As always, a special Batgirl thank you to James Jean
![]() posted by Jennifer Apple | permalink | send comments
posted by Jennifer Apple | permalink | send comments
![]()
WEDNESDAY - OCTOBER 11 2006
Exclusive 20% Discount On Select Total Training Products & Bundles
 To redeem our exclusive discount coupon, use promotion code save20pss in your shopping cart. You could save hundreds of dollars. Use this special link to see the full offer.
Total Training for Adobe Photoshop CS2
Learn Adobe Photoshop CS2 from Deke McClelland, with 21 hours of interactive Adobe Photoshop tutorials. Training for real-world situations and additional tips and techniques used by the pros.
$299.99 (take 20% off this price with coupon)
Total Training for Macromedia Flash Professional 8
Learn inside tips for the most useful tools and features of Macromedia Flash Professional 8. Watch Flash tutorials on how to create better designs and author interactive content rich with video, graphics, and animation.
$299.99 (take 20% off this price with coupon)
Total Training for Macromedia Dreamweaver 8
Macromedia Dreamweaver 8 training to learn how to efficiently layout, develop and maintain standards-based websites. Dreamweaver tutorials teach you with tips and tricks that can only be learned from an expert user of the software.
$199.99 (take 20% off this price with coupon)
Total Training for Website Design - Extreme Website Makeover
These video tutorials equip you with the skills necessary to turn an ordinary website into one that's content-rich using popular web design and development tools: Dreamweaver, Fireworks, Flash, Contribute, Photoshop, and Illustrator.
$149.99 (take 20% off this price with coupon)
Total Training Premium Bundle - Adobe Creative Suite 2
Creative Suite 2 Premium Edition Bundle from Total Training. Learn valuable tips and techniques to sharpen your skills in Photoshop CS2, InDesign CS2, Illustrator CS2, GoLive CS2, and Acrobat 7.
Retail Value $1179.94 ($729.95 Savings)
$449.99 (take 20% off this price with coupon)
Visit Total Training now to take advantage of this exclusive special offer.
![]() posted by Jennifer Apple | permalink | send comments
posted by Jennifer Apple | permalink | send comments
![]()
Vertus Launch Live Free Daily Training For Fluid Mask
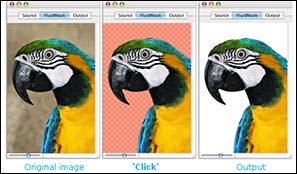 Vertus today announced the launch of its live free daily training for its pioneering Photoshop plug-in Fluid Mask. The decision to offer this as part of Vertus’ customer service mix was influenced by Vertus’ growing and vibrant online community. As James Carr-Jones, CEO of Vertus points out, “Cutting out is the number 1 issue in digital image manipulation. Fluid Mask has revolutionised this process in terms of speed and cutting quality. Whether people are a customer or evaluating the application, they are hungry to learn and what better way than to talk with an expert – it’s a great innovation”
The way it works is that people link their screens with the instructors screen. They see Fluid Mask as the instructor sees it, in real time, and they can speak and ask questions of him on the phone as part of a seminar group. To do this they call a toll free number (US only) and click on a URL to see the instructors screen.
Currently this is operational once a day but as numbers increase there will be more free live training sessions set up on the website.
What are the benefits? Here’s what Ed Kneler had to say after trying out a training session, “I have quite a bit of money invested in hardware and software... with your live tutorials, you have done quite a bit to educate the users of your product... I will tell my photographic club about your product which I believe is excellent.”
Exclusive Special Offer - Fluid Mask 2.0 - $189
Vertus Software is offering Fluid Mask at the special 'friends and partner' discounted rate of just $189 - PLUS free upgrades for the next 6 months. This is an exclusive offer to visitors of PhotoshopSupport.com. To qualify, visit the Fluid Mask Discount Price page. Find out more about Fluid Mask on our special Fluid Mask Page.
![]() posted by Jennifer Apple | permalink | send comments
posted by Jennifer Apple | permalink | send comments
![]()
The Daily F’log Photo Blog
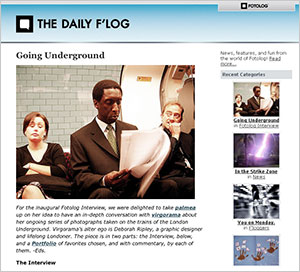 For a fun, addictive peek inside the global photo-blogging phenomenon, you’ll want to check out The Daily F’log, a new blog launching this week from the folks at Fotolog, the world’s largest photo-blogging community. Edited by Andrew Long, a former photography reviewer and editor at The New Yorker and one of the earliest Fotolog members, The Daily F’log will include:
- Reviews of projects exploring the impact of photo-blogging, such as David Friend’s acclaimed new book, “Watching the World Change: The Stories Behind The Images of 9/11” or “Signs of Life: Surviving Katrina,” by two longtime Fotolog members
- Interviews with Fotolog’s most intriguing members, like Virgorama, who photographs riders on the London Underground, and quick takes on noteworthy photos, like minmin’s beautiful school lunch pictures
- In-depth looks at Fotolog’s influence in the world at large, such as the organizing role it played in the massive student protests in Chile this past spring
- Thoughts from members and leading thinkers on issues like privacy, social networking, and digital communities
- Recaps of unusual photography, arts, and tech news
- The Fotolog take on new cameras, tech gadgets, and photography tips and tricks
Founded in 2002 as a way for a few friends to share photos, Fotolog membership has surged from 1 million to more than 4.7 million in the past 20 months, pushing Fotolog into the top 50 websites worldwide, according to Alexa Rankings. So head on over and give The Daily F’log a whirl.
![]() posted by Jennifer Apple | permalink | send comments
posted by Jennifer Apple | permalink | send comments
![]()
TUESDAY - OCTOBER 10 2006

 From Adobe Creative Suite Video Podcast
Take advantage of the Bridge Center
If you have the Adobe Creative Suite, you not only have the Bridge, you have a component of the Bridge called the Bridge Center. The Bridge Center is the hub of the Creative Suite and allows you to quickly access recently used files and folders. It also allows you to read your RSS feeds, sync your color management settings and create Version Cue projects.
From Graphics.com
The Plugin Site Releases New Plugin for Creating Black and White Effects
B/W Styler is initially available for Windows, providing B/W conversion as well as the ability to create traditional B/W effects and manipulate B/W photos. The plugin is certainly ambitious, in that it attempts to simulate the entire photographic process, from shooting a photo to processing it in the lab and framing the end result.
From Photojojo
How Big Can I Print This Photo? — A Simple Answer, Once and for All
If you’re a digital camera convert (or thinking of becoming one) you’ve likely wondered how big you can print those digital files you’ve been capturing by the hundreds. The good folks over at Design215 have put together a super easy-to-digest resolution chart that gives you the straight dope. At a glance, it tells you how many megapixels you’ll need to print at true, photographic quality. (ie. It looks sharp, even when your nose is mashed up against the print.) Simple!
From Jan Kabili's Photoshop Online
My Photoshop tips on upcoming iLifeZone
I'll be offering more Photoshop tips on the upcoming October 10 episode of the popular iLifeZone podcast, which I'll be guest hosting along with regulars Derrik Story and Scott Bourne. Check it out.
From GraphicDesignBar
Web 2.0 Color Palette
![]() Throw out your personal feelings about the label "Web 2.0" and bask in the silly color glory that is Miles Burke's Web 2.0 color palette, available for free download as either a Photoshop file or a jpg. In February, Burke took primary or logo colors from some of the "big names in 2.0 land" and created a palette of over 70 colors, including Technorati Green, Blogger Orange, Flickr Pink, and Basecamp Blue.
Throw out your personal feelings about the label "Web 2.0" and bask in the silly color glory that is Miles Burke's Web 2.0 color palette, available for free download as either a Photoshop file or a jpg. In February, Burke took primary or logo colors from some of the "big names in 2.0 land" and created a palette of over 70 colors, including Technorati Green, Blogger Orange, Flickr Pink, and Basecamp Blue.
From CreativeGuy
Photoshop layers palette keyboard shortcuts
I’m not sure if I’ve posted these Photoshop layer palette shortcuts before, a quick search didn’t come up with anything, so here you go...
![]() As always, a special Batgirl thank you to James Jean
As always, a special Batgirl thank you to James Jean
![]() posted by Jennifer Apple | permalink | send comments
posted by Jennifer Apple | permalink | send comments
![]()
New Tutorial - Autochrome Color Process Effect
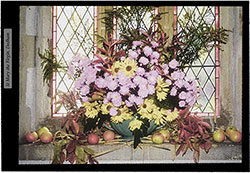 In 1907, the Lumière brothers introduced “autochrome,” the first commercially successful color process. Glass was coated in a fine mosaic of red, green, and blue dyed potato starches which acted as a filter over a light-sensitive emulsion.
During development, the emulsion layer became a black-and-white positive image, and the autochrome could then be projected or held up to the light, like an early version of a color slide or transparency. The process was enthusiastically received, and many photographers experimented with it, some of the best-known being Léon Gimpel in France and Frank Eugene and Alfred Stieglitz in the United States. Production of autochrome glass plates continued until the 1930s, when color film and printing first became available.
When you consider the characteristics of an autochrome, the most obvious is probably its Impressionistic or Pointillist appearance. Viewed close up, the colored particles can look rather like the color noise you sometimes find in digital photos. The particles also contribute to an overall softness, although this was sometimes the result of one-second exposure times and frosted-glass protective covers (you may want to simulate damage, too). In general, the colors are subdued and a little faded, in some cases unevenly.
Read Autochrome - Color Process Effect — a sample recipe from the Photoshop Digital Studio Cookbooks, courtesy of O'Reilly Media.
![]() For more tutorials see our Photoshop Tutorials Page.
For more tutorials see our Photoshop Tutorials Page.
![]() posted by Jennifer Apple | permalink | send comments
posted by Jennifer Apple | permalink | send comments
![]()
FRIDAY - OCTOBER 06 2006

 From John Nack
Camera Raw 3.6 beta now available
As promised, the next rev to Adobe Camera Raw & the DNG Converter has been on an accelerated development schedule, and now beta releases of both have been posted for Mac (Universal) and Windows.
New (preliminary) support in this release includes the following cameras: Canon EOS 400D / Rebel XTi, Leica D-LUX3, Leica Digilux 3, Nikon D80, Panasonic DMC-LX2, Pentax K100D.
The full list of 130 or so supported cameras is on the Camera Raw product page.
From Adobe Creative Suite Video Podcast
Lightroom Beta 4 New Features
With Lightroom Beta 4 you can work on the latest Camera RAW controls. In this episode I will show you some of the coolest new features. This version also brings feature parity to the Windows version.
From Signal vs. Noise (by 37signals)
Finding fresh inspiration
Look at web design these days: Gradients, bursts, big type, rounded corners, pastel colors, and reflections rule the roost. This slavish adherence to Web 2.0 design trends by the “chorus” is resulting in a big snoozefest.
(Note: Web designers aren’t the only guilty ones here either. Print designers leaf through design annuals for ideas, bands copy the hot sound on the radio, writers parrot whatever’s charting on the bestseller list, etc. There are “lookalikes” everywhere.)
Now it’s not like all outside inspiration is evil. Everyone’s influenced. If you believe Oscar Wilde, “Talent borrows, genius steals.” The problem is that when everyone is turning to the same places for influence, things get stale. We wind up drowning in a sea of me-toos. Here are some ideas for where to find fresh inspiration...
From Fresh Creation
Virtual Painter
 Here's a demo of an early prototype interface called Touch Me Tender which allows you to draw with your finger on the screen. The way they visualized the interface is great. They actually took the traditional way of painting, with a glass of water, jars of paint and different kinds of brushes, and brought that to the screen. Made by KsanLab.
From creativepro.com
Photoshop Tips: The Ins and Outs of Color by Deke McClelland
Most photographs look better after a little color balancing. Just go to Image > Adjustments > Color Balance, right? Nope. Photoshop's most obvious solutions are rarely its best. Use other methods for standout results.
From Graphics.com
Photoshop Fundamentals: Creating A Glow Effect
Use Layer Styles and create this classic effect with a few clicks in Photoshop.
From CreativeGuy
Understanding Photoshop’s Curves Tool
Photoshop’s Curves tool is perhaps one of the most powerful and flexible image enhancement tools, and one of the most difficult to understand and master. Curves affects both tones and contrast, and so it’s a favorite tool of digital photographers everywhere. As a designer, you should understand how to use the Curves tool as well. Cambridge in Colour has a fantastic tutorial on understanding Photoshop’s Curves tool that is a must read for all budding digital photographers and designers.
![]() As always, a special Batgirl thank you to James Jean
As always, a special Batgirl thank you to James Jean
![]() posted by Jennifer Apple | permalink | send comments
posted by Jennifer Apple | permalink | send comments
![]()
THURSDAY - OCTOBER 05 2006
New Tutorial — Creating Paper Folds and Creases
Enrique of The Photoshop Roadmap has written a comprehensive tutorial on crumples. Yes, crumples — as in how to create that crumpled up paper look that have creases and folds. From the intro:
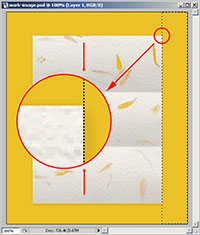 It is very common to find tutorials about making page curls. Many of those tutorials are great, but the final effect is very unrealistic, not because of the quality of the tutorial, but due to the 3D nature of the effect. If you feel the urge of creating 3D paper effects, I suggest you to take a look at the superb PageCurl Pro plugin from AVBros to take care of all your 3D paper effects needs.
Creases and folds, instead, are more subtle. They can be created only with clever shading and little or no retouching at all. They look intimidating, but as soon as you realize how to create basic creases, you will be able to move on to more complex projects.
So head over to the The Photoshop Roadmap and feast on this jumbo tutorial, and bump your Photoshop skills up another level.
![]() For more tutorials see our Photoshop Tutorials Page.
For more tutorials see our Photoshop Tutorials Page.
![]() posted by Jennifer Apple | permalink | send comments
posted by Jennifer Apple | permalink | send comments
![]()
Hello Photojojo!

I really enjoy the high-energy buzz I get from the Photojojo site and from their email newsletter. As it turns out one of the founders, Amit Gupta, happens to be connected to a lot of people who's books I've read. In 2004, Amit helped create ChangeThis for Seth Godin (All Marketers Are Liars), and he contributed to The Big Moo, a best-selling business book co-authored with Malcolm Gladwell (Blink, The Tipping Point), Tom Peters, Guy Kawasaki (The Art Of The Start), Alan Webber and Mark Cuban, among others.
Then in April of this year Amit launched Photojojo, an email newsletter devoted to "finding the very best Photo tips, DIY projects, and Gear."
I'll be including some of Photojojo's offerings in my I Cover The Waterfront posts, but why wait — just signup for their newsletter now or browse through their archives. You'll be happy you did! And if you're feeling apprehensive about subscribing to an email newsletter, you can trust this one. Believe me. And here are some rave reviews to convince you.
![]() posted by Jennifer Apple | permalink | send comments
posted by Jennifer Apple | permalink | send comments
![]()
WEDNESDAY - OCTOBER 04 2006
'Adobe Photoshop Elements 5.0 Maximum Performance' By Mark Galer On Pre-order
There's an interesting Photoshop Elements 5 book from Mark Galer that has come to my attention — Adobe Photoshop Elements 5.0 Maximum Performance. Part of the appeal is that the book ships with 5 hours of DVD tutorials and a whole bunch of free stock photos. That's a nice touch. And the book is getting a good amount of positive reviews, including this one: 'Using crafty work-arounds to achieve remarkable results, Mark Galer pushes Elements' capabilities to new levels.' — Christy Brandt, Director of Engineering, Photoshop Elements, Adobe Systems, Inc. Here's some press on Mark's book:
Adobe Photoshop Elements 5.0 Maximum Performance
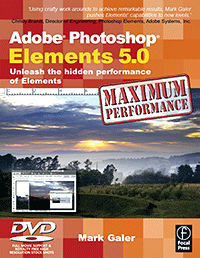 Get the most from your digital camera to produce high-end results that casual users only dreamed of. Your photos will look like a pro shot them as imaging guru Mark Galer shows you how to use critical but little-known techniques for professional quality editing.
- Create awesome effects with no commercial lighting or studio equipment
- Extend the dynamic range of your digital camera by merging multiple exposures
- Give your shots the WOW! factor with advanced options for more power
Everything is at your fingertips with the DVD:
- 5 hours of video tutorials, cataloged into digestible snippets
- Over 200 royalty-free, high-resolution images
- Raw and 16-bit/Channel files
- wMulti-layered project files, loadable presets and keyboard shortcut reference guide
Mark Galer is a senior lecturer in digital imaging at RMIT, Australia, is a Photoshop Elements Ambassador and is the author of 7 best-selling digital imaging books. 'Well written, well illustrated, with a good knack for explaining complex issues.' - Steve Caplin, digital illustrator and author of How to Cheat in Photoshop.
![]() Buy Adobe Photoshop Elements 5.0 Maximum Performance at Amazon.com (34% off).
Buy Adobe Photoshop Elements 5.0 Maximum Performance at Amazon.com (34% off).
![]() visit Mark Galer's site.
visit Mark Galer's site.
![]() Photoshop Elements 5.0 - Special Offer - only $65.99 at Amazon.com.
Photoshop Elements 5.0 - Special Offer - only $65.99 at Amazon.com.
![]() For more on Photoshop Elements see our Photoshop Elements Resource Center.
For more on Photoshop Elements see our Photoshop Elements Resource Center.
![]() posted by Jennifer Apple | permalink | send comments
posted by Jennifer Apple | permalink | send comments
![]()

 From Adobe Creative Suite Video Podcast
Create Gallery Prints to show off your Photos in Photoshop CS2
You took a great shot with your digital camera. However, how do you make it look like it was taken by a pro? It's all about the "presentation." in this episode you'll see how to create a "Gallery Print." We'll even record the steps as an action so that you can instantly transform any of your shots into Gallery Prints.
From CreativeBits
Creating Windows XP Icons
This article discusses how to design and create colorful and dynamic icons for Windows XP using a vector program, such as FreeHand or Illustrator, and Photoshop. (19 printed pages).
From creativepro.com
Photoshop Quick Tips
No time for an in-depth Photoshop tutorial? No worries — here's a passel of short tips you can use right now.
From Photojojo
Zingfu — Goofy Photo Fun for Everyone
Ever wanted to see yourself up on a giant screen in Times Square? On the cover of Rolling Stone? Ever wondered what you’d look like in a plane full of snakes, or as George Costanza in his infamous semi-nude portrait? Zingfu, my friend, Zingfu.
From John Nack
Lightroom Library module in depth
On the heels of his excellent overview of the Lightroom Develop module, author/photographer Martin Evening has posted an in-depth reveiw of the Library module. He discusses optimizing image libraries for performance and file size; exchanging shoots via the new concept of "photo binders"; renaming files; converting to DNG; and more. (By the way, Martin's Lightroom book is due from Peachpit around the end of the year.)
From GetBrushes.com
 JavierZhX Abstract9 Brush Set
Fifteen medium to large scaled abstract brushes designed especially to add energy and interest in your artwork. A great tool for any abstract piece.
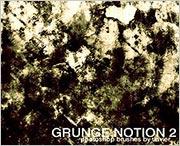
JavierZhX Grunge Notion Brushes
A fresh, fun set of grunge brushes that work well in creating stone and wall textures. With the right amount of grain and noise they add the feeling of coarsness and age in surfaces.
From SwissMiss
inspiration gallery
Amazing background pattern collection at the Inspiration Gallery.
![]() As always, a special Batgirl thank you to James Jean
As always, a special Batgirl thank you to James Jean
![]() posted by Jennifer Apple | permalink | send comments
posted by Jennifer Apple | permalink | send comments
![]()
TUESDAY - OCTOBER 03 2006
Luxology's Photoshop Plugin imageSynth & 3D Modeling Software modo 202 — Special Discount Offer
 I'm happy to report that we've found a couple of very amazing products from Luxology and were able to broker a nice discount coupon for each of them. First is Luxology's state-of-the-art 3D modeling software MODO 202. Although not a Photoshop specific tool, it's used by many Photoshop artists, and we're offering a $100 discount coupon for this industrial strength 3D software.
We also have a $10 discount coupon for Luxology's imageSynth texture and background generator. This is a Photoshop plugin that's receiving rave reviews. Look below for the coupon codes, some quick info about the products, and links that will take you to our full spotlight pages, which also include links to the full demos.
Exclusive $10 Discount On imageSynth Plugin Texture Generator
Simply enter discount coupon code psptimage during the checkout process at the Luxology site and you'll receive an instant $10 discount on the purchase of the imageSynth Photoshop plugin.
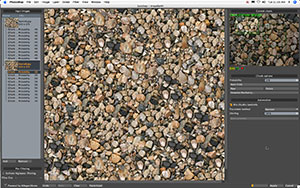 New Tool Streamlines Arduous Process of Creating Tiling Textures, Synthetic Images, Unique Backgrounds and More
imageSynth is advanced technology that works within Adobe Photoshop for creating seamless textures and for creating high resolution images from low resolution sources using advanced image synthesis algorithms. Hence the name! imageSynth is included FREE with every purchase of modo. And now you can buy it standalone.
Developed in conjunction with the smart people at Allegorithmic, the imageSynth plug-in is a powerful ally to Adobe Photoshop for anyone wanting to create seamless tiling textures. The plug-in is simple to use and rewards experimentation. You can use imageSynth from Luxology to create an unlimited number of creative new images based upon simple seed images that you choose from your collection.
The resulting images are unique, and will tile seamlessly, making them ideal for use as backgrounds, brushes or texture maps. You can also take a low resolution image source and use it to generate a high resolution image that is based upon. This is a very powerful tool providing a myriad of creative solutions.
Go to our Luxology imageSynth Page to find out more (includes links to demos).
Exclusive $100 Discount On Modo 3D Modeling Software
Simply enter discount coupon code psptmodo during the checkout process at the Modo site and you'll receive an instant $100 discount on the purchase of the modo 3d modeling software package.
Faster Rendering Speeds and Improvements to Modeling, UV Editing and Paint Tools; Free Full-featured Evaluation Version Now Available
Luxology have announced the immediate availability of modo 202, a robust update to its innovative 3D modeling, painting and rendering software. Boasting a peak rendering speed that is over 40 percent faster than modo 201, modo 202 features performance gains, tool improvements and innovative extensions to its overall toolset to create an enhanced workflow for artists working in game development, film visual effects, video production, graphic arts and design visualization. Registered modo 201 customers can upgrade to modo 202 free of charge, and a free 30-day full-featured evaluation version is now available for immediate download from the Modo site.
“modo 201 is fast, but modo 202 is blazing fast,” explains Brad Peebler, president and co-founder of Luxology. “modo 202 is a significant advancement towards our grand vision for modo. We built modo from the ground up to integrate modeling, painting and rendering in a way that dramatically improves workflow for 3D designers in all disciplines. modo 202 refines this development one step further, allowing artists to focus even more on creating and less on process and repetitive steps.”
Go to our Luxology modo 3d modeling software page to learn more (includes links to free demos).
![]() posted by Jennifer Apple | permalink | send comments
posted by Jennifer Apple | permalink | send comments
![]()
MONDAY - OCTOBER 02 2006
October's Free Brush Sets And Textures From Janita
Brush angel Janita has just shipped us her October package of free goodies for your exclusive downloading pleasure. These brush and texture packs are previews that she offers to our site every month (thanks Janita!). So grab them while you can, because I'm very sure you'll enjoy these lovely, enchanting and inspiring Janita creations. And to detail all of the details, here's the angel herself...
Brushset Nipponline contains small but very cute Japanese brushes. Sakura flowers, postal stamps and some funny airplane brushes. Maybe not to be used on printings and digital scrapbook arts — but great for website layouts, icon designs and all the tiny things.
Brushset The Little Things also includes small brushes, swirly flowers, ornaments and is made of one big flower print which didn't look pretty special but all the single parts in there inspired me.
Brushset Workshop #1 is already my favy one. It contains abstract squares, foil brushes, transparent blocks and some cute petals. All the sets are probably not made for large designs, I'd call them "detail brushes" — you know, it is always a detail that makes the whole thing special.
Texture #88 is made of the "Gently" and "Salsa Party" brushsets and is just a bubble explosion. The picture wasn't actually meant to become a texty but with a few bubbles on I felt like going on until there was nothing left that didn't look like being bubbled. Really a heavy picture but surely useful to pattern illustrations — or to use as a background for something!?
You can download all the new brush sets and the textures below, but also make sure to visit Janita's site Seishido — and then help us spread the word about her amazing Photoshop brush resources. Oh, and don't forget to join her newsletter!
![]() Download Brushset Nipponline (zip - 120 KB)
Download Brushset Nipponline (zip - 120 KB)
![]() Download Brushset The Little Things (zip - 110 KB)
Download Brushset The Little Things (zip - 110 KB)
![]() Download Brushset Workshop #1 (zip - 160 KB)
Download Brushset Workshop #1 (zip - 160 KB)
![]() Download Texture #88 (zip - 450 KB)
Download Texture #88 (zip - 450 KB)
![]() For more brushes, see our Photoshop Brushes Page.
For more brushes, see our Photoshop Brushes Page.
![]() posted by Jennifer Apple | permalink | send comments
posted by Jennifer Apple | permalink | send comments
![]()
SEE PREVIOUS POSTS FROM THE SEPTEMBER 2006 BLOG...
![]()
Technorati Tag: Photoshop
More blogs about Photoshop.
![]()
Exclusive Special Offer - Fluid Mask 2.0 - $189
 Fluid Mask 2.0 is based on breakthrough segmentation technology inspired by the way the eye, optic nerve and brain perform visual processing. When an image is loaded, Fluid Mask's segmentation engine analyses the distribution of colors, finding the natural groups within the image. Together with information calculated about edges, gradients and textures, a model is constructed which divides the images into objects.
Vertus Software is offering Fluid Mask at the special 'friends and partner' discounted rate of just $189 - PLUS free upgrades for the next 6 months.
New Features Of Fluid Mask 2.0
- Importing and exporting 16 bit color images
- Improved mask selections — especially on compressed images and fiddly cut-out tasks — making selecting your mask faster and more accurate
- Increases mask selection usability (a completely new image information layer IIL) giving you confidence with your selections, and helping you to learn how to use Fluid Mask easily.
This is an exclusive offer to visitors of PhotoshopSupport.com. To qualify, visit the Fluid Mask Discount Price page. Find out more about Fluid Mask on our special Fluid Mask Page.
![]()
Exclusive 10% Discount On All onOne Products
 Enter discount coupon code PSSPPT06 during the checkout process at onOne Software for an instant 10% discount on any onOne Software product. This is a special offer exclusively for PhotoshopSupport.com visitors. Vist our onOne Software Page for summaries and reviews of PhotoFrame Pro, Genuine Fractals, Mask Pro, Nik Sharpener, and The Photoshop Plugin Suite.
From the PhotoFrame Pro Review by Jennifer Apple: "PhotoFrame Pro 3 offers an upgraded batch of new features, making this plug-in even more of a valuable asset for the professional graphic designer or amateur digital photographer alike! The folks at onOne software have compiled what is arguably the most comprehensive collection of border and edge effects available on the plugin market right now. You can treat your digital images to the thousands of new frames offered in PhotoFrame Pro 3, ranging from crisp black and white to brilliant RGB color — from abstract edging effects to realistic frame-and-matte simulations."
![]() Read the full PhotoFrame Pro review.
Read the full PhotoFrame Pro review.
![]()


