![]()
![]() Try before you buy. Download any Adobe product for a free 30 day trial.
Try before you buy. Download any Adobe product for a free 30 day trial.
![]() Looking for Photoshop CS6 info? See our CS6 Resource Page for the latest news.
Looking for Photoshop CS6 info? See our CS6 Resource Page for the latest news.
![]()
![]()
![]() The Photoshop Blog offers the latest Photoshop news and software updates, Photoshop tips and tutorials, and random thoughts from graphic artist and Photoshop expert Jennifer Apple.
The Photoshop Blog offers the latest Photoshop news and software updates, Photoshop tips and tutorials, and random thoughts from graphic artist and Photoshop expert Jennifer Apple.
![]()
Grains Of Sand Magnified 250 Times Reveal Beautiful Delicate Structures
January 30, 2012
Have a look at the amazing photos of magnified grains of sand at the Uk Daily Mail site.
"Viewed at a magnification of over 250 times real life, tiny grains of sand are shown to be delicate, colourful structures as unique as snowflakes. When seen well beyond the limits of human eyesight, the miniature particles are exposed as fragments of crystals, spiral fragments of shells and crumbs of volcanic rock." Read the full article.

![]()
![]()
 Find Us On Facebook, Follow Us On Twitter
Visit PhotoshopSupport on Facebook. Follow us on Twitter.
Adobe Deals & Special Coupon Offers
Visit the Adobe Coupons & Special Offers Page to see the latest deals from Adobe. Find upgrade options at the Adobe Store. Get up to 80% off at the Adobe Education Store. Find out about monthly or annual subscriptions. You can also download a free 30 day trial of any Adobe CS5 product.
posted by Jennifer Apple | facebook | RSS feed | bookmark | comment | twitter
![]()
Photographing Light Trails — Tips and Tricks From Night and Low-Light Photography Photo Workshop Book
January 30, 2012
 Here is an excerpt from Chapter 8 from Night and Low-Light Photography Photo Workshop, excerpted with permission from John Wiley and Sons, Inc. The book is available in stores and through online retailers nationwide. Here’s a link to a multi-retailer sales page. Author Alen Hess is a professional event and concert photographer whose subjects have included The Grateful Dead, Bruce Hornsby, John Legend, Robin Williams, and many more.
The basics of photographing light trails are simple: Use a shutter speed long enough that the lights in question turn from points of light into trails as they move through the frame. There are three different types of captures in this section: the first is where the camera is stationary and the subject is moving, the second is where the camera moves along with the subject creating a background that seems to be made up of streaks of light, and the third is to use the zoom on a lens to create trails from a stationary light source.
CAPTURING TRAFFIC FLOW
Living in Southern California, one thing that I can count on is that there will be traffic every night. This means that I can capture the light trails produced by the cars’ headlights and taillights. The idea is pretty simple: Leave the shutter open long enough that the camera records the lights from the cars as they drive by.
To capture the light trails produced by traffic, you need a good view of the traffic where you can set up a tripod and stay safe. It is best to scout out the locations during the daylight hours so that you can see exactly what is around you. It takes a little more imagination to picture the scene without the headlights visible, but just watch the flow of the traffic. Look for roads that lead to or away from something so that the light trails created from the cars can be used to lead the eye around the photo. Take the trails in Figure 8-5, where I photographed the cars heading to and from downtown San Diego, from a pedestrian overpass. Because it was taken late, I needed to leave the shutter open for a long time in order to get enough cars to make a good design.
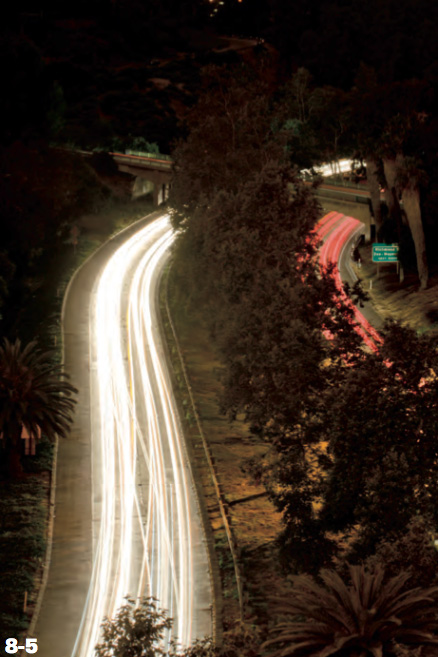
ABOUT THIS PHOTO The bright white lights are the headlights
as the traffic flows under a pedestrian bridge. The 30-second exposure allowed the light from the headlights to illuminate the surrounding area. Taken at 30 seconds, f/14, and ISO 100.
To capture the light trails from the cars, just follow these directions:
Set the camera on your tripod.
Compose the photo and switch the focus to manual mode and don’t touch the focus ring on the lens.
Set the exposure mode to manual.
Set the IS0 to 100.
Set the aperture to f/10.
Set the shutter speed to 10 seconds and take a shot.
Check the exposure and the look of the image on your camera’s LCD.
— If the image is too bright but the trails look good, then use a smaller aperture.
— If the image is too dark but the trails look good, then use a larger aperture.
— If the trails are too short, then use a longer shutter speed.
— If the trails seem overexposed, then use a shorter shutter speed.
— Take another photograph.
If you start to take your images right after sunset, the sky will get darker and the headlights and taillights will get brighter in relation to their surroundings. You will have to adjust the exposure as the sky gets darker.
One of the more interesting areas to photograph the light trails created by traffic is from a bridge overlooking the traffic. As you can see in Figure 8-6, the view makes for some great motion in the images; however, on the downside, I had to photograph through a fence that is set up to stop people from falling into traffic. If you face a similar situation, the key is to get the front of the lens as close to the fence as possible and try to use the widest aperture that you can.
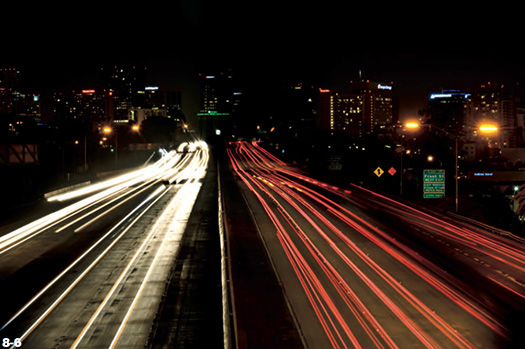
ABOUT THIS PHOTO Traffic on Interstate 5 streams to and from downtown San Diego. The camera was set on a tripod right up against a safety fence and the live view function was used because I could not get my eye close enough to the viewfinder. Taken at 10 seconds, f/14, and ISO 100.
MOVE THE CAMERA
When photographing the lights of moving traffic, the camera generally stays stationary and the lights move; however, you can also do it the other way, with the lights stationary and the camera moving. This works best if you have a subject that you can follow with the camera.
This technique is commonly known as panning, where, with the shutter open, you follow along with the subject and keep the subject in focus while the background blurs. When you do this at night, any lights in the scene that are stationary become streaks of lights. The key is to follow the subject while the shutter is open and match its movement. This works best with subjects that are moving across the frame. Start with the subject in focus and track the movement; then press the shutter release button and keep moving at the subject’s speed. This can take multiple tries to get right, but that’s half the fun. The taxi in Figure 8-7 was moving across the frame from left to right, but what really makes this image work is that the background is nice and bright and blurred.
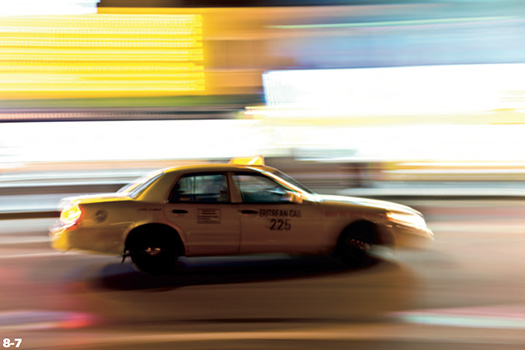
ABOUT THIS PHOTO One of the best cars to follow when panning is a taxi cab. They are easily recognizable and the light on the roof makes them easy to follow. Taken at 1/2 second, f/2.8, and ISO 200.
USE THE ZOOM
One technique that can give you some unusual effects when shooting light trails is to change the focal length during the exposure. To do this, you need to be photographing with a zoom lens and you need to be using at least the widest aperture that the lens has on the longest focal length. For example, if you have a lens that goes from 28mm to 300mm and from f/4.5 to f/6.3, then you need to make sure that you are using at least f/6.3 or smaller when you start photographing. This is so that the aperture doesn’t change during the exposure. For example, I zoomed from 135mm to 70mm during the exposure to get the light trails you see in Figure 8-8.
I achieved this effect by pressing the shutter release button, waiting 4 seconds, and then slowly zooming out for the other 4 seconds. As you can see from Figure 8-9, if you start out wide and zoom in, the look you get is really different — well, maybe not really different, but different enough that you should just try it both ways and see which one you like better.
You can use this technique with any light source, but those that are easily recognizable make really great subjects.
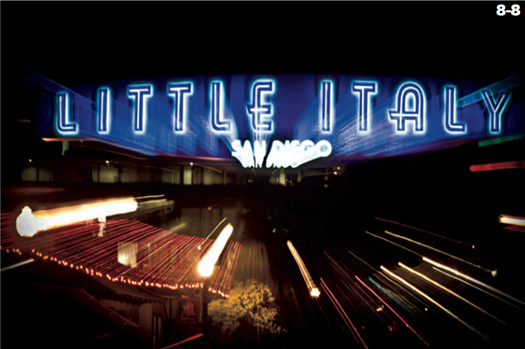
ABOUT THIS PHOTO Many of the neighborhoods in San Diego have their own signs. This one in Little Italy is a real treat to photograph, and when shot while zooming out, you can get a really neat effect. Taken at 8 seconds, f/16, and ISO 200.
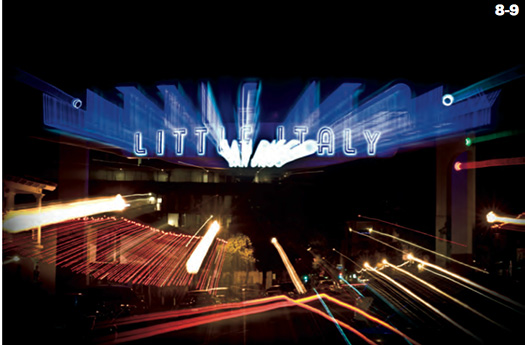
ABOUT THIS PHOTO The exact same subject as in Figure 8-8, but instead of zooming from 135mm to 70mm, this was zoomed from 70mm to 135mm. Taken at 8 seconds, f/16, and ISO 200.
posted by Jennifer Apple | facebook | RSS feed | bookmark | comment | twitter
![]()
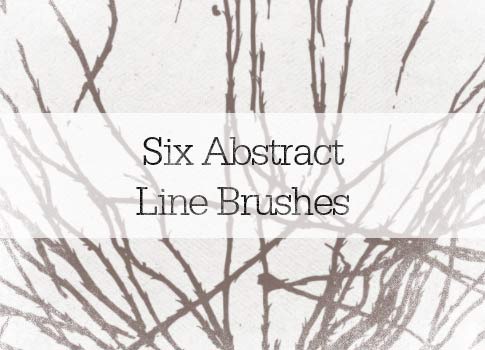
6 Abstract Lines Photoshop Brushes From Bittbox
January 27, 2012
Another nice set of free Photoshop brushes from Bittbox: The source for these was a microscopic piece of pollen. Up close the strands looked like barbed wire. After photographic it, I brought the images into Illustrator and Live Traced each one, so the edges are very defined. Each brush is 2500×1800, hope you enjoy.
posted by Jennifer Apple | facebook | RSS feed | bookmark | comment | twitter
![]()
Topaz Releases Star Effects, A Lighting Enhancement And Star Creation Plugin - Plus Discount Code
January 26, 2012
Topaz Labs has released Topaz Star Effects, a Photoshop Plug-in that manipulates and enhances light sources to create radiant lighting and star effects. Using a leading-edge technology that automatically recognizes light sources, Topaz Star Effects provides a fast and effective way to creatively embellish points of light in an image. Topaz Star Effects retails for $29.99, and will be discounted to $19.99 until 2/15/12. Simply enter coupon code TopazStars
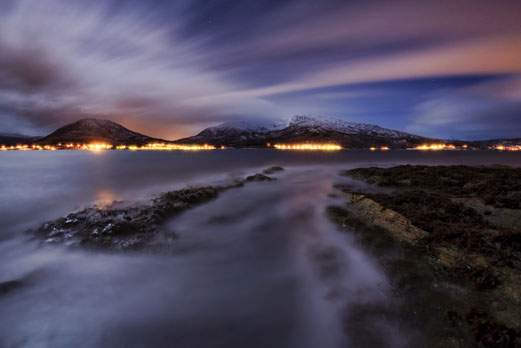
Topaz Star Effects is the most customizable and inclusive star filter out there right now. With adjustments like star type, glow, ring flare and color controls, the program allows for users to create effects from realistic sun flares and glowing water to more obvious, artistic additions," said Nichole Paschal, Senior Marketing Specialist for Topaz Labs. "Plus the ability to selectively add and remove these effects, in a single click, is easy to understand and an important aspect to Star Effects."

"With an advanced detection algorithm powering Star Effects, we have developed a simple and intuitive way to recognize hundreds of light sources at once, along with the choice to selectively amplify sources. Star Effects has the most comprehensive tool set available, allowing for users to create both natural, accurate renditions or more dramatic, graphic effects," said Dr. He Yang, Senior Software Designer at Topaz Labs.
The comprehensive and customizable tool set in Topaz Star Effects offers a simple and intuitive workflow that results in quick enhancements to your light sources. It is a plug-in that works with a variety of host programs including Photoshop, Photoshop Elements, Aperture, iPhoto and Lightroom. Topaz Star Effects retails for $29.99, and will be discounted to $19.99 until 2/15/12. Simply enter coupon code TopazStars.
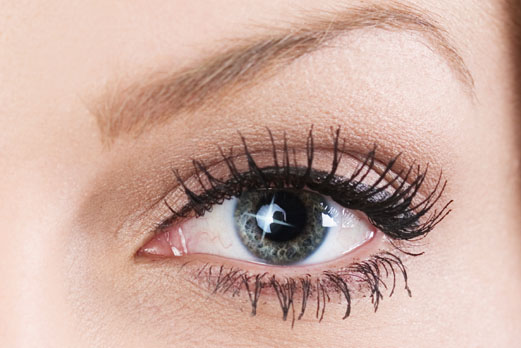
You could spend hours in Photoshop selecting multiple light sources and fiddling around with multiple settings, layer styles and blending modes. Or you can enjoy a more simplistic and
user-friendly process using Star Effects, which automatically detects light sources allows
you to quickly select how many or how few of those light sources to enhance. Star Effects also includes a highly comprehensive toolset, offering the most flexibility and control for customizing your effects. Using the adjustment sliders, you can instantly change
the appearance and characteristics of your selected light sources. Key user benefits include:
Topaz Automatic light source detection - seeks out the light sources in your image.
Added flexibility via the selective brush used to individually select or de-select light sources.
Star type selection with options like traditional, starburst, cross star, hollywood star
and more!
Star Stack-a-bility via the Apply button which allows you to stack multiple effects.
Added adjustment controls for color, temperature, secondary spikes, glow and ring
flares - for a customizable workflow. And much more...
posted by Jennifer Apple | facebook | RSS feed | bookmark | comment | twitter
![]()
Shooting Street Scenes, Tips and Tricks From Night and Low-Light Photography Photo Workshop Book
January 26, 2012
 Here is an excerpt from Chapter 8 from Night and Low-Light Photography Photo Workshop, excerpted with permission from John Wiley and Sons, Inc. The book is available in stores and through online retailers nationwide. Here’s a link to a multi-retailer sales page. Author Alen Hess is a professional event and concert photographer whose subjects have included The Grateful Dead, Bruce Hornsby, John Legend, Robin Williams, and many more.
When the sun sets and the city lights start to come on, it looks like the city is waking up and coming to life. The drabness of the day is slowly replaced by an energy that is most evident in the way the city is lit. Think of the city as a one-stop show for night photography, as it offers a huge variety of different subjects. These can include the street scenes, light trails, bright neon lights, and the cityscapes themselves.
There is also a lot of fun to be had photographing the same scene in both day and night and comparing them. One of the biggest differences is the direction of the light. When the scene in Figure 8-1 is lit during the day, the sun is the main light source and the light comes from overhead, but at night, the light comes from within the scene, from the lights used to illuminate the memorial from the ground up, which creates a look that does not exist during the day.
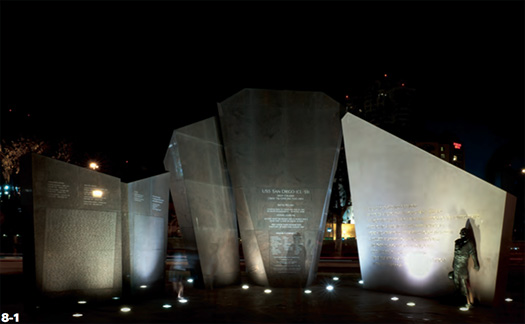
ABOUT THIS PHOTO The memorial shot at 40 seconds allowed me to capture the detail in the stone, yet the people visiting it look a lot like ghosts. Taken at 40 seconds, f/22, and ISO 100.
READ MORE...
posted by Jennifer Apple | facebook | RSS feed | bookmark | comment | twitter
![]()
Sneak Peak At Photoshop CS6 And Camera Raw - Video Reveal
January 26, 2012
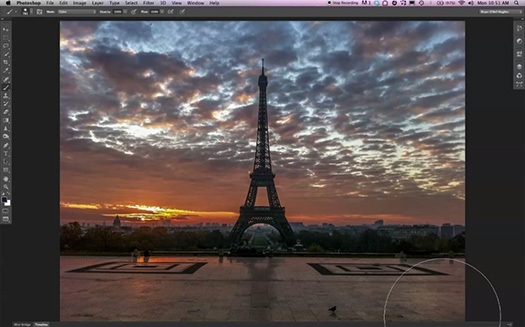
This video from Senior Product Manager Bryan O'Neil Hughes, reveals an early look at some of the things the Photoshop team is working on for Camera Raw and Photoshop CS6, including a much darker interface.
posted by Jennifer Apple | facebook | RSS feed | bookmark | comment | twitter
![]()
How To Create Type In Photoshop That Inverts What's Behind
January 25, 2012
You've probably been there. You're working with a high-contrast photo or composition, with lots of lights and darks, and it’s your job to lay text over it. Readable text. So, do you choose dark text or light? Either one risks becoming unreadable when it hits an object behind it that doesn’t provide enough contrast. And please, whatever you do, don’t compromise with that medium gray text that’s completely unsatisfying no matter where it lands.
This week’s free technique from Deke that shows you how to conveniently set up your type so that it automatically inverts everything behind it. By setting up your text this way, you no longer have to make the compromised choice to leave the text in some state of questionable readability, or the tedious choice to stop and manually reset text color as you move it around. By using a blend mode and a couple of well-placed adjustment layers to mathematically tell Photoshop what you want it to do when, you’ll create automatically reversing yet entirely editable text.
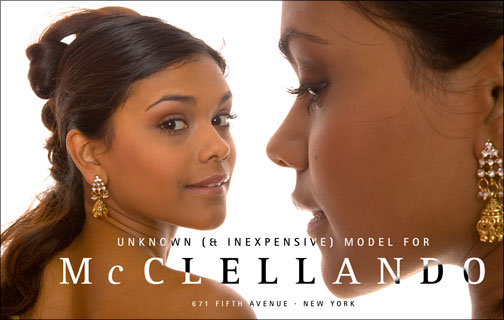
And for members of the lynda.com Online Training Library, Deke has an exclusive movie this week, Creating auto-inverting line art, in which he shows you how to do the same inverse effect with line art (in this case a signature). The steps in this technique are similar to those discussed in Deke’s free tutorial, but require you to additionally separate and invert the lines that make up the image.

You can get a free 7-day trial to the lynda.com Online Training Library. A credit card is required to ensure uninterrupted access to lynda.com, if you choose to remain a member after your free trial ends. There is no long-term commitment required, and you can cancel any time. The free trial allows access to over 60,000 video tutorials instantly.
posted by Jennifer Apple | facebook | RSS feed | bookmark | comment | twitter
![]()
Assorted Free Textures For Photoshop From Bittbox
January 24, 2012
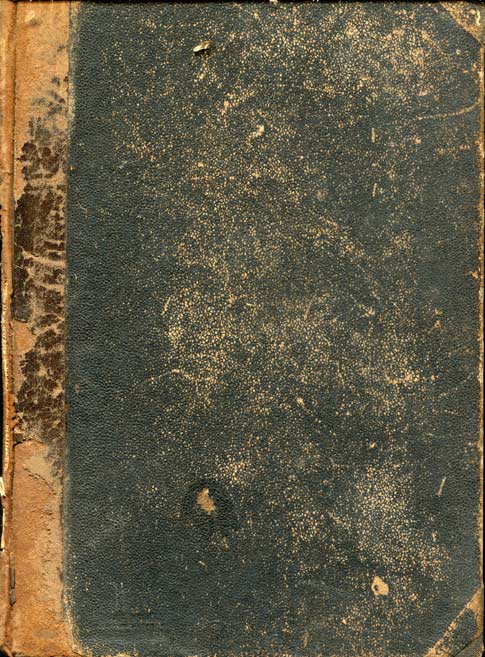
From Bittbox: Today's grab bag of textures contains a couple old book covers and three other various textures. Each one will add a different dimension to your designs.
posted by Jennifer Apple | facebook | RSS feed | bookmark | comment | twitter
![]()
5 Free Fabric Photoshop Brushes
January 20, 2012
A nice set of 5 free Photoshop brushes from Bittbox: This collection of five subtle hi-res fabric brushes will add some natural surfacing to your work. Each brush is 2500×2500.
posted by Jennifer Apple | facebook | RSS feed | bookmark | comment | twitter
![]()
5 Free Cracked, Peeling Wood Textures - Plus Photoshop Tutorial Digital Diorama "Living Room"
January 19, 2012
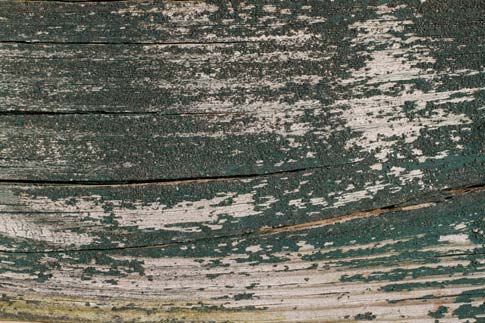
Shutterstock blog has a Photoshop tutorial that shows you how to create a surreal "living" room with blue-sky walls, a turbulent sea floor, and an antique clock sun. It's a good way to also learn how to use textures. In step 3 you add textures to the walls to give them a grungy feel. And so I've included the latest from Bittbox as well: 5 free hi res wooden board textures.

posted by Jennifer Apple | facebook | RSS feed | bookmark | comment | twitter
![]()
All About Perfect Layers 2 - The Perfect Add-on To Lightroom
November 18, 2011
 Perfect Layers 2 is a fast, easy and affordable way to create layered files outside of Adobe Photoshop. Perfect Layers is an application that allows photographers to combine multiple images from Adobe Photoshop Lightroom, Apple Aperture, or any application, into a single-layered file. As photographers do more of their work in Lightroom or Aperture, Perfect Layers has evolved to support these changing workflows.
Perfect Layers 2 is available as standalone product for $69.95 and as part of the Perfect Photo Suite 6 for $299.95. When purchasing at the onOne website, use our discount code - PSSPPT06 - for an instant 10% discount on all products, including upgrades.
Perfect Layers can be used to blend multiple exposures together or build composite images. New capabilities have been added to version 2, including a Retouch Brush to remove blemishes and dust spots, a file browser that quickly finds and provides access to the right files, and flexible preview options that show changes being made side by side with the original image.
Perfect Layers was developed and designed along with industry thought leader Scott Kelby as an application that would deliver the power and benefits of layered images to users working primarily in Lightroom or Aperture. The simplicity of Perfect Layers and the tools provided allow photographers to be able to quickly do what they want to without having to wade through dozens of tools they will never use. To further streamline workflows, Perfect Layers can be used as a standalone application and has been integrated into the new Perfect Photo Suite 6.
posted by Jennifer Apple | permalink | RSS feed | bookmark | comment | twitter
![]()
How To Turn A Photo Into A Line Drawing In Photoshop - HD Video Tutorial
January 17, 2012
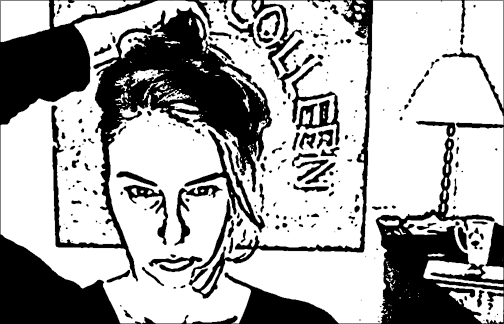
This week Deke shares one of his most asked-for techniques, how to turn an ordinary portrait into a line drawing. It seems that when people encounter wonderful photo-realistic line drawings out in the wild, they immediately equate said photo-realism with Photoshop. And, if nature didn’t endow you with the ability to draw, then applying some careful Photoshop effects to a well-chosen photo is indeed the way to go.
In this week’s free movie, you’ll see how to take a photographed portrait, apply the Photocopy filter and then adjust and finesse your drawing with the Levels command, Gaussian Blur, a little hand-work (you’re calling it a “drawing” after all), and finally some advanced layer effects. The result is a technique that can work on any well-defined portrait.
For example, check out how this unsuspecting photo booth poser in the upper image can become the proto-Nagel woman you see in the lower image below (while doing some fairly wonderful things to my chalkboard in the process).

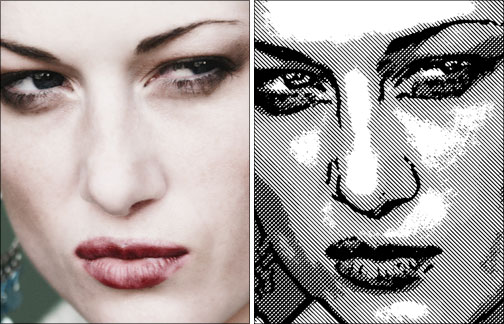
For members of lynda.com, Deke has an exclusive movie in the Online Training Library this week called Adding a crosshatch shading pattern that really sells the illustration effect. By the time you go through Deke’s meticulous steps, you’ll take this dramatic photo on the left and turn it into the deadly (but awesome) line drawing on the right:
You can get a free 7-day trial to the lynda.com Online Training Library. A credit card is required to ensure uninterrupted access to lynda.com, if you choose to remain a member after your free trial ends. There is no long-term commitment required, and you can cancel any time. The free trial allows access to over 60,000 video tutorials instantly.
posted by Jennifer Apple | facebook | RSS feed | bookmark | comment | twitter
![]()
2 Hours Of Free Lightroom 4 Video Training Tutorials
January 16, 2012
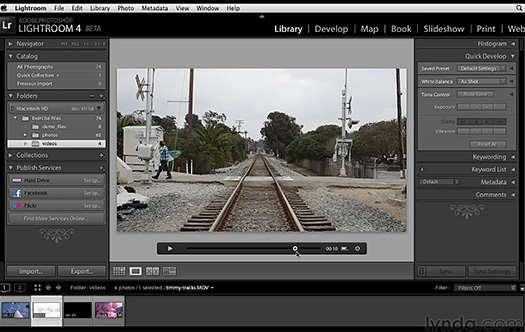
![]() From lynda.com: Earlier this week, Adobe released a public beta version of Lightroom 4 for Windows and Mac. To help you get up to speed with what’s new, we’ve published Photoshop Lightroom 4 Beta Preview with Chris Orwig. a free 2-hour tour of Lightroom 4′s new features, including its enhanced photo- and video-editing features, its ability to tag your photos to a map, and its Blurb book-layout module.
From lynda.com: Earlier this week, Adobe released a public beta version of Lightroom 4 for Windows and Mac. To help you get up to speed with what’s new, we’ve published Photoshop Lightroom 4 Beta Preview with Chris Orwig. a free 2-hour tour of Lightroom 4′s new features, including its enhanced photo- and video-editing features, its ability to tag your photos to a map, and its Blurb book-layout module.
And because free is a very good price, we’ve made the entire course free, meaning, you don’t have to be a lynda.com member in order to watch it. The Lightroom 4 beta software expires at the end of March, and when it does, we’ll retire this course. You can see all the free Lightroom 4 video training tutorials here.
1 - Working with Video (30m 20s)
Video playback and trimming 06m 31s
Editing the color and tone of a video file 06m 13s
Organizing video files in a Lightroom database 05m 24s
Capturing a still image from a video file 02m 49s
Exporting or publishing a video to your hard drive 05m 23s
Publishing videos to Flickr and Facebook 04m 00s
2 - Creating a Custom Book Layout (19m 11s)
Overview of the new Book module 05m 55s
Creating and customizing a layout 03m 13s
Editing pages 06m 50s
Exporting and ordering books 03m 13s
3 - Introducing the Map Module (14m 03s)
Overview of the new Map module 03m 43s
Tagging images with locations 04m 25s
Creating saved locations 05m 55s
4 - Develop Module - Image Editing Improvements (39m 09s)
Overview of the new Develop module basic controls 07m 28s
Using the new Develop module basic controls 03m 40s
Working with clarity 02m 30s
Making RGB tone curve adjustments 05m 19s
Overview of the adjustment brush improvements 05m 06s
Using the Adjustment Brush and Graduated Filter 03m 32s
Fixing chromatic abberation and white balance 02m 21s
Soft Proof reinvented 09m 13s
5 - Other noteworthy improvements (14m 24s)
E-mailing photos from within Photoshop Lightroom 05m 54s
Improvements in Fast Load and Lossy DNG 07m 19s
Using the Module Walkthrough help feature 01m 11s
See more videos on our Lightroom 4 Tutorial & Free Download Page.
You can get a free 7-day trial to the lynda.com Online Training Library. A credit card is required to ensure uninterrupted access to lynda.com, if you choose to remain a member after your free trial ends. There is no long-term commitment required, and you can cancel any time. After signing up for the free 7-day trial to the lynda.com Online Training Library you'll gain access to over 60,000 video tutorials instantly. Subscriptions to the lynda.com Online Training Library provide anytime access to tens of thousands of video tutorials covering Photoshop, Illustrator, Dreamweaver, web design, digital imaging, 3D, digital video, animation, and many other topics. View free video clips.
posted by Jennifer Apple | facebook | RSS feed | bookmark | comment | twitter
![]()
Tutorial - Create A Punchy Black And White Effect In Photoshop
January 13, 2012
Here's a simple and effective tutorial from Photoshop Daily that shows how to create a rich
black and white conversion using the Channel Mixer adjustment.
There are quite a few techniques you can call upon when it comes to converting an image to monochrome. One of our favourite methods includes using the Channel Mixer adjustment layer. This is especially useful if the Black and White adjustment isn’t part of your inventory. The Channel Mixer gives control over the individual RGB values, allowing for the finest tweaks to certain areas of the image for emphasis.

Before

Desaturate adjustment

Channel Mixer adjustment
Step 1 – Load adjustment
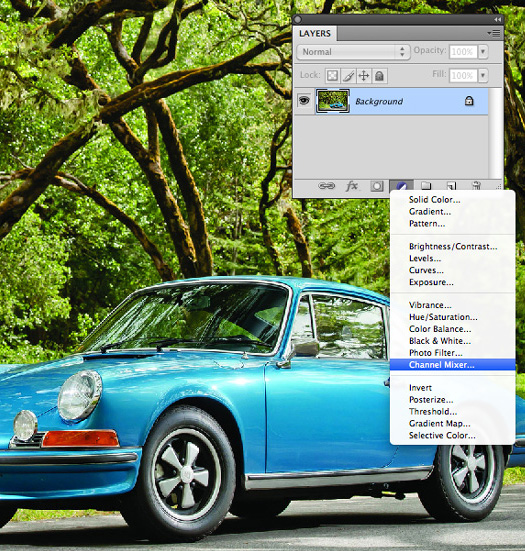
We want to be able to re-edit the adjustment over and again, so load the Channel Mixer as an adjustment layer. You can do this from the Layer menu in New Adjustment Layer, or by using the small circle button in the Layers palette.
Step 2 – Remove colour
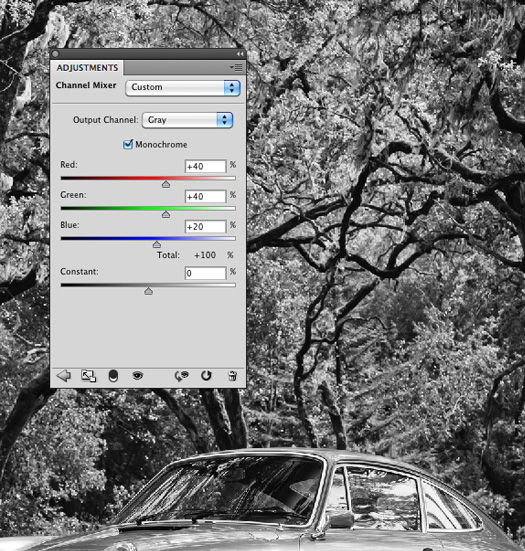
Initially the Channel Mixer is designed to alter colour in the image. If you’re working with a greyscale image, this option won’t actually be available. To kick start the conversion process, tick the Monochrome box. Notice how the Output Channel now reads “Gray”.
Step 3 – Tweak channels
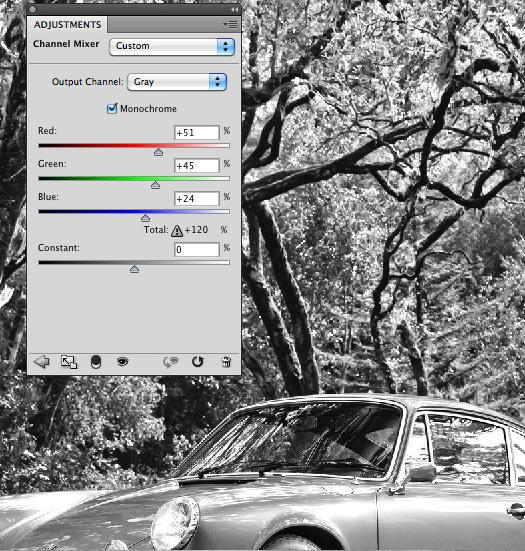
The auto black and white effect made by pressing Monochrome is an improvement from using the Image>Adjustments>Desaturate method. By tweaking each Channel only slightly, we were able achieve a good black and white conversion with stronger details in the car and greenery. One rule when using the adjustment is that the Total value must end up at 100%. Well, for monochrome, it doesn’t. It just so happened that after creating the effect, Total ended up at 120%.
![]()
![]()
 Find Us On Facebook, Follow Us On Twitter
Visit PhotoshopSupport on Facebook. Follow us on Twitter.
Adobe Deals & Special Coupon Offers
Visit the Adobe Coupons & Special Offers Page to see the latest deals from Adobe. Find upgrade options at the Adobe Store. Get up to 80% off at the Adobe Education Store. Find out about monthly or annual subscriptions. You can also download a free 30 day trial of any Adobe CS5 product.
posted by Jennifer Apple | facebook | RSS feed | bookmark | comment | twitter
Free Photoshop Brush Set - 4 Subtle Rust Brushes
January 13, 2012
From Bittbox, a free set of 4 subtle rust brushes for Photoshop.

![]()
 Find Us On Facebook, Follow Us On Twitter
Visit PhotoshopSupport on Facebook. Follow us on Twitter.
Adobe Deals & Special Coupon Offers
Visit the Adobe Coupons & Special Offers Page to see the latest deals from Adobe. Find upgrade options at the Adobe Store. Get up to 80% off at the Adobe Education Store. Find out about monthly or annual subscriptions. You can also download a free 30 day trial of any Adobe CS5 product.
posted by Jennifer Apple | facebook | RSS feed | bookmark | comment | twitter
![]()
Free Set Of 10 Moon Brushes For Photoshop From iDeasplayer
January 12, 2012
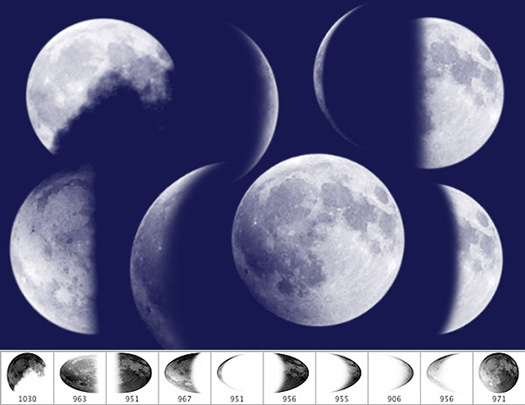
I really like this free set of 10 Moon Brushes from PE at iDeasplayer.com: As always they are free for both personal and commercial use. I really hope yo'’ll like them. Enjoy!
posted by Jennifer Apple | facebook | RSS feed | bookmark | comment | twitter
![]()
Topaz Lens Effects - Plugins Gallery - Sample Filter Effects - Plus 15% Discount
January 10, 2012
Lens Effects simulates a variety of camera filter and lens effects that you can virtually apply to your image. These effects are used to correct or enhance characteristics of your image. Here are samples of some of the filters and lens effects that illustrate how they will change and enhance your images. (Order Lens Effects from Topaz Labs and use our coupon code PHOTOSHOPSUPPORT for an instant 15% discount.)
posted by Jennifer Apple | permalink | RSS feed | bookmark | comment | twitter
![]()
Photoshop Lightroom 4: Public Beta
- An Overview by Mark Galer
January 12, 2012
Adobe has released Lightroom 4 beta for Windows and Mac, and it is available as a free public download from Adobe Labs. Here is an overview of Lightroom 4 from Mark Galer.
posted by Jennifer Apple | facebook | RSS feed | bookmark | comment | twitter
![]()
How To Create Shadows For Objects In Photoshop
January 11, 2012
It’s all well and good to use Deke's impeccable masking techniques to meticulously isolate objects—like, say, this week's car—and set them down on new backgrounds. But the fact is, if you don't bring the shadow of your object along for the ride, your subject is never going to look like it really belongs there.
That’s why in this week’s free movie Deke shows you how to capture the shadow under an object—like, say, this week’s car—and prepare it for use in any new background. The technique centers around the Calculations command (don’t worry, Photoshop does all the math) and some standard masking clean-up techniques. Check out the difference in these before (plopped down without a shadow) and after (with the shadow intact) images:


Don’t leave your transported objects floating out in space, ground them in reality by including their shadows. You can get a free 7-day trial to the lynda.com Online Training Library. A credit card is required to ensure uninterrupted access to lynda.com, if you choose to remain a member after your free trial ends. There is no long-term commitment required, and you can cancel any time. After signing up for the free 7-day trial to the lynda.com Online Training Library you'll gain access to over 60,000 video tutorials instantly. Subscriptions to the lynda.com Online Training Library provide anytime access to tens of thousands of video tutorials covering Photoshop, Illustrator, Dreamweaver, web design, digital imaging, 3D, digital video, animation, and many other topics. View free video clips.
posted by Jennifer Apple | permalink | RSS feed | bookmark | comment | twitter
![]()
Pixelmator Image Editor - Special Price - $19.99
January 10, 2012
![]() I've heard a lot of good things about Pixelmator and right now you can get it at 60% off. The list price is $59.99. The just announced sale price is $19.99. Pixelmator is an easy-to-use, fast and powerful image editing program that has everything you need to enhance, edit and transform your photos.
I've heard a lot of good things about Pixelmator and right now you can get it at 60% off. The list price is $59.99. The just announced sale price is $19.99. Pixelmator is an easy-to-use, fast and powerful image editing program that has everything you need to enhance, edit and transform your photos.
Made for the Mac, Pixelmator takes advantage of built-in iPhoto support and one-click access to iSight. Use layer-based image editing, color management, filters and special effects to quickly achieve impressive imagery.
130+ Filters and Special Effects
See results in real-time—choose from standard filters such as blur, sharpen and distort, as well as many unique filters like comic-style halftones, title, kaleidoscope and thermal camera.
Layer-Based Image Editing
Stack portions of your image on top of one another and quickly create layers from photos, selections and more. You can also blend layers, change layer opacity and add layer masks to hide portions of layers. Add images as layers via drag-and-drop.
![]() Color Correction Tools
Color Correction Tools
16+ color correction tools help you make quick corrections to your images with Auto Enhance, Levels and Curves. Adjust hue, saturation, exposure, brightness, contrast and more.
Add Text to Your Images
Create editable text layers and use the type tool to create your own invitations and logos.
Select, Paint and Retouch Tools
One-click iSight® support takes your computer and adds it as a layer in Pixelmator. Access your iPhoto® Library, events, albums, Smart Albums and Pictures folder with the built-in Photo Browser. Supports Spotlight™, ColorSync®, Quick Look and many other Mac-only technologies, and takes advantage of Core Image and OpenGL®. Built-in Automator actions let your quickly enhance, resize and transform images with batch processing.
Supports Popular File Formats
Export to 100+ file formats including PSD, JPEG, TIFF, PNG, GIF, PICT, BMP and PDF. Also supports Adobe Photoshop files with layers.
System Requirements
Macintosh:Mac OS X 10.5 or higher, with full support of Snow Leopard; Power Mac G5, iMac G5, or Intel Processor; 512MB RAM or greater (1GB recommended); 1GB hard disk space; Core Image supported graphics card recommended; Some features require iLife
posted by Jennifer Apple | permalink | RSS feed | bookmark | comment | twitter
![]()
Free Textures From Bittbox - Tree Stumps
January 10, 2012
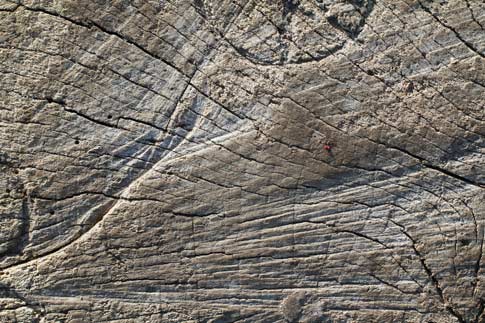
From Bittbox: These five hi-res wood textures come from looking down at a tree stump. The line detail in these is really interesting. Each texture is 4500×3000.
posted by Jennifer Apple | permalink | RSS feed | bookmark | comment | twitter
![]()
Adobe Lightroom 4 Beta Video Tutorials - Adobe TV Videos
January 10, 2012
![]() If you want to see what's new in the just released Adobe Photoshop Lightroom 4 beta for Windows and Mac, have a look at the Lightroom 4 Beta Video Page at Adobe TV. Here are the videos that have been posted so far:
If you want to see what's new in the just released Adobe Photoshop Lightroom 4 beta for Windows and Mac, have a look at the Lightroom 4 Beta Video Page at Adobe TV. Here are the videos that have been posted so far:
INTRODUCTION TO LIGHTROOM 4 BETA - 00:01:44
Julieanne Kost discusses what will be covered in the LR4 Beta videos.
DEVELOP MODULE ADVANCEMENTS - 00:11:51
This episode covers some of Lightroom 4 Beta’s new features in the Develop Module and Basic Panel including major improvements to image processing.
SOFT PROOFING AND DNG ENHANCEMENTS - 00:13:29
Learn some of the great ways the new Lightroom 4 beta allows you to soft proof your images. Also in this episode, Julieanne covers improvements to the way Lightroom handles the Digital Negative Format.

WORKING WITH DSLR VIDEO - 00:08:40
Learn how the new Lightroom 4 Beta will work with and share video clips .
MAPPING YOUR PHOTOS - 00:04:49
Discover how the new Lightroom 4 beta allows you to sort and manage your images based on where they pictures were originally taken the new map Module makes it possible.
BOOK MODULE BASICS - 00:14:22
In this first of 3 videos, Julieanne Kost gives an overview of the new Book Module in the new Lightroom 4 Beta which allows you to layout and print book from Lightroom.
MODIFYING BOOK LAYOUTS - 00:12:55
This episode shows you how you can customize your book layout in the new Lightroom 4 Beta.
ADVANCED BOOK FEATURES - 00:10:13
This episode covers more features of the Book Module in the Lightroom 4 beta including different ways to work with captions and templates.
posted by Jennifer Apple | permalink | RSS feed | bookmark | comment | twitter
![]()
Adobe Debuts Photoshop Lightroom 4 Public Beta on Adobe Labs
January 10, 2012
Adobe has announced Adobe Photoshop Lightroom 4 beta for Windows and Mac. Available as a free public download from Adobe Labs, Lightroom is the essential digital photography workflow solution helping amateur and professional photographers quickly import, manage, enhance and showcase their images.

Lightroom 4 beta is a preview of new features and capabilities that will be offered in the final release of Lightroom 4, expected in early 2012. The beta features refined technology for superior shadow and highlight processing, expanded management capabilities including enhanced DSLR video support and the ability to create beautiful photo books from within Lightroom. Adobe encourages photographers to try the beta release and provide feedback to the product team.
Lightroom 4 beta is a major software update adding a broad range of new capabilities based on feedback provided by the photography community. All new basic tonal adjustment controls extract the entire dynamic range from cameras for stunning shadow details and highlights. The software features additional local adjustment controls, including Noise Reduction, Moire and White Balance.
New native video support gives photographers the capability to play, trim and extract frames from video clips shot on DSLRs, point-and-shoot cameras and smartphones. Many standard Lightroom image adjustment controls can also be applied to video clips and adjusted videos can be exported as a H.264 file or published directly to Facebook or Flickr.
Lightroom 4 beta provides photographers the tools to create impressive photo books with rich text controls and a variety of easy-to-use templates, as well as a direct link for photo book creation from within the new Book module. Also, a new intuitive Map module displays images already assigned a location, provides location tagging controls and saved locations for effortless assignment of a photographer’s common locations.
In the Develop module, the addition of soft proofing helps photographers tune images in a destination color space to ensure prints and Web content look their best. In addition, customers can now email images directly from Lightroom using an email account of their choice including Gmail, Hotmail and Yahoo! Mail.
Adobe Photoshop Lightroom 4 beta is available immediately as a free download on both Windows and Mac at labs.adobe.com/downloads.
posted by Jennifer Apple | permalink | RSS feed | bookmark | comment | twitter
![]()
How To Extract Hair In Photoshop - Tutorial From New Book, Photoshop Compositing Secrets
January 10, 2012
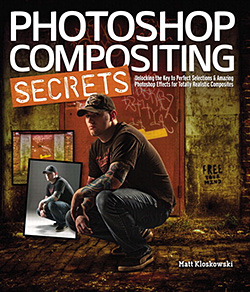 You can read a good tutorial for selecting hair in Photoshop - Photoshop Compositing Secrets: Extracting Hair - from a new book, Photoshop Compositing Secrets. Here is the intro:
If you've ever worked on compositing multiple graphical elements into one glorious image, you know how maddening it can be trying to make hair look as natural with a new background as it did in its original location. Matt Kloskowski, author of Photoshop Compositing Secrets, shares some great tricks he uses to get even the wispiest of baby-fine hair to cooperate in Photoshop (no matter how badly it behaves in real life).
If you want to get into Photoshop compositing, one of the first features you'll have to conquer is selections. If you've ever tried selecting people (especially people with wispy hair) from one background and placing them onto another background, you know that it can be a huge pain in the neck. But by using the Refine Edge feature and a few other tricks in Photoshop CS5, you'll start your composites out right—with a good selection. After that, making them fit into another background becomes a lot easier.
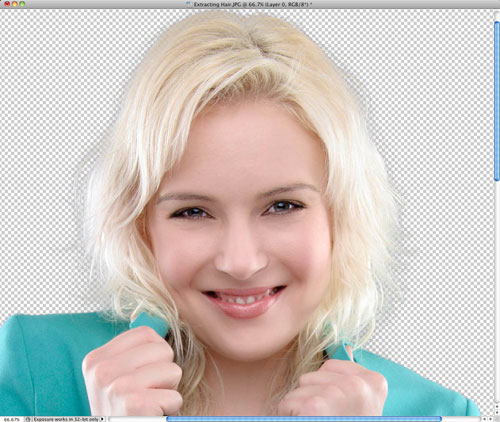

Read the full tutorial - Photoshop Compositing Secrets: Extracting Hair. You might also want to try this amazing tutorial on extracting hair from Photoshop pro Mark Galer:
One of the most challenging montage or masking jobs in the profession of post-production editing is the hair lift. When the model has long flowing hair and the subject needs to change location many post-production artists call in sick. Get it wrong and, just like a bad wig, it shows. Extract filters, Magic Erasers and Tragic Extractors don’t even get us close.

Read the full tutorial on extracting hair from Photoshop pro Mark Galer.
posted by Jennifer Apple | permalink | RSS feed | bookmark | comment | twitter
![]()
7 Soft Grunge Brushes From Bittbox
January 06, 2012
From Bittbox, 7 soft grunge brushes: These brushes will make a valuable addition to your library and will come in handy for adding that extra surfacing and personality that your design’s require. Each brush is 2500×2000.

posted by Jennifer Apple | permalink | RSS feed | bookmark | comment | twitter
![]()
How To Increase Saturation Using The Sponge Tool - Tutorial
January 06, 2012
Here's a good tutorial from Photoshop Daily: There are many ways to hoick up the colour in your images but one of the easiest methods is using the Sponge tool. Found in the toolbar, co-habiting with the Dodge and Burn tools, it enables you to increase or decrease the saturation of an image. The benefit of using the Sponge tool is that you literally brush the edit on. This gives you great control and is brilliant for images with lots of little areas that need some saturation help here and there, but which don’t warrant a full-on Hue/Saturation command.
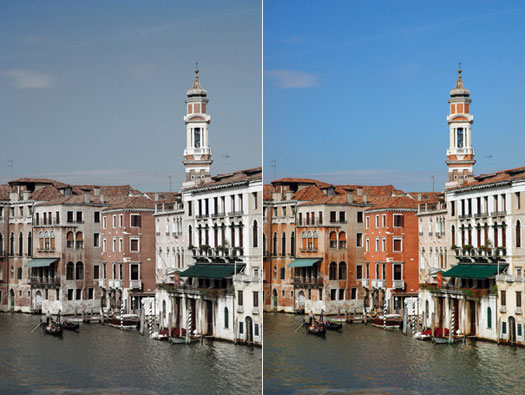
Read more...
posted by Jennifer Apple | permalink | RSS feed | bookmark | comment | twitter
![]()
5 Free Concrete Wall Textures From Bittbox
January 05, 2012
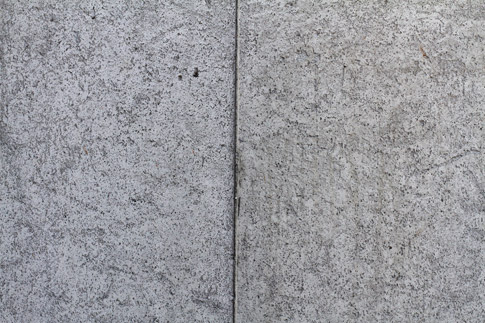
From Bittbox, 5 free concrete wall textures: These are mostly smooth, with some nice nooks and crannies. If you’re looking to add some subtle surfacing to your work, these would do the trick nicely. Each texture is 4500×3000.
posted by Jennifer Apple | permalink | RSS feed | bookmark | comment | twitter
![]()
GuideGuide Free App For CS4, CS5 Boosts Power Of Photoshop Guides
January 04, 2012
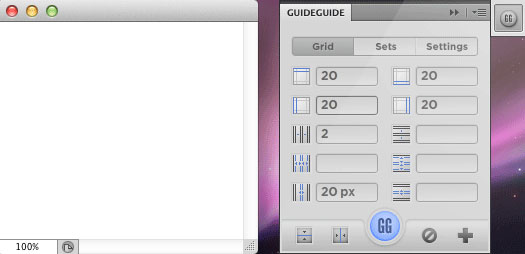
From the GuideGuide site: Dealing with grids in Photoshop is a pain, with GuideGuide, it doesn't have to be. Pixel accurate columns, rows, midpoints, and baselines can be created based on your document or marquee with the click of a button. Frequently used guide sets can be saved for repeat use. Grids can use multiple types of measurements. Best of all it's free.
posted by Jennifer Apple | permalink | RSS feed | bookmark | comment | twitter
![]()
Remove People From Photos Using Photoshop - Video Tutorial
January 04, 2012
In this week’s free video, Deke uses Photoshop to remove people from a wedding photo. Now that may sound harsh, but sometimes you just want to pretend that the camera captured just the happy couple, and not the whole crowd. (OK, some of you may want to remove people from your life altogether, but that’s beyond the power of Photoshop.)

While Photoshop CS5′s Content-Aware Fill is designed to fill in spaces where undesired objects reside in a photo, it doesn’t always work exactly the way you intend. The process Deke demonstrates here allows you to get around one of the limitations of Content-Aware Fill, namely that it fills your voids with information from the entire photograph. If you were to simply select the unwanted guests and try to fill them in, Content-Aware Fill would sample the areas that include the very people we’re trying to remove, which in this circumstance, would also make a duplicate of Mary’s head (which would probably leave Billy confused when it came time to kiss the bride). So, the trick to achieving good results on this project is to use Content-Aware Fill to create a new layer composed entirely of foliage. Then you can put the masked couple back on top of the purged background.
By the end of this free video Deke will show you how to arrive here, with a nice leafy background devoid of interlopers, but Mary’s head in need of some restoration:

Next, in this week’s two member-exclusive Deke’s Techniques videos—Masking people back into a photo and Hand-painting a mask—members of the lynda.com Online Training Library® will see how Deke eventually restores Mary to her full bridal glory. It takes some planning and patience, but eventually Mary and Billy are able to begin their lives together sans onlookers—at least in this final result:

You can get a free 7-day trial to the lynda.com Online Training Library. A credit card is required to ensure uninterrupted access to lynda.com, if you choose to remain a member after your free trial ends. There is no long-term commitment required, and you can cancel any time. After signing up for the free 7-day trial to the lynda.com Online Training Library you'll gain access to over 60,000 video tutorials instantly. Subscriptions to the lynda.com Online Training Library provide anytime access to tens of thousands of video tutorials covering Photoshop, Illustrator, Dreamweaver, web design, digital imaging, 3D, digital video, animation, and many other topics. View free video clips.
posted by Jennifer Apple | permalink | RSS feed | bookmark | comment | twitter
![]()
7 Free Scratchy Grunge Brushes From Bittbox
January 02, 2012
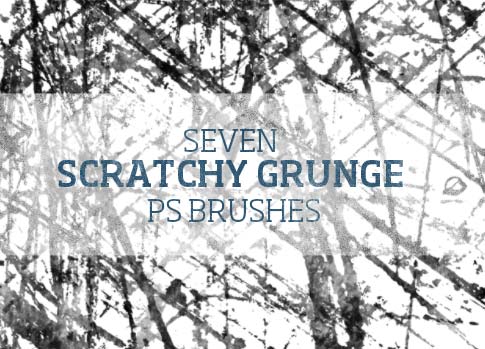
From Bittbox, 7 free scratchy grunge brushes: These brushes come from an interesting source, microscopic photos of some hand-scratched 35mm film. Then I grunged them up a bit in Photoshop. Each one is 2500×1800.
posted by Jennifer Apple | permalink | RSS feed | bookmark | comment | twitter
![]()
The Photoshop Blog - Earlier Posts
![]() The Photoshop Blog offers the latest Photoshop news and software updates, Photoshop tips and tutorials, and random thoughts from graphic artist and Photoshop expert Jennifer Apple.
The Photoshop Blog offers the latest Photoshop news and software updates, Photoshop tips and tutorials, and random thoughts from graphic artist and Photoshop expert Jennifer Apple.
PHOTOSHOP NEWS — DECEMBER 2011
33- Free Video Tutorial - How To Create A Starburst In Photoshop
25- Topaz Photoshop Plugins Bundle - 30% Discount - Save $90
24- Photoshop Tips - Easy-To-Do Film Effects
23- Get 5 Free Stained Paper Textures From Bittbox
22- Set Of 5 Free Bokeh Brushes For Photoshop
21- Assorted Free Textures From Bittbox
20 - How To Create A Stained Gass Effect In Photoshop - Video Tutorial
19- Get US$100 off Adobe Photoshop Lightroom - Starts Monday December 19th, Stops January 3rd 2012
18- 5 Free Ink SPlatter Brushes For Photoshop
17- Nik Software Creative Efex Collection Software Bundle - Get 15% Off
16- Topaz Lens Effects 1.2 – Low Intro Price, $29.99 - Free Upgrade
15- Media Lab Releases SiteGrinder 3.5
14- Free Video Tutorials - Photoshop Black-and-White Workshop
13- Creating Masks Using Photoshop Quick Selection And Magic Wand Tools
12- Lightroom 3.6 And Camera Raw 6.6 Now Available
11- Free Snow Flakes Photoshop Brush Set - 10 Free Snow Images
10- How To Create HDR Effects Using Photoshop Layers
09- Receive 10% Off On Select Adobe Products In the North America Online Store
08- Six Free Antique Postcard Photoshop Brushes
07- Auto FX Photoshop Plugins - 20% Off Coupon Code - Get The Bundle For Big Savings
06- Adobe UK Store December Specials - 30% Off Lightroom
05- How To Create An Indiana Jones Text Effect In Photoshop
04- Free Subtle Blue Grunge Textures From Bittbox
03- 4 Free Photoshop Videos - Sharpening In Photoshop And Lightroom
02- Photoshop Quick Tip - Using Notes In Photoshop
01- How To Create A Retro Light Leak Effect In Photoshop
See Earlier Posts From The Photoshop Blog - DECEMBER 2011.
![]()
Exclusive 15% Discount On All Topaz Plugins - Use Coupon Code PHOTOSHOPSUPPORT - Includes Bundles And Upgrades
 Enter our exclusive discount coupon code PHOTOSHOPSUPPORT during the checkout process at Topaz Labs for an instant 15% discount on any Topaz product, including bundle deals and upgrades.
Topaz Labs Photoshop plug-ins are specifically designed to expand a photographer's creative toolbox by harnessing powerful image technology developments.
Photographers everywhere are now taking advantage of the creative exposure effects, artistic simplification, unique edge manipulation, and top-of-the-line noise reduction offered in Topaz products. The Topaz Photoshop Bundle includes the following Topaz plugins:
Topaz Adjust optimizes image exposure, color, and detail strength for stunning image results.
 Topaz DeNoise offers a complete noise reduction solution that removes far more noise and preserves far more detail than other solutions.
Topaz Detail gives full control over all aspects of detail manipulation and micro-contrast adjustment without creating any edge artifacts or halos.
Topaz Simplify provides creative simplification, art effects, and line accentuation for easy one-of-a-kind art.
Topaz Clean integrates unique smoothing capabilities with stylized detail manipulation to add refreshing flair to photos.
Topaz ReMask quickly creates detailed masks and extractions from even the most difficult images.
Topaz DeJPEG drastically improves the quality of web images and other compressed photos.
READ ABOUT THE TOPAZ BUNDLE OFFER.
![]()
Exclusive onOne Software 10% Instant Discount Coupon
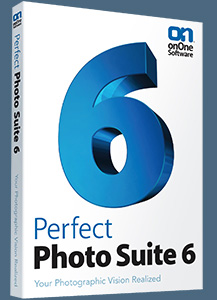 Enter our exclusive discount coupon code - PSSPPT06 - during the checkout process at onOne Software for an instant 10% discount on any onOne product. This includes Genuine Fractals and their amazing Photoshop Plug-In Suite.
onOne Software's Plug-In Suite combines full versions of six essential software tools — Genuine Fractals Print Pro, PhotoTools Pro, PhotoFrame Pro, Mask Pro, PhotoTune and FocalPoint — an affordable combination that includes everything a photographer needs to make their images look their best.
Why do you need plugins? Photoshop is an amazing image editing application that has forever changed graphic design and digital photographic editing, but like any tool, if you don't have time to fully learn it, you can't get the most out of it.
Plugins for Photoshop allow you to either do something that you cannot do with the features included in Photoshop or they allow you to do something easier, faster or better than you could do in Photoshop without the plug-in. Whether it is color correction, resizing, masking or creating an effect, you can find a Photoshop plug-in that can help you be more efficient with your time.
![]()
Photoshop Masking Plugin Fluid Mask 3 - Price Drop And Exclusive $20 Instant Discount - Now Only $129
 The 4 1/2 out of 5 star review of Fluid Mask 3 at MacWorld begins by saying that this "Photoshop plug-in takes the pain out of extracting backgrounds," and goes on to recommend the latest version, stating that "Fluid Mask 3.0.2 is a very effective tool for separating objects from their backgrounds. It offers a variety of useful features for tackling almost any difficult image, from wispy hair to complex foliage. Online video tutorials and live training sessions help ease the learning curve."
Our friends at Vertus, the makers of Fluid Mask 3 Photoshop Plugin, have set up a special exclusive discount for PhotoshopSupport.com. Buy now for only $129. Just follow this discount link and instantly get $20 off your purchase of Fluid Mask 3.
Fluid Mask 3 is designed for photographers, image editors, graphic designers and all those who take digital image editing seriously. In a streamlined interface and workflow, Fluid Mask 3 instantly shows key edges in the image and provides comprehensive easy to use tools that work with difficult-to-see edges and tricky areas like trees & lattices. Fluid Mask will also preserve all-important edge information for a professional quality cut out. Simply follow this discount link and pay only $129 for Fluid Mask 3.
![]()
Special Deals On Nik Software Photoshop Plugins - Viveza, Complete Collection - 15% DISCOUNT COUPONS
Follow the links below and the 15% discount will be AUTOMATICALLY APPLIED to any purchase you make, or use our exclusive discount coupon code - NIKPSS - during the checkout process at Nik Software for the instant 15% discount. This exclusive discount coupon code can be applied to all the latest Nik Software Photoshop plugins, including Silver Efex Pro, Color Efex Pro, Viveza, HDR Efex Pro, and The Complete Collection (big savings).
Nik Software The Complete Collection (Plugins Bundle)
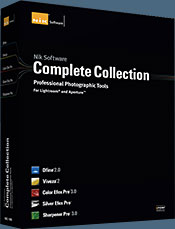 The Complete Collection includes all of Nik Software's latest award-winning plug-in software titles for Photoshop, Lightroom and Aperture including: Dfine, Viveza, HDR Efex Pro, Color Efex Pro, Silver Efex Pro, and Sharpener Pro.
The Complete Collection features products with Nik Software's patented U Point® technology, giving photographers the most powerful tools for precise and natural photographic enhancements and corrections without the need for complicated selections or layer masks.
The Complete Collection is offered in two editions: (1) the Complete Collection Ultimate Edition includes support for every plug-in to work in Photoshop, Lightroom, and Aperture, and offers Color Efex Pro 3.0 to work in Capture NX 2 as well. (2) the Complete Collection for Lightroom and Aperture includes support for each plug-in to only work in Lightroom and Aperture. Click here to compare both editions
Color Efex Pro 3.0
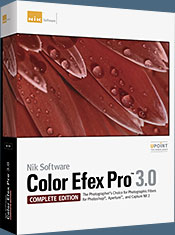 52 photographic filters with over 250 effects for professional quality images.
Completely Original. Completely Indispensable.
Nik Software Color Efex Pro 3.0 filters are the leading photographic filters for digital photography. The award-winning Color Efex Pro 3.0 filters are widely used by many of today's professional photographers around the world to save time and get professional level results. Whether you choose the Complete Edition, Select Edition, or Standard Edition, you’ll get traditional and stylizing filters that offer virtually endless possibilities to enhance and transform images quickly and easily.
Patented U Point technology provides the ultimate control to selectively apply enhancements without the need for any complicated masks, layers or selections. Control color, light and tonality in your images and create unique enhancements with professional results. With 52 filters and over 250 effects found in Color Efex Pro 3.0, you can perform high quality retouching, color correction, and endless creative enhancements to your photographs. Download a free Trial version.
Viveza
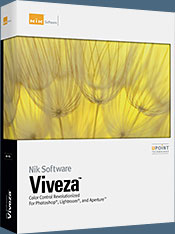 The most powerful tool to selectively control color and light in photographic images without the need for complicated selections or layer masks.
Two of the most important factors in creating great photography are color and light. Mastering the art of selectively correcting or enhancing each of these is now possible for every photographer without the need for complicated masks or selections, or expert-level knowledge of Photoshop. Integrating award-winning U Point technology, Viveza is the most powerful and precise tool available to control light and color in photographic images.
U Point powered Color Control Points, placed directly on colors or objects in an image (such as sky, skin, grass, etc.), reveal easy-to-use controls that photographers can use to quickly adjust brightness, contrast or color in a fraction of the time needed by other tools. With Viveza you’ll spend more time shooting photographs and save hours of image editing. Download a free Trial version.
Silver Efex Pro
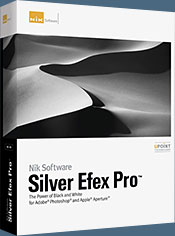 Complete power and control to create professional quality black and white images in one convenient tool.
Silver Efex Pro from Nik Software is the most powerful tool for creating professional quality black and white images from your photographs. For the first time, all the advanced power and control required for professional results have been brought together in one convenient tool.
Featuring Nik Software’s patented U Point technology to selectively control the tonality and contrast of the image, Silver Efex Pro includes advanced imaging algorithms to protect against unwanted artifacts, a comprehensive collection of emulated black and white film types, a variable toning selector for adding traditional toning techniques, over 20 one-click preset styles, and a state-of-the-art grain reproduction engine that help produce the highest quality black and white images possible from your color images while providing more freedom to experiment. Download a free Trial version to use Silver Efex Pro.
HDR Efex Pro
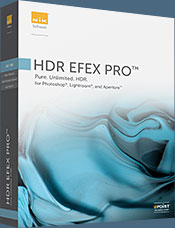 Experience the power, control, and creative expression of HDR. This all in one toolkit lets you achieve your best HDR images ever, ranging from the realistic to artistic.
HDR Efex Pro is the essential new standard for creating amazingly high quality realistic to artistic HDR images with a revolutionary new all-in-one workflow. HDR Efex Pro includes a vast selection of one-click visual presets for incredibly fast results, advanced tone mapping algorithms, powerful and detailed HDR controls, and patented U Point® technology
Follow our discount coupon links, or enter our exclusive discount coupon code - NIKPSS - during the checkout process at Nik Software for the instant 15% discount. This exclusive discount coupon code can be applied to all the latest Nik Software Photoshop plugins, including Silver Efex Pro, Color Efex Pro, Viveza, HDR Efex Pro, and The Complete Collection (big savings).
![]()


