![]()
![]() Try before you buy. Download any Adobe product for a free 30 day trial.
Try before you buy. Download any Adobe product for a free 30 day trial.
![]()
![]() The Photoshop Blog offers the latest Photoshop news and software updates, Photoshop tips and tutorials, and random thoughts from graphic artist and Photoshop expert Jennifer Apple.
The Photoshop Blog offers the latest Photoshop news and software updates, Photoshop tips and tutorials, and random thoughts from graphic artist and Photoshop expert Jennifer Apple.
![]()
5 Free Photoshop Brushes - Plywood Brushes
March 31, 2012
Here's a new set of free Photoshop brushes from Bittbox: 5 plywood brushes, each with a maximum resolution of 2500×2500. (All textures or downloadable files on Bittbox.com are free for personal use. For commercial use they require a usage fee.)

Adobe Photoshop CS6 & Photoshop CS6 Extended
 Photoshop CS6 Extended integrates the state-of-the-art editing, compositing, and graphic design capabilities of Adobe Photoshop CS6, and features advanced tools for 3D design, image and video editing.
Photoshop CS6 and Photoshop CS6 Extended can be purchased as stand-alone applications, as components of the Adobe Creative Suite 6 family, or as part of Adobe's new Creative Cloud offering.
Adobe Photoshop CS6, Adobe Photoshop CS6 Extended, Adobe Creative Suite 6 editions and Adobe Creative Cloud can be ordered now. Upgrade pricing is also available to eligible customers.
Download
the 30-day Photoshop CS6 free trial.
See our Photoshop CS6 Tutorials Page for a collection of free Photoshop CS6 tutorials and Photoshop CS6 videos.
Adobe Deals & Special Coupon Offers
Visit the Adobe Coupons & Special Offers Page to see the latest deals from Adobe. Find upgrade options at the Adobe Store. Get up to 80% off at the Adobe Education Store. You can also download a free 30 day trial of any Adobe product.
posted by Jennifer Apple | facebook | RSS feed | bookmark | comment | twitter
![]()
How To Create A Star Wars–style Hologram Effect In Photoshop - HD Video
March 29, 2012
 In this free video tutorial, Deke uses a variety of Photoshop effects to turn a couple of unsuspecting rental car agents from this world into rental car agents from a galaxy far, far away.
The eerie Star Wars hologram effect made famous by Princess Leia can work nicely on everyday substantive earthlings with the right combination of a custom pattern, a Displacement Map, and some choice layer effects.
Imagine if your next rental car included the two regular people (on left) waiting virtually (on right) to acclimate you to the cool, but unfamiliar, controls of your strange vehicle.

The effect starts by saturating an ordinary pair of humans with some old-school, horizontal TV static via the application of a simple custom pattern (Deke shows you how to make the pattern in the free video). Then the shadows of the humans are given faux-holographic substance via the application of a Displacement Map. To finish the effect, Deke applies a few layer effects and shows you how to customize your holograph based on whether it’ll appear digitally or in print.
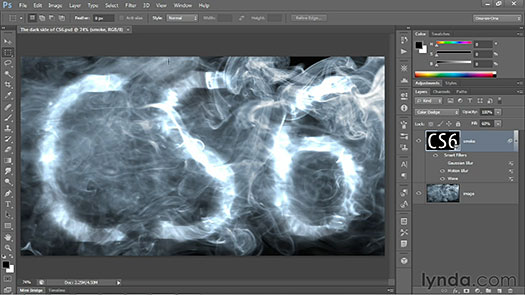
On the note of cool but unfamiliar controls, you may notice that in this week’s Deke’s Techniques movie Deke is using the new dark user-interface brought to you by Photoshop CS6 (available as a free download from Adobe Labs). While Deke’s technique will work just fine in CS5, if you’d like to try Photoshop CS6 and experience the dark interface for yourself, you can download the free Photoshop CS6 public beta for a limited time from Adobe Labs. After you have the CS6 beta, if you’d like to hear more about how it works, lynda.com has made Deke’s Photoshop CS6 Beta Preview course free to everyone for a limited time as well.
Get Photoshop CS6 Beta For Free At Adobe Labs
Adobe has announced that Adobe Photoshop CS6 beta, a preview of what's to come in the next release of Photoshop, is available as a free download from Adobe Labs.
![]()
 Find Us On Facebook, Follow Us On Twitter
Visit PhotoshopSupport on Facebook. Follow us on Twitter.
Adobe Deals & Special Coupon Offers
Visit the Adobe Coupons & Special Offers Page to see the latest deals from Adobe. Find upgrade options at the Adobe Store. Get up to 80% off at the Adobe Education Store. Find out about monthly or annual subscriptions. You can also download a free 30 day trial of any Adobe CS5 product.
posted by Jennifer Apple | facebook | RSS feed | bookmark | comment | twitter
![]()
5 Free Black And White Grunge Textures
March 29, 2012
From Bittbox, a nice set of 5 black and white grunge textures. These have a nice, complex pattern to them. All textures or downloadable files on Bittbox.com are free for personal use. For commercial use they require a usage fee.

Get Photoshop CS6 Beta For Free At Adobe Labs
Adobe has announced that Adobe Photoshop CS6 beta, a preview of what's to come in the next release of Photoshop, is available as a free download from Adobe Labs.

![]()
 Find Us On Facebook, Follow Us On Twitter
Visit PhotoshopSupport on Facebook. Follow us on Twitter.
Adobe Deals & Special Coupon Offers
Visit the Adobe Coupons & Special Offers Page to see the latest deals from Adobe. Find upgrade options at the Adobe Store. Get up to 80% off at the Adobe Education Store. Find out about monthly or annual subscriptions. You can also download a free 30 day trial of any Adobe CS5 product.
posted by Jennifer Apple | facebook | RSS feed | bookmark | comment | twitter
![]()
Adaptive Wide Angle Filter In Photoshop CS6 Renders Perfect Architectural Lines - Tutorial
March 28, 2012
Here's a step-by-step tutorial from Mark Galer, ADAPTIVE WIDE ANGLE: New to Photoshop CS6. It shows how the new Adaptive Wide Angle filter in Photoshop CS6 can be used to render perfect architectural lines.
In the image below if I had moved any further back to get everything in a single shot I would have included the power lines, telephone lines and tramlines that are just over my shoulder. Capturing a building so close, however, will inevitably lead to aggressive converging verticals due to a combination of the wide-angle lens and the angle of view required to capture the top of the structure.

If you allow Photoshop’s Photomerge feature to take full automated control of the stitching you will end up with aggressive converging verticals. You can achieve a more professional result by intercepting the automated process to align and blend the images as separate tasks.
Prior to stitching, lens distortions can be easily removed in ACR using the Lens Corrections panel but when the wide-angle images are stitched together and distortions become problematic we can now utilize the power and performance of the new Adaptive Wide Angle filter in Photoshop CS6 to render perfect architectural lines.

Read the full tutorial.
Get Photoshop CS6 Beta For Free At Adobe Labs
Adobe has announced that Adobe Photoshop CS6 beta, a preview of what's to come in the next release of Photoshop, is available as a free download from Adobe Labs.

![]()
 Find Us On Facebook, Follow Us On Twitter
Visit PhotoshopSupport on Facebook. Follow us on Twitter.
Adobe Deals & Special Coupon Offers
Visit the Adobe Coupons & Special Offers Page to see the latest deals from Adobe. Find upgrade options at the Adobe Store. Get up to 80% off at the Adobe Education Store. Find out about monthly or annual subscriptions. You can also download a free 30 day trial of any Adobe CS5 product.
posted by Jennifer Apple | facebook | RSS feed | bookmark | comment | twitter
![]()
Photoshop CS6 Insights - 4 Videos On New Features
March 27, 2012
 From lynda.com: Adobe made a beta version of Photoshop CS6 available to everyone, providing an opportunity for you to download and check out the new version of the application for free. The CS6 version of Photoshop includes mammoth updates to the program, and to make sure you get the most from your free test-drive, lynda.com has made our new Photoshop CS6 Beta Preview course, authored by Deke McClelland, completely free to everyone. (You can find it here, a whole two hours plus worth of videos.)
This Photoshop update has something for everyone from photographers, to print, web, and interaction designers, to video and 3D artists. The list of new features is impressive, bordering on overwhelming. Which new feature will be the most significant for you? Depends on your point of view. To help you decide where to look first during this free trial period, we quizzed some of the lynda.com resident Photoshop experts for their initial reactions:
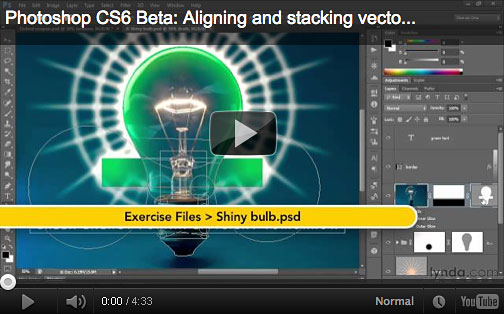
Michael Ninness, lynda.com VP of Product and Content, and veteran lynda.com author: “I’d say I am most interested in all the changes they’ve made to the Shape tools attempting to provide a real object-based design metaphor.” If you’d like to see what Michael is talking about in action, check out this video:
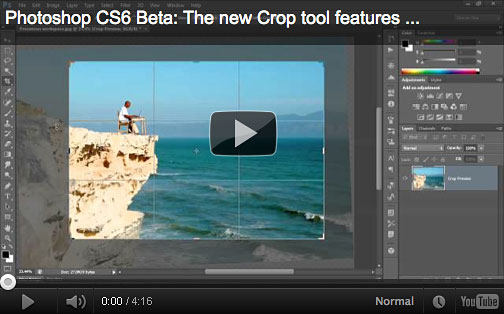
Jim Heid, content manager for the lynda.com Photography segment: “It isn’t as glitzy as the Blur Gallery, but Photoshop CS6′s revamped Crop tool is one of those improvements that will make my photographic life better. One Crop tool enhancement in particular stands out: the tool is non-destructive. If you change your mind about a crop after you’ve been working on an image, just activate the Crop tool again and recrop. Unlike previous Photoshop versions, CS6 doesn’t discard pixels that you cropped out. It’s a bit more analogous to how cropping works in Lightroom, and it gives you more freedom to experiment.” Here’s a video look at the new improved Crop tool from the Photoshop CS6 Beta Preview course:
Nigel French, author of the lynda.com Photoshop for Designers series: “Loving the new Camera RAW process. The new sliders make more sense and the results are discernibly better than previous versions. The improvements to the Graduated Filter are especially welcomed.”
James Fritz, content manager for the Design segment at lynda.com: “As a designer, I am happy to see that with the release of Photoshop CS6 graphic designers are finally getting some love. With the addition of new vector layers and layer filtering, comping up web sites, posters, and other complicated designs is easier than ever. As usually is the case, the little ‘just do it’ updates have my favorite new feature—the ability to insert Lorum Ipsum text.”
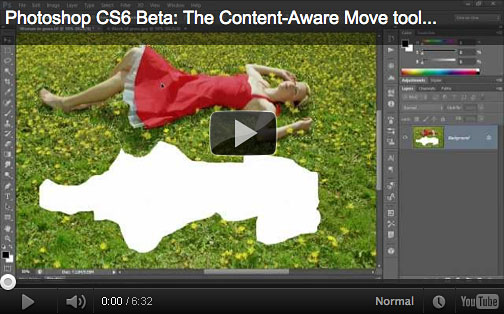
Deke McClelland, lynda.com author of the free Photoshop CS6 Beta Preview course and Photoshop One-on-One series: “Content-Aware Move, which allows you to select an object in your image and move it somewhere else while filling in the old background works extremely well. You’ll still need to have the refinement features at the ready, but Content-Aware Move gets you most of the way there.”
Ben Long, author of the lynda.com Foundations of Photography series: “The Blur Gallery is cool. In general, if I want shallow depth of field (one of the things the Blur Gallery lets you simulate) I prefer to get it by using a fast lens and a wide aperture. But if I don’t have a fast lens with me—or if decide that I’d like a shot to have shallower depth of field than what I originally captured—it’s nice to have the option. I’ve also found that the Blur Gallery delivers better results than third-party plug-ins that provide similar features.”
Justin Seeley, lynda.com staff author: “My favorite new feature is the auto-saving. Photoshop CS6 automatically saves a temporary file as you work, so that if the program crashes, you can recover easily. This will be killer for new and old users alike. I’m always flooded with emails from people asking if I know any magic trick to recover unsaved work they’ve lost in a power outage or software crash. Now they don’t have to endure that!”
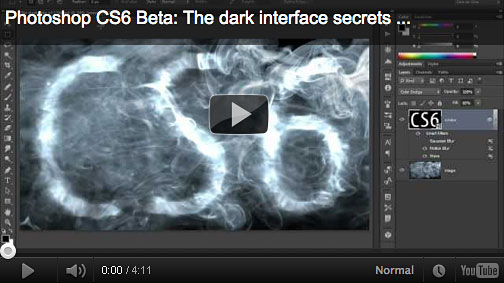
Not surprisingly the new dark interface (see video below) is the most obvious change and the one mentioned most often by our esteemed panel. By default Photoshop CS6 will use a dark gray interface, providing a vastly different look from previous versions. You can of course change back to a more familiar lighter interface by resetting the preferences, as Nigel did: “The first thing I did when I got the beta was make the interface look like what I was used to. But upon reflection, and with some time to get acclimatized, I like the new, lean, mean dark interface.” Deke, who has been using the light interface for over 20 years notes, “Surprisingly, I’m finding the dark interface my preference. It’s much less distracting, and lets me focus on just the image at hand.”
If your interest in the new Photoshop is piqued, you can download the beta for free from Adobe and pair it up with our free Photoshop CS6 Beta course. For further exploration, in the coming months, lynda.com will also be creating new courses that provide in-depth, specific information on Photoshop CS6, from a variety of perspectives.
Get Photoshop CS6 Beta For Free At Adobe Labs
Adobe has announced that Adobe Photoshop CS6 beta, a preview of what's to come in the next release of Photoshop, is available as a free download from Adobe Labs.

![]()
 Find Us On Facebook, Follow Us On Twitter
Visit PhotoshopSupport on Facebook. Follow us on Twitter.
Adobe Deals & Special Coupon Offers
Visit the Adobe Coupons & Special Offers Page to see the latest deals from Adobe. Find upgrade options at the Adobe Store. Get up to 80% off at the Adobe Education Store. Find out about monthly or annual subscriptions. You can also download a free 30 day trial of any Adobe CS5 product.
posted by Jennifer Apple | facebook | RSS feed | bookmark | comment | twitter
![]()
Importing Photos In Adobe Photoshop Lightroom 4 - Sample Chapter From The Complete Guide for Photographers
March 27, 2012
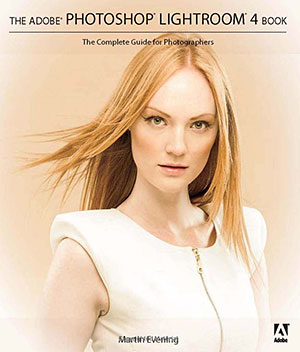 In this excerpt (16 pages) from The Adobe Photoshop Lightroom 4 Book, Martin Evening shows how the Lightroom import procedure provides an adaptable import workflow, one that can be streamlined through the use of Import presets, as well as offering the ability to import files directly from the camera using a tethered shooting setup.(download a free 30-day trial of the new Lightroom 4.) From the intro:
Lightroom is essentially a catalog management program and raw image processor combined into one. It is important to appreciate how Lightroom differs from browser programs such as Adobe Bridge, where you simply point Bridge at a folder to inspect the contents. The browser method is really suited for those times where you need the freedom to search everything that’s on your computer. The downside of this approach is that you first have to know where to look in order to find what you are searching for. Plus, you’ll be shown all the files that are contained in each folder. If there are also lots of non-image files to sort through this can make image browsing quite tricky.
Lightroom is different. With Lightroom you must import your photos first, and in doing so make a conscious decision as to which photos you want to have added to the catalog. As you will come to learn in this chapter, the Lightroom import procedure provides an adaptable import workflow, one that can be streamlined through the use of Import presets, as well as offering the ability to import files directly from the camera using a tethered shooting setup.
Read the full 16-page article: Martin Evening on Importing Photos in Adobe Photoshop Lightroom 4.
Adobe Photoshop Lightroom 4 Book: The Complete Guide for Photographers is a completely updated bestseller that was also written with photographers in mind. Author Martin Evening describes features in Lightroom 4 in detail from a photographer's perspective. As an established commercial and fashion photographer, Martin knows firsthand what photographers need for an efficient workflow.
Get Photoshop CS6 Beta For Free At Adobe Labs
Adobe has announced that Adobe Photoshop CS6 beta, a preview of what's to come in the next release of Photoshop, is available as a free download from Adobe Labs.

![]()
 Find Us On Facebook, Follow Us On Twitter
Visit PhotoshopSupport on Facebook. Follow us on Twitter.
Adobe Deals & Special Coupon Offers
Visit the Adobe Coupons & Special Offers Page to see the latest deals from Adobe. Find upgrade options at the Adobe Store. Get up to 80% off at the Adobe Education Store. Find out about monthly or annual subscriptions. You can also download a free 30 day trial of any Adobe CS5 product.
posted by Jennifer Apple | facebook | RSS feed | bookmark | comment | twitter
![]()
9 More Free Wacom Tablet Training Video- Plus 20% Off Coupon
March 27, 2012
 Below are 9 new free videos from the Wacom MasterClass Complete Collection. (You can see the first 9 here.) If you choose to purchase this product, make sure to use our exclusive discount coupon code Wacom20 for an instant 20% discount, which brings you 10 hours of expert video training for only $79.99.
This exceptional value includes all of Volumes 1–3 of the Wacom MasterClass collection, including lessons from artists Angie Taylor, Steve Caplin, Daniel Lieske, and Uli Staiger. In addition to a basic course covering the tablet’s tools and settings, you get training on everything from beauty retouching and painting in Photoshop to drawing in Illustrator and motion design with After Effects.
Each class features lessons with picture-in-picture live footage of the artist working with their pen and tablet, enabling you to see and learn from their techniques up close.
Vol.1: Beauty Retouching Major Adjustments Liquify Filter: The Eye
The left eye on our model looks too small and too far away from the nose, producing an unbalanced appearance. The Liquify filter can correct this problem too, as shown in this video.
Vol.1: Optimizing Your Architectural and Landscape Images — Panoramas and the Vanishing Point Filter — Patching with Vanishing Point
This video looks at the Vanishing Point filter. Everyone who works with architectural photography needs to know how to use this filter, which is the single most useful tool for fixing architectural blemishes.
Vol.1: Lightroom Crash Course Spot Removal
This video looks at spot removal in Lightroom, which is a curious process that involves defining a circular area to be patched and then specifying the source location for the patch. The end results, though, are worth the trouble.
Vol.2: Drawing in Illustrator Building the Human Form — Customizing Shapes with the Reshape Tools
The Reshape tools can be used to reshape paths and customize shapes with your Wacom pen. In this video you'll try them out, using the Warp, Pucker, Bloat, and Wrinkle tools to give your artwork your own unique style.
Vol.2: Drawing in Illustrator — Editing Shapes and Adding Details — Creating Textures and Patterns with the Symbol Sprayer Tool
This video looks at the Symbol Sprayer, which you can use in to add a large number of identical objects to the artwork at one time. Once they are created you can update them as a group or break them apart so they behave like ordinary objects.
Vol.2: Painter Crash Course — Blocking in with the Digital Watercolor Brush
Using the sketch as a guide, in this video we'll block in the big shapes of our painting using the Digital Watercolor brush.
Vol. 3: Motion Design with After Effects Painting Techniques — Basic Drawing and Painting in After Effects
Every application is different and has its own idiosyncrasies when it comes to drawing and painting. In this lesson you'll experiment with various brushes and settings so that you become comfortable painting in After Effects.
Vol.3: Motion Design with After Effects Painting Techniques — Creating Reveals with the Eraser Tool
Hand-painted reveals can produce really nice, organic-looking animations. In this tutorial you'll learn how to create reveals over time using the Eraser tool.
Vol.3: Zbrush Crash Course — Unified Skin
Before using polysculpting tools, we need to turn our sketch sphere model into a polygon mesh with the Unified Skin panel. This is a simple process, as you'll see in this video.
Get Photoshop CS6 Beta For Free At Adobe Labs
Adobe has announced that Adobe Photoshop CS6 beta, a preview of what's to come in the next release of Photoshop, is available as a free download from Adobe Labs.

![]()
 Find Us On Facebook, Follow Us On Twitter
Visit PhotoshopSupport on Facebook. Follow us on Twitter.
Adobe Deals & Special Coupon Offers
Visit the Adobe Coupons & Special Offers Page to see the latest deals from Adobe. Find upgrade options at the Adobe Store. Get up to 80% off at the Adobe Education Store. Find out about monthly or annual subscriptions. You can also download a free 30 day trial of any Adobe CS5 product.
posted by Jennifer Apple | facebook | RSS feed | bookmark | comment | twitter
![]()
Buy CS5.5 Now And Get CS6 At No Additional Cost
March 26, 2012
 Adobe has just announced an amazing offer. From March 26 until May 6 if you purchase CS5.5 you will automatically be eligible to receive CS6 at no additional cost. (See pricing at the North America Store, or the Euro Stores). Upgrade paths may be limited on release of CS6, so this is a way to insure you are on the least expensive path if you are one or more versions behind.
This is a huge deal considering all the buzz that's happening with the Photoshop CS6 Beta right now (get Photoshop CS6 beta from Adobe Labs for free). Anyone who doesn’t have the current CS5.5 product can now upgrade and be guaranteed a free version of CS6 next month.
All you need to do is purchase the Full or Upgrade version of CS5.5 from eligible previous versions and you will receive the complimentary upgrade for CS6. This offer is good at the Adobe North America Store, and the Adobe Euro Stores (Austria, Belgium, Czech Republic, Denmark, Finland, France, Germany, Ireland, Italy, Luxembourg, Netherlands, Norway, Poland, Portugal, South Africa, Spain, Sweden, Switzerland, Turkey, and The UK). Offer ends May 6, 2012.
posted by Jennifer Apple | facebook | RSS feed | bookmark | comment | twitter
![]()
Photoshop CS6 Beta - Top 10 Features - Tim Grey 30 Minute Video
March 26, 2012
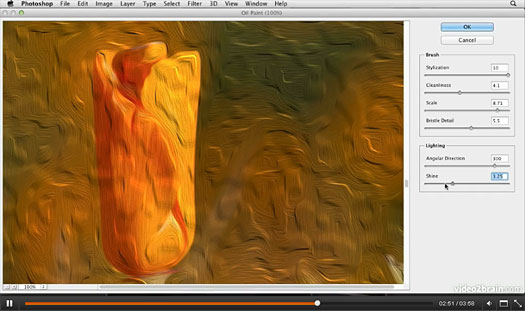
 In this free 30 minute workshop video Tim Grey shares his top 10 favorite new and enhanced features in the public beta version of Photoshop CS6 (get Photoshop CS6 beta from Adobe for free). In addition to updates to the various panels and tools, including the Crop and Patch tools, you’ll learn about the new Paragraph and Character Styles panels, new auto adjustments, the new Perspective Crop and Content-Aware Move tools, and more.
10 - Paragraph and Character Styles 04:57
9 - Panel Updates 01:42
8 - Auto Brightness/Contrast 01:32
7 - Auto Curves and Levels 01:40
6 - Perspective Crop Tool 03:10
5 - Sample Size for Magic Wand 03:18
4 - Crop Tool Overhaul 03:45
3 - Content-Aware Move Tool 04:04
2 - Improved Patch Tool 02:52
1 - Oil Paint Filter 03:59
posted by Jennifer Apple | facebook | RSS feed | bookmark | comment | twitter
![]()
Wacom MasterClass Video Training - 9 Free Videos - 20% Discount Code
March 24, 2012
 Below are 9 free videos from the Wacom MasterClass Complete Collection. If you choose to purchase this product, make sure to use our exclusive discount coupon code Wacom20 for an instant 20% discount, which brings you 10 hours of expert video training for only $79.99.
This exceptional value includes all of Volumes 1–3 of the Wacom MasterClass collection, including lessons from artists Angie Taylor, Steve Caplin, Daniel Lieske, and Uli Staiger. In addition to a basic course covering the tablet’s tools and settings, you get training on everything from beauty retouching and painting in Photoshop to drawing in Illustrator and motion design with After Effects.
Each class features lessons with picture-in-picture live footage of the artist working with their pen and tablet, enabling you to see and learn from their techniques up close.
Basic Settings - Installing Your Tablet - Installing the Wireless Tablet
In this lesson you'll see how to install the Wacom tablet Intuos4 and connect it to your computer via Bluetooth. You'll also get some tips on optimizing the battery life of your tablet.
Basic Settings - Working with Pens - Pressure Sensitivity
In this tutorial you'll learn about the pressure sensitivity of the pen and how you can adjust its settings to suit the way you work in Photoshop.
Basic Settings - Working with Pens - Fine Tuning and Tilt Sensitivity
In this video you'll see how to use the Wacom Control Panel to fine-tune the click threshold and adjust tilt sensitivity to work with the new Art Pen.
Vol.1: Beauty Retouching - Removing Skin Blemishes - Spot Healing Tool: More Blemishes
A few small scars and wrinkles detract from the model's overall appearance, so in this video we'll get rid of them using the Spot Healing tool.
Vol.2: Drawing and Painting in Photoshop - Preliminaries - Warming Up with Scribbles
In this lesson we'll do some casual scribbling to get comfortable in the workspace and warm up the creative part of the brain.
Vol.2: Creating the Planet - Creating the Planet - Refining the Clouds
We'll nondestructively refine the appearance of our clouds in this video by adding a layer mask and an adjustment layer.
Vol. 3: 3D with Photoshop Crash Course - Creating a Complex Object from a Grayscale Image
You can create a new 3D object just by painting a 2D image – Photoshop uses the luminance information to build up a great landscape-like object! You'll see how it works in this video.
Vol.3: Motion Design with After Effects Painting Techniques - Clone Tool Basics
In this tutorial you'll learn the basics of the very powerful Clone tool. We'll also look at the options for offsetting cloned pixels in time.
Vol.3: SketchBook Pro Crash Course - Setting Everything Up - Wacom Control Panel
This video looks at the Wacom Control Panel and how to set it up. You'll get some ideas of things you might want to change, like the contents of the Radial menu and the ExpressKeys.
Wacom Intuos 5 Tablets
Wacom today announced the Intuos 5, the next generation lineup of pen tablets for professional photographers, designers and artists. Superior new features include multi-touch gesture support for intuitive input, an Express View display to facilitate an efficient workflow and wireless capabilities for convenience and comfort. Combined with Wacom’s renowned pen pressure and tilt sensitive pen, the state-of-the-art Intuos5 inspires creativity through an immersive experience.
The Intuos5, available today, comes in three models: Intuos5 touch Small ($229.95 USD), Medium ($349.95 USD) and Large ($469.95 USD).

posted by Jennifer Apple | facebook | RSS feed | bookmark | comment | twitter
![]()
How To Make Photoshop's Layer Thumbnails Larger
March 24, 2012
Here's a great tip from Topaz Labs: Larger Layer Thumbnails in Photoshop.
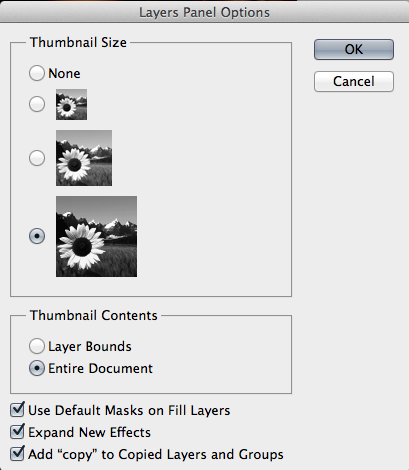
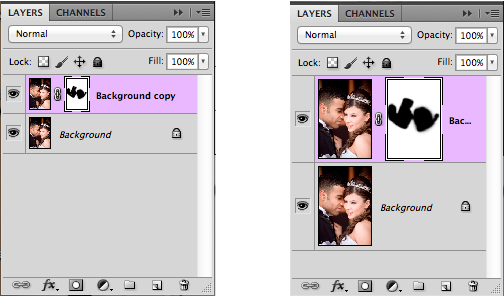
Photoshop has a lot of helpful features that go unused and unnoticed. Let’s take a quick look at how to get a better view of your layer thumbnails – this is one that I found very useful! Most of our layers palette thumbnails look like the image on the left, but did you know that you can actually adjust the size of or even remove the thumbnails (shown on right)?
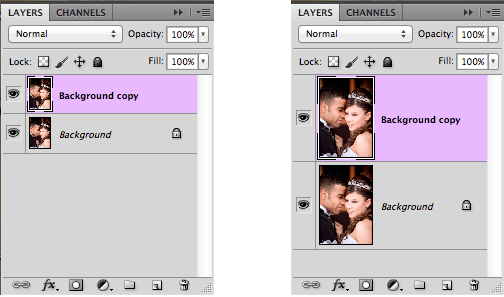
So how do you make this change in your program?
1. Go to your layers menu option

2. Select Panel Options
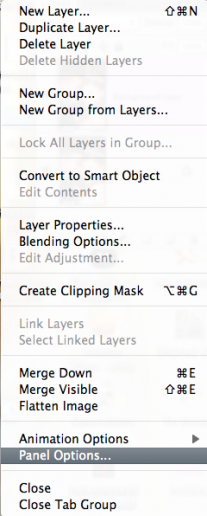
3. Under the Thumbnail Size category, select the thumbnail size of your choice and click OK
Having a larger preview can be better on the eyes and will often help when working with layer masks.
posted by Jennifer Apple | facebook | RSS feed | bookmark | comment | twitter
![]()
Adobe Lightroom 4 – The Missing FAQ PDF Version Now Available
March 24, 2012
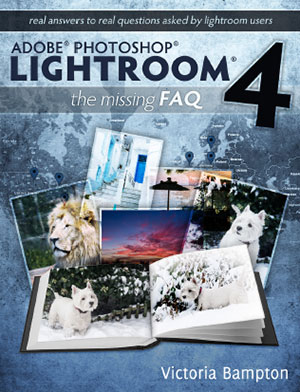 The first release of the PDF version of Adobe Lightroom 4 – The Missing FAQ is now available.
Whether you’re a new user who likes to dive straight into new software and figure it out as you go along, a more experienced user wanting to learn how to get the best out of Lightroom, or you’ve just got a burning question you’d like answered, this book is for you.
There are questions ranging from simple ones like how to import photos, to much more in-depth details about how the previews are used and how to create your own camera profiles. These are real-world answers to real questions asked by real Lightroom users. It not only covers how to do things, but also why they work the way they do.
Victoria Bampton is an Adobe Community Professional and a Certified Expert for Lightroom, and a well known name on numerous Lightroom forums, where she's always happy to lend a helping hand. The nickname 'The Lightroom Queen' came from one of those many forums, and it stuck.
posted by Jennifer Apple | facebook | RSS feed | bookmark | comment | twitter
![]()
Free Set Of Photoshop Brushes - 6 Crisp Tree Branch Brushes
March 23, 2012
From Bittbox, 6 free Photoshop brushes of tree branches. These are stark black and white images that have a good feel to them. All downloadable files on Bittbox.com are free for personal use. For commercial use they require a usage fee.

posted by Jennifer Apple | facebook | RSS feed | bookmark | comment | twitter
![]()
Julieanne Kost's Top 6 Photoshop CS6 Beta Features - HD Video
March 22, 2012
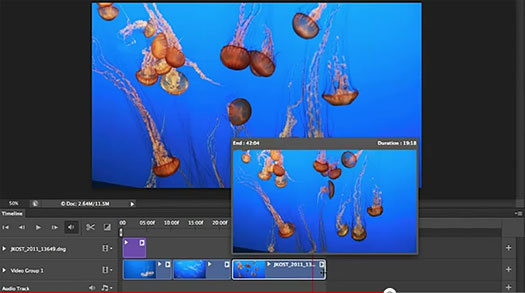
Here's a quick look at Julieanne Kost's favorite 6 features in Photoshop CS6 Beta including improved processing in Adobe Camera Raw, the intuitive new Blur Gallery, time-saving type styles, re-engineered Shape layers, powerful video editing tools, the all-new Crop tool, and auto-select interpolation. (download Photoshop CS6 beta from Adobe Labs for free.)
posted by Jennifer Apple | facebook | RSS feed | bookmark | comment | twitter
![]()
Photoshop CS6 Beta Free Video Training - 2 Hours and 30 Minutes of Photoshop CS6 Tips And Secrets
March 22, 2012
 In the first installment of lynda.com's extensive coverage of the Adobe Creative Suite 6, Deke McClelland offers a comprehensive sneak peak at the new features in the free public beta of Photoshop CS6. Adobe has announced that Adobe Photoshop CS6 beta, a preview of what's to come in the next release of the industry standard in digital imaging, is available as a free download from Adobe Labs.
This free Photoshop CS6 Beta course reveals the secrets behind the new dark interface, searchable layers, the powerful Blur Gallery, Camera Raw 7, video editing, and the Adaptive Wide Angle filter, which removes distortion from extreme wide-angle photographs and panoramas. Deke also covers the new nondestructive Crop tool, dashed strokes, paragraph and character styles, editable 3D type, and the exciting Content-Aware Move tool, which moves selections and automatically heals the backgrounds. Below the screenshot are the clips and their running times:

— The secrets of the dark interface 03m 55s
— Saving with Background Save and Auto Save 03m 22s
— Cropping with the altogether revamped Crop tool 04m 00s
— Using the consolidated Properties panel 03m 58s
— Exploring the searchable Layers panel 05m 02s
— Modifying multiple layers at a time 04m 50s
— Exploring the wide world of layer enhancements 06m 48s
— Using Content-Aware Move and Extend 06m 16s
— Using Content-Aware Patch 03m 14s
— Making powerful automatic color adjustments 06m 03s
— Exploring the brave new world of Camera Raw 7 06m 16s
— Using the new three-part Blur Gallery 08m 09s
— Working with the Adaptive Wide Angle filter 07m 07s
— Correcting wide-angle panoramas 07m 14s
— Exploring text and style enhancements 04m 48s
— Filling and stroking shape layers 04m 37s
— Aligning and stacking vector-based shapes 04m 17s
— Working with the Scripted Patterns feature 03m 32s
— Using erodible brush tips and airbrushes 05m 44s
— Working with the enhanced Liquify filter 04m 20s
— Exploring the new Oil Paint filter 04m 10s
— Selecting skin tones and faces 05m 11s
— Using the new Lighting Effects filter 06m 29s
— Editing videos in the Timeline panel 10m 16s
— Making editable 3D type 08m 08s
— Exploring 3D shadows and reflections 06m 35s
— Aligning and distributing meshes in 3D
posted by Jennifer Apple | facebook | RSS feed | bookmark | comment | twitter
![]()
Get Photoshop CS6 Beta For Free At Adobe Labs
March 22, 2012
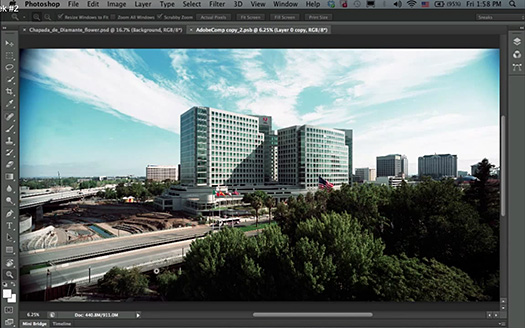
Adobe has announced that Adobe Photoshop CS6 beta, a preview of what's to come in the next release of the industry standard in digital imaging, is available as a free download from Adobe Labs. Customers can download the beta, try out the experience and provide feedback to the product team. Packed with groundbreaking new innovations, features and incredible performance enhancements, Adobe Photoshop CS6 beta is available for the Mac OS and Microsoft Windows platforms. The final release is expected in the first half of 2012.

"Photoshop CS6 will be a milestone release that pushes the boundaries of imaging innovation with incredible speed and performance," said Winston Hendrickson, vice president products, Creative Media Solutions, Adobe. "We couldn't wait to share this beta of Photoshop CS6 with our customers and are looking forward to hearing from them and seeing the ways they are incorporating the beta into their daily creative workflows."
New Features in Photoshop CS6 Beta
Adobe Photoshop CS6 beta demonstrates Adobe's focus on huge performance enhancements, imaging magic and creativity tools that offer customers a new experience in digital imaging. Key features include new additions to the Content-Aware tools: Content-Aware Patch allows greater control by letting users select and duplicate an area of an image to fill in or "patch" another. Content-Aware Move lets users select and magically move an object to a new place in the image.
Customers will experience incredible performance, powered by the new Adobe Mercury Graphics Engine*, enabling near-instant results from popular editing tools including Liquify, Puppet Warp, Transform and Lighting Effects; and a refined, modern interface featuring dark UI options to make images pop. New and re-engineered design tools make creating designs faster and more efficient. Vector layers allow users to apply dashed lines and gradient strokes, searchable layers help quickly zero in on any layer you need, and new type styles let designers quickly apply type treatments to their designs.
In addition, the Adobe Photoshop CS6 beta offers all the features of Adobe Photoshop CS6 and Adobe Photoshop CS6 Extended, such as new 3D editing features and quantitative imaging analysis capabilities. These features will be included in the shipping version of Photoshop CS6 Extended when it becomes available.
Pricing and Availability
The Photoshop CS6 beta is available immediately as a free download in English and Japanese. At installation, users will be required to provide an Adobe ID to complete a one-time login and online product activation.
Read more...
posted by Jennifer Apple | facebook | RSS feed | bookmark | comment | twitter
![]()
Free Rust Textures From Bittbox
March 21, 2012
Some nice free rust textures from Bittbox: Today I’m sharing these five various hi-res rust textures. Each one is 4500×3000. All textures or downloadable files on Bittbox.com are free for personal use. For commercial use they require a usage fee.

posted by Jennifer Apple | facebook | RSS feed | bookmark | comment | twitter
![]()
March 22 Only - Adobe Europe Stores - Save €105/£85 On Top Of 80% Discount On CS5.5 Design Premium Student, Teacher Edition - Plus Free Shipping
March 01, 2012
Adobe has a new one day deal for the European Education Stores. You can save an additional €105 euro (£85 GBP) off Design Premium CS5.5 Student and Teacher edition and receive free shipping. This is for March 22 only!
posted by Jennifer Apple | facebook | RSS feed | bookmark | comment | twitter
![]()
How To Use Photoshop's Variations To Tweak Colors
March 20, 2012
Here's a tutorial by Simon Skellon from Photoshop Daily: Photoshop Tip: Use Variations to tweak colour. Learn to control tone, brightness and saturation with Photoshop's Variations adjustment using these quick tips. Here’s how Variations is laid out and what it all means.
Original and Current Pick
These are self-explanatory, however what’s sometimes confusing is that whenever you close Variations and then go back into the adjustment, your last settings are always saved on the Current Pick preview. To reset Variations, click on the Original image box.
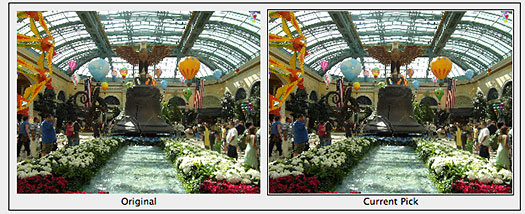
Before/After - This is where you can see how your image looks after all the adjustments have been applied
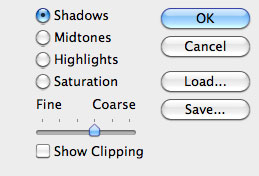
Variations variables
This is where the adjustment really shines.
Shadows, Midtones, Highlights – Colours in each of these areas can be tweaked, depending on your image’s overall balance and which areas standout the most.
Saturation – Selecting Saturation presents you with two options, Less Saturation and More Saturation. This will boost the entire colour range.
Fine to Coarse – It’s easy to be put off by Variations because its default has a very strong effect (too strong!). Lower this slider to Fine to keep changes to a minimum and you’ll end up with more accurate results.
Show Clipping – Reveals for the Shadows, Midtones and Highlights sections which have lost their details.
Altering colours
So you’re presented with this; a hypnotic layout of the same image repeated seven times! This is great for changing the mood of an image, or correcting colours for more accuracy and a true-to-life tone. Treat this as if you’re trying to balance scales, tipping its direction one way and then the other. Every click adds one more weight on to the scale.
The colours are presented as opposites, so if you add more red you can reverse the effect by adding more cyan, and so on.
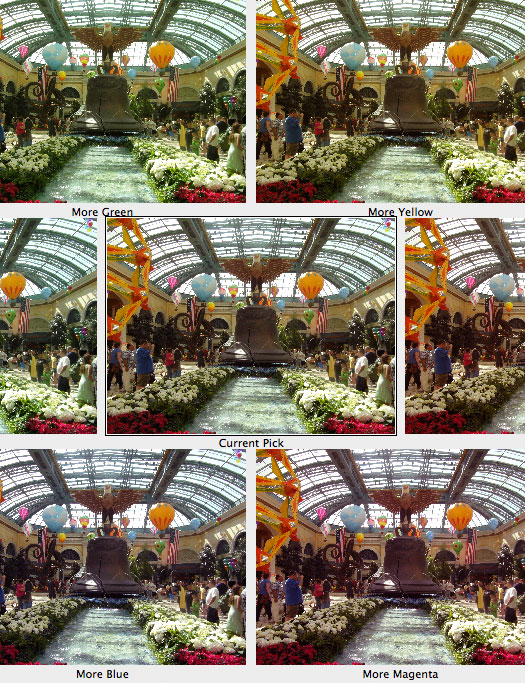
This is where all colour variables are shown across the spectrum to tweak.
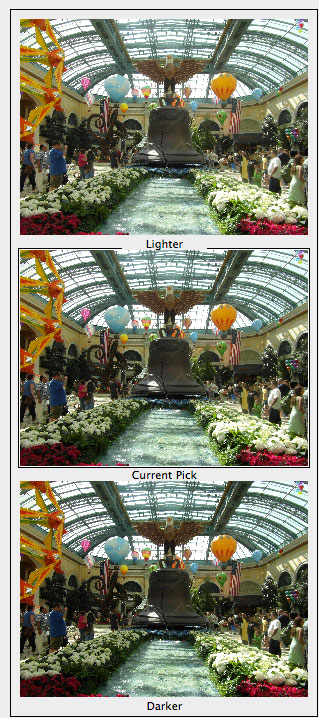
Finally, Brightness!
Adjust the brightness of your image using these two boxes down the right side of the Variations menu. Remember, to offset one side simply click the same number of times on the opposite. Use this to alter exposure to complete the Variations adjustment.
![]()
 Find Us On Facebook, Follow Us On Twitter
Visit PhotoshopSupport on Facebook. Follow us on Twitter.
Adobe Deals & Special Coupon Offers
Visit the Adobe Coupons & Special Offers Page to see the latest deals from Adobe. Find upgrade options at the Adobe Store. Get up to 80% off at the Adobe Education Store. Find out about monthly or annual subscriptions. You can also download a free 30 day trial of any Adobe CS5 product.
posted by Jennifer Apple | facebook | RSS feed | bookmark | comment | twitter
![]()
Adobe Photoshop Lightroom 4 Book: The Complete Guide for Photographer- Free Chapter PDF - Devlop Module Image Editing
March 20, 2012
 Adobe Photoshop Lightroom was designed from the ground up with digital photographers in mind, offering powerful editing features in a streamlined interface that lets photographers import, sort, and organize images.
Adobe Photoshop Lightroom 4 Book: The Complete Guide for Photographers is a completely updated bestseller that was also written with photographers in mind. Author Martin Evening describes features in Lightroom 4 in detail from a photographer's perspective.
As an established commercial and fashion photographer, Martin knows firsthand what photographers need for an efficient workflow.
You can download a complete free chapter, Chapter 4 - Develop Module Image
Editing from the Peachpit site. From the intro:
One of the most powerful features in Lightroom is the image
processing engine and the way the image adjustment processing
is deferred until the time you choose to edit in Photoshop or
export an image. This method of image processing actually originated in the early days of computer imaging, when deferred
processing was adopted by programs such as Live Picture and
xRes as a means to speed up the image editing.
 Computers were
a lot slower back then, but it was possible to manipulate large
image files in real time on relatively slow computers (with as
little as 24 MB of RAM memory) and defer the image rendering
process to the end of a photo edit session.
Of course, these days, you can edit large images in no time at
all in Photoshop. But one of the key advantages of Lightroom is
that you can apply a crop, spot the image, make localized adjustments, tweak the color, do some more retouching, readjust the
crop again, and so on, without ever touching the pixels in the
original photograph.
In a conventional pixel-editing workflow,
the pixels are always modified in a consecutive sequence of
steps. When you work in Lightroom, no restrictions are placed
on the order in which you do things and the edit changes you
make in the Develop module are only applied when you output
a photo as a rendered file, such as a PSD, TIFF, or JPEG.
A definitive guide to working with the image
processing controls in the Develop module.
![]()
 Find Us On Facebook, Follow Us On Twitter
Visit PhotoshopSupport on Facebook. Follow us on Twitter.
Adobe Deals & Special Coupon Offers
Visit the Adobe Coupons & Special Offers Page to see the latest deals from Adobe. Find upgrade options at the Adobe Store. Get up to 80% off at the Adobe Education Store. Find out about monthly or annual subscriptions. You can also download a free 30 day trial of any Adobe CS5 product.
posted by Jennifer Apple | facebook | RSS feed | bookmark | comment | twitter
![]()
Free Photoshop Brushes - 6 Simple Grunge Brushes
March 17, 2012
From Bittbox: These six high resolution grunge brushes can add a great punch to your designs. They can serve as backgrounds, masking brushes, subtle details, and more. Each brush is 2500×2000.

![]()
 Find Us On Facebook, Follow Us On Twitter
Visit PhotoshopSupport on Facebook. Follow us on Twitter.
Adobe Deals & Special Coupon Offers
Visit the Adobe Coupons & Special Offers Page to see the latest deals from Adobe. Find upgrade options at the Adobe Store. Get up to 80% off at the Adobe Education Store. Find out about monthly or annual subscriptions. You can also download a free 30 day trial of any Adobe CS5 product.
posted by Jennifer Apple | facebook | RSS feed | bookmark | comment | twitter
![]()
Photoshop CS6 3D Capabilities - Sneak Peek Video
March 17, 2012
In this Photoshop CS6 sneak video, you can see the 3D capabilities that are to come in Photoshop CS6 Extended, including enhanced performance and the ability to change the position, color, material, shadow, and light source of a 3D image.
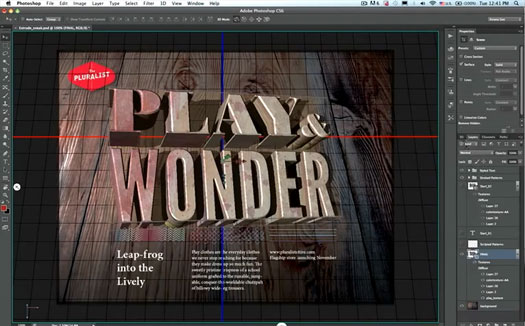
Take a look at previous sneak peeks of Photoshop CS6.
posted by Jennifer Apple | facebook | RSS feed | bookmark | comment | twitter
![]()
Get 30% Off All Topaz Photoshop Plugins, Including Plugins Bundle
March 16, 2012
Celebrate St. Patrick's day by saving some green and taking advantage of a unique weekend only sale at Topaz Labs. All of the Topaz products, including the Topaz Bundle and Bundle Upgrades, are 30% off until March 18th. Just enter the coupon code TopazGold when purchasing.
posted by Jennifer Apple | facebook | RSS feed | bookmark | comment | twitter
![]()
How To Create Fake Lightening In Photoshop - HD Video Tutorial
March 15, 2012
In this week's free tutorial, Deke shows you how to intensify your dark and stormy scenes by adding a 100-percent artificial, but no less striking bolt of Photoshop-based lightning.
Start by simply painting in a black lightning-shaped brush stroke. Then, by ingeniously selecting parts of your bolt, you’ll apply the Difference Clouds filter to randomize the edges, and an unusual Levels command setting to convert that blobby line into a tendril of light. Then, with some carefully applied Blend modes, some Gradient masks, and a hint of brushed-in contact spots for eerie glow, you’ll finish up your truly believable lightning effect.

The entire procedure takes some concentration and diligence, but in the end you’ll be rewarded with a flash of creative control, and ready to illuminate any scene with this high-impact effect. And if that doesn’t satisfy your desire to control the elements, Deke’s got an exclusive members-only movie this week called Creating a driving rain effect in Photoshop, in which he, you guessed it, shows you how to create driving rain. Photoshop weather at your fingertips, all courtesy of your benevolent meteorologist Deke.
You can get a free 7-day trial to the lynda.com Online Training Library. The trial membership entitles you to 7 days of access to all 986 courses in the lynda.com Online Training Library for free. Click sign up on the subscription plan of your choice to get started.
posted by Jennifer Apple | facebook | RSS feed | bookmark | comment | twitter
![]()
Adobe Photoshop Lightroom 4 Classroom In A Book - Excerpt On Book Module And Map Module
March 15, 2012
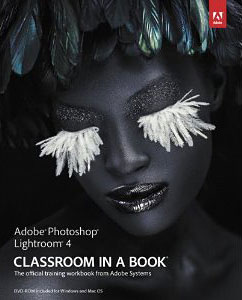 Serious digital photographers, amateur or pro, who seek the fastest, easiest, most comprehensive way to learn Adobe Photoshop Lightroom 4 (try a free 30-day trial) choose Adobe Photoshop Lightroom 4 Classroom in a Book from the Adobe Creative Team at Adobe Press. The 11 project-based lessons in this book show readers step-by-step the key techniques for working in Photoshop Lightroom 4.
Readers will learn how to manage large volumes of digital photographs, work in a non-destructive environment to allow for fearless experimentation, and perform sophisticated image processing tasks to easily produce good-looking pictures and polished presentations for both web and print.
This completely revised Photoshop Lightroom 4 cross-platform edition explains new tools that bring out greater detail in highlights and shadows, and tools that help you make targeted adjustments to white balance, noise reduction, and more. You'll learn how to craft elegant photo books, organize your images by location, and easily share your images and videos on social media and photo sharing sites.
You can read a sample from the book, A First Look at the Book Module and Map Module in Adobe Photoshop Lightroom 4, at the Peachpit site. From the intro:
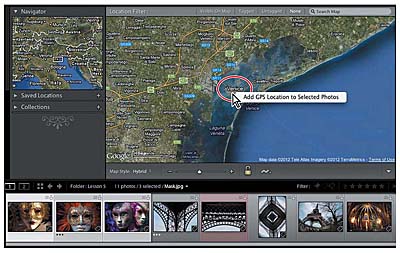
This excerpt from Adobe Photoshop Lightroom 4 Classroom in a Book shows you how to work with the new Book and Map modules in Adobe Photoshop Lightroom 4 (try a free 30-day trial). The Book module, also new in Lightroom 4, delivers a suite of layout and type tools to help you create sophisticated photo book designs that can either be uploaded directly from Lightroom for printing through the online book vendor Blurb, or saved to PDF and printed on your own printer.
You can work with a multi-page preview of your layout, focus on your design spread-by-spread, or view single pages in the Book module’s central work area, switching between these viewing modes and moving through the pages of your book using the controls in the Toolbar.
posted by Jennifer Apple | facebook | RSS feed | bookmark | comment | twitter
![]()
Lightroom 4 Image Management Workshop - 5 Free Videos
March 15, 2012
 Here are 5 free video clips from Lightroom 4 Image Management Workshop from author and digital imaging expert Tim Grey. Use coupon code LR20 for an instant 20% discount if you decide to purchase the full series. (You can download a free 30-day Photoshop Lightroom 4 trial version.)
Reviewing Images Using Survey View
When you want to select a single image from a group you're already somewhat familiar with, the Survey view can be a perfect solution, especially if those images are quite different from one another. In this lesson you'll learn how to put Survey view to use.
Organizing Images — Auto-Advancing During Image Review
If you generally only use a single method - pick flags, star ratings, or color labels - to identify your favorite images, you might want to take advantage of the auto-advance feature when reviewing your photos. In this lesson you'll learn how this feature works.
Organizing Images Using the Painter Tool
The Painter tool in Lightroom makes quick work of adding keywords or other metadata values to a number of images, as you'll see in this lesson.
Organizing Images — Correcting Capture Time
If you neglect to change the time setting for your camera when you travel across time zones, you can correct the erroneous date and time very easily, as you'll see in this lesson.
Locating Images — Locking the Library Filter
 Once you've established particular criteria for the Library Filter, you can choose to lock those criteria so that all folders and collections you browse will be filtered by those settings. In this lesson you'll learn how to lock and unlock the Library Filter.
About This Course
In this video training course, author and digital imaging expert Tim Grey teaches you how to use the Library module in Lightroom 4 to manage your images, ensuring that you’ll always be able to find any image you need, when you need it.
You’ll learn how to make full use of the Import feature, sort and organize your images, add keywords and otherwise identify key images, filter and search images, create backups, and much more. You’ll also get lots of tips on configuring the Lightroom interface to suit the way you work, making everything you do faster and easier.
posted by Jennifer Apple | facebook | RSS feed | bookmark | comment | twitter
![]()
How To Create A Retro Effect In Photoshop - Tutorial
March 14, 2012
 Here's a tutorial from Photoshop Daily that shows you how to create retro photo effects using colour adjustments in Photoshop.
Start by opening your intended image and duplicating it. You can make comparisons between the original and treated duplicate to get the right effect strength. Apply Filter>Convert for Smart Filters, then apply Filter>Distort>Lens Correction>Vignette and set Amount -100 and Midpoint +50. You can go back in and reapply at any time now.
Apply the following adjustment layers – Brightness/Contrast>Contrast 20, Hue/Saturation>Saturation +20. Curves are applied next, treating Red, Green and Blue individually.
The Red first point (downward curves) is set to Output 80 and Input 110. The second point (upward curve) is set to Output 255 and Input 225.
The Green first point (downward curves) is set to Output 88 and Input 96. The second point (upward curve) is set to Output 190 and Input 180.
The Blue first point (bottom corner) is set to Output 26 and Input 0. The second point (top corner) is set to Output 247 and Input 255.
Apply a Colorize Hue/Saturation adjustment layer with Hue at 53 and Saturation at 25, set to 30% Opacity. Adding a Color Fill adjustment layer applies a subtle wash, when setting layer Opacity to 10%. Experiment with colour effects. Overlapping these with Screen and Luminosity blending modes at varying opacity brings washed tones to shadowed areas.

posted by Jennifer Apple | facebook | RSS feed | bookmark | comment | twitter
![]()
5 Free Bluish Rainy Window Textures From Bittbox
March 14, 2012
Bittbox has 5 free rainy window textures, mostly bluish water images. All textures or downloadable files on Bittbox.com are free for personal use. For commercial use they require a usage fee.

posted by Jennifer Apple | facebook | RSS feed | bookmark | comment | twitter
![]()
Free Lightroom 4 Video Training Clips From lynda.com
March 14, 2012
 The Lightroom 4 video training from lynda.com has been released. As with all their courses, you can sample some free videos to see if it's what you're looking for and if the course connects with you. Below are links to the 3 different courses, and a list of the free videos they offer for each one.
Lightroom 4 New Features
This course covers the newest features and enhancements in Photoshop Lightroom 4, the popular photo-asset management, enhancement, and publishing program. Author and photographer Chris Orwig details the new video editing and sharing capabilities in Lightroom; its new book-layout features for creating Blurb photo books; the new Map module, to tag images with locations; and the various image editing improvements in the Develop module. Exercise files are included with the course.
Free Video Clips
— Organizing video files in the Photoshop Lightroom database
— Overview of the new Develop module
Lightroom Essentials Enhancing Photos
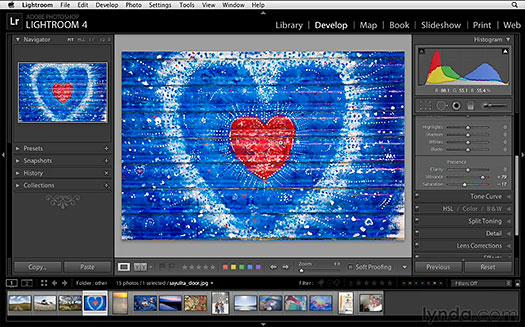
In this installment of the Photoshop Lightroom 4 Essentials series, author and teacher Chris Orwig guides photographers through the process of improving images with creative color, sharpening, and other effects in the Lightroom Develop module. The course covers each of the tools and features in the Develop module, and shows how to perform basic adjustments, such as exposure enhancement; how to improve image quality through noise reduction and clarity adjustments; how to apply creative effects, such as split toning and vignettes; and how to perform advanced tasks, such as correcting for lens distortion. Exercise files are included with the course.
Free Video Clips
— Develop module overview and essential shortcuts
— Working with legacy Lightroom files
— Understanding white balance and color temperature
— Understanding vibrance and saturation
— Basic panel workflow
— Cropping
Lightroom 4 Essentials - Organizing and Sharing with the Library Module
Join photographer and author Chris Orwig in Photoshop Lightroom 4 Essentials: Organizing and Sharing with the Library Module, as he explores the interface of this popular image-management program and shows how to use its Library module to organize and manage a photo library. The course covers importing both still images and video; shooting in tethered-capture mode; organizing and rating images with flags, stars, labels, and location tags; and working with collections. The course also details how to export, email, and share photos, and introduces the Lightroom 4 video-editing features, as well as its ability to work together with the full editing power of Photoshop. Exercise files are included with the course.
Free Video Clips
The broad Photoshop Lightroom overview
The Photoshop Lightroom interface
Importing images and looking at file formats
Drag-and-drop importing
Introducing catalogs
Working in the Grid and Loupe views
Working with flags, stars, and labels
posted by Jennifer Apple | facebook | RSS feed | bookmark | comment | twitter
![]()
Adobe Europe Deal - Save 25% Off Creative Suite 5.5 - March 14 Only
March 13, 2012
Save 25% off the standard price of a full, download version of Adobe Creative Suite 5.5 Design Premium when purchasing directly from the Adobe Stores in Europe. Offer valid on 14 March, 2012. Offer is limited to one discount per customer. The discount will be taken off subtotalled amounts prior to calculation of tax. Offer is not valid for boxed products, subscription products, OEM bundles, or education versions of software. This offer is subject to availability and to change or withdrawal without notice.
posted by Jennifer Apple | facebook | RSS feed | bookmark | comment | twitter
![]()
Lightroom 4 Image Optimization Workshop - 5 Free Videos
March 13, 2012
 Here are 5 free video clips from Lightroom 4 Image Optimization Workshop from author and digital imaging expert Tim Grey. Use coupon code LR20 for an instant 20% discount if you decide to purchase the full series. (You can download a free 30-day Photoshop Lightroom 4 trial version.)
Getting Started — Seeing a Before and After View
As you adjust the appearance of your photos, it can be very helpful to see a before and after view in order to get a better perspective on the adjustments. In this lesson you'll learn how to take advantage of these various view options in Lightroom.
Develop Module Basics — Adding Clarity to an Image
The Clarity adjustment enables you to cut through the haze and improve the local contrast in a photo, and in this lesson you'll learn how to put this great feature to use.
Advanced Develop Module Adjustments — Sharpening an Image
In this lesson you'll learn to use sharpening techniques to compensate for the loss of sharpness that occurs with digital captures.
Image Cleanup — Applying Noise Reduction
Noise can be a very real problem for digital photos, especially when they are captured at a particularly high ISO setting. In this lesson you'll learn how to reduce the appearance of noise in your photos.
Creative Adjustments — Creating Virtual Copies
 When you want to explore creative possibilities for your photos, it can be helpful to create virtual copies to work with. In this lesson you'll see how to create virtual copies in Lightroom.
About This Course
In the Perfect Your Photos with the Develop Module workshop digital imaging guru Tim Grey focuses on the Develop module of Lightroom 4. Starting with an overview of the image optimization workflow in Lightroom, Tim walks you through the process of evaluating your images and deciding what adjustments you need to make.
He teaches you how to use the Develop module’s presets to achieve quick results, as well as how to apply your own adjustments, from simple exposure and color adjustments to advanced options like the Tone Curve and the Graduated Filter tool.
posted by Jennifer Apple | facebook | RSS feed | bookmark | comment | twitter
![]()
Wacom Inkling Digital Sketch Pen - Draw On Sketchbook Or Paper
March 12, 2012
The Inkling digital sketch pen captures a digital likeness of your work while you sketch with its ballpoint tip on any sketchbook or standard piece of paper. Designed for rough concepting and creative brainstorming, the Inkling digital sketch pen is ideal for the front end of the creative process.
In addition to capturing your sketch, stroke by stroke, Inkling allows you to create layers in digital files while you sketch on paper. Digital files are transferred to your computer using the Inkling Sketch Manager software, and later, exported to applications such as Adobe®Photoshop and Illustrator. Files can also be opened with the included Inkling Sketch Manager software to edit, delete, add layers or change file formats.
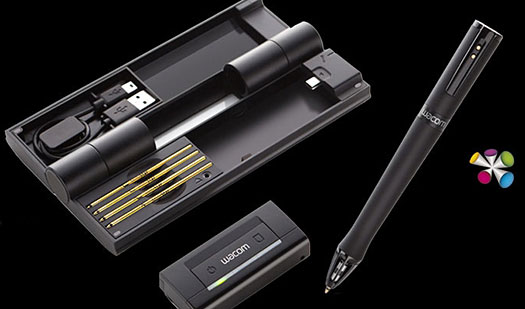
TheInkling digital sketch pen is comprised of both hardware and software components. Hardware includes the pen and a wireless receiver that captures a likeness of the sketch and stores it digitally. The ballpoint pen uses Wacom pressure-sensing technology to detect how hard the pen is being pressed to the paper while sketching. These pressure variations will appear in the digital version of your drawing.
The receiver can be clipped to the edge of standard paper or sketchbooks and the position can be adjusted for left or right handed users to provide the receiver with an uninterrupted line of sight with the pen tip. When sketching is complete, the receiver is connected to the user’s computer via USB to transfer the digital files. Files are opened with the included Inkling Sketch Manager software to manage layers or change file formats before transferring them for adjustment and editing in other creative software applications.
The Inkling Sketch Manager software is designed to help you save time by quickly preparing your files for immediate email distribution or for further development in other creative software application, such as Adobe Photoshop. In the Inkling device, you can add, delete and combine layers and then save the files in the format you need, or export the files, with layers, directly to select applications.

From the Sketch Manager Preview screen, you can see all of your sketches that are in your “My Sketches” folder. From this screen, save or open any sketch, for further adjustment, or if you forgot to add layers while you were drawing, make these changes right in Inkling Sketch Manager.
Inkling Tutorials
When the installation of the Inkling Sketch Manager software (located on the flash memory of the Inkling receiver and not on a DVD) is complete, the Installer asks if you would like to view the Inkling tutorial. We suggest that you take this opportunity to view the tutorial to acquaint yourself with the complete functionality and recommended use of the product. You can also watch the Inkling Tutorial by selecting each chapter from the menu below:
Chapter 1: Installing software (PC)
Chapter 1: Installing software (Mac)
Chapter 2: Charging Inkling
Chapter 3: Replacing the pen cartridge
Chapter 4: Setting up Inkling
Chapter 5: Using Inkling
Chapter 6: Connecting Inkling & transferring sketches
Inkling FAQ
How long does it take to charge Inkling and what is the work time?
Inkling will fully charge within 3 hours, yielding a typical work time of up to 15 hours for the pen and up to 8 hours for the receiver.
How accurate are the sketches?
In general, sketches with Inkling will be accurate to within approximately +/- 0.1 inches (+/- 2.5 mm) in the main drawing area of an A4 page, and within (approximately +/- 0.2 inches (+/- 5.0 mm) at the edges of the page.
What are the drawing sizes that Inkling supports?
The maximum size area that Inkling can record is A4 paper, 8.27” x 11.69 inches (210 x 297 mm). Inkling can be attached to a larger sized paper, but it will only record a portion of the drawing that fits within this recording area. Inkling also does not record any part of a drawing that is within approximately 0.8 inches (2.0 cm) of the receiver.
What are the factors that affect the accuracy?
Inkling uses both ultrasonic and infrared technologies that require proper conditions to operate well. The main factors that can affect the accuracy of Inkling are obstruction of the line of sight between the pen sensors and the receiver. (the pen sensors are located in the pen tip area starting just below the widest point of the pen). Very high stroke speeds, direct sunlight on the receiver, the position of the receiver, ultrasonic noise, and other “white” noise at specific frequencies can also affect performance.
What is the resolution of Inkling sketches?
The resolution of the sketches is 600 dpi.
posted by Jennifer Apple | facebook | RSS feed | bookmark | comment | twitter
![]()
Develop Module Advancements In Lightroom 4 - HD Video
March 12, 2012
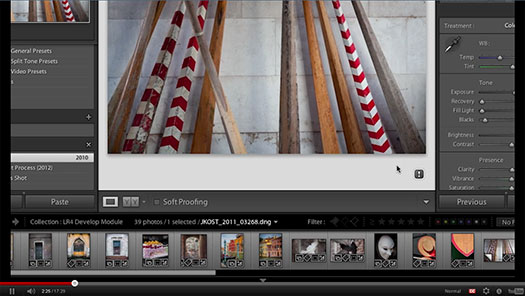
In this 18 minute HD video tutorial, Digital Imaging Evangelist Julieanne Kost shows you how to create the highest quality photographs by taking advantage of new and improved global and local adjustments in the Lightroom 4 Develop module.
posted by Jennifer Apple | facebook | RSS feed | bookmark | comment | twitter
![]()
Lightroom 4 Image Sharing Workshop - 6 Free Videos
March 11, 2012
 Here are 6 free video clips from Lightroom 4 Image Sharing Workshop from author and digital imaging expert Tim Grey. Use coupon code LR20 for an instant 20% discount if you decide to purchase the full series. (You can download a free 30-day Photoshop Lightroom 4 trial version.)
Sharing Basics Creating an Identity Plate
The identity plate in Lightroom enables you to add branding to the Lightroom interface, but also enables you to brand the images you share with others, as you'll see in this lesson.
Publishing and Exporting Emailing Photos
In this lesson you'll learn how to send images via email from directly within Lightroom.
Creating Photo Books Modifying a Book Layout
In this lesson we'll dig a little deeper into book design, taking a look at how you can refine an existing layout.
Creating Slideshows Creating a Simple Slideshow
The basic process of creating a slideshow in Lightroom is very simple, as you'll see in this lesson.
Printing Photos Printing to a JPEG Image
 The Print module isn't exclusively about putting ink to paper. In this lesson you'll see how you can create a JPEG image of your print layouts, making it easy, for example, to share contact sheets via email.
Web Photo Galleries Posting a Web Photo Gallery to Your Website
In this lesson you'll learn how to configure settings for your website and upload galleries automatically so they can be shared with virtually anyone.
About This Course
You can take the greatest photos ever captured, but it probably won’t mean much until you get them out there where people can see them. In this workshop from digital imaging guru Tim Grey, you´ll learn how to use Lightroom 4 to share your images with the world.
He begins with the basics, like selecting images for sharing and working with collections, watermarks, and identity plates. Then you’ll learn about publishing your photos to the web, whether you want to upload images to Facebook or Flickr or create your own web galleries. Tim also covers creating photo books and slideshows and offers advice on getting the highest-quality prints.
posted by Jennifer Apple | facebook | RSS feed | bookmark | comment | twitter
![]()
10 Free Abstract Circle Brushes For Photoshop
March 09, 2012
From Bittbox: These bright and lively brushes come from a microscopic source. I vectorized some microscopic photos of soap suds, which have real kinetic energy when placed onto a slide. Each brush is 2500×1800. Enjoy!
posted by Jennifer Apple | facebook | RSS feed | bookmark | comment | twitter
![]()
Adobe Shadow - Tool For Mobile Device Workflow Previews
March 08, 2012
 Adobe Shadow is a new inspection and preview tool that allows front-end web developers and designers to work faster and more efficiently by streamlining the preview process, making it easier to customize websites for mobile devices.
Shadow Labs Release is currently available as a complimentary download on Adobe Labs. This is an early look at Shadow, for evaluation and feedback that will help shape the features and future roadmap of the product. Users are also encouraged to submit feature requests and report bugs.
Adobe Shadow will be updated regularly to stay ahead of web standards, web browser updates and support for new mobile devices entering the market, while incorporating user feedback to provide the best functionality and experience possible. This current version of Shadow focuses primarily on the following:
-
Device pairing
- Synchronized browsing and refreshing in sync with your computer
- Perform remote inspection and debugging so you can see HTML/CSS/JavaScript changes instantly on your device.
posted by Jennifer Apple | facebook | RSS feed | bookmark | comment | twitter
![]()
90 Minutes Of Free Lightroom 4 Video Training From Adobe
March 08, 2012
 In the following HD video tutorials, Digital Imaging Evangelist Julieanne Kost details the most efficient methods for working with Photoshop Lightroom 4.
Lightroom 4 - Importing and Organizing Your Images (18 minutes)
The video shows you how to quickly import and manage your photo collection in a library that makes organizing, finding and editing your photos easy.
Lightroom 4: Select, Rate and Prioritize Your Images (23 minutes)
Find out which method of tagging images works best for the photography you do in order to simplify the creation of collections of images.
Lightroom 4: Create Stunning Images (22 minutes)
Learn how to create the highest quality photographs by learning how to crop, remove lens distortion, correct perspective, make global and local color and tonal corrections in the Lightroom 4 Develop module.
Lightroom 4: Adding Special Effects (12 minutes)
Discover the best way to convert images to black and white, as well as add tonal overlays, edge effects, selective coloring and film grain textures.
Lightroom 4: Moving Between Lightroom 4 and Photoshop CS6 (14 minutes)
Learn how to take a single image or multiple images for editing seamlessly between Lightroom and Photoshop. Also, see how to use Photoshop tools like Photomerge, HDR pro, and the export dialog in Lightroom for exporting multiple files.
Lightroom 4: Publish a Slideshow (8 minutes)
Learn how to create, render and publish a slideshow with music by sequencing your images to tell the perfect story.
Lightroom 4: Print the Perfect Image (12 minutes)
Learn how to use the Print module to bring your images into the spotlight and share with clients, friends or family. Also, see the new tools for making custom contact sheets and print packages.
Lightroom 4: Share Images Online (10 minutes)
Learn to use the Web module to publish to the popular online photo sharing sites with Lightroom's new Publish Services option in the Library module.
See more on our Lightroom 4 Tutorial Page.
posted by Jennifer Apple | facebook | RSS feed | bookmark | comment | twitter
![]()
onOne Offers 3 New Preset Packs Created For Lightroom 4
March 08, 2012
Three new Lightroom 4 Preset Packs will be available March 8th from the onOne Marketplace. These preset packs have been developed with the new Lightroom 4, released earlier this week, to take advantage of its new and improved Develop Module tools and to help photographers work more quickly and easily while expanding their creative options.
Nicole Young Film Presets for Lightroom 4 – Developed by Nicole Young, lifestyle and food photographer, this pack of presets takes images back in time. Hints of film grain with touches of contrast and cross processing add a beautiful retro feel to portraits, landscapes, or any image.
Nicole Young Black and White Presets for Lightroom 4 – Also designed by Nicole Young, this preset pack makes it easy to apply a beautiful black and white treatment to photographs with classic tones, subtle color enhancements, and more.
New York City Stories Presets for Lightroom 4 – Built exclusively in Lightroom 4 by onOne Software's Curriculum and Education Manager, Brian Matiash, these presets were inspired by images taken by Brian in his home city of New York. They are best used with urban and architectural-based images.
These three Lightroom 4 Preset Packs are just the first pieces of add-on content that onOne Software will offer for Lightroom 4. Over the coming months, more Lightroom 4 Exclusive Preset Packs are planned for release through the onOne Marketplace. Additionally, with the new Book Module in Lightroom 4, development of a series of book templates is planned for release in the near future.
Each of the onOne Lightroom 4 preset packs are available for $9.95 each through the onOne Marketplace, a premier online resource for digital accessories that help make your images extraordinary.
posted by Jennifer Apple | facebook | RSS feed | bookmark | comment | twitter
![]()
6 Free Video Clips - Getting Started With Lightroom 4
March 07, 2012
 Here are 6 free video clips from Getting Started with Lightroom 4 from author and digital imaging expert Tim Grey. Use coupon code LR20 for an instant 20% discount if you decide to purchase the full series. (You can download a free 30-day Photoshop Lightroom 4 trial version.)
First Steps — Keyboard Shortcuts
One of the ways you can improve the speed of your workflow in Lightroom is to take advantage of keyboard shortcuts. In this lesson you'll see how easy it is to learn about which keyboard shortcuts are available for commonly used features.
Importing Images — Images with Bridge Color Labels
If you have previously used Adobe Bridge or other software to apply color labels to your images, this lesson will guide you through the process of ensuring that Lightroom understands the meaning of those color labels.
Identifying and Locating Images — Utilizing Smart Collections
Smart Collections enable you to quickly view a group of images based on criteria you've specified, essentially serving as instant saved searches. In this lesson you'll learn how to put Smart Collections to use in your workflow.
Identifying and Locating Images — Sorting Images
Lightroom enables you to sort images by a variety of criteria, and in this lesson you'll learn how to use this feature to help you sort through your photos.
Optimizing Images — Synchronizing Adjustments
When you've captured multiple images under similar lighting conditions, you can likely apply the same adjustment to each of those images. This lesson will show you how to apply adjustments from one image to one or more other images.
Sharing Images — Printing Photos
 A print is the classic method of sharing photographic images, and in this lesson you'll learn about the many options that exist for printing your photos in Lightroom.
About This Course
Whether you’re completely new to Lightroom or have been using it from the start, this course from author and digital imaging expert Tim Grey will help you get up to speed quickly with Lightroom 4.
You’ll get a complete overview of the Lightroom interface and workflow and learn how to set up Lightroom to best suit your needs. You’ll also learn the basics of importing, managing, optimizing, and sharing your images. Along the way you’ll learn to use features like auto-advance, Smart Collections, the Library Filter, the Map module, and more.
posted by Jennifer Apple | facebook | RSS feed | bookmark | comment | twitter
![]()
Five Free Textures From Bittbox - Patterns, Water, Wood
March 07, 2012
Bittbox has just posted five free textures for download, including patterns, water and wood.
posted by Jennifer Apple | facebook | RSS feed | bookmark | comment | twitter
![]()
Lightroom 4 Free 30-Day Trial Now Available For Download
March 06, 2012
 You can download a free 30-day trial version of Photoshop Lightroom 4 from Adobe.
Lightroom is the essential digital photography workflow solution helping amateur and professional photographers quickly import, manage, enhance and showcase their images.
Lightroom 4 is now available for US$149 for the full version and US$79 for the upgrade, providing an incredible value for photographers. Lightroom 4 introduces refined technology for superior shadow and highlight processing, ability to create photo books, additional local adjustment controls, and enhanced video support.
Lightroom 4 is a major release, adding significant new capabilities and innovations. New adjustment controls maximize dynamic range from cameras, recovering exceptional shadow details and highlights. The software features new and improved auto adjustments to dynamically set values for exposure and contrast, and additional local adjustment controls including Noise Reduction, Moire and White Balance.
posted by Jennifer Apple | facebook | RSS feed | bookmark | comment | twitter
![]()
5 Free Videos For Lightroom 4 - New Features Workshop
March 06, 2012
 Here are 5 free videos from the course Adobe Photoshop Lightroom 4: New Features Workshop, taught by world renowned photographer and author Mikkel Aaland. Use coupon code LR20 for an instant 20% discount if you decide to purchase the full series. (You can download a free 30-day Photoshop Lightroom 4 trial version.)
Overview of New Features — New Models
Lightroom 4 has added two new modules, Book and Map, and in this video you'll get an overview of their features.
Using the Map Module — Working with Non-Geotagged Photos
Most cameras don't automatically add GPS data to an image, but that doesn't mean you can't take advantage of Lightroom's Map module. In this video you'll see how to manually add GPS data directly from a Google map.
New Develop Module Features — RGB Curves
Curves in Lightroom just got even more powerful by enabling you to control individual red, green, and blue channels. In this video you'll get an example of how these channels work.
Soft Proofing — Soft Proofing with a Custom Profile
In Lightroom 4 you have the option to soft proof an image using a custom profile, and this video will show you how.
Video Editing — Setting a Poster Frame
Want to select another static image to represent your video in the Library module? This video will show you how to select a new poster frame that does just that.
posted by Jennifer Apple | facebook | RSS feed | bookmark | comment | twitter
![]()
Lightroom 4: Importing and Organizing Your Images - HD Video Tutorial
March 06, 2012
In this HD video tutorial, Lightroom 4 - Importing and Organizing Your Images (18 minutes), Digital Imaging Evangelist Julieanne Kost details the most efficient method for downloading images into Lightroom 4 and organizing them. The video shows you how to quickly import and manage your photo collection in a library that makes organizing, finding and editing your photos easy.
posted by Jennifer Apple | facebook | RSS feed | bookmark | comment | twitter
![]()
Adobe Releases Lightroom 4 With New Low Pricing - $79 Upgrade, $149 Full
March 06, 2012
 There will be free shipping on all Lightroom 4 products from March 6th through March 31st, plus save 30% on Lightroom 4 Full when you purchase Photoshop CS5 in the North America and European Stores. (Also see our Top New Features in Lightroom 4 post.)
Adobe today announced the availability of Adobe Photoshop Lightroom 4 software for Mac OS and Windows. Lightroom is the essential digital photography workflow solution helping amateur and professional photographers quickly import, manage, enhance and showcase their images.
First released as a public beta in January 2012, the final version of Lightroom 4 is now available for US$149 for the full version and US$79 for the upgrade, providing an incredible value for photographers. Lightroom 4 introduces refined technology for superior shadow and highlight processing, ability to create photo books, additional local adjustment controls, and enhanced video support.
posted by Jennifer Apple | facebook | RSS feed | bookmark | comment | twitter
![]()
Lightroom 4 - Top New Features
March 06, 2012
There will be free shipping on all Lightroom 4 products from March 6th through March 31st, plus save 30% on Lightroom 4 Full when you purchase Photoshop CS5 in the North America and European Stores.
 How does Adobe Photoshop Lightroom differ from Adobe Photoshop?
Adobe Photoshop Lightroom software provides all the tools you need for digital photography in one intuitive solution. Lightroom helps photographers work fast and efficiently, while maintaining the highest quality. Adobe Photoshop software is the industry standard in digital image editing, with advanced tools for detailed, pixel-level editing and working with multilayered files.
Why should I use Lightroom if I already have Photoshop?
Lightroom is designed to boost your efficiency by handling all the tasks a digital photographer faces in one intuitive environment. It includes powerfully simple one-click adjustments, as well as the widest range of advanced tools for efficiently processing sets of images, organizing photo libraries, and sharing images.
To install an upgrade version of Adobe Photoshop Lightroom 4 software, you must have an eligible earlier version of Lightroom. For information on eligibility, visit www.adobe.com/go/photoshoplightroom_upgrade.
posted by Jennifer Apple | facebook | RSS feed | bookmark | comment | twitter
![]()
5 Free Soft Flame Photoshop Brushes
March 02, 2012
From Bittbox: I created these free Photoshop brushes from some long-exposure fire photos that I shot the other day. The long exposure gives a soft and fluid form to the flames. Each brush is 2500px wide.
posted by Jennifer Apple | facebook | RSS feed | bookmark | comment | twitter
![]()
Wacom Intuos 5 Pen Tablet - Multi-touch, Wireless, Heads-up Display Inspires Creative Expression
March 01, 2012
Wacom today announced the Intuos 5, the next generation lineup of pen tablets for professional photographers, designers and artists. Superior new features include multi-touch gesture support for intuitive input, an Express View display to facilitate an efficient workflow and wireless capabilities for convenience and comfort. Combined with Wacom’s renowned pen pressure and tilt sensitive pen, the state-of-the-art Intuos5 inspires creativity through an immersive experience.
The Intuos5, available today, comes in three models: Intuos5 touch Small ($229.95 USD), Medium ($349.95 USD) and Large ($469.95 USD).
posted by Jennifer Apple | facebook | RSS feed | bookmark | comment | twitter
![]()
The Photoshop Blog - Earlier Posts
![]() The Photoshop Blog offers the latest Photoshop news and software updates, Photoshop tips and tutorials, and random thoughts from graphic artist and Photoshop expert Jennifer Apple.
The Photoshop Blog offers the latest Photoshop news and software updates, Photoshop tips and tutorials, and random thoughts from graphic artist and Photoshop expert Jennifer Apple.
PHOTOSHOP NEWS — FEBRUARY 2012
42- 5 Free Soft Flame Photoshop Brushes
41- Photoshop CS6 Blur Gallery - Sneak Peek HD Video
40- 5 Free Rusted Metal Sign Textures From Bittbox
39- Photo Retouching PDF - Free Chapter From Retouching Faces And Bodies Book
38- How To Quickly Apply Makeup In Photoshop
37- 10 Free Photoshop Brushes - Burned Paper Edges
36- Adobe Photoshop Touch Now Available for iPad 2
35- Simple Skin Retouching Techniques - Photoshop Tutorial
34- onOne Launches Marketplace For Photographers
33- 5 Free Rippled Glass Textures From Bittbox
32- How To Create A Frame Effect In Photoshop - HD Video Tutorial
31- Free Ornament Photoshop Brushes From Janita - 24 In Set
30- Free Photoshop Brushes - 10 Artsy Fantasy Brushes
29- Free PDF From Social Media Marketing for Photographers - Chapter 10, Survival Tips
28- 8 Free Dynamic Grunge Brushes From Bittbox
27- Teaching Photographers How To Use Social Media - Free PDF Of Social Media Words
26- 5 Vintage Book Covers - Free Textures
25- HD Video Tutorial - How To Draw With The Reshape Tool In Illustrator
24- Save 50% Off The Full Version of Elements And Premiere Elements Bundle
23- How To Create Brushes From Textures - Photoshop Tutorial
22- Photoshop CS6 - Moving And Removing With Better Content-Aware Technology
21- Free Photoshop Brushes - Floral Textures
20- Photoshop CS6 Preview - Create Dashed And Dotted Lines With One Click - HD Video
19- 41 Free Valentine's Photoshop Brushes
18- HD Video - How To Create A Dual-focus Hybrid Image In Photoshop
17- Grungy Stars and Texty Fabrics - 20 Free Photoshop Brushes
16- Perfect Photo Suite 6 Super Sale - Get $100 Off
15- Shooting Cityscapes, Tips and Tricks For Night and Low-Light Photography
14- Fantasy Brushes - Free Photoshop Brush Set From Janita
13- Save 15% On Adobe Orders Over $375
12- Fancy Flowers Photoshop Brushes
11- Save 25% Off Adobe CS5.5 Design Premium Full - Today Only
10- Free Photoshop Brushes — Distressed Flowers
09- Free Photoshop Brushes — Bubbly Doodles
08- Fluffy Feathers - Free Photoshop Brush Set
07- Shooting Neon, Tips and Tricks From Night & Low-Light Photo Workshop Book
06- Free Photoshop Brushes - Butterflies
05- New Liquify Tool And Background Save Option Highlighted in Photoshop CS6 Preview
04- HD Video - How To Create Movie-Poster Credits In Illustrator
03- Free Photoshop Brush Set From Janita - Doodles
02- Get 50% Off Lightroom 3 - Discount Set To Run For All Of February
01- February 2012 Newsletter
See Earlier Posts From The Photoshop Blog - FEBRUARY 2011.
![]()
Exclusive 15% Discount On All Topaz Plugins - Use Coupon Code PHOTOSHOPSUPPORT - Includes Bundles And Upgrades
 Enter our exclusive discount coupon code PHOTOSHOPSUPPORT during the checkout process at Topaz Labs for an instant 15% discount on any Topaz product, including bundle deals and upgrades.
Topaz Labs Photoshop plug-ins are specifically designed to expand a photographer's creative toolbox by harnessing powerful image technology developments.
Photographers everywhere are now taking advantage of the creative exposure effects, artistic simplification, unique edge manipulation, and top-of-the-line noise reduction offered in Topaz products. The Topaz Photoshop Bundle includes the following Topaz plugins:
Topaz Adjust optimizes image exposure, color, and detail strength for stunning image results.
 Topaz DeNoise offers a complete noise reduction solution that removes far more noise and preserves far more detail than other solutions.
Topaz Detail gives full control over all aspects of detail manipulation and micro-contrast adjustment without creating any edge artifacts or halos.
Topaz Simplify provides creative simplification, art effects, and line accentuation for easy one-of-a-kind art.
Topaz Clean integrates unique smoothing capabilities with stylized detail manipulation to add refreshing flair to photos.
Topaz ReMask quickly creates detailed masks and extractions from even the most difficult images.
Topaz DeJPEG drastically improves the quality of web images and other compressed photos.
READ ABOUT THE TOPAZ BUNDLE OFFER.
![]()
Exclusive onOne Software 10% Instant Discount Coupon
 Enter our exclusive discount coupon code - PSSPPT06 - during the checkout process at onOne Software for an instant 10% discount on any onOne product. This includes Genuine Fractals and their amazing Photoshop Plug-In Suite.
onOne Software's Plug-In Suite combines full versions of six essential software tools — Genuine Fractals Print Pro, PhotoTools Pro, PhotoFrame Pro, Mask Pro, PhotoTune and FocalPoint — an affordable combination that includes everything a photographer needs to make their images look their best.
Why do you need plugins? Photoshop is an amazing image editing application that has forever changed graphic design and digital photographic editing, but like any tool, if you don't have time to fully learn it, you can't get the most out of it.
Plugins for Photoshop allow you to either do something that you cannot do with the features included in Photoshop or they allow you to do something easier, faster or better than you could do in Photoshop without the plug-in. Whether it is color correction, resizing, masking or creating an effect, you can find a Photoshop plug-in that can help you be more efficient with your time.
![]()
Photoshop Masking Plugin Fluid Mask 3 - Price Drop And Exclusive $20 Instant Discount - Now Only $129
 The 4 1/2 out of 5 star review of Fluid Mask 3 at MacWorld begins by saying that this "Photoshop plug-in takes the pain out of extracting backgrounds," and goes on to recommend the latest version, stating that "Fluid Mask 3.0.2 is a very effective tool for separating objects from their backgrounds. It offers a variety of useful features for tackling almost any difficult image, from wispy hair to complex foliage. Online video tutorials and live training sessions help ease the learning curve."
Our friends at Vertus, the makers of Fluid Mask 3 Photoshop Plugin, have set up a special exclusive discount for PhotoshopSupport.com. Buy now for only $129. Just follow this discount link and instantly get $20 off your purchase of Fluid Mask 3.
Fluid Mask 3 is designed for photographers, image editors, graphic designers and all those who take digital image editing seriously. In a streamlined interface and workflow, Fluid Mask 3 instantly shows key edges in the image and provides comprehensive easy to use tools that work with difficult-to-see edges and tricky areas like trees & lattices. Fluid Mask will also preserve all-important edge information for a professional quality cut out. Simply follow this discount link and pay only $129 for Fluid Mask 3.
![]()
Special Deals On Nik Software Photoshop Plugins - Viveza, Complete Collection - 15% DISCOUNT COUPONS
Follow the links below and the 15% discount will be AUTOMATICALLY APPLIED to any purchase you make, or use our exclusive discount coupon code - NIKPSS - during the checkout process at Nik Software for the instant 15% discount. This exclusive discount coupon code can be applied to all the latest Nik Software Photoshop plugins, including Silver Efex Pro, Color Efex Pro, Viveza, HDR Efex Pro, and The Complete Collection (big savings).
Nik Software The Complete Collection (Plugins Bundle)
 The Complete Collection includes all of Nik Software's latest award-winning plug-in software titles for Photoshop, Lightroom and Aperture including: Dfine, Viveza, HDR Efex Pro, Color Efex Pro, Silver Efex Pro, and Sharpener Pro.
The Complete Collection features products with Nik Software's patented U Point® technology, giving photographers the most powerful tools for precise and natural photographic enhancements and corrections without the need for complicated selections or layer masks.
The Complete Collection is offered in two editions: (1) the Complete Collection Ultimate Edition includes support for every plug-in to work in Photoshop, Lightroom, and Aperture, and offers Color Efex Pro 3.0 to work in Capture NX 2 as well. (2) the Complete Collection for Lightroom and Aperture includes support for each plug-in to only work in Lightroom and Aperture. Click here to compare both editions
Color Efex Pro 3.0
 52 photographic filters with over 250 effects for professional quality images.
Completely Original. Completely Indispensable.
Nik Software Color Efex Pro 3.0 filters are the leading photographic filters for digital photography. The award-winning Color Efex Pro 3.0 filters are widely used by many of today's professional photographers around the world to save time and get professional level results. Whether you choose the Complete Edition, Select Edition, or Standard Edition, you’ll get traditional and stylizing filters that offer virtually endless possibilities to enhance and transform images quickly and easily.
Patented U Point technology provides the ultimate control to selectively apply enhancements without the need for any complicated masks, layers or selections. Control color, light and tonality in your images and create unique enhancements with professional results. With 52 filters and over 250 effects found in Color Efex Pro 3.0, you can perform high quality retouching, color correction, and endless creative enhancements to your photographs. Download a free Trial version.
Viveza
 The most powerful tool to selectively control color and light in photographic images without the need for complicated selections or layer masks.
Two of the most important factors in creating great photography are color and light. Mastering the art of selectively correcting or enhancing each of these is now possible for every photographer without the need for complicated masks or selections, or expert-level knowledge of Photoshop. Integrating award-winning U Point technology, Viveza is the most powerful and precise tool available to control light and color in photographic images.
U Point powered Color Control Points, placed directly on colors or objects in an image (such as sky, skin, grass, etc.), reveal easy-to-use controls that photographers can use to quickly adjust brightness, contrast or color in a fraction of the time needed by other tools. With Viveza you’ll spend more time shooting photographs and save hours of image editing. Download a free Trial version.
Silver Efex Pro
 Complete power and control to create professional quality black and white images in one convenient tool.
Silver Efex Pro from Nik Software is the most powerful tool for creating professional quality black and white images from your photographs. For the first time, all the advanced power and control required for professional results have been brought together in one convenient tool.
Featuring Nik Software’s patented U Point technology to selectively control the tonality and contrast of the image, Silver Efex Pro includes advanced imaging algorithms to protect against unwanted artifacts, a comprehensive collection of emulated black and white film types, a variable toning selector for adding traditional toning techniques, over 20 one-click preset styles, and a state-of-the-art grain reproduction engine that help produce the highest quality black and white images possible from your color images while providing more freedom to experiment. Download a free Trial version to use Silver Efex Pro.
HDR Efex Pro
 Experience the power, control, and creative expression of HDR. This all in one toolkit lets you achieve your best HDR images ever, ranging from the realistic to artistic.
HDR Efex Pro is the essential new standard for creating amazingly high quality realistic to artistic HDR images with a revolutionary new all-in-one workflow. HDR Efex Pro includes a vast selection of one-click visual presets for incredibly fast results, advanced tone mapping algorithms, powerful and detailed HDR controls, and patented U Point® technology
Follow our discount coupon links, or enter our exclusive discount coupon code - NIKPSS - during the checkout process at Nik Software for the instant 15% discount. This exclusive discount coupon code can be applied to all the latest Nik Software Photoshop plugins, including Silver Efex Pro, Color Efex Pro, Viveza, HDR Efex Pro, and The Complete Collection (big savings).
![]()


